

Inviting Users by Email
Invite a new user to CommPeak Dialer by email, let them set their own password, and resend or revoke pending invites.
Invite new users to CommPeak Dialer by email and let them set their own password. The invitee receives a link to choose a password, and their user account is created only when they accept the invite.
From the following instructions, you will learn how to invite a user to CommPeak Dialer, what the invitee needs to do, and how to resend or revoke pending invites.
NOTETo invite users, your user role must include the user_invite permission. Learn more in User Roles.
Inviting a user
To invite a user:
Open User Management
Expand the Users tab and select User Management.
Open the invite form
Above the list of users, click the Invite User button (paper plane icon).

Pending invites and Invite User buttons
Fill in the invite details
In the Invite User window, fill in the fields as explained in the table below.
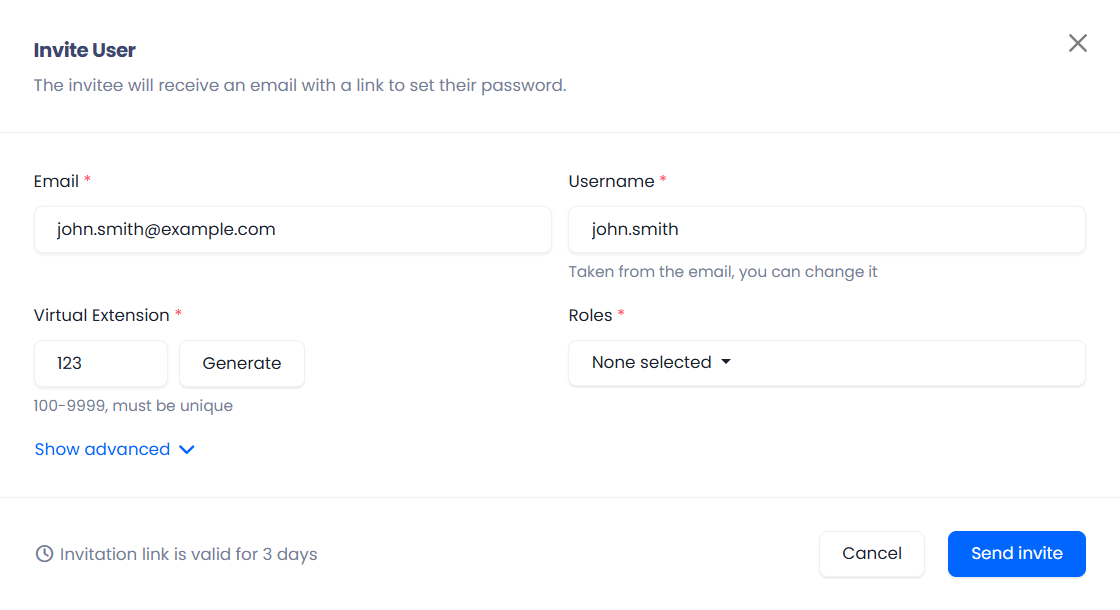
Invite User window
Send the invite
Click Send invite. A confirmation message appears, and the invite is added to the pending invites list.
NOTEThe fields marked with an asterisk (*) are mandatory.
| Field | Description |
|---|---|
| Enter the email address the invite will be sent to. The email must not belong to an existing user. | |
| Username | Filled in automatically from the part of the email before the @ sign. For example, [email protected] becomes dana.levi. You can change it. |
| Virtual Extension | A unique number from 100 to 9999, filled in automatically. Enter a different number or click Generate to get a new one. |
| Roles | Assign a set of permissions to the user. You can only assign roles that are available to you. |
Advanced fields
Click Show advanced to add more details to the invite:
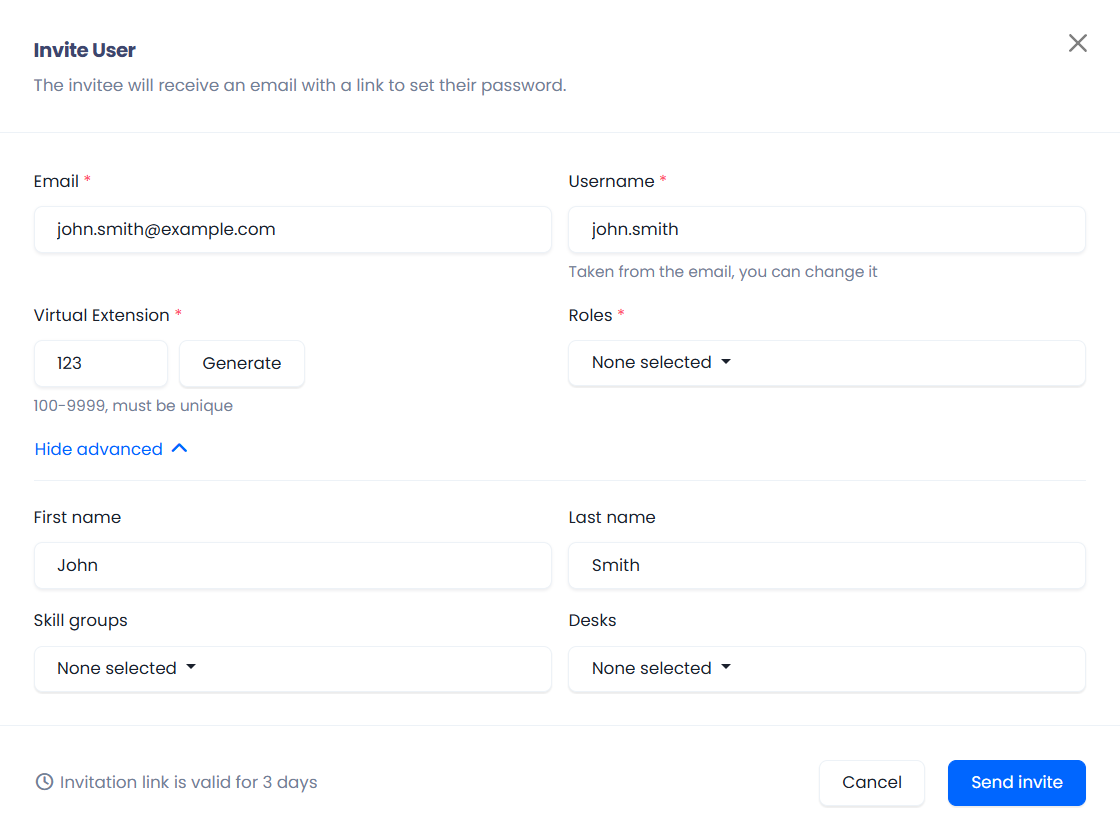
Advanced fields
| Field | Description |
|---|---|
| First name | Specify the first name of the user. |
| Last name | Specify the last name of the user. |
| Skill groups | Choose skill groups for the user from the drop-down list. |
| Desks | Choose desks for the user from the drop-down list. |
Other user settings, such as timezone, language, and security settings, get their default values. You can change them after the user accepts the invite. Learn more in Managing Existing Users.
IP ACLIf IP ACL is enabled for your account, the invitee must open the invite link from an allowed IP address. Otherwise, the page is blocked and the invite stays pending. The Invite User window shows a reminder when this applies.
Accepting the invite
After you send the invite:
- The invitee receives an email with a link to set their password. The link is valid for 72 hours (3 days) and can be used only once.
- The invitee opens the link, chooses a password, and confirms it.
- The user account is created, and the invitee is redirected to the login page to log in with their username and new password.
The user appears in the list of users only after they accept the invite. A pending invite reserves the username and extension, so no other user can take them in the meantime.
The new user's SIP Settings are set to Use WebRTC. You can change this after the user is created.
NOTENo temporary password is shown or sent at any stage. If the invitee loses the email, resend the invite.
Managing pending invites
To see the invites that have not been accepted yet, click the Pending invites button (clock icon) above the list of users.
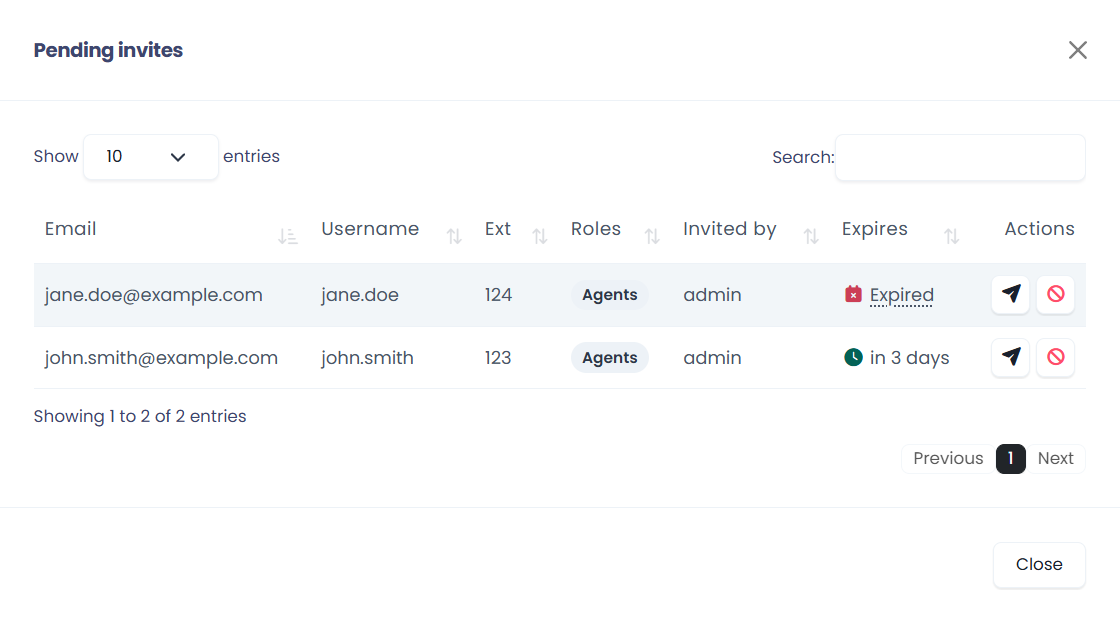
Pending invites window
For each invite, you can see the email, username, extension, roles, who sent the invite, and when it expires. In the Actions column, you can:
- Resend (paper plane icon) - send the invite email again with a new link. The previous link stops working.
- Revoke (ban icon) - cancel the invite. The link stops working, and the username and extension become available again.
Expired invites are marked as Expired and remain in the list for 7 days, during which you can still resend them.
Pending invites are revoked automatically if the user who sent them is deleted or deactivated.
Tracking invites
All invite actions are recorded in the activity log: when an invite is sent, resent, revoked, or accepted. To view them, go to Reports > Global Logs and switch to the Activity Logs tab.
Updated about 9 hours ago