

Post-Answer Playback
Learn how to upload an announcement recording to Classic PBX and assign it to an outbound route so called parties hear a disclosure before the call connects.
Configuring post-answer playback
Post-Answer Playback plays a short pre-recorded announcement to the called party immediately after they pick up, before the agent and the called party are connected. The most common use is a call-recording disclosure ("This call may be recorded for quality purposes…").
When a call goes through a route with Post-Answer Playback enabled:
- The called party answers.
- They hear your announcement (usually 3–8 seconds).
- During that window, your agent hears silence - that is normal.
- When the announcement finishes, the agent and the called party are joined and the call proceeds normally.
If the announcement recording is unavailable when a call comes in, the system ends the call before it connects. The feature ensures the system always plays the disclosure - it never lets a call through silently if it cannot play the disclosure.
Before you start
You need:
- Sign-in access to your FreePBX dashboard.
- The announcement audio file ready on your computer, in WAV or MP3 format (the system handles any sample rate or channel layout - it'll be converted automatically on upload).
- Knowing which outbound route(s) the announcement should apply to.
Accessing post-answer playback
To access Post-Answer Playback:
- In the FreePBX top menu, go to Applications > Post-Answer Playback.
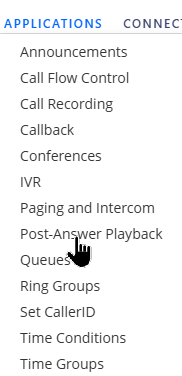
Post-Answer Playback menu tab
- You'll see three tabs:
- Routes: turn the announcement on or off per outbound route.
- Recordings: upload, preview, and delete announcement files.
- Logs: see which calls played the announcement and which were ended because the recording wasn't available.
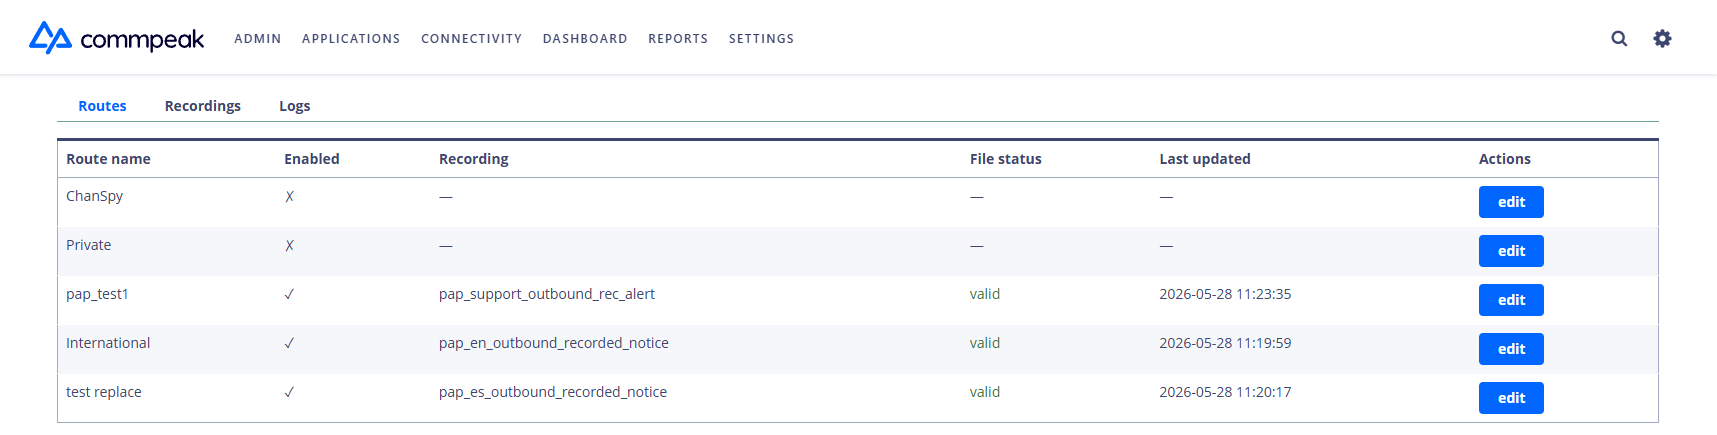
Post-Answer Playback tabs: Routes, Recordings, Logs
Uploading announcements
- Click the Recordings tab.

Recordings tab
- Click Browse.
- Choose your .wav or .mp3 file (≤ 5 MB, ≤ 60 s) from your drive.
- Wait for the confirmation banner: usually under a second.
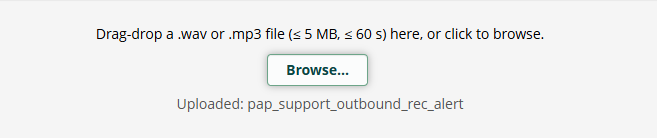
Confirmation banner: audio file uploaded
- Your file appears in the list. The name will start with
pap_followed by your filename (for example,pap_hello_and_welcome_long). That prefix keeps these announcement files separate from any other system recordings on the PBX.
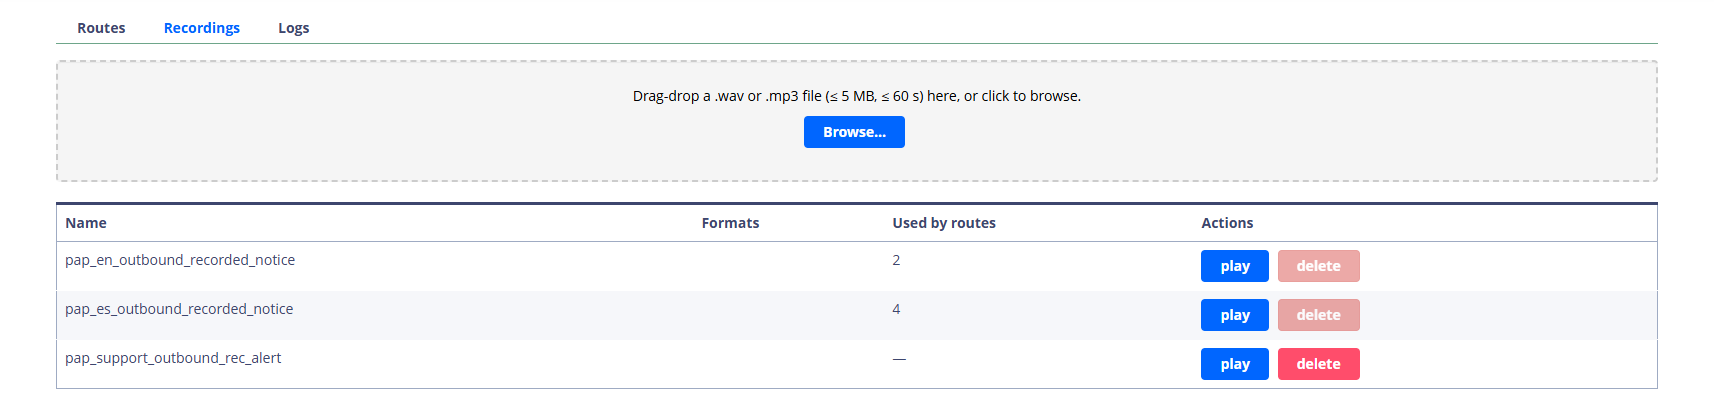
Uploaded file listed in the Recordings tab
- Click play to play the recording in your browser and confirm it sounds right before assigning it to a route.
- To delete the recording, click delete.
If upload fails
| What you see | What to do |
|---|---|
| Name already in use; rename file and retry. | A recording with that filename already exists. Rename the file (e.g. add a version suffix) and re-upload. |
| The file is too large or too long | The system caps uploads at 5 MB and 60 seconds. Trim the audio on your side and try again. |
| The file isn't a valid WAV /MPs | The source file may be corrupt or in an unsupported variant. Confirm it plays in any media player on your computer; if it does, contact your CommPeak support contact with the filename. |
| No file received | Your upload was interrupted. Retry on a stable connection. |
Assigning recordings to outbound routes
- Go to Connectivity > Outbound Routes.

Outbound Routes menu tab
- Click to edit the route that should carry the announcement.
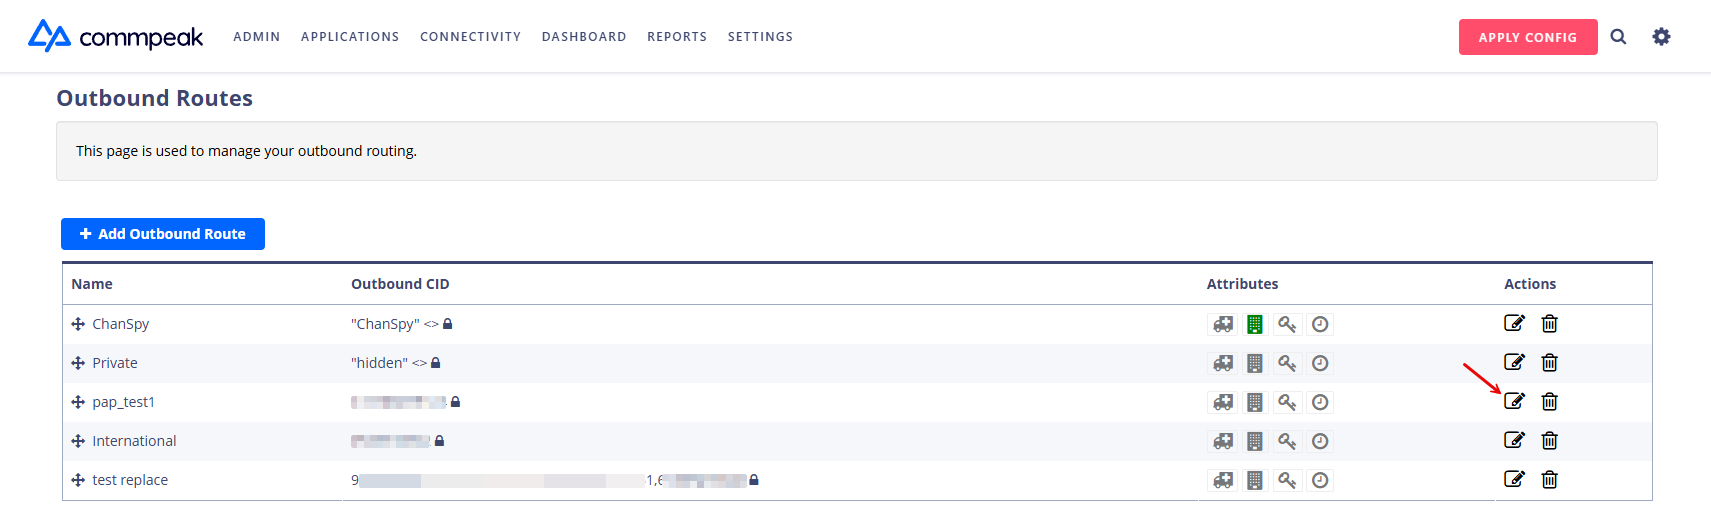
Editing outbound routes
- Switch to the Additional Settings tab.
- In the Post-Answer Playback section:
- Set Enable post-answer playback to Yes.
- The Recording dropdown appears below it. Pick the recording you just uploaded.
- Click Submit at the top of the route page.
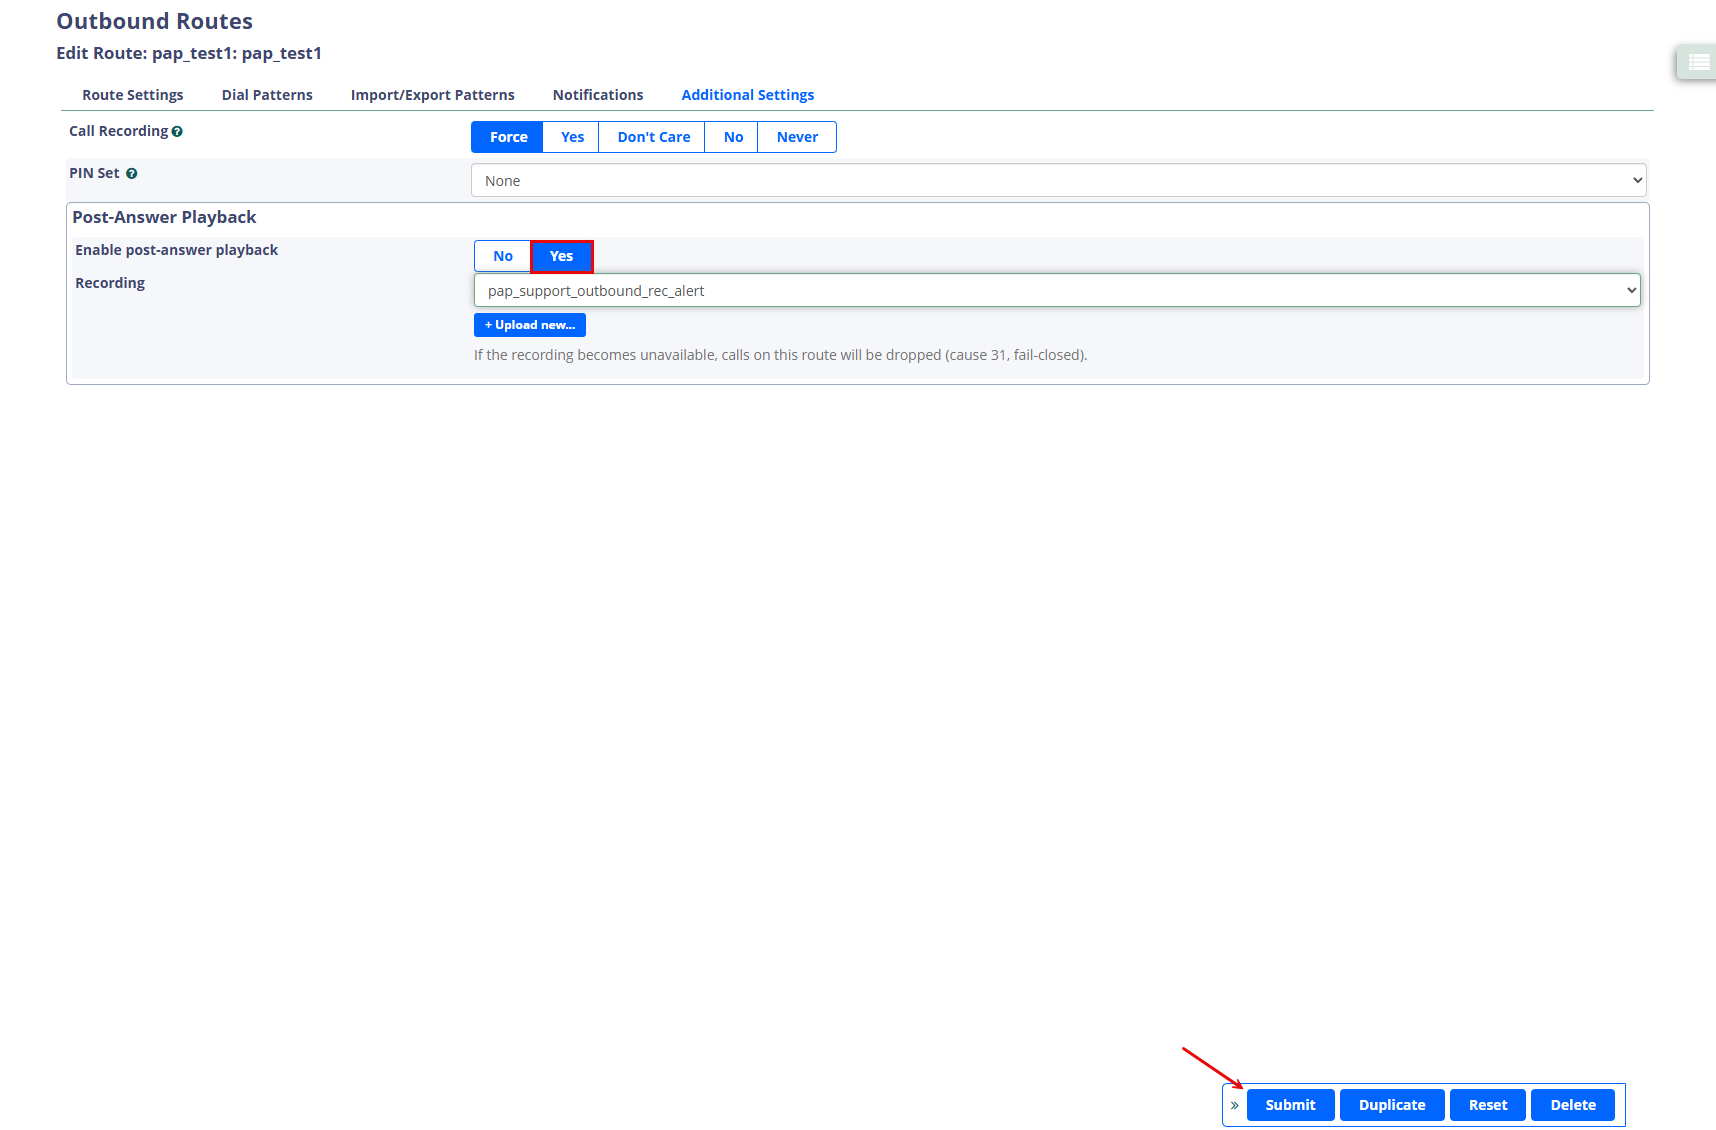
Enable post-answer playback set to Yes
Applying the configuration
At the top right of every FreePBX page is a red APPLY CONFIG button that appears whenever you have unsaved changes.

APPLY CONFIG button
Click it. After a few seconds the button disappears which means your changes are now active. The next call placed through that outbound route will play your announcement.
Verifying with a test call
- Place a call through the route you just configured.
- When the called party answers, they hear the announcement. The agent hears silence during this window — that's expected.
- When the announcement finishes (usually 3–8 seconds), both sides are joined and you can talk normally.
✔️ Congratulations! You're done.
Checking the call log
Open the Logs tab in the Post-Answer Playback tab.
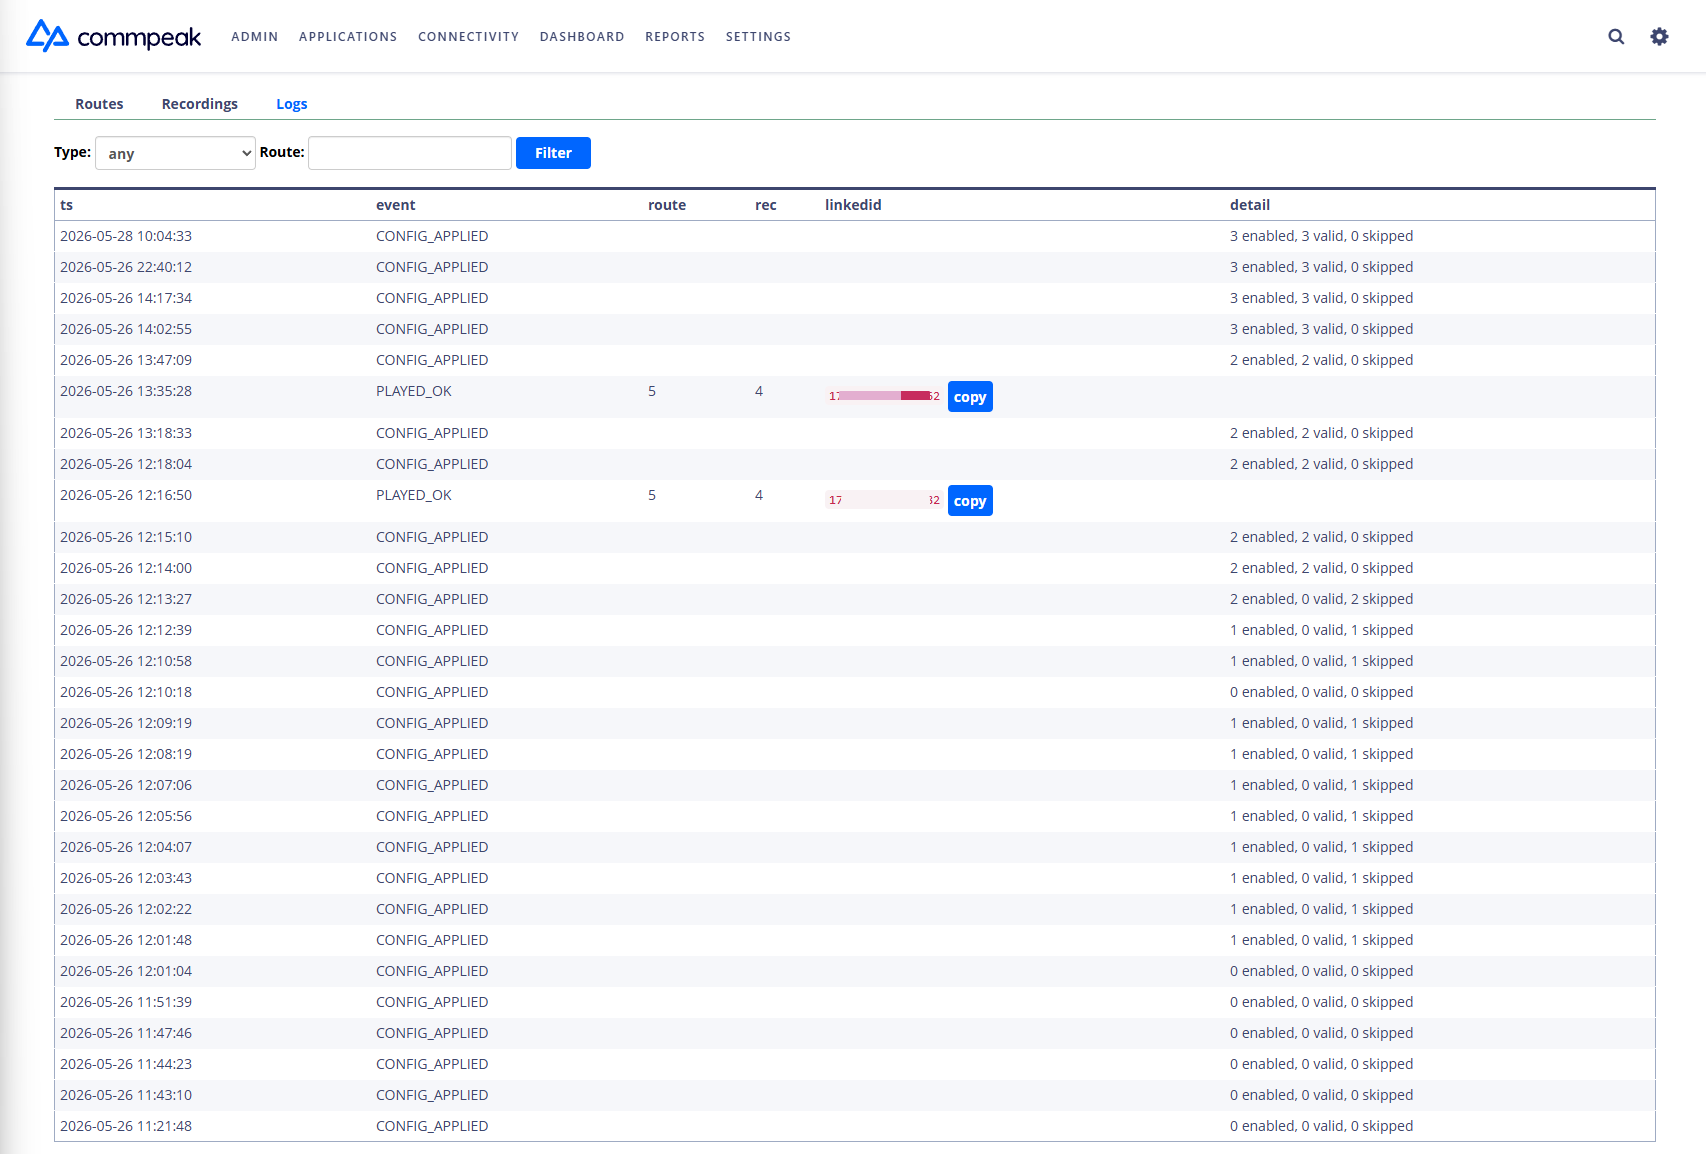
Logs tab: list of recent calls
Each row is one event. The most useful ones to recognize:
| Event | Description |
|---|---|
| Played OK | The announcement played to the called party as expected. |
| Fail closed | The recording wasn't available, so the call was ended before it connected. Check that the recording still exists in the Recordings tab; re-upload if needed. |
| Missing file | The system noticed that a recording file is missing. Re-upload the recording. |
| Config applied | Logged every time you click APPLY CONFIG. Use it to confirm your changes were picked up. |
Use the filters at the top of the table to narrow by event type or date range.
Turning the announcement off for a route
- Go back to Connectivity > Outbound Routes.
- Click to edit the needed route and switch to its Additional Settings tab.
- In the Post-Answer Playback section, set Enable post-answer playback to No.
- Click Submit.
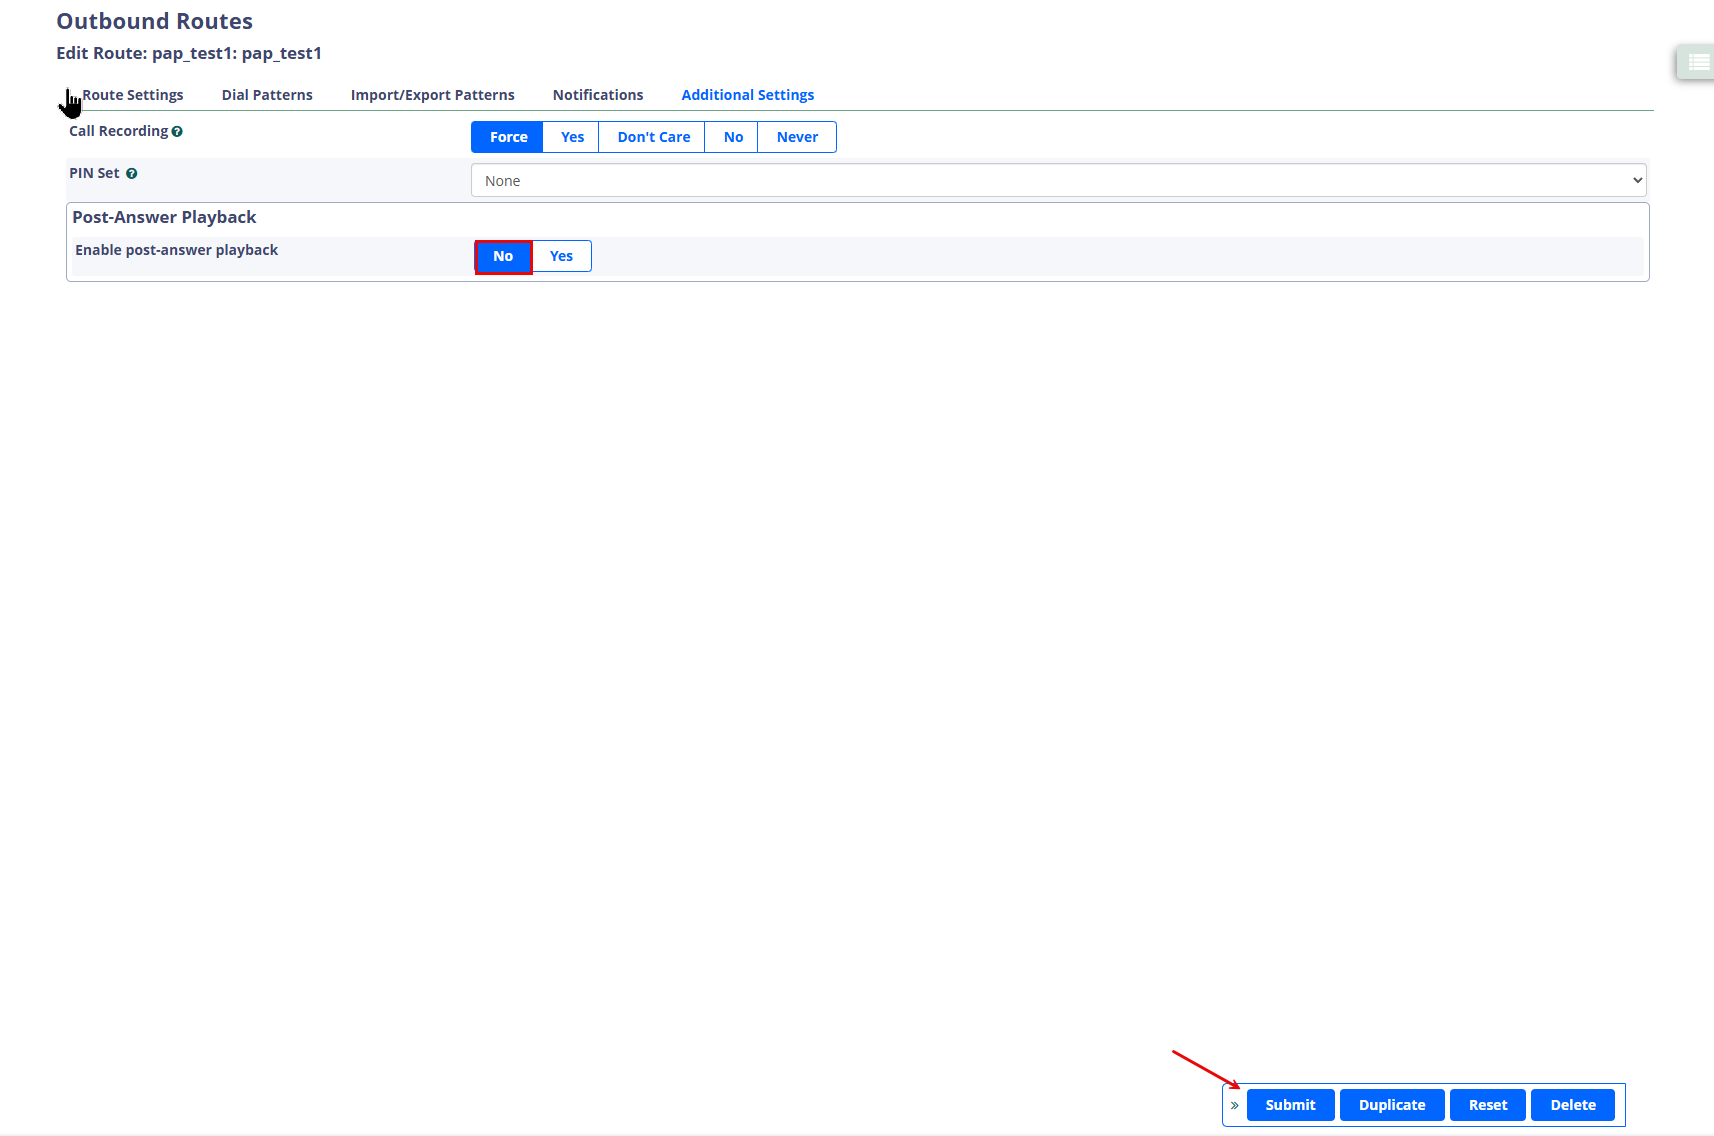
Enable post-answer playback set to No
- Finally click APPLY CONFIG.
NOTEThe recording itself is not deleted and you can re-enable the route later, or use the same recording on a different route, without re-uploading.
Deleting a recording
In the Recordings tab, click Delete on the row.
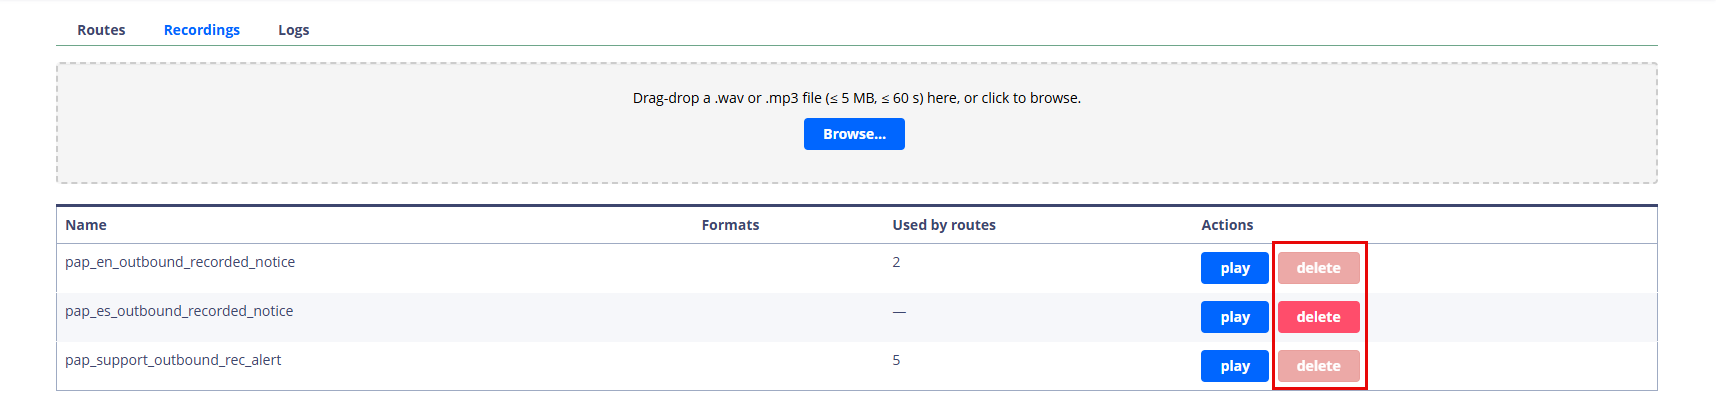
Recordings tab: Delete buttons
NOTEYou can't delete a recording while it's still assigned to an outbound route that has Post-Answer Playback enabled. Disable it on the relevant route(s) first, then delete.
Quick reference
| I want to… | Where to go |
|---|---|
| Upload an announcement | Applications → Post Answer Playback → Recordings → Upload |
| Turn it on for a route | Connectivity → Outbound Routes → (route) → Post-Answer Playback → Yes → Submit → Apply Config |
| Turn it off for a route | Connectivity → Outbound Routes → (route) → Post-Answer Playback → No → Submit → Apply Config |
| Delete an old recording | Applications → Post Answer Playback → Recordings → Delete (must be unassigned first) |
| Check what happened on a call | Applications → Post Answer Playback → Logs |
NEED HELP?For help resolving common Post Answer Playback issues, see Troubleshooting Post-Answer Playback Issues .
If your issue isn't covered in the troubleshooting section , contact your CommPeak support contact and include:
- The date and time of the test call, including your time zone.
- The outbound route name.
- The recording name you assigned.
- A screenshot of the Logs tab from around that time.
That's enough for support to identify exactly what happened.
Updated 10 days ago