

Customizing Your WebCall Widget
Set the position, agent identity, theme, and texts of your WebCall Widget, and let visitors request a callback.
The WebCall Widget Generator sets how your WebCall Widget looks and behaves, and whether visitors can request a callback. You find it on the Create WebCall Widget and Edit WebCall Widget pages in VoIP Services > WebCall Widgets. Every change shows in the preview on the right.
To create a widget first, see WebCall Widget: In-Page VoIP Calls.
To check how the widget looks on each screen and device, see Previewing your widget.
Previewing your widget
The preview on the right of the WebCall Widget Generator shows the widget on a sample page. Switch between Desktop and Mobile to check both layouts.
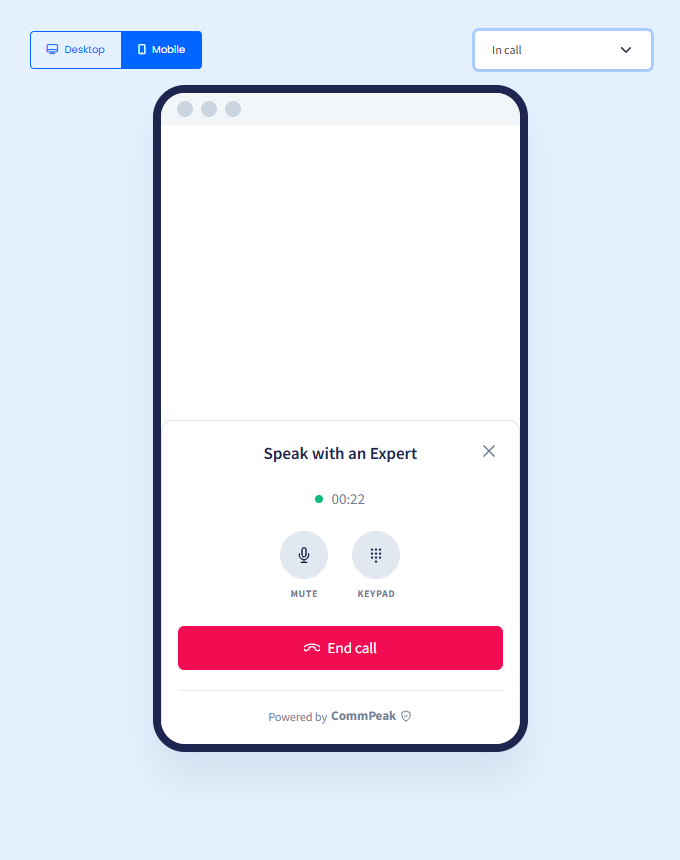
Switching between Desktop and Mobile preview
Select a screen from the list in the top-right corner of the preview to see what visitors get at each point.
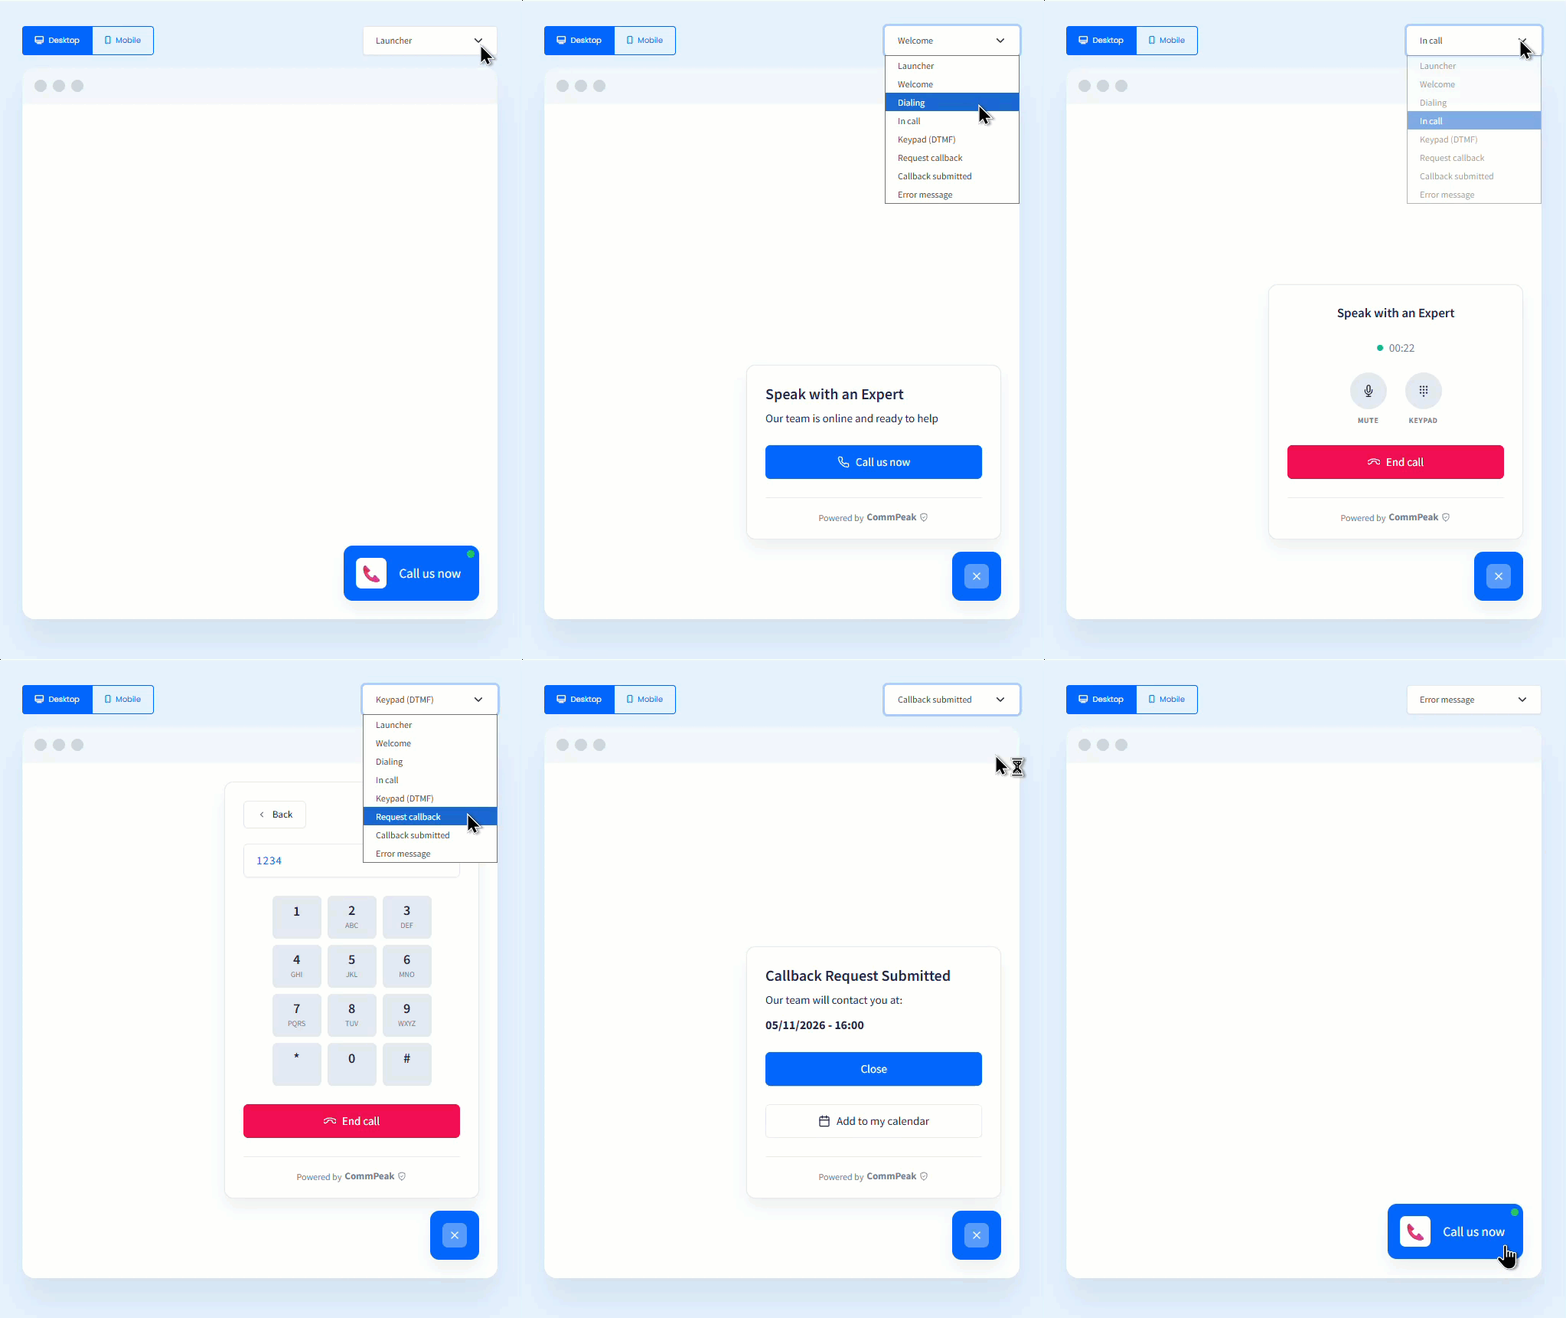
Previewing screen options
| Screen | What visitors see |
|---|---|
| Launcher | The button on your page, with the launcher icon and text. |
| Welcome | The agent's avatar, name, and title (once you set them), the widget title and message, and Call us now. Request a callback also appears when callback requests are on. |
| Dialing | Connecting... with a Cancel button. |
| In call | The call timer, Mute, Keypad, and End call. |
| Keypad (DTMF) | A dial pad for entering digits during the call, with Back and End call. |
| Request callback | The form with the fields you selected, plus a date and time. |
| Callback submitted | The requested date and time, with Close and Add to my calendar. |
| Error message | Microphone access needed, with Try again and Close. Shown when the browser can't use the microphone. |
NOTEThe agent's avatar, initials, and name appear in the preview and in the widget only after you fill in the corresponding fields on the General tab: Agent Identity, Initials, and Agent name. Until then, the widget shows no agent details.
General settings
| Setting | Description |
|---|---|
| Widget position | The corner of the page where the widget appears: Top Left, Top Right, Bottom Left, or Bottom Right. |
| Vertical offset / Horizontal offset | The distance between the widget and the edges of the page, in px. |
| Agent Identity | The avatar visitors see in the widget. Click Change Avatar to upload a PNG, JPEG, or WebP image (the portal resizes it automatically, up to 64 KB), or Reset to go back to initials. Use Initials to set the letters shown when there is no image. Visitors see the avatar only after you upload an image or enter initials. |
| Agent name | The name shown next to the avatar, for example, CommPeak Agent. Visitors see it only after you fill it in. |
| Agent title | The role shown under the agent name, for example, Support Specialist. |
| Request a Callback | Adds a Request a callback option to the widget. For the setup, see Receiving callback requests. |
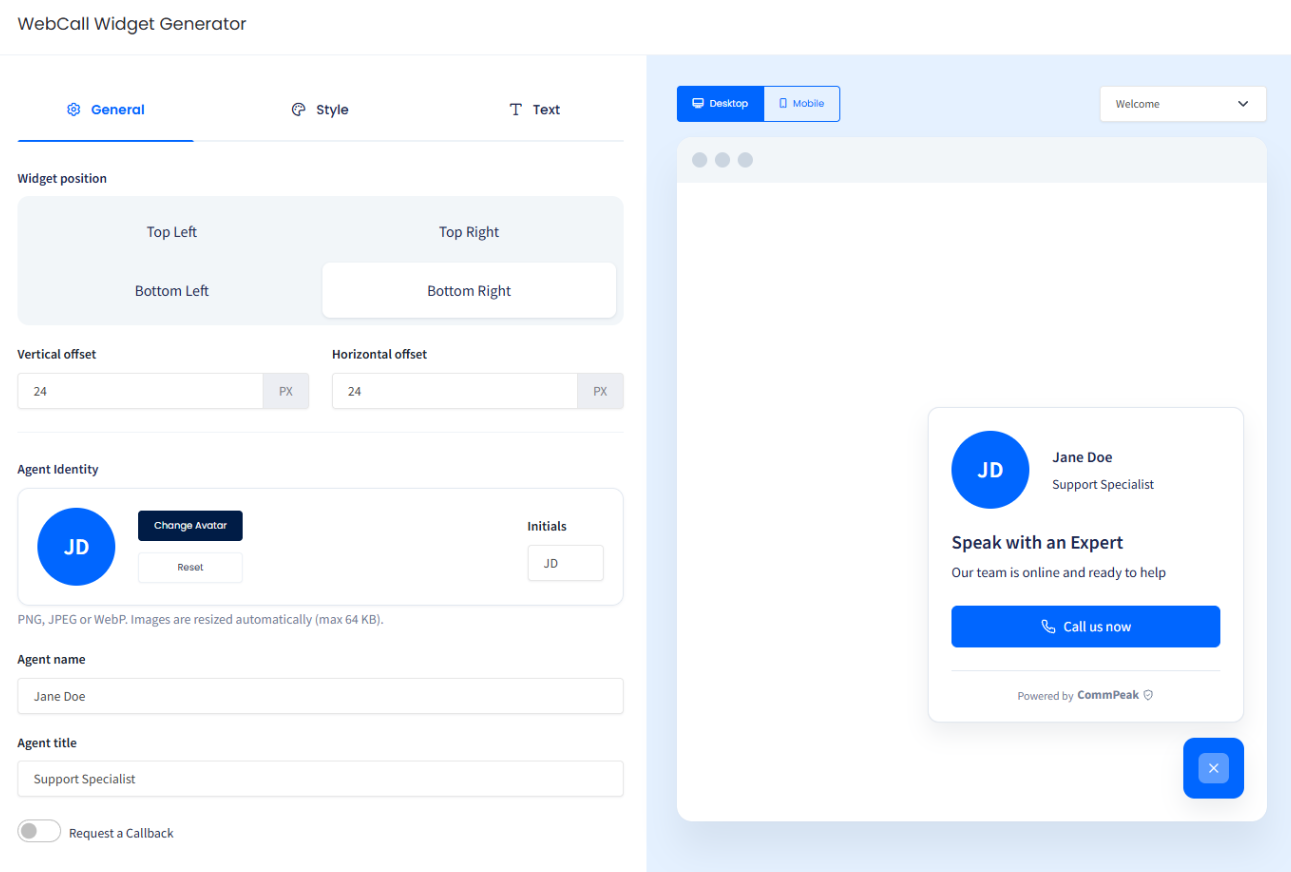
General tab
Style settings
| Setting | Description |
|---|---|
| Quick themes | Ready-made color pairs: Modern blue, Midnight, Professional, and Sunrise. |
| Launcher icon | The icon on the launcher button. Choose one of the preset icons, or click the custom icon button to upload your own image. |
| Font | The font of the widget text: Inherit from website, System font, Serif, Monospace, or Custom font name. |
| Rounding (Radius) | How rounded the widget corners are, in px. |
| Widget shadow | The shadow under the widget: None, Soft, Medium, Heavy, or Elevated. |
| Brand colors | Your own Primary color and Background color, as HEX codes or from the color picker. |
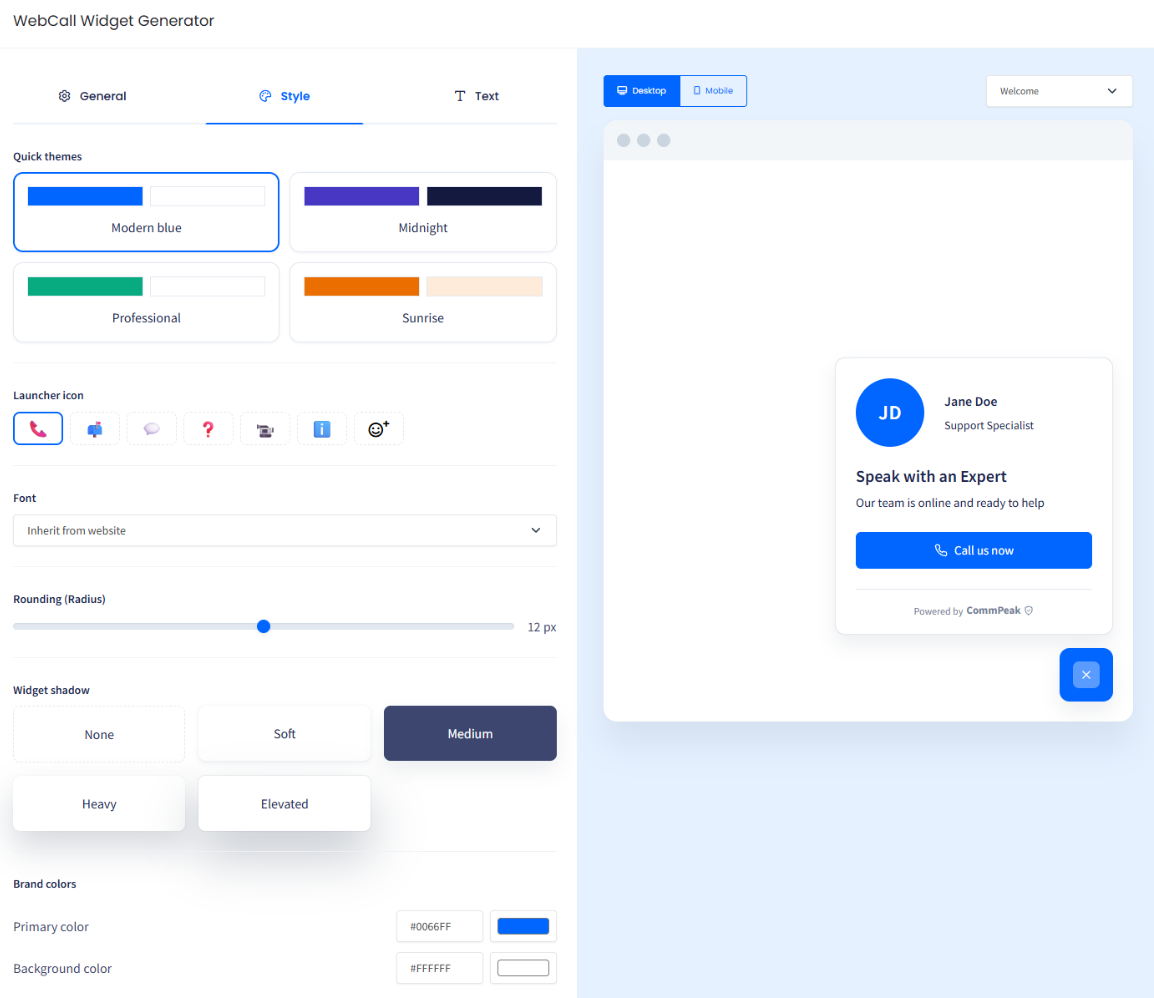
Style tab
Text settings
| Setting | Description |
|---|---|
| Launcher text | The text on the launcher button. Default: Call us now. |
| Widget title | The heading visitors see when they open the widget. Default: Speak with an Expert. |
| Widget message | A short line under the title. Default: Our team is online and ready to help. |
| Audio feedback | Plays interaction sounds in the widget. On by default. |
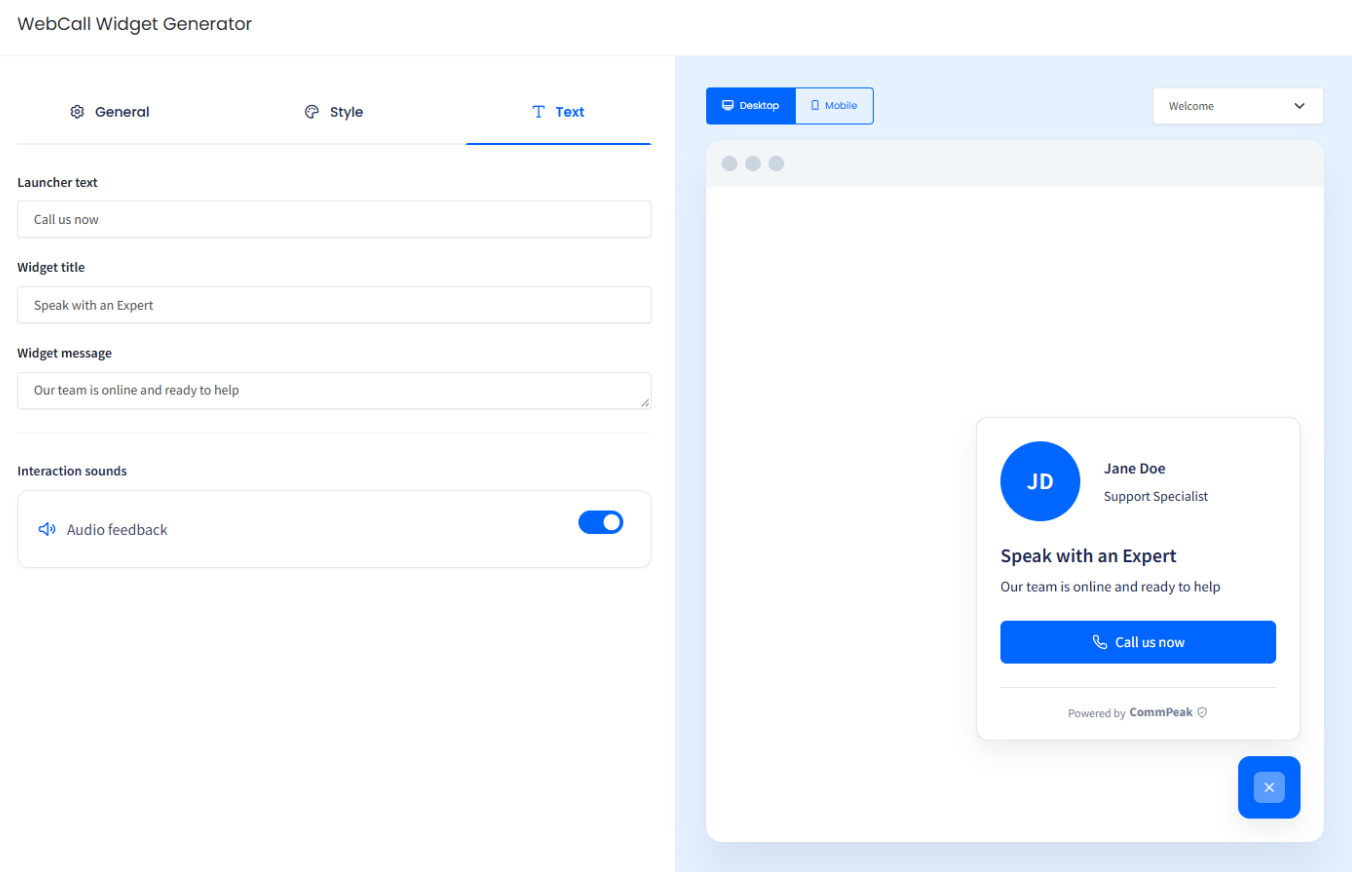
Text tab
Receiving callback requests
When Request a Callback is on, visitors who can't talk right away can leave their details and a preferred date and time for your team to call them back.
To set up callback requests:
Turn on callback requests
On the General tab, turn on Request a Callback.
Choose the form fields
Select the fields visitors fill in: First Name, Last Name, Phone, and Email. First Name and Phone are selected by default. The form always asks for a date and time.
Choose where requests go
Set up one or both of the following:
- Send callback requests by email: Enter up to 5 addresses in Destination email, separated by commas.
- Webhook URL (optional): Enter the URL of your endpoint. CommPeak sends each request to it as JSON, signed with your JWT secret.
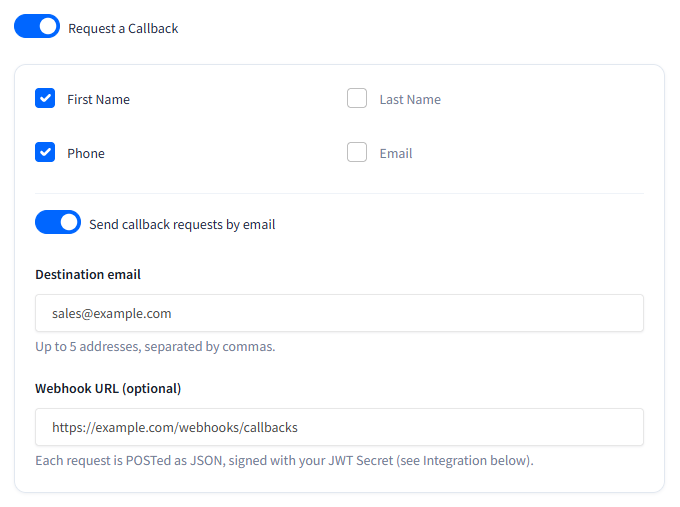
Callback request settings
WARNINGThe widget fetches a new JWT from your endpoint for every callback request, so your JWT endpoint must be reachable from your website.
For the webhook payload and how to verify its signature, see Receiving callback webhooks.
Updated about 7 hours ago