

Connect your own domain to the TextPeak inbox to send, receive, and reply to emails, then publish the DNS records and confirm verification.
An Email channel connects a domain you own to the TextPeak Inbox, so your team can send, receive, and reply to emails the same way they would in Gmail or any other mailbox. On top of that, every email conversation gets the inbox features your team uses for other channels, such as statuses, assignments, and auto-replies.
This article walks you through creating the channel on the Channels > Email page, publishing the DNS records the domain needs, and confirming that verification has completed.
Before you begin
To create an Email channel, you need a domain you can control, such as example.com. A free mailbox on a provider domain, such as a Gmail address, cannot be verified because you cannot publish DNS records for it.
Opening the email channel list
- Log in to TextPeak in your browser.
- Click Channels in the main menu on the left.
- The Channels page opens and lists every channel type, with the number of channels you have created under each one.
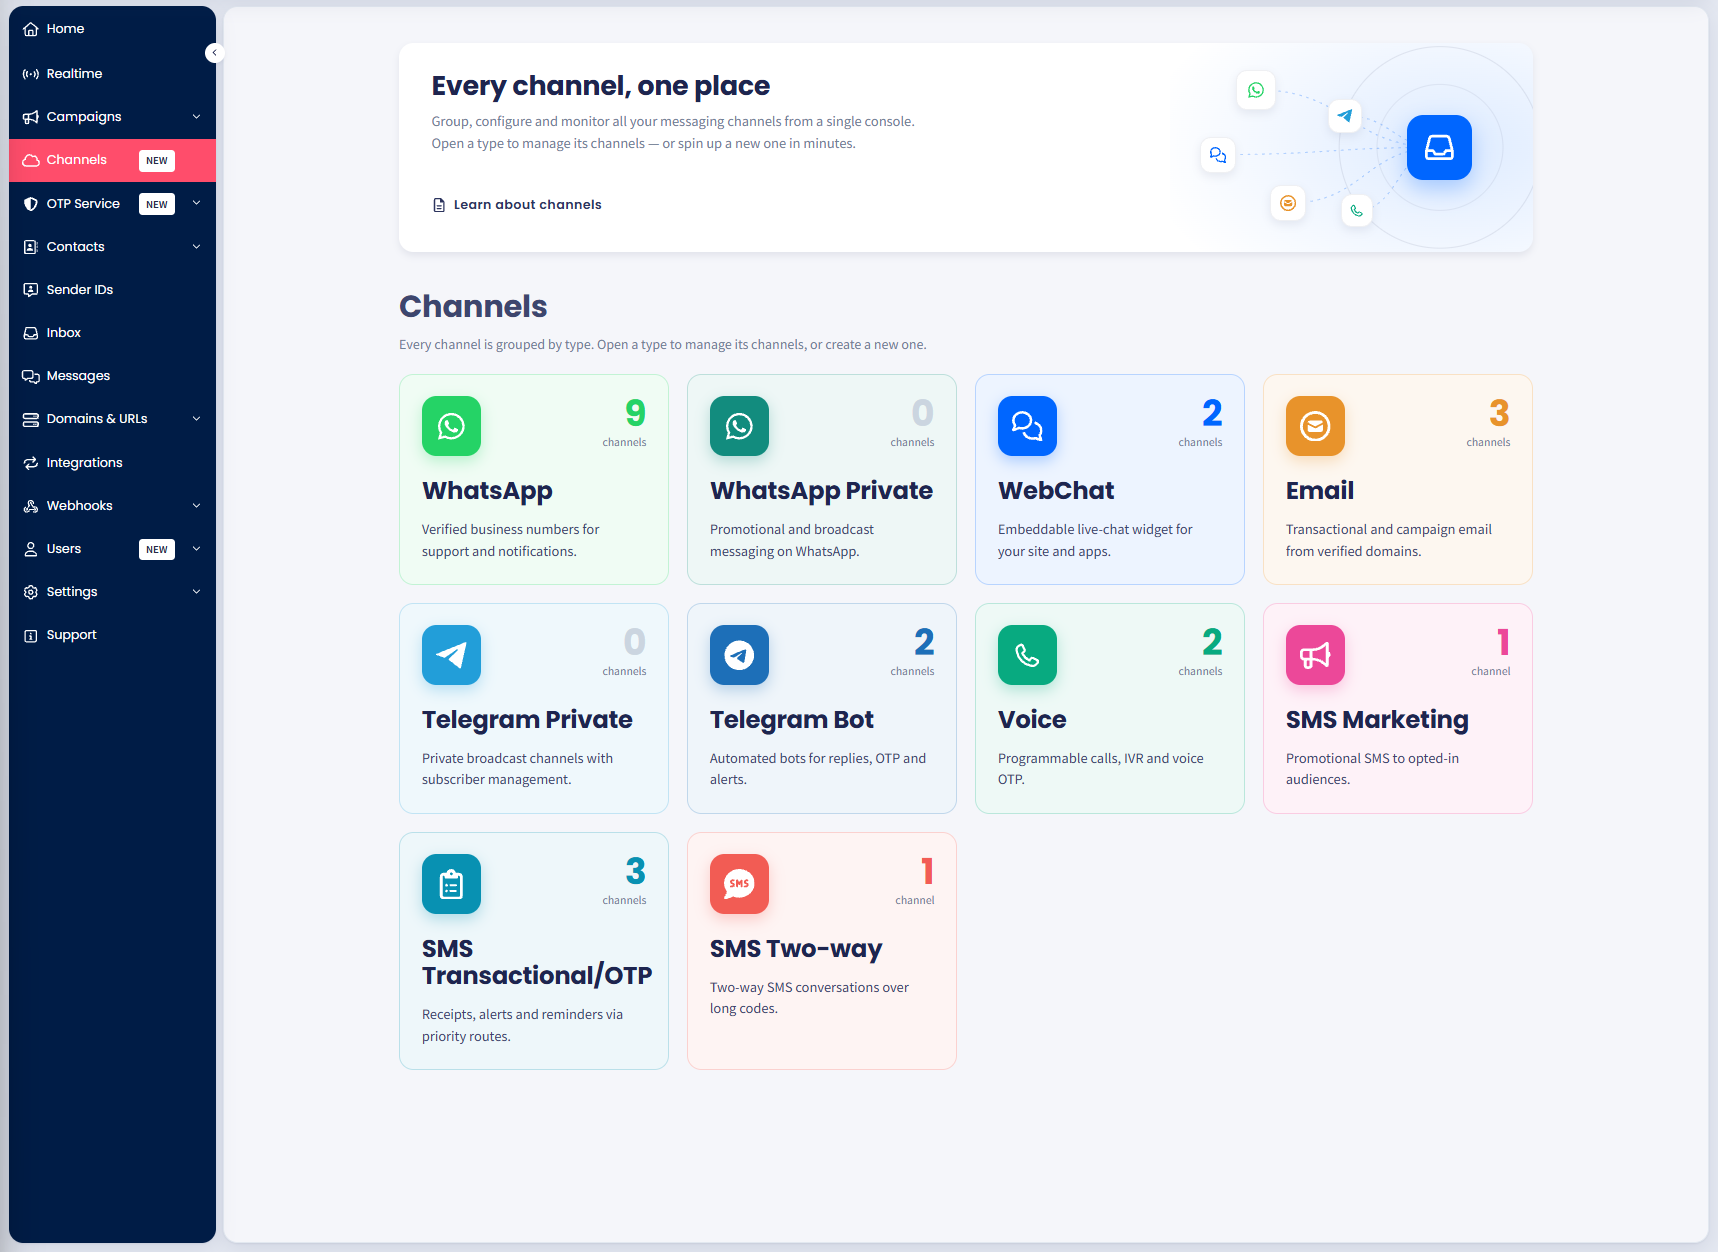
The Channels page in TextPeak
- Select the Email card.
- The Email channels page lists every Email channel on the account.
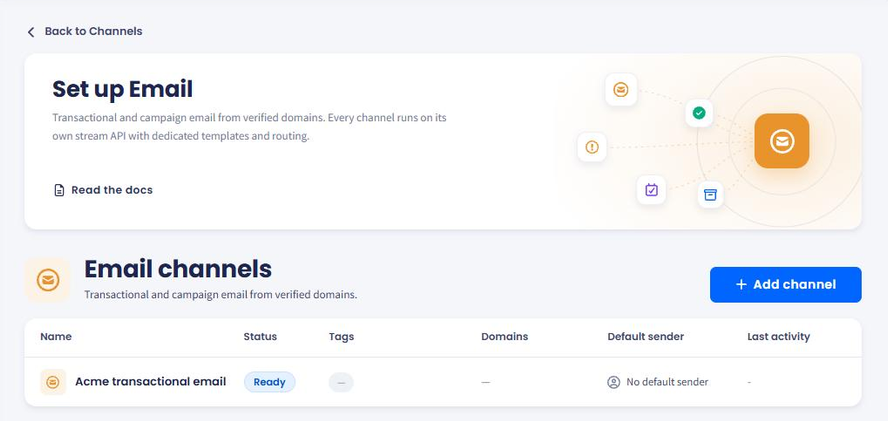
The Email channels page
Creating the channel
-
Click + Add channel.
-
On the Channel details step, enter a Channel name and a Channel description.
-
Set Enable IP ACL if you want to restrict which addresses may call the channel, and add any Tags, if needed.
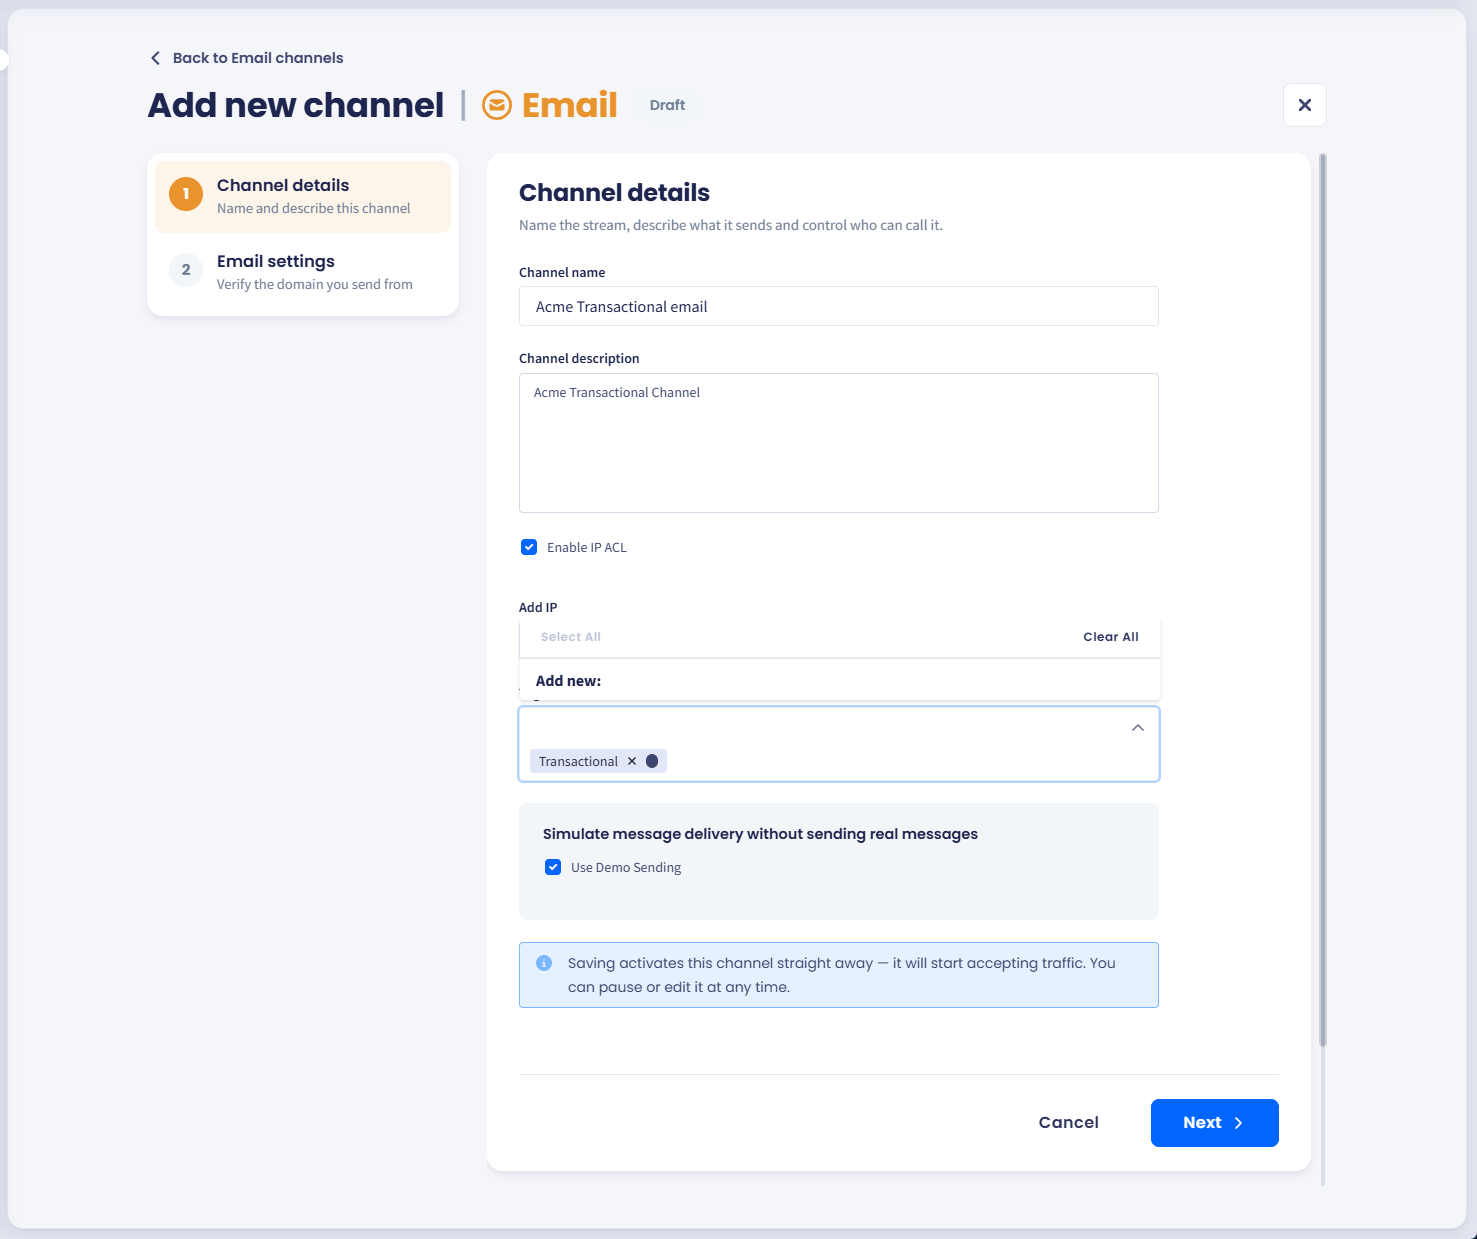
Channel details section showing the channel name and description and the optios to enable IP ACL and add tags
- Click Next.
Adding the sending domain and its addresses
The Email settings step is where you name the domain the channel sends from and the addresses on it.
- In Sending domain, enter the domain, such as
example.com. - Under Addresses on this domain, enter each address the channel sends from and receives on, such as
[email protected], then click the plus icon. Add at least one address.
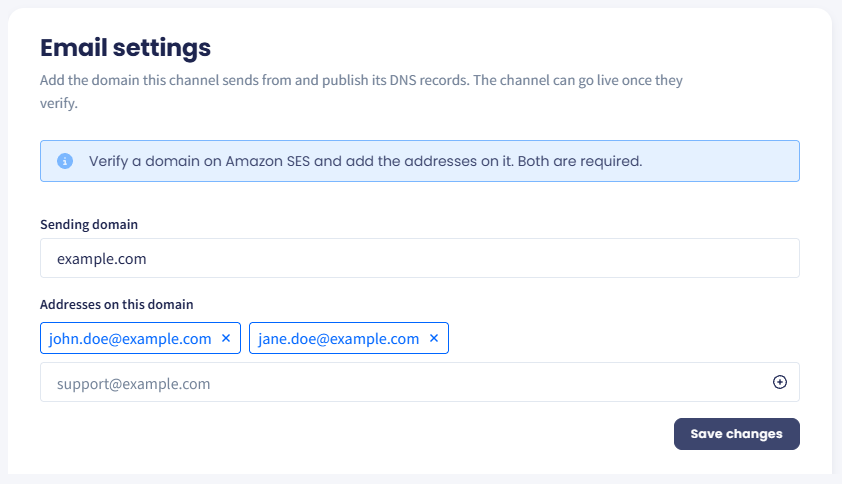
Email settings section
- Click Save changes.
NOTEBoth sections are required. TextPeak verifies the domain on Amazon SES, and the addresses tell the platform which mailboxes on that domain belong to this channel.
Publishing the DNS records
Saving the domain generates the DNS records it needs. TextPeak lists them under Add these DNS records, and you publish them at your DNS host, such as GoDaddy, Porkbun, or Google Domains.
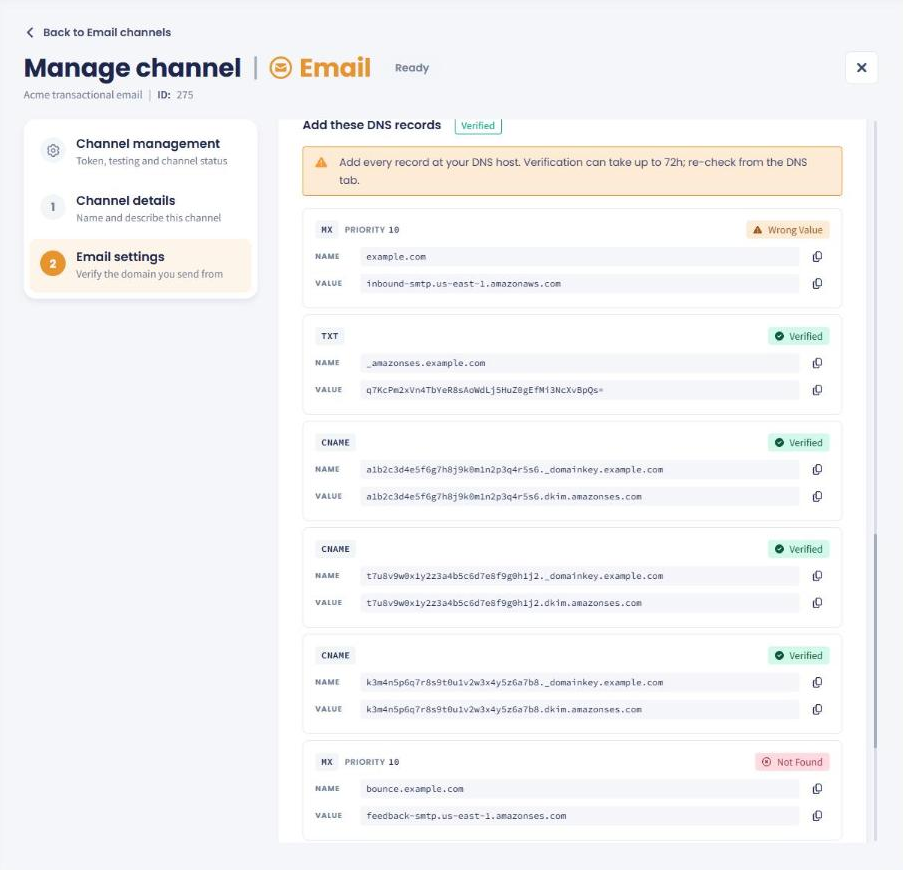
Add these DNS records, with the verification and DKIM records
Refer to the following table for what each record does.
| Type | Name | Purpose |
|---|---|---|
| MX | example.com | Routes inbound mail for the domain to the platform, so replies reach your inbox. Priority 10. |
| TXT | _amazonses.example.com | Proves you control the domain. |
| CNAME | Three ._domainkey.example.com records | DKIM keys that sign outgoing mail so receivers can confirm it came from you. |
| MX | bounce.example.com | Routes bounce and complaint notifications back to the platform. Priority 10. |
| TXT | bounce.example.com | The SPF record that authorizes the sending service. |
| TXT | _dmarc.example.com | The DMARC policy for the domain. |
To publish a record, copy it with the copy icon at the end of its row, then add it at your DNS host using the Type, Name, Value, and, for the MX records, the Priority shown here.
Checking each record
Every record carries its own status badge, and that is where you look when a domain will not verify.
| Badge | What it means |
|---|---|
| Verified | The record was found at your DNS host and its value matches. |
| Not Found | No record of that type and name was found. It has not been published, or it has not propagated yet. |
| Wrong Value | A record was found, but its value does not match the one shown here. Copy the value again and replace what you published. |
WARNINGAdd every record. A domain with some of its records published stays unverified, and the channel cannot go live until all of them resolve.
You can re-check channel details at any moment.
To do it:
- Click Show DNS records under Domain records in Channel management.
- This opens the side menu where you can switch between the Info and DNS tabs to review the sender addresses and the records at your DNS host.
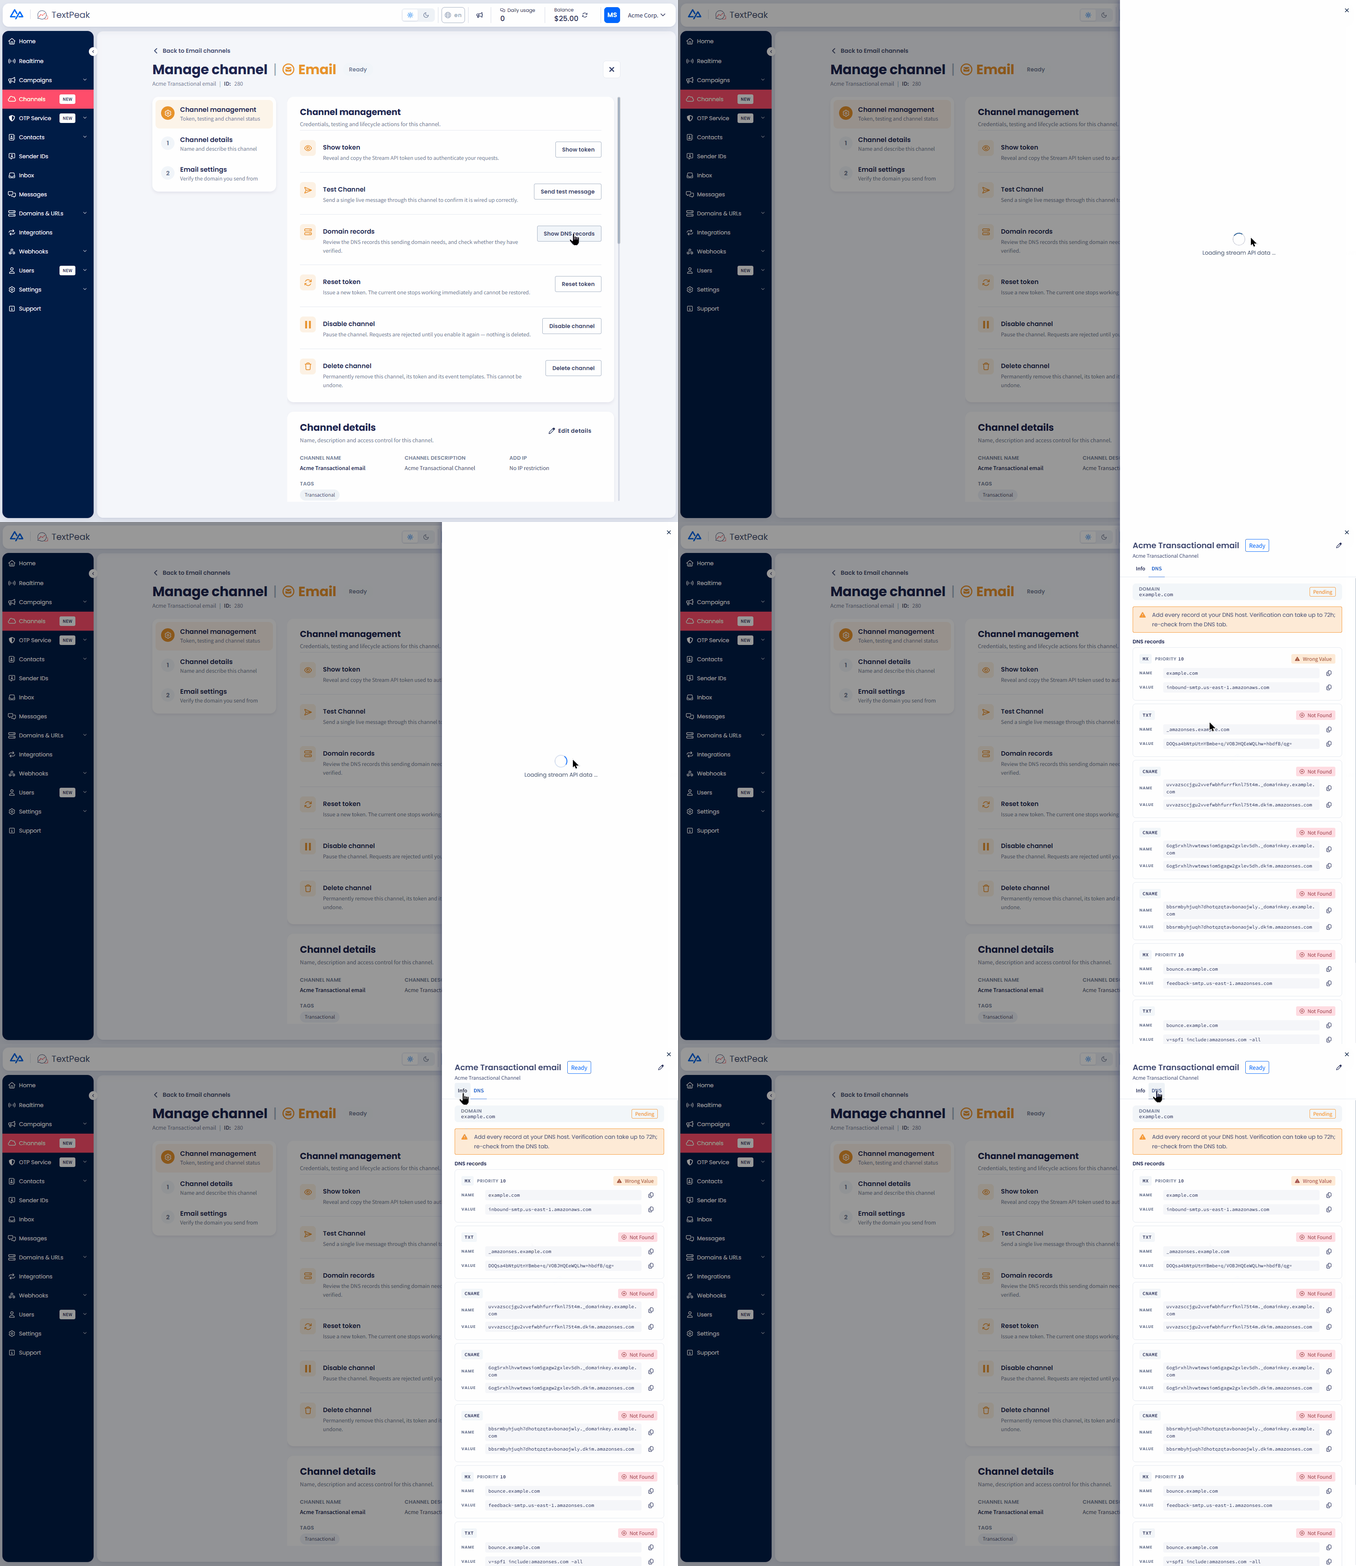
The flow to re-check channel details
Confirming verification
Verification runs on the DNS side and can take up to 72 hours to complete, depending on how quickly your host propagates the change.
- A Verified badge next to Add these DNS records means the domain has passed.
- To re-check before the badge appears, open the channel and click Show DNS records under Domain records in Channel management.
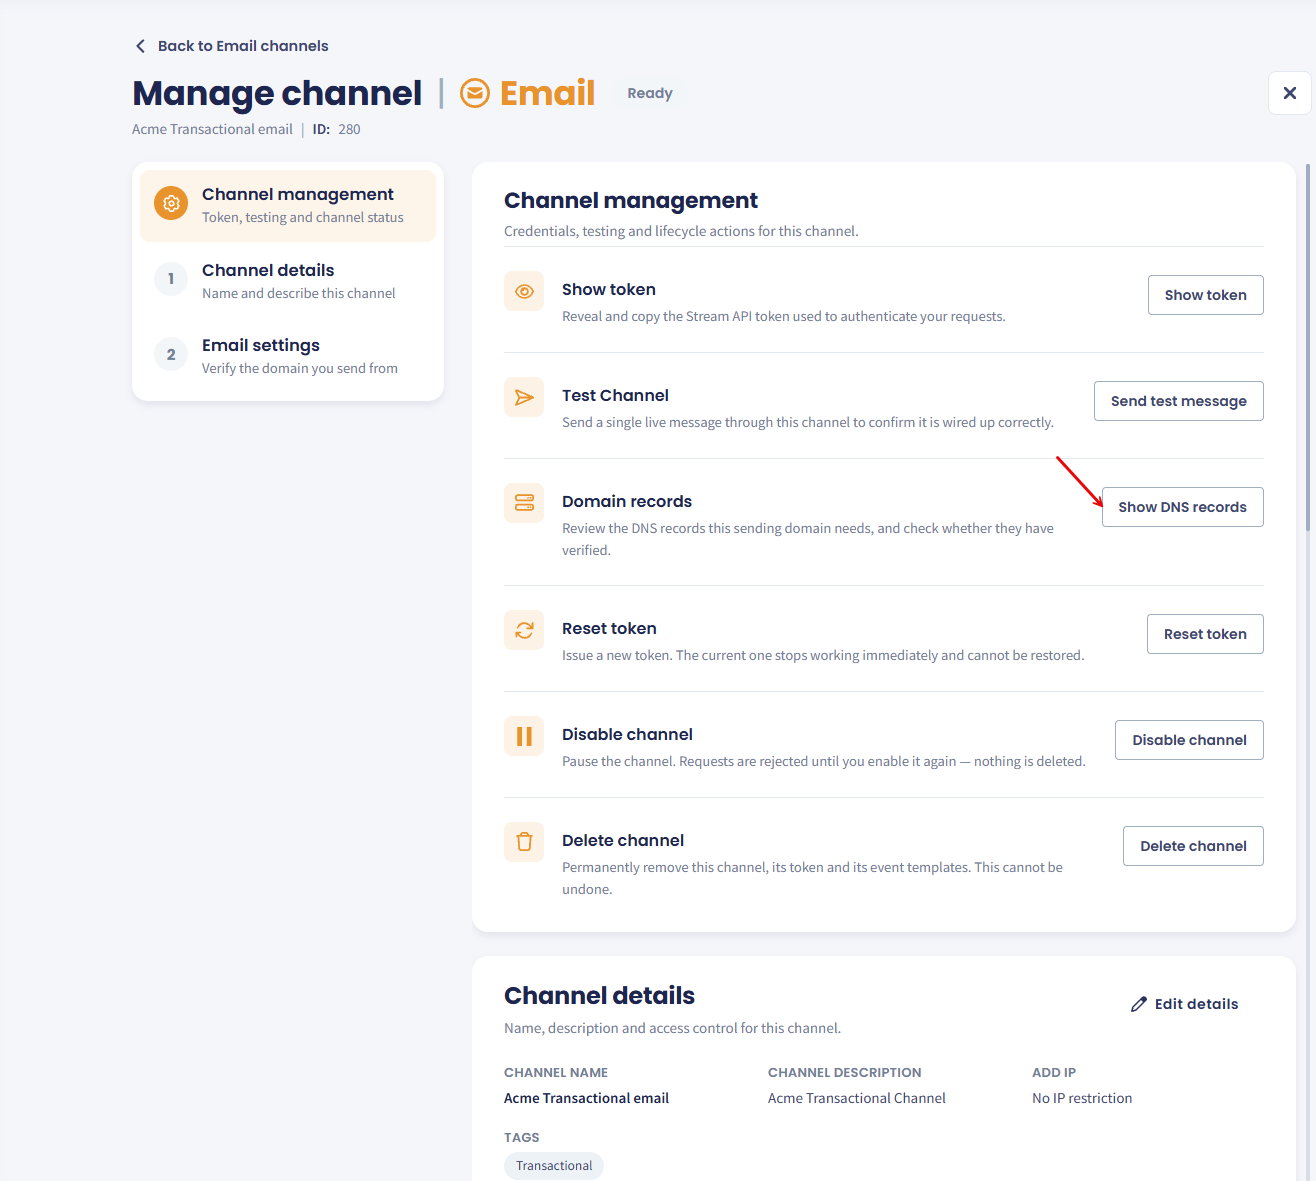
Domain records in Channel management
TIPIf the badge has not appeared after 72 hours, compare each published record against the row in the table, character for character. A trailing dot or a missing subdomain in the Name field is the usual cause.
Using the channel
Once the domain is verified, the Email channel works like a regular mailbox inside the TextPeak inbox. Complete two settings before your team starts using it:
- Select the Email channel in the sender profile you want it to send from. See Sender Profiles.
- Set its incoming routing so emails reach the right team. See Incoming Routing.
Your team can then work with email the same way they would in Gmail or any other mailbox, with the inbox features on top:
- send new emails, receive incoming ones, and reply to them from the inbox
- track each email conversation with statuses
- assign email conversations to agents, manually or automatically
- respond outside working hours or on first contact with auto-replies
- use every other inbox feature available for your other channels.
For more on working with conversations, see Managing Conversations and Inbox Settings.
Managing the channel
To manage an Email channel after you create it, click Channels in the main menu on the left, open the Email card, and then select the channel in the list. The Manage channel page opens, showing the channel name, its ID, and its status, such as Ready, at the top.
The menu on the left of the page has three sections:
- Channel management - token, testing, and channel status actions
- Channel details - the channel name and description
- Email settings - the sending domain you verified and its addresses.
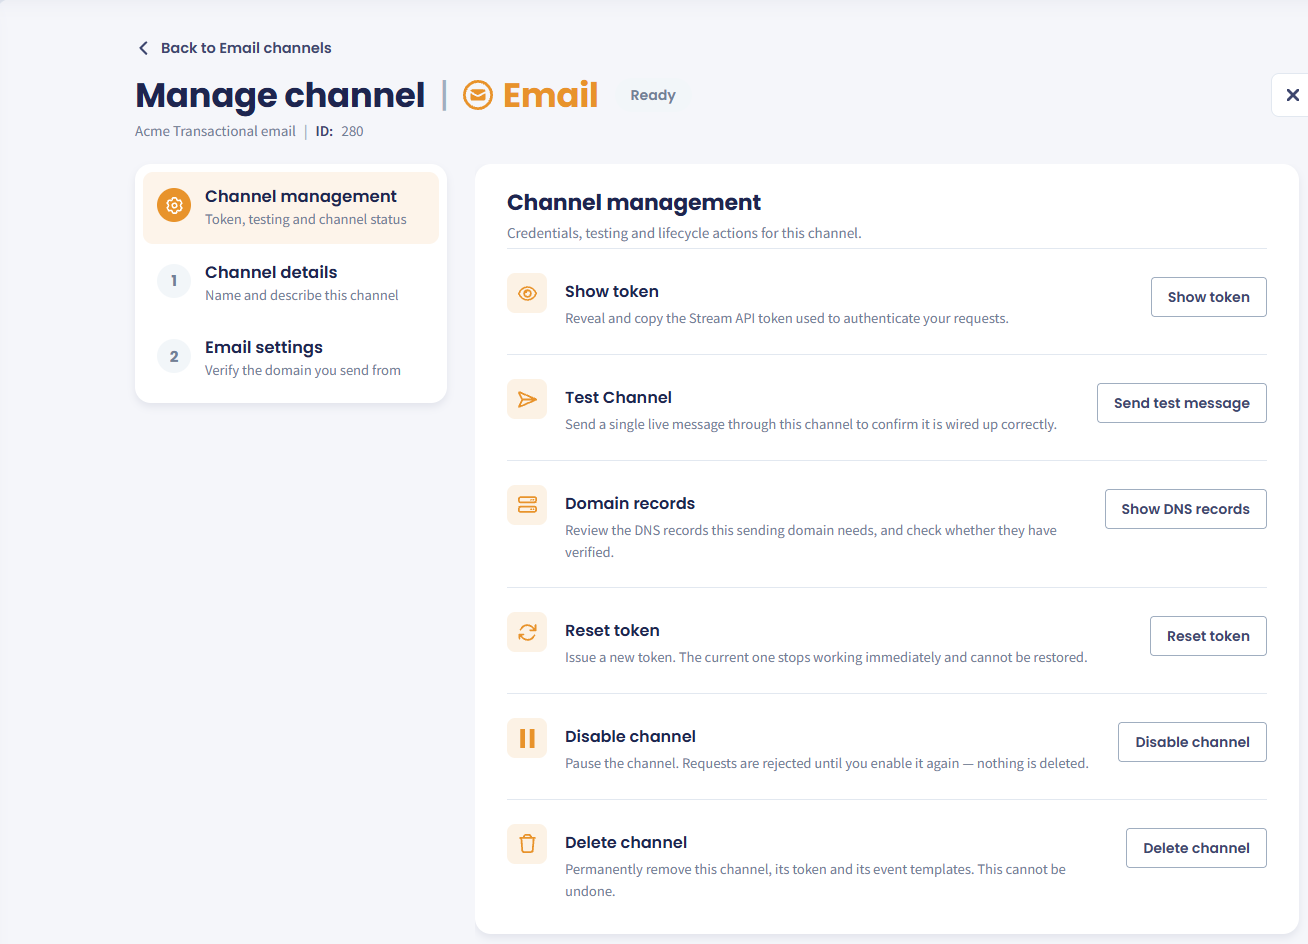
Manage channel page for an Email channel
Channel management holds the credentials, testing, and lifecycle actions for the channel:
| Action | What it does |
|---|---|
| Show token | Click Show token to reveal and copy the API token that authenticates your requests. |
| Test Channel | Click Send test message to send a single live message through the channel and confirm it is set up correctly. |
| Domain records | Click Show DNS records to open the side menu where you can switch between the Info and DNS tabs to review the sender addresses and the records the sending domain needs and check whether each one has verified. See Checking each record. |
| Reset token | Click Reset token to issue a new token. The current token stops working right away and cannot be restored. |
| Disable channel | Click Disable channel to pause the channel. Requests are rejected until you enable it again, and nothing is deleted. |
| Delete channel | Click Delete channel to permanently remove the channel, its token, and its event templates. |
IMPORTANTResetting the token and deleting the channel cannot be undone. Before you reset the token, make sure you can update every integration that uses it, as their requests fail until they switch to the new token.
For more on the actions every channel type shares, see TextPeak Channels.
Updated 9 days ago