This page provides information on how to set up and manage your DIDs.
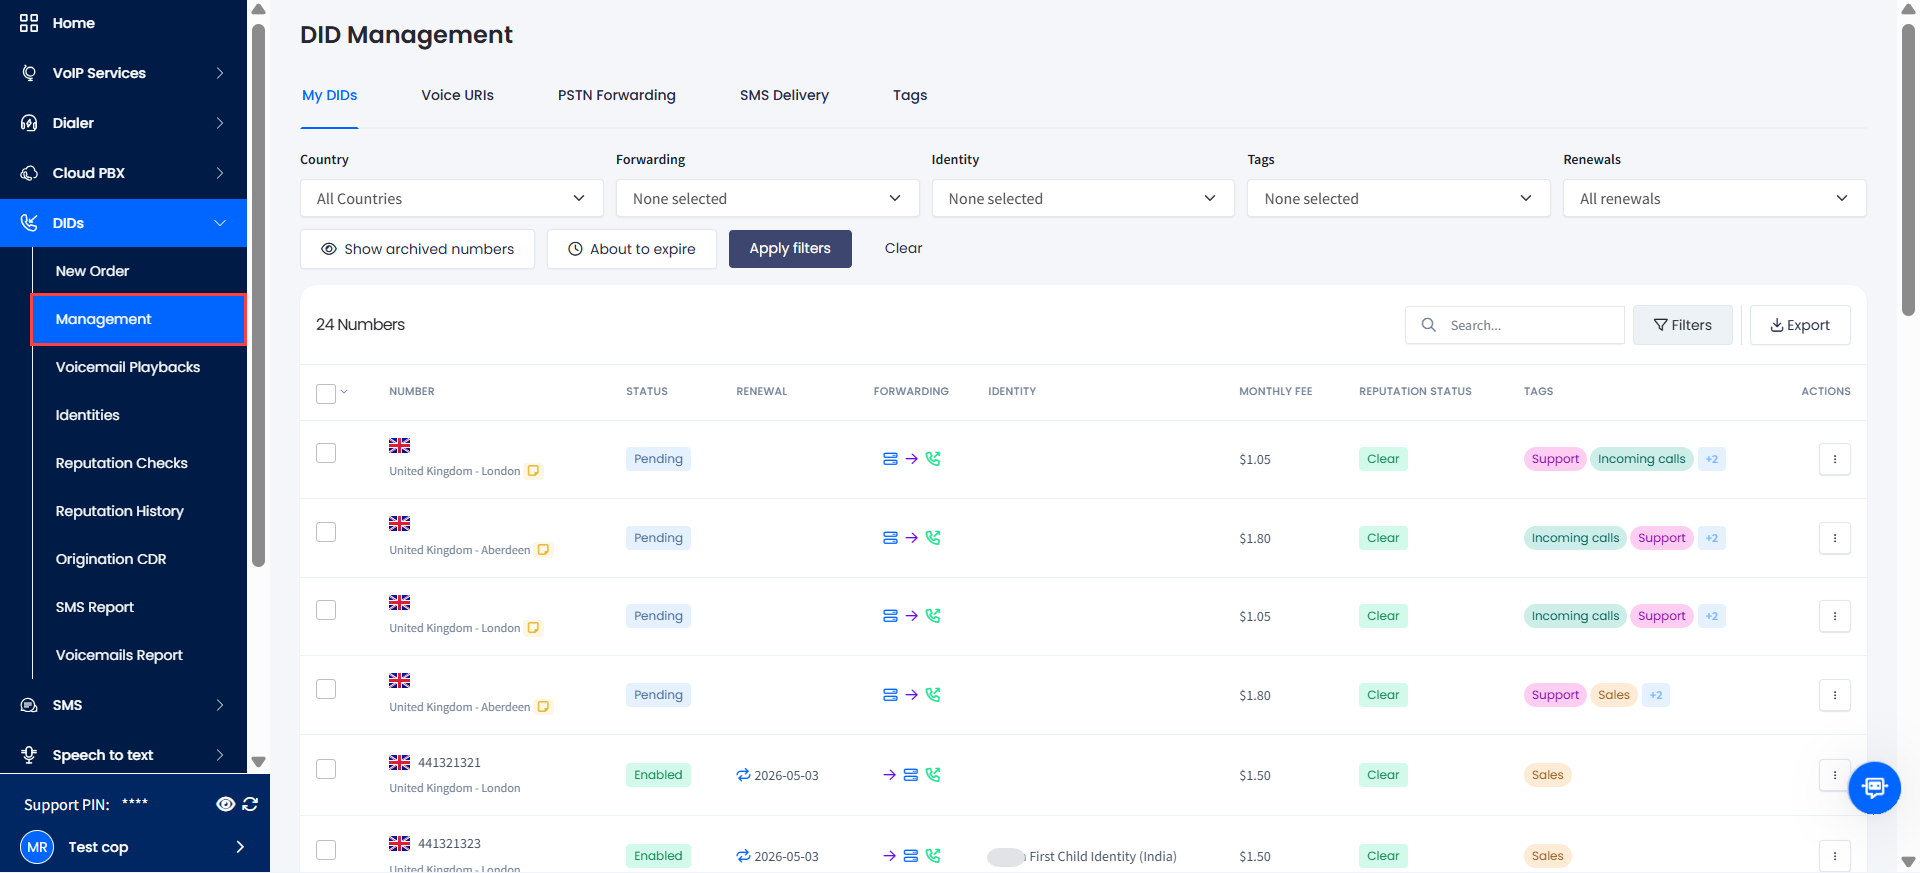
Use your CommPeak Portal to see the detailed table view of your entire DIDs inventory with the visual indicators and columns used to manage your numbers.
DID Management
In the DID > Management page, you can:
View and manage DIDs assigned to your CommPeak Account.
You can enable or stop auto-renewal of the selected DIDs added to your account.
To enable Auto-Renew:
Open the My DIDs tab.
In the My DIDs table, use the checkbox on the left or select the needed number by applying search filters at the top right of the DID Management page.
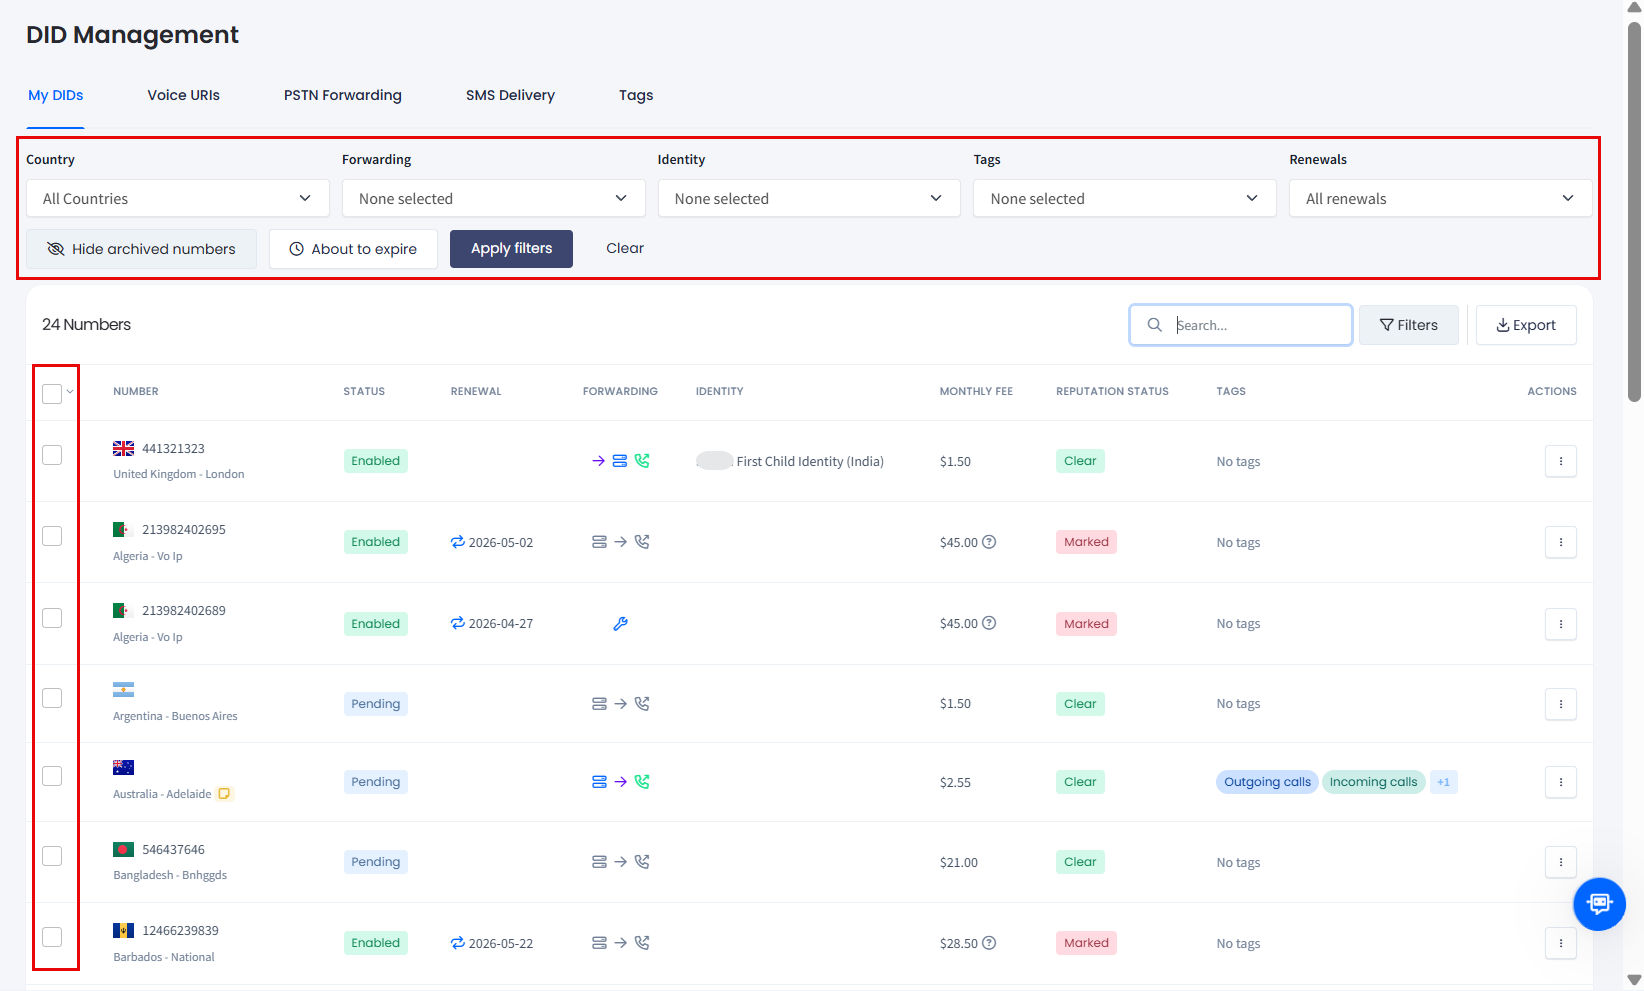
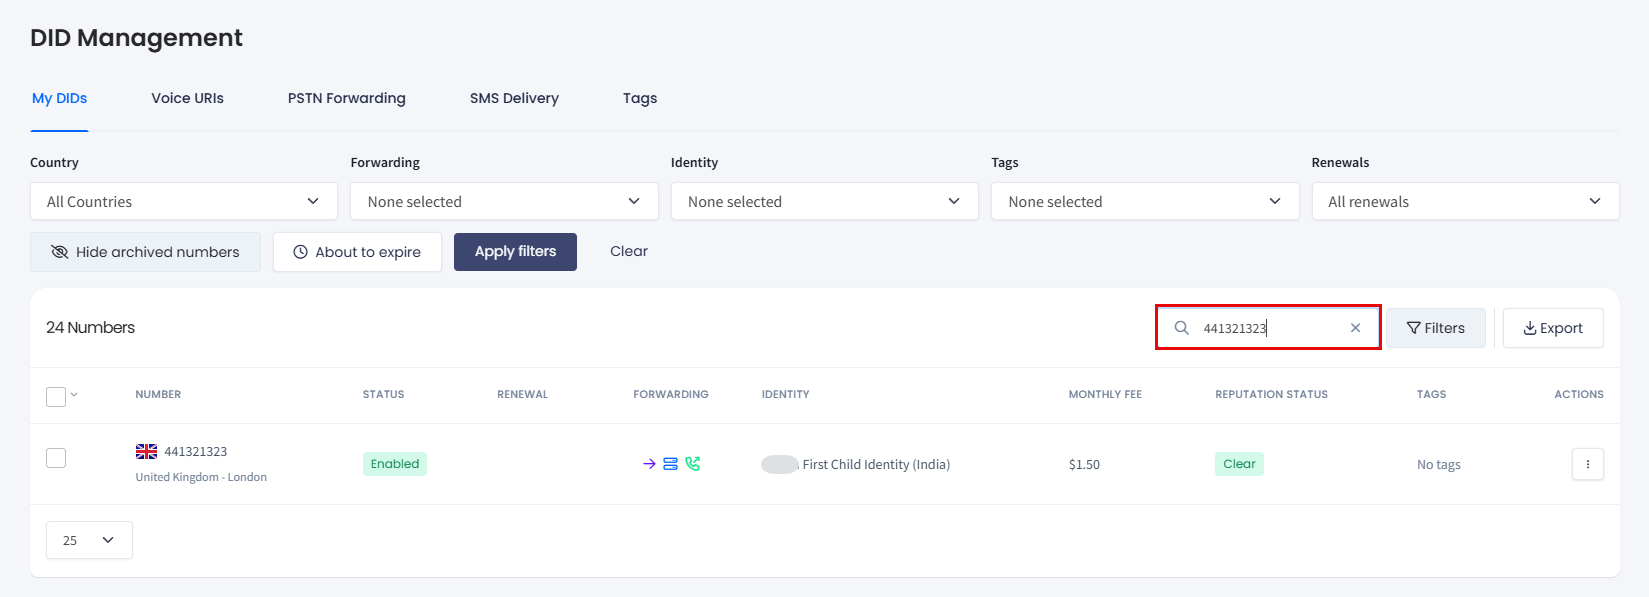
Filtering or selecting DID numbers
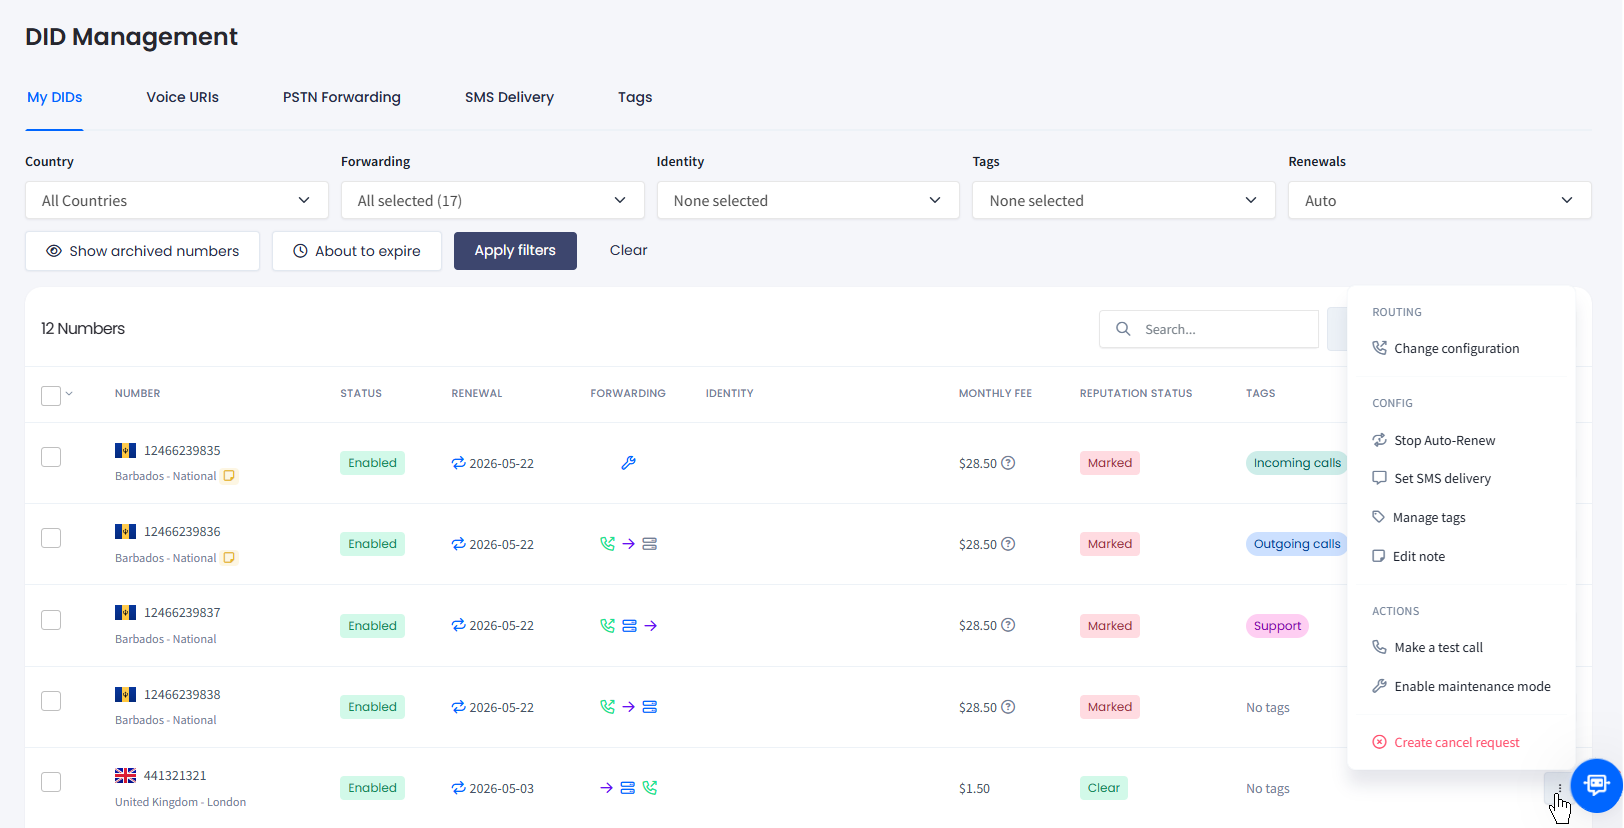
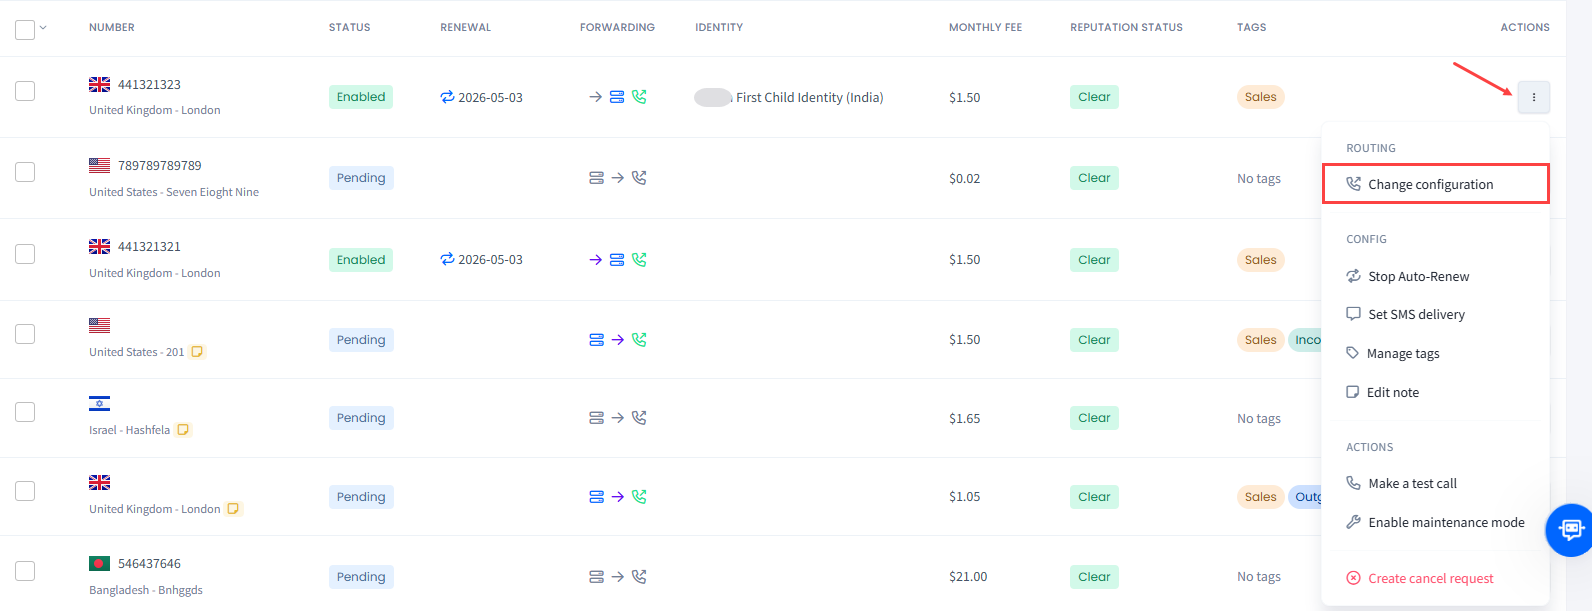
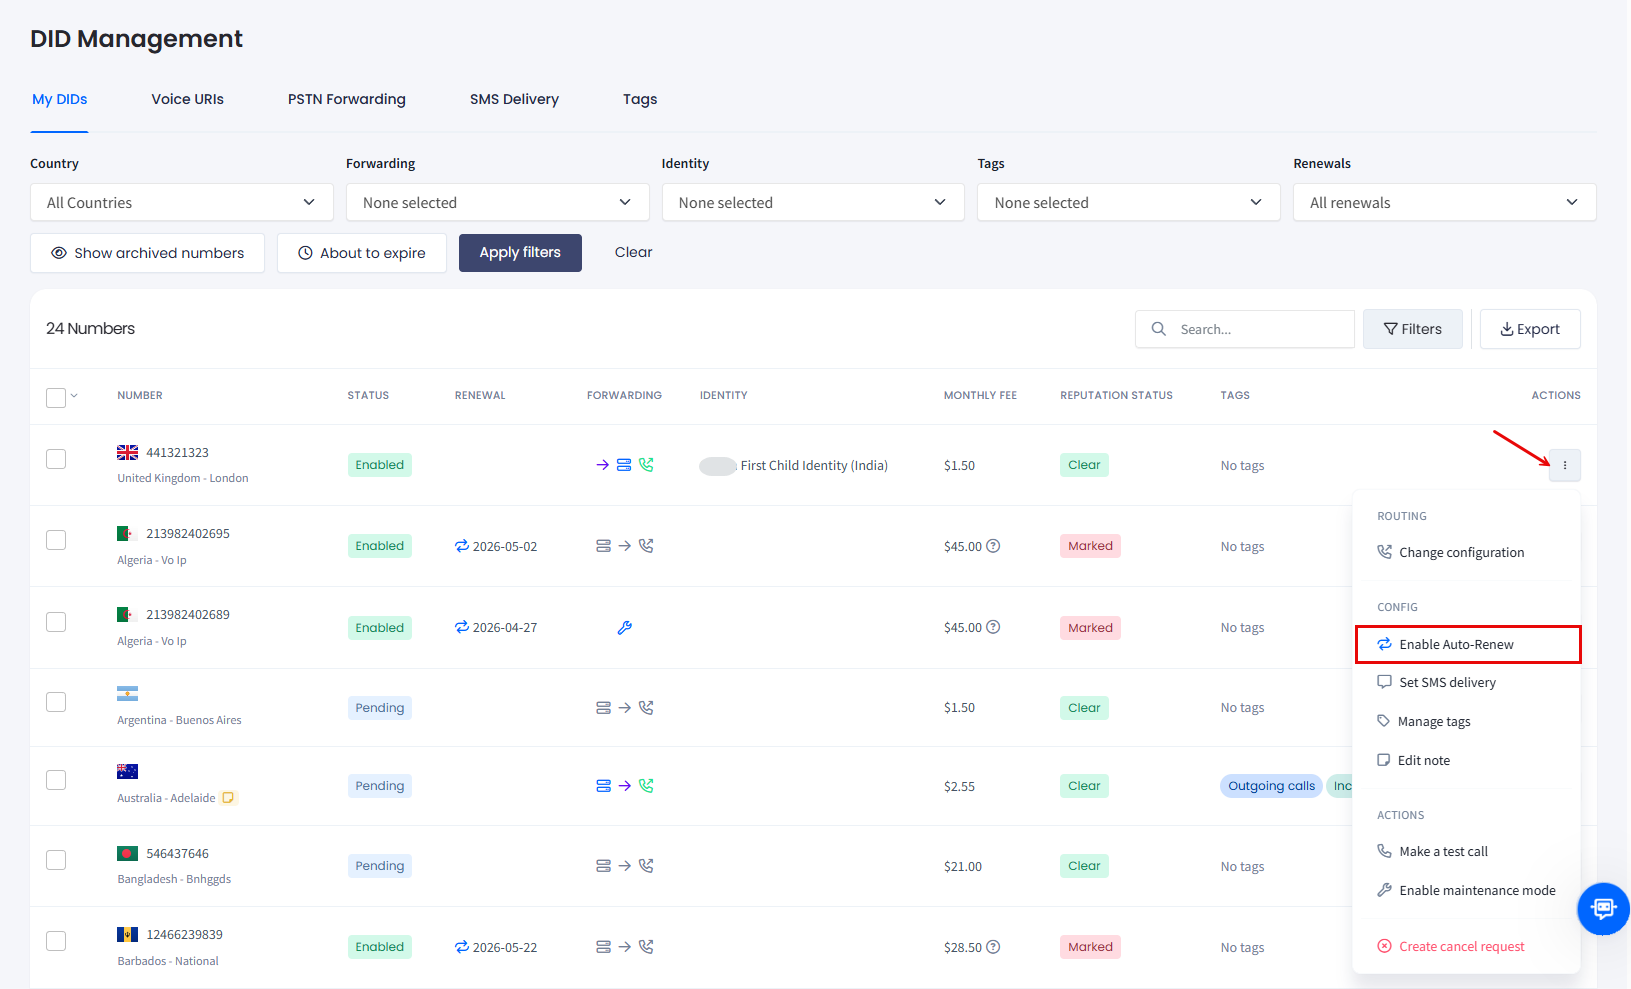
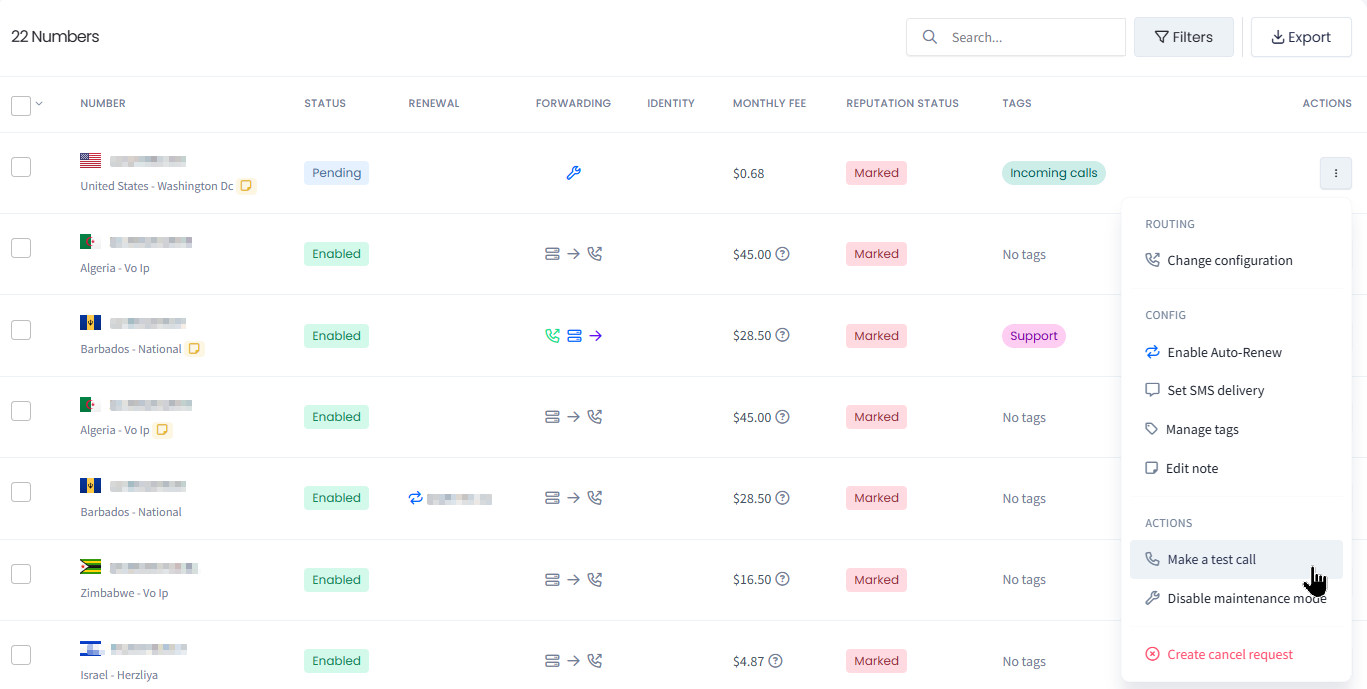
Click the three-dot action icon for the needed number and select the Enable Auto-Renew action from the drop-down list.
Selecting Enable Auto-Renew option
👍
NOTE
You can also apply this action across multiple DIDs. For more details, check the Managing Multiple DIDs article.
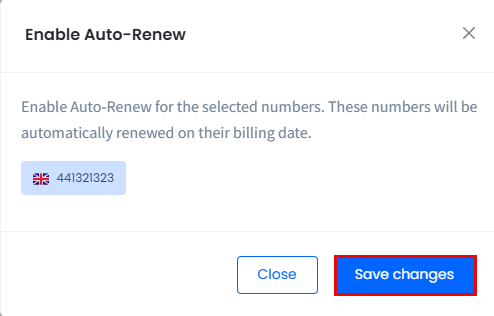
In the Enable Auto-Renew window, review the number(s) selected and click Save changes to confirm.
Enable Auto-Renew window
You will be notified that auto renewal was successfully enabled for the number.
Auto renewal enabled successfully message
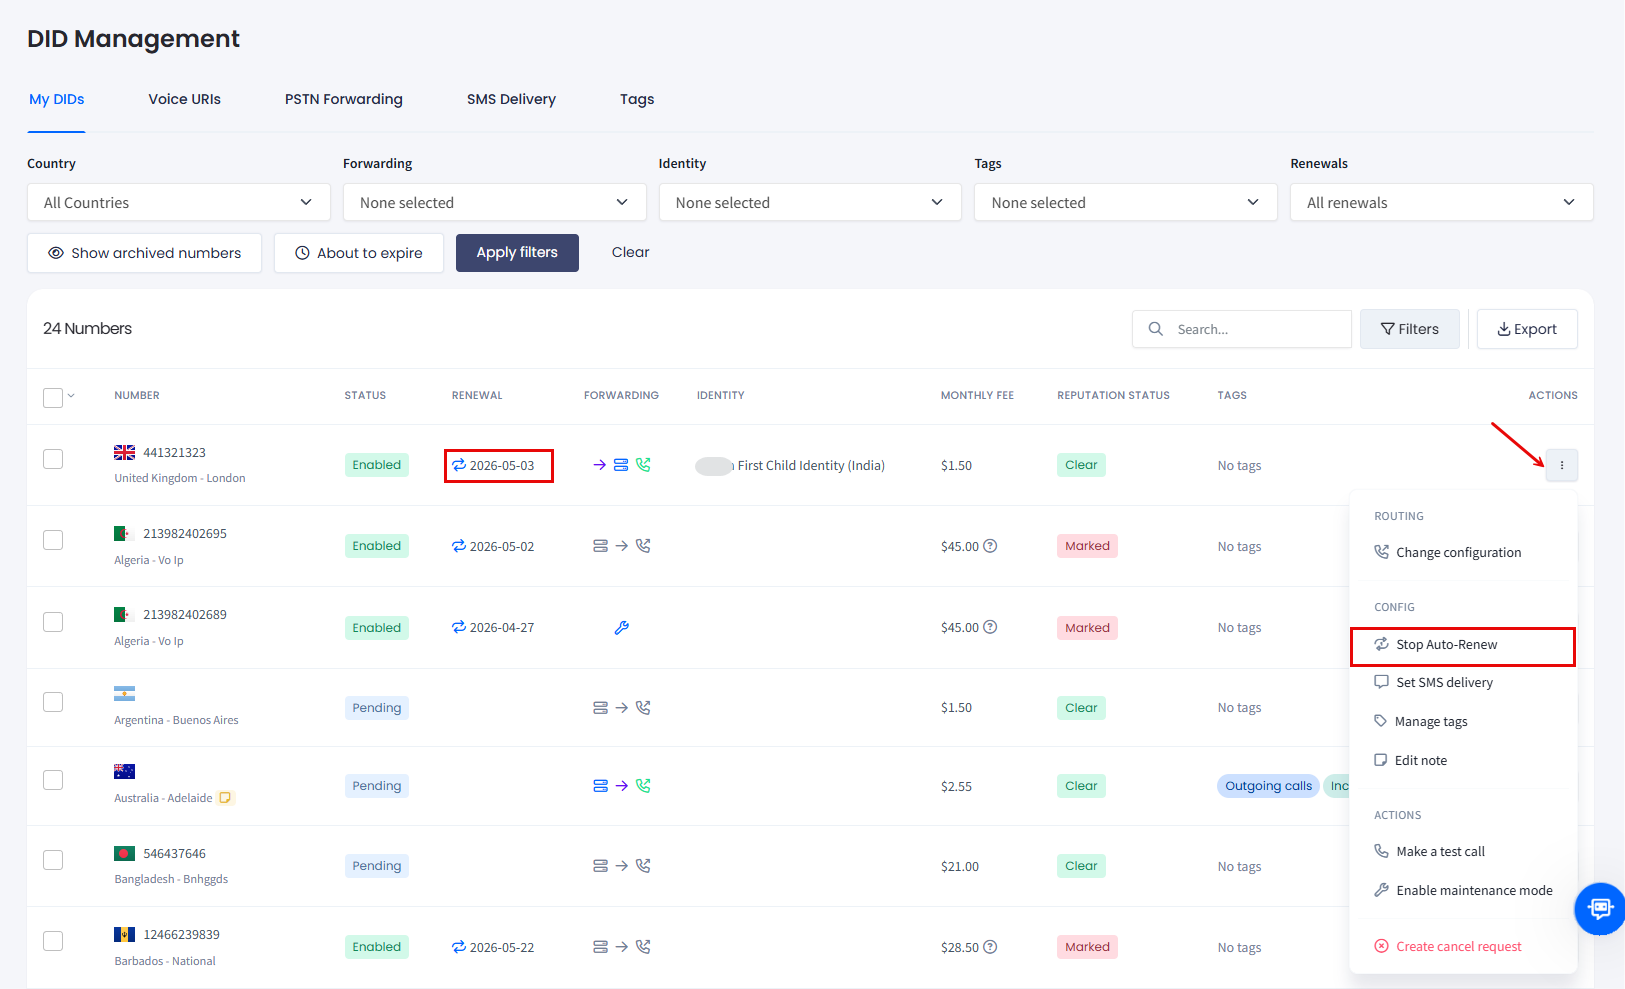
To check if the change has been added to the correct number, check the Renewal column for the corresponding DID number record (this should indicate the upcoming renewal date). Hover over the icon (the blue repeat arrows) to see the note on the upcoming renewal date.
Auto renewal applied to the DID number
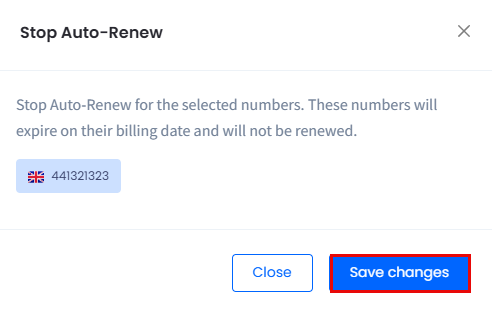
To stop Auto-Renew:
Open the My DIDs tab.
In the DIDs Management table, click the three-dot action icon for the needed number and select the Stop Auto-Renew action from the drop-down list.
Selecting Stop Auto-Renew option
👍
NOTE
You can also apply this action across multiple DIDs. For more details, check the Managing Multiple DIDs article.
In the Stop Auto-Renew window, review the number(s) selected and click Save changes to confirm.
Stop Auto-Renew window
You will be notified that auto renewal was successfully disabled for the number.
Auto renewal disabled successfully message
To check if the change has been added to the correct number, check the Renewal column for the corresponding DID number record (the Auto-Renew entry should be cleared).
Auto-renew entry cleared
👍
TIP
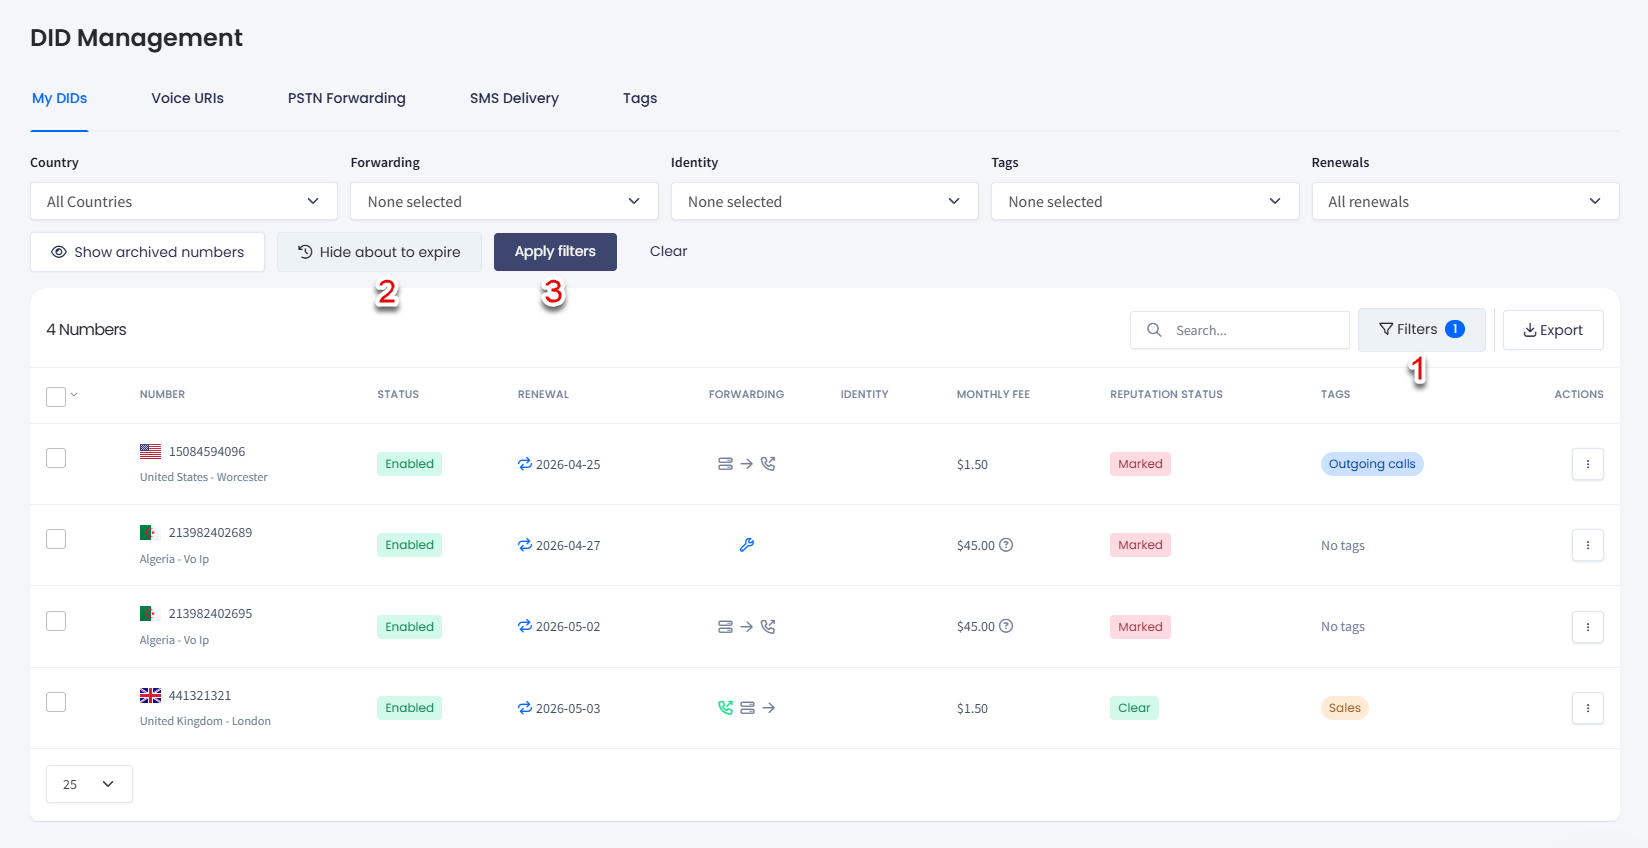
To find numbers that expire soon, click Filters, then click the About to expire button and confirm applying the filter.
Filtering by About to expire DIDs
Making Test Calls
You can make a test call to the DID from any number to verify a DID's routing.
To do it:
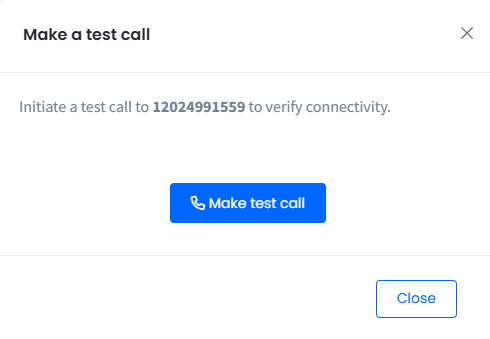
Open the three-dot menu and select Make a test call.
Make a test call action selected
In a new window, click to place the call.
Making test call
CommPeak simulates an incoming call to confirm connectivity (with no external phone required) to verify the call reaches your third-party platform.
Check the call record in DIDs > Origination CDR to confirm CommPeak forwarded it correctly.
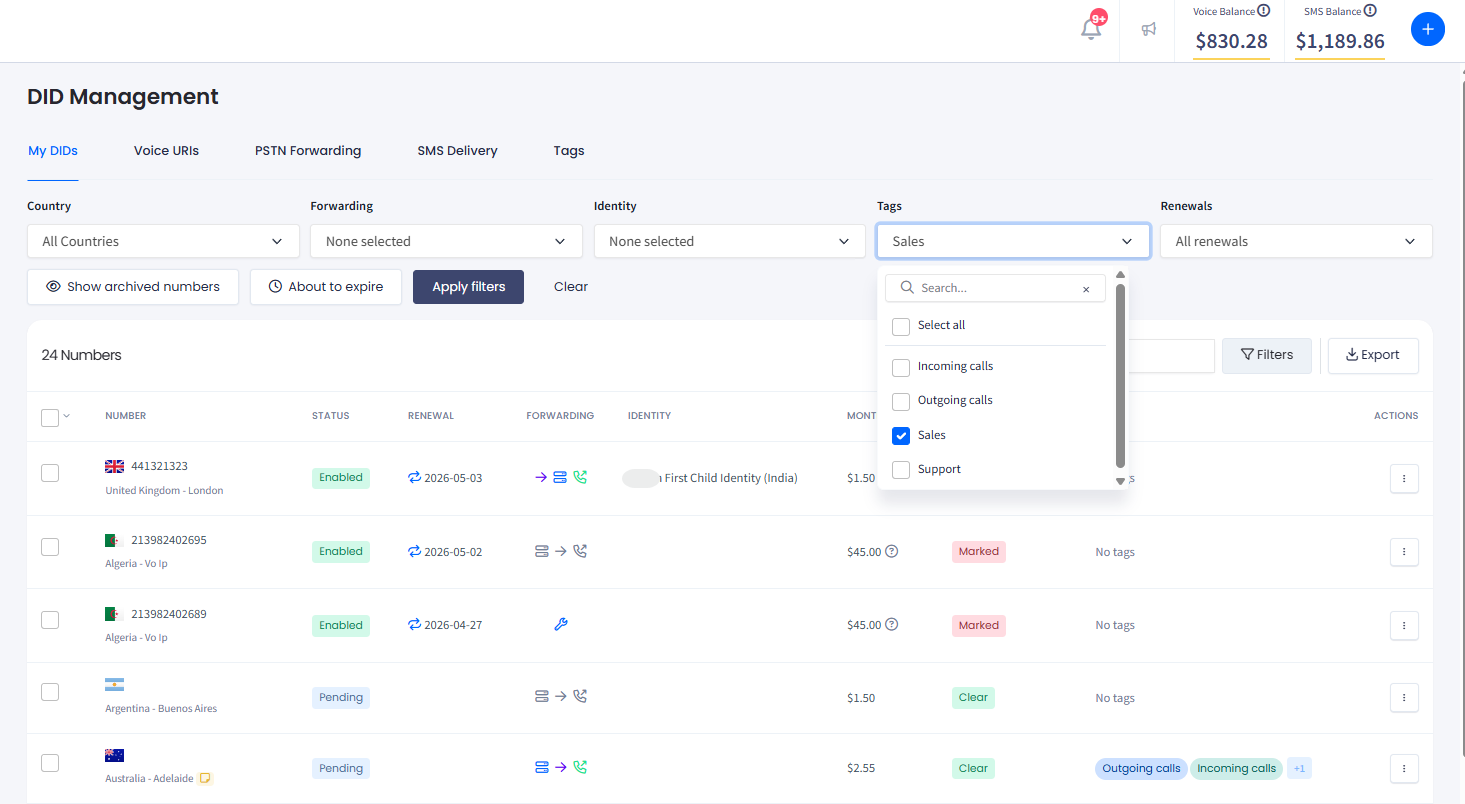
Use the checkboxes on the left or select numbers by applying various search filters at the top right of the DID Management page.
Here, you can:
Use the Search option to search for the needed number record.
Search option
Apply filters or select the needed record(s) from the list of DIDs under your account.
Filtering and Selecting options
To access the filtering options:
Click the Filter button.
Apply filters by country, forwarding option, identity, tag, or renewal date to search for needed number(s) or click to show (hide) archived numbers or those about to expire.
Filtering DIDs
To clear filtering results, click Clear .
📘
NOTE
Archived numbers are hidden by default. Click the Show archived numbers button to view them; to hide them back, click Hide archived numbers:
Show/Hide archived numbers button
To download your filtered .CSV list or export the whole table for reporting or external audits, click the Export button at the top right of the table.