Learn about what information is available on the My DIDs page that provides a detailed table view of your entire DID inventory.
Use the DIDs > Management page to see the detailed table view of your entire DIDs inventory with the visual indicators and columns used to manage your numbers.
Video tutorial
DIDs inventory
To access the inventory list of your virtual numbers:
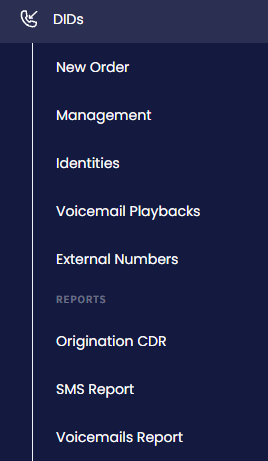
Expand DIDs in the menu on the left.
Then click the Management tab.
DIDs > Management tab
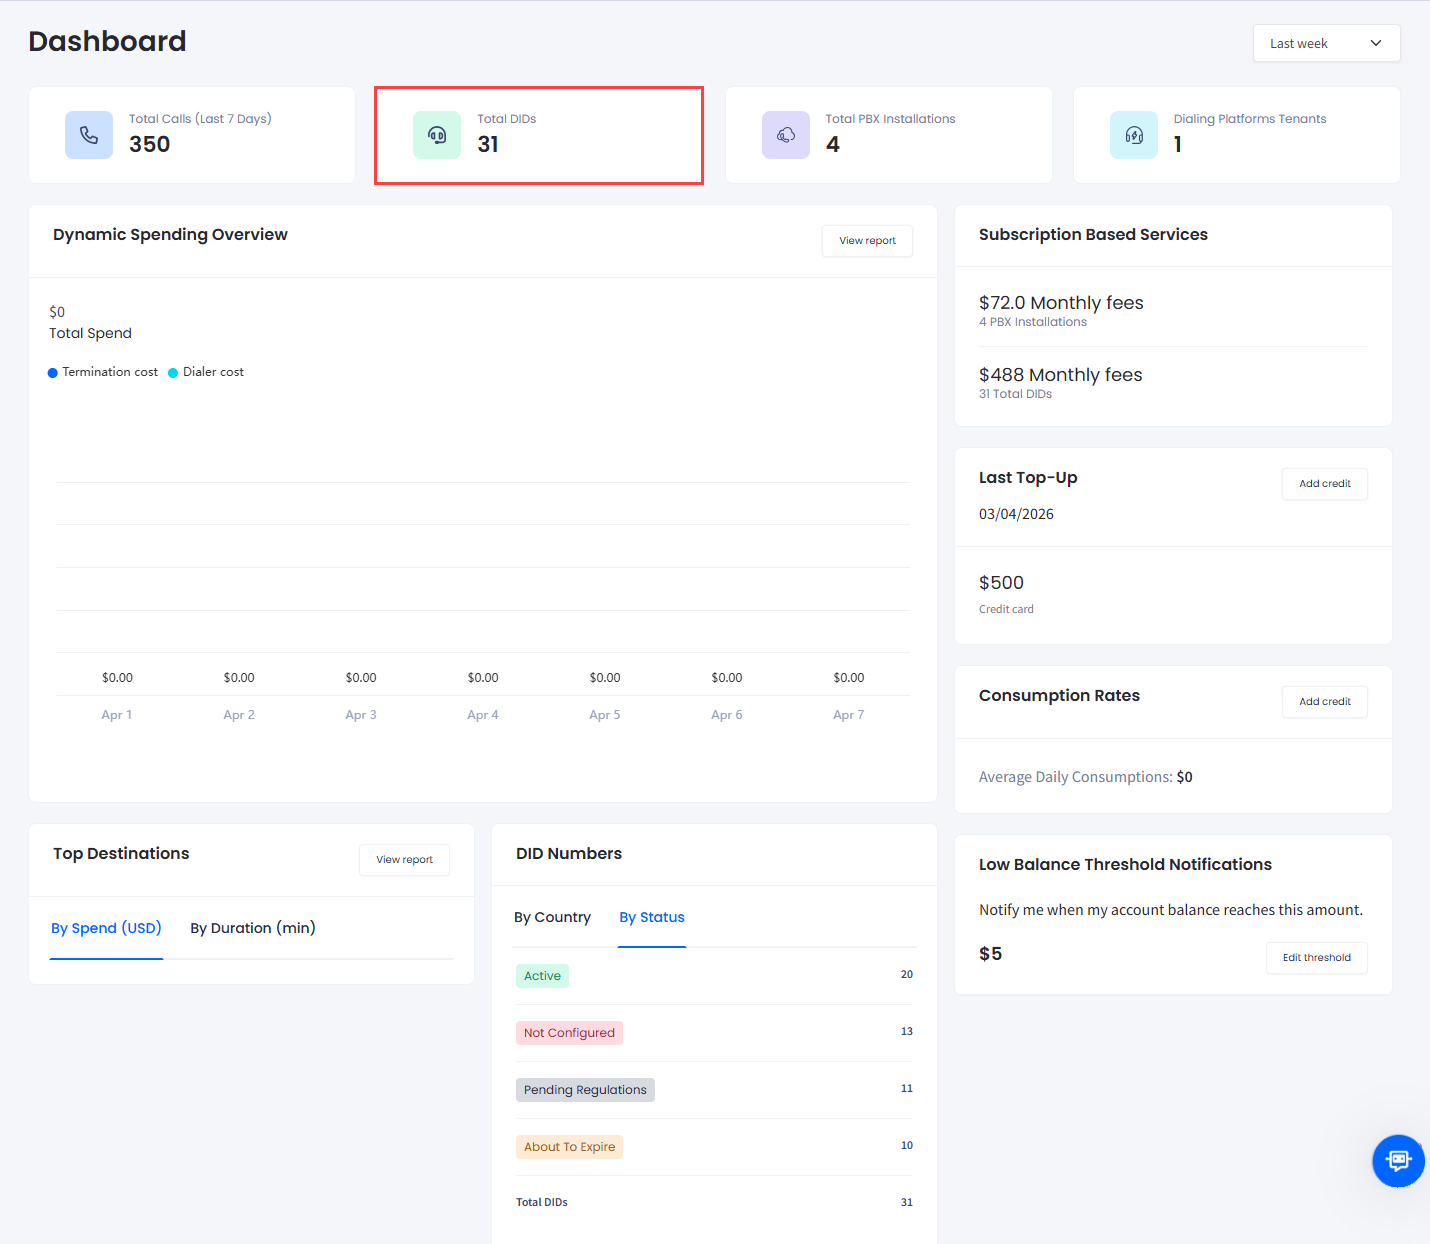
Alternatively, click the Total DIDs widget in the page header.
DIDs > Management tab
📘
Dashboard: Home
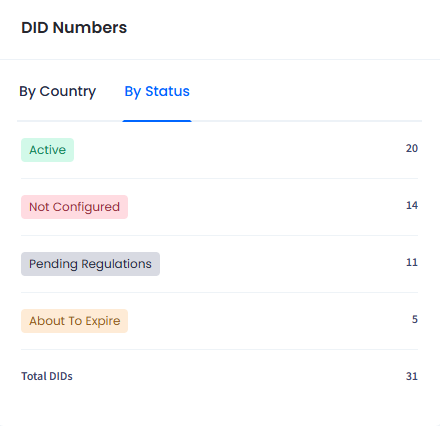
At the bottom of the homepage Dashboard, you can check the DID Numbers section to view activity by country or by status.
DID Numbers section: By status tab
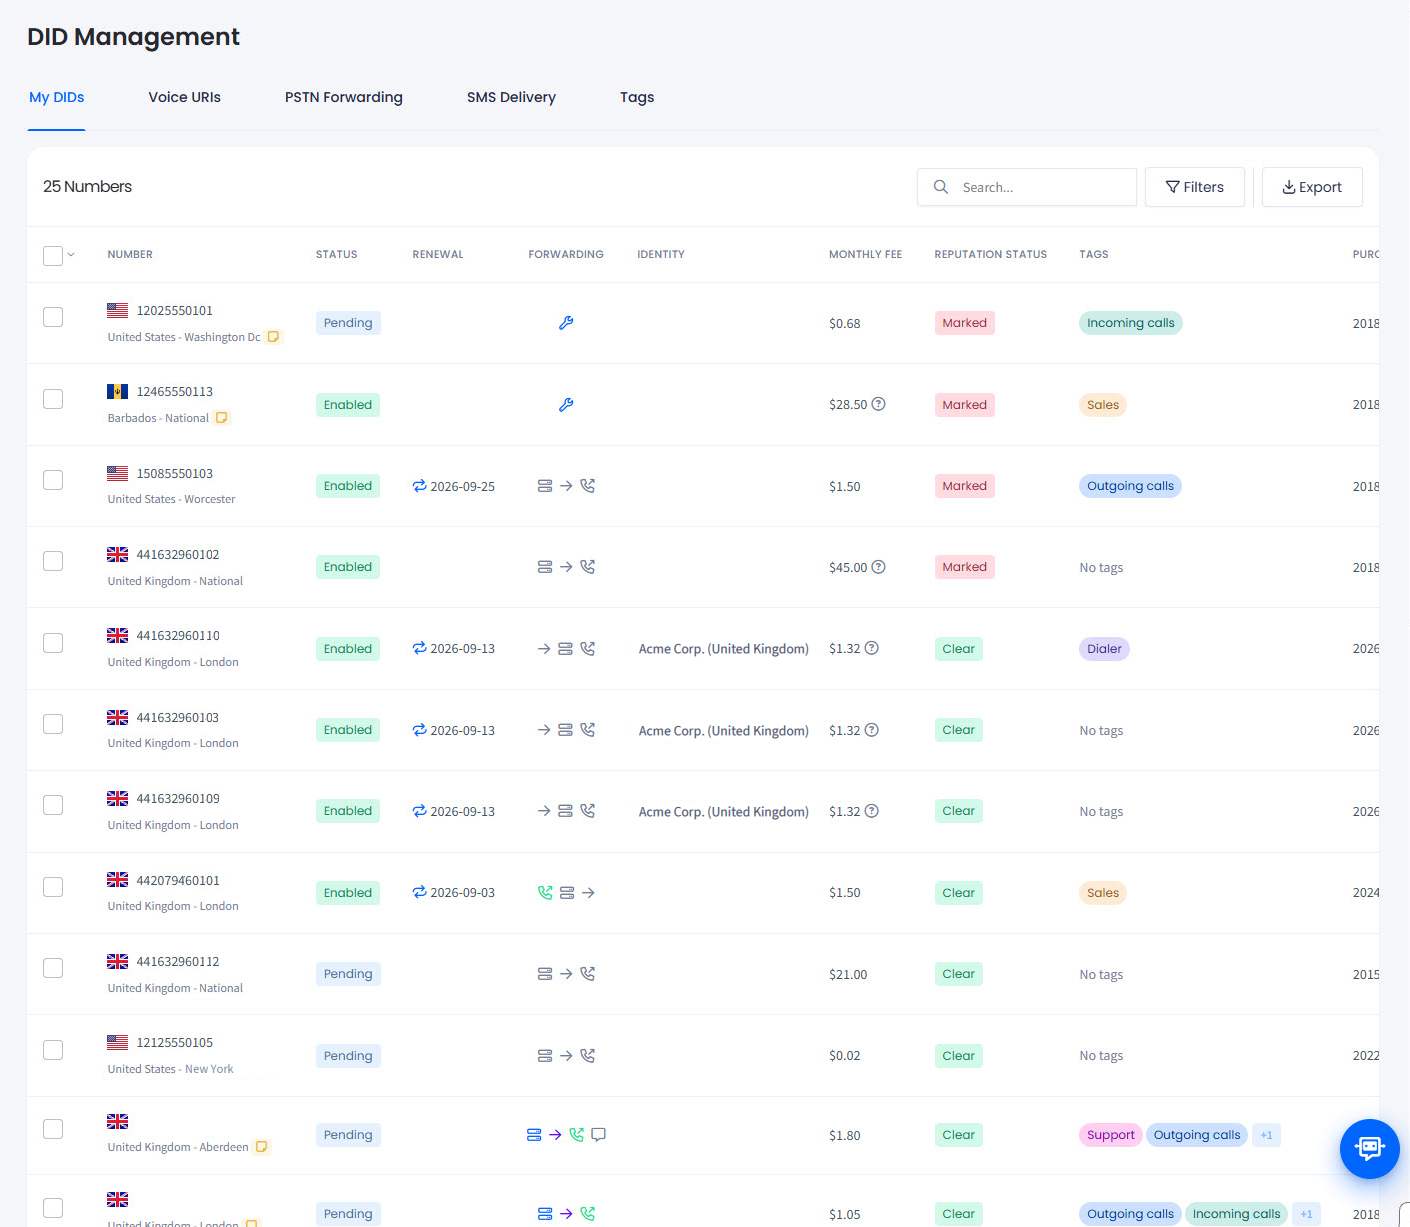
The My DIDs tab opens where you can view and manage DID numbers under your CommPeak Account.
My DIDs
The table under the My DIDs tab displays the following key information for every DID under your account.
My DIDs tab
Refer to the following table for column descriptions.
Column
Description
Image
Number
The Number column shows the number with its country flag, and beneath it the country and city or region the number belongs to. May also contain an internal note for better organization of your inventory. Find more details in the DID Types article.
Status
DID numbers can be marked as Enabled, Pending, or Archived.
Renewal
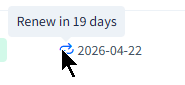
The renewal date with the arrows icon appear here when you activate auto-renewal. If the feature is disabled, the field is empty. Hover over the icon to view the remaining days. To find numbers that expire soon, click Filters and use the Show/Hide about to expire toggle.
Forwarding
The forwarding destinations defined to route incoming calls on your DID(s), arranged in the specified order. Colored icons vary by the destinations set and indicate if the number is routed via URI, SIP, or PSTN. If the forwarding icon is gray, this specific option is disabled.
Identity
View the identity linked to the virtual number set on its purchase anf its country.
Monthly Fee
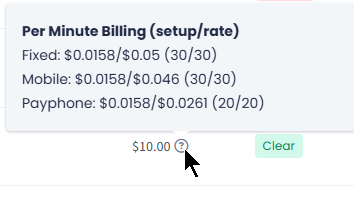
To see a breakdown of the monthly rate and any initial setup amount, hover over ?.
Reputation Status
Check if your outgoing caller IDs have been identified as not spam (Clear) or marked as spam (Marked) by receiving carriers. Refer to the Number Reputation Checks page to learn more about how to inspect DID numbers, set up scheduled checks, or monitor their status.
Tags
Tags created for the DID numbers in your CommPeak Account. If no tags are added, the field is empty. Learn more about how to work with tags in the Creating Tags and Assigning Them to DID Numbers article.
Purchase Date
The date of purchase.
Actions
Click the three-dot icon to select an action from the list and perform further steps. See the actions described in the dedicated Applying Actions section.
Filtering the my DIDs table
The filters above the table narrow your inventory before you act on it. Combine as many of them as you need: the table shows only the numbers that match all of them.
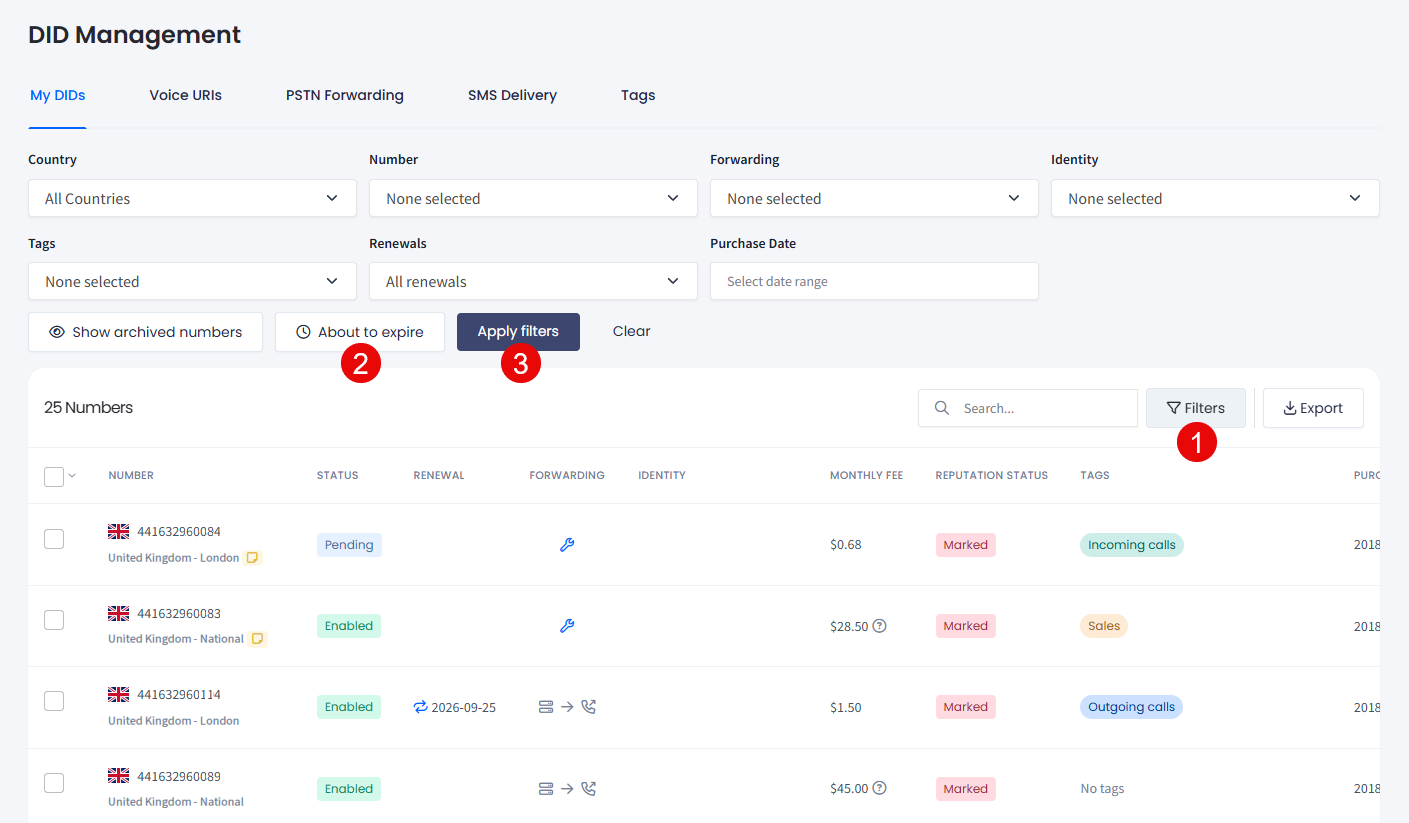
Click Filters at the top right of the table to show or hide the filter panel. The badge on the button counts the filters you currently have applied.
The panel offers the following filters.
Download CSV
Filter
How you set it
What it narrows by
Country
Drop-down, one country at a time
The country the DID belongs to. The default, All Countries, applies no filtering.
Number
Multi-select with a search box
One or more DIDs from your inventory, grouped by country.
Forwarding
Multi-select with a search box
The routing destination set on the number, grouped by Voice URI and PSTN.
Identity
Multi-select with a search box
The identity linked to the number.
Tags
Multi-select with a search box
The tags you created for your DIDs.
Renewals
Drop-down
The renewal state of the number. The default, All renewals, applies no filtering.
Purchase Date
Date range
The date range in which you bought the number.
Two buttons below the filters narrow the table on their own:
Show archived numbers reveals archived DIDs, which are hidden by default. The button then reads Hide archived numbers.
About to expire narrows the table to numbers whose renewal date is approaching.
To apply the filters you have set:
Set one or more filters in the panel.
Click Apply filters, for example, select About to expire. The table updates to show the matching numbers, and the count above it.
Applying filters: About to expire
To start over, click Clear.
📘
NOTE
The filters and the Search box do different jobs. Use Search to find one number by typing part of it. Use the Number filter to build a set of several specific numbers you can then act on together. For more details, check the Filtering by multiple numbers at once section below.
🚧
Export ignores your filters
Export always downloads every DID under your account, whatever you have filtered or selected. To work with a subset, filter the table and use the bulk actions instead.
Filtering by multiple numbers at once
The Number filter accepts as many DIDs as you need, which is how you act on a specific set of numbers rather than one at a time.
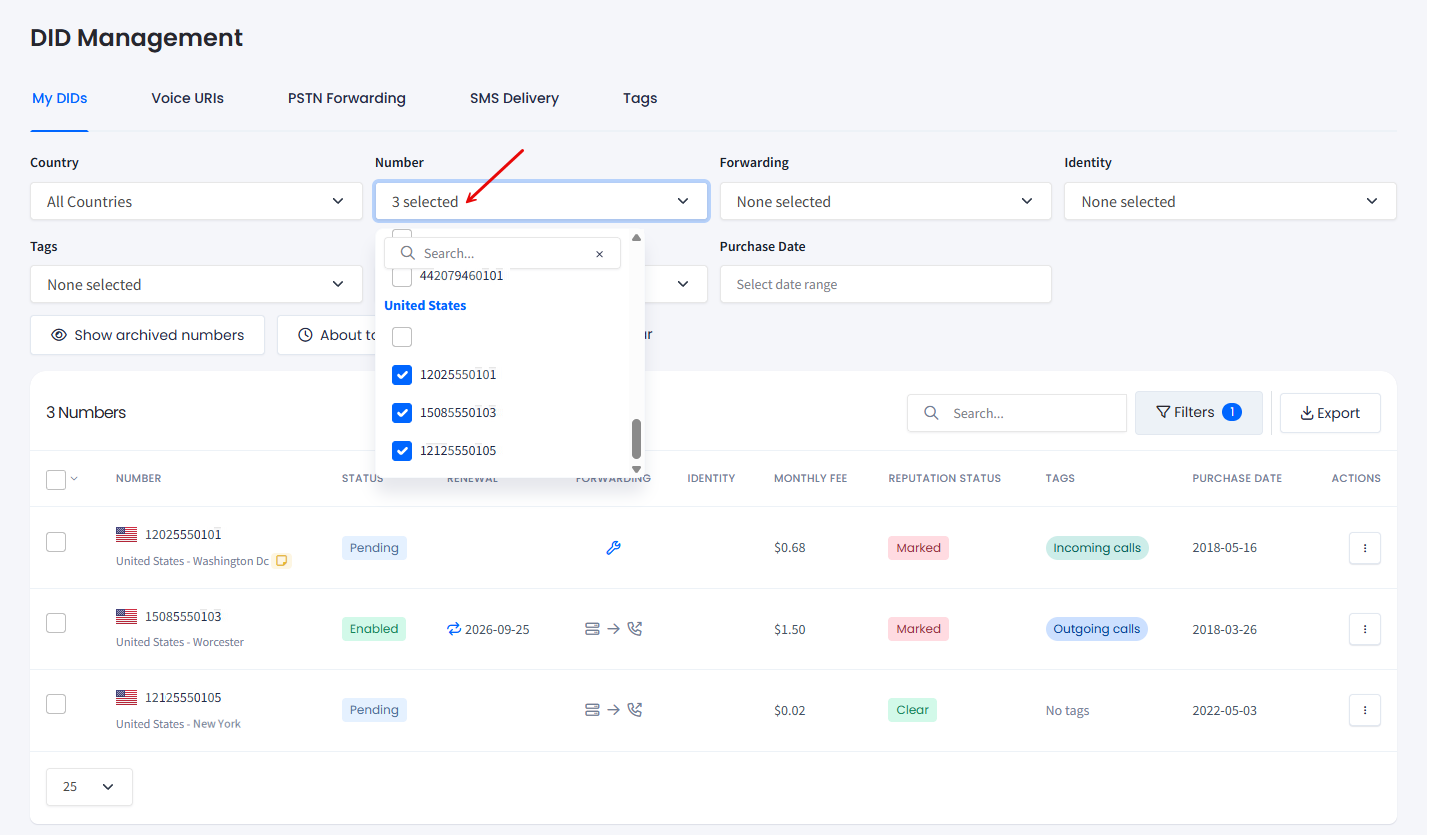
On the DIDs > Management page, click the Number filter.
Start typing a number in the search box to narrow the list, or scroll through the numbers grouped by country.
Select the checkbox next to each number you want to include. To include everything in the list, click Select all, then click Apply filters.
Number filter with 3 selected numbers
The filter button reports your selection, for example 3 selected. After you click Apply filters, the table shows only those numbers.
An empty selection displays None selected and applies no filtering, so the table shows your full inventory.
👍
TIP
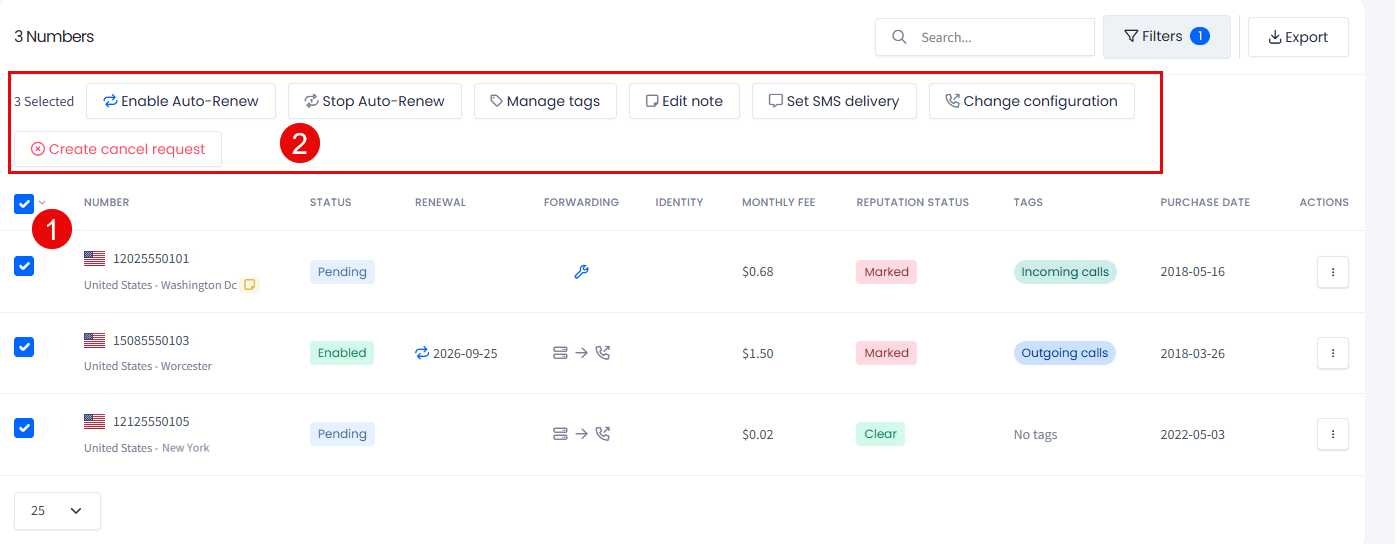
Filter the table down to the numbers you need, then manage them in bulk to apply one change to all of them: change configuration, manage auto-renewal, set SMS delivery, manage tags, add internal notes, or create a cancellation request. For details, see the Managing Multiple DIDs page.
Managing selected numbers in bulk
Adding notes
You can also add internal notes to categorize your DID numbers for more efficient organization.
To create /edit the note:
Open the My DIDs tab.
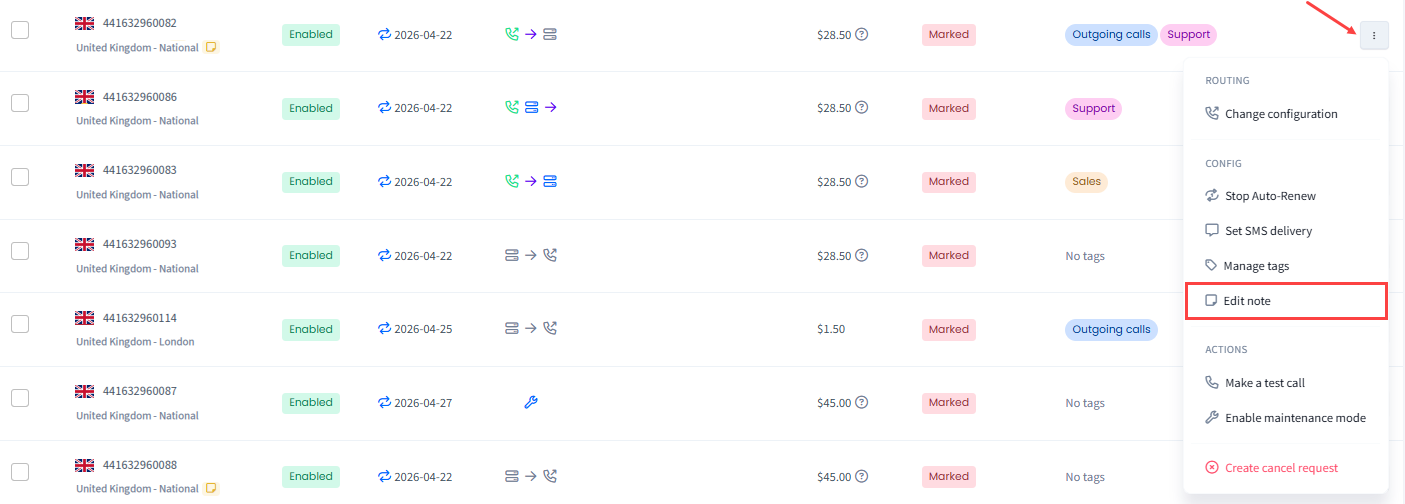
In the DIDs Management table, click the three-dot action icon for the needed number and select the Edit note action from the drop-down list.
Edit note action
👍
NOTE
You can also apply this action across multiple DIDs. For more details, check the Managing Multiple DIDs article.
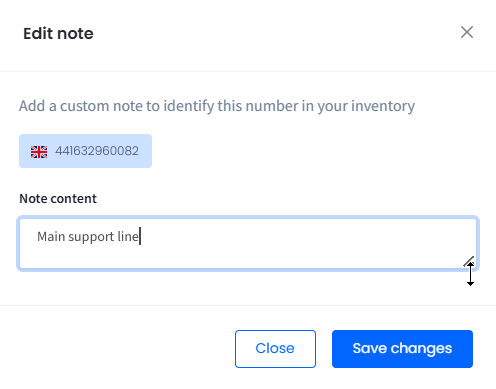
In the Edit note window, review the number(s) selected, enter the note text (you can optionally expand the text field for better visibility), and click Save changes to confirm.
Editing note content
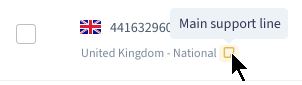
To check if the note has been added to the correct number, hover over the corresponding icon for the DID number record (the yellow note sticky).