Sender Profiles
A comprehensive guide for managers on how to create sender profiles and restrict their availability to specific Inbox teams or agents.
The Sender Profiles feature is an integral part of the TextPeak Inbox tool.
They act as aliases for groups of senders (phone numbers or IDs) within specific channels such as SMS, WhatsApp, or Telegram and simplify the messaging process for agents by allowing them to select a profile without needing to know the actual sender details.
In the Sender Profiles view, Inbox admins or managers (provided they hold the corresponding Inbox role permissions) can create and manage sender profiles.
To access the Sender Profiles tab options:
- In your browser, log in to TextPeak with manager access privileges.
- In the main TextPeak menu, select the Inbox tab.
- Click Settings at the bottom left and navigate to the Sender profiles tab.
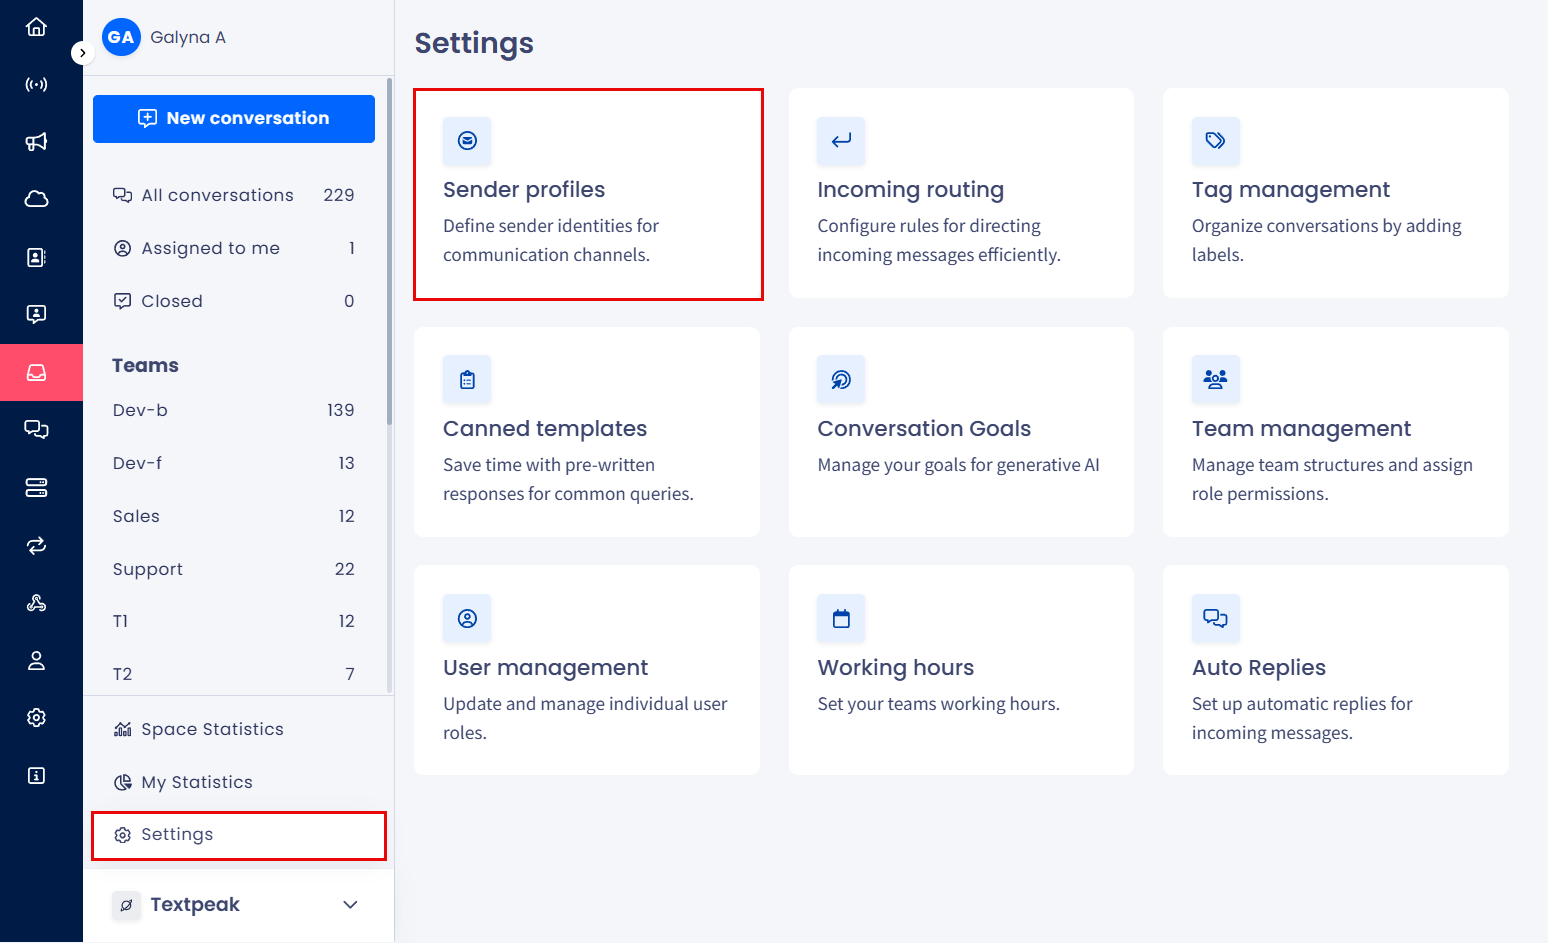
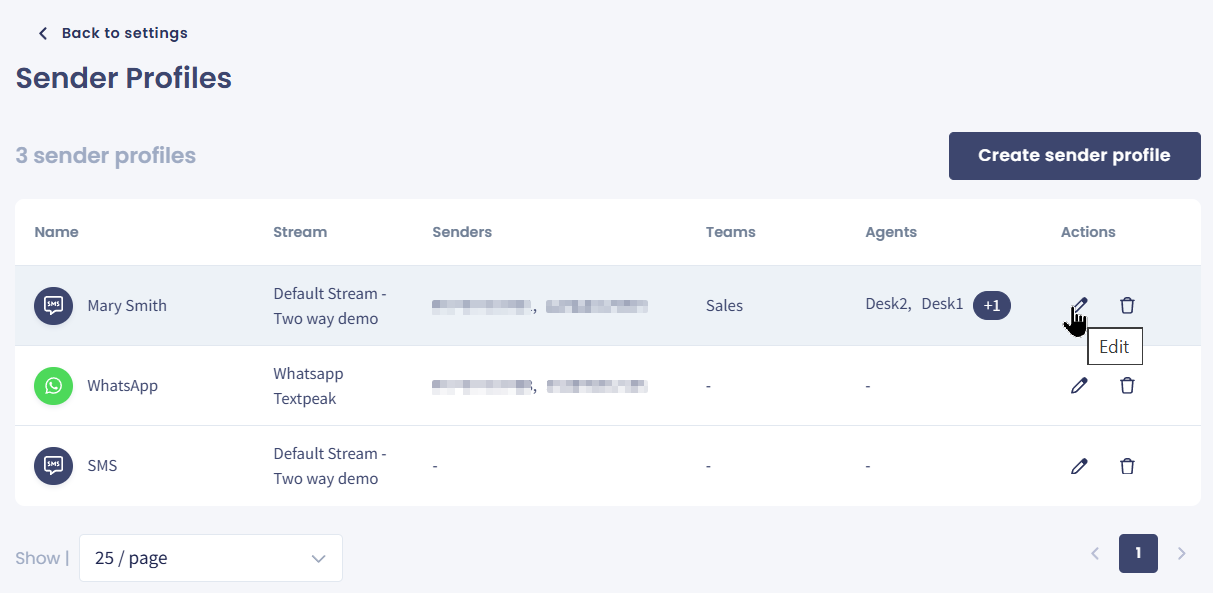
Sender Profiles page
IMPORTANTInbox agents have no access to the Settings > Sender Profiles page and can manage conversations only where they can view the name of the sender profile, not the senders it contains.
Here, you can view a table with existing sender profiles and add new ones.
The table organizes all information about sender profiles in the following columns: Name, Stream , Senders, Teams, Agents, and Actions.
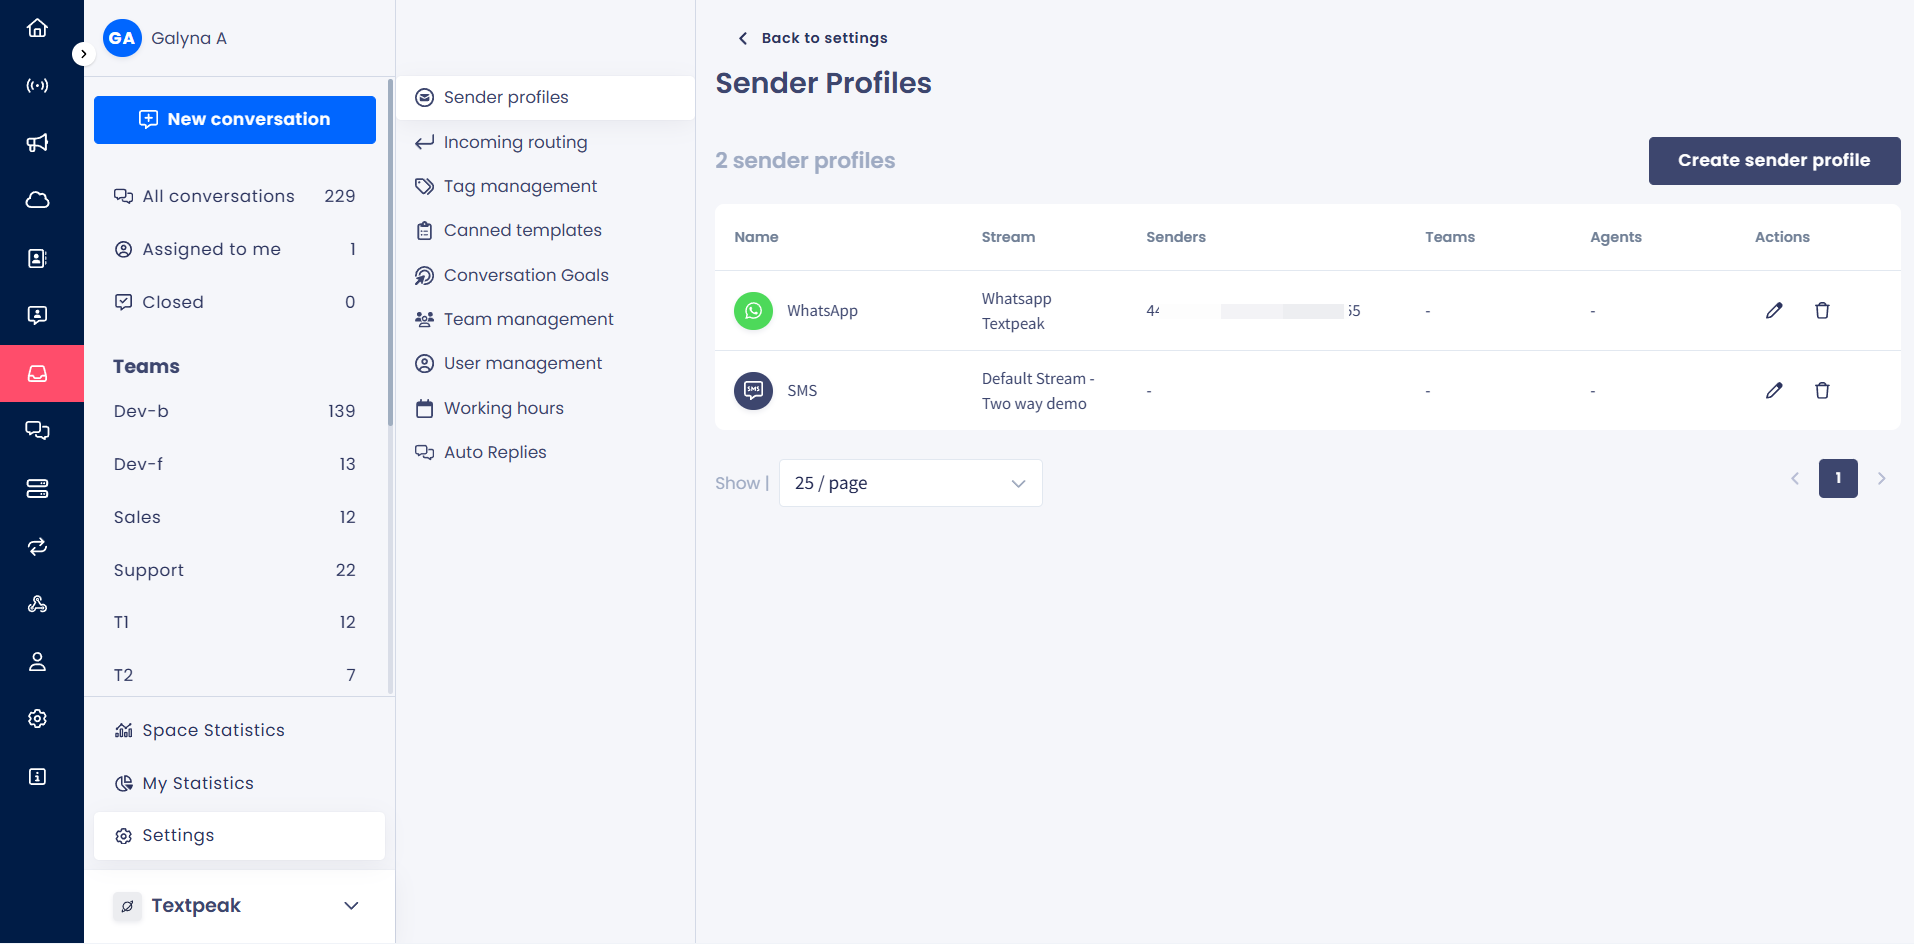
Inbox > Settings > Sender Profiles tab
Creating Sender Profiles
To create a new sender profile:
- Click Create sender profile at the top right.
- In the pop-up window that appears, give a name to your new sender profile, then click to select the stream and senders from the drop-down menus.
NOTEBy default, every sender profile is available to all teams and agents.
To limit availability, select specific teams, specific agents, or both. See Restricting Sender Profile Availability below.
NOTEYou cannot assign the same sender to multiple sender profiles.
- Click Create.
- Once created, a sender profile is automatically assigned to one of the supported platforms: SMS, WhatsApp, or Telegram with a corresponding label.
Restricting Sender Profile Availability
By default, a sender profile is available to every agent in the tenant. You can restrict it to specific teams, specific agents, or both, so only authorized senders are exposed in the New conversation dialog and the message editor.
The restriction logic works as follows:
- No teams and no agents selected: the profile is available to every agent.
- Teams selected, no agents: the profile is available only to agents in those teams.
- Agents selected, no teams: the profile is available only to those specific agents.
- Both selected: the profile is available to anyone matching either selection (an agent is allowed if they belong to one of the selected teams or if they appear in the agent list).
NOTEThe teams list and the agents list are evaluated independently. Selecting a team does not pre-select its agents, and selecting an agent does not pre-select their team.
To restrict a sender profile:
- Open the Create sender profile or Edit sender profile dialog.
- (Optional) In Teams, select one or more teams that should have access to the profile.
- (Optional) In Agents, select one or more individual agents that should have access.
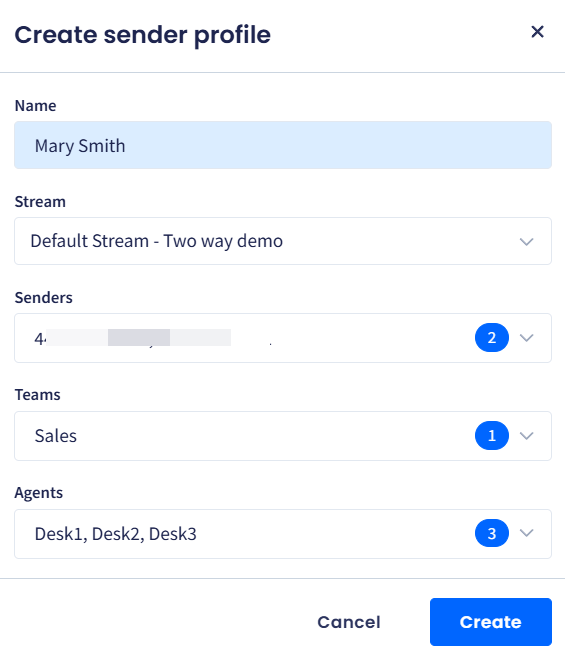
Create new sender profile dialog box
- Click Create (or Save for editing action) to apply the restriction.
- A new profile is created.
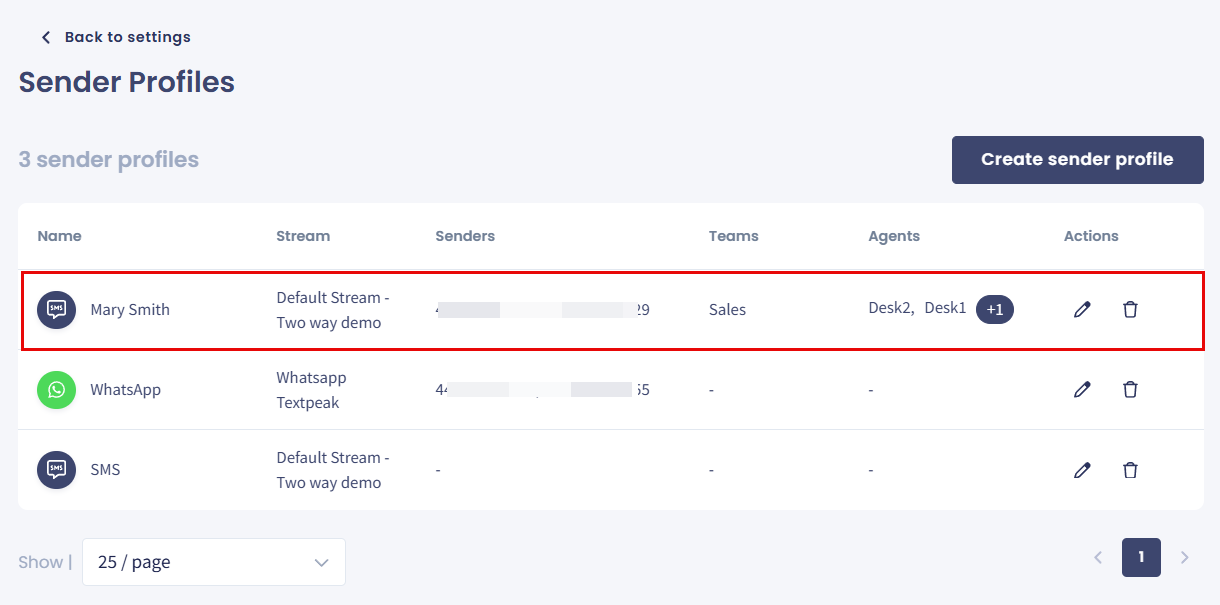
New sender profile cretaed
TIPUse team-level restrictions for stable role-based access (e.g., "only the Sales team uses this profile"), and agent-level restrictions for one-off exceptions (e.g., a single agent who handles VIP outreach).
IMPORTANTRestricting a sender profile only changes who can select it for new messages. It does not retroactively reassign or hide existing conversations that already use the profile.
Managing Sender Profiles
To edit an existing sender profile:
- Click the pencil button next to the profile record.
Editing sender profile
- In the Edit sender profile dialog, update the profile data.
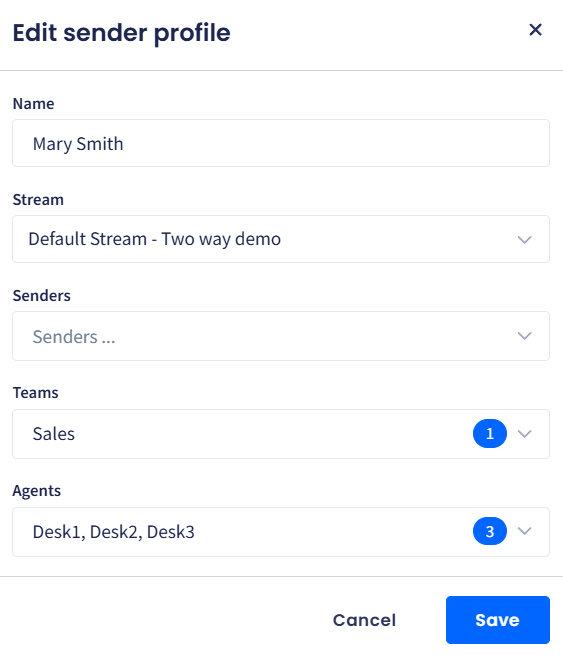
Edit sender profile dialog box
- Click Save.
- Alternatively, to remove the sender profile, click the bin button.
- In the pop-up window that appears, confirm you want to delete this sender profile from your team.

Removing sender profile confirmation dialog
- Click Cancel to navigate back to the inbox settings menu.
Updated 3 months ago