Desks
Learn how to create and edit desks, and add or remove users.
The purpose of the user desks is to allow managers to see information and statistics only about their relevant desks and agents.
NOTEIn the Call Analytics report, users can view system-wide data, not limited to the desks they are assigned to.
You can create as many desks as you need for all departments and other purposes, e.g., English Desk, Night Shift, Weekend, or any other, and add users to desks when creating or editing.
To create a desk:
-
Go to the Users > User Management tab.
-
Switch to the Desks tab.
The table on the tab displays all existing desks with IDs, names, and users belonging to the group. On each line, you can click a button in the Actions column to edit or delete the desk. -
Click Create New User Desk in the top right corner of the table.
-
Enter a desk name on the page that opens.
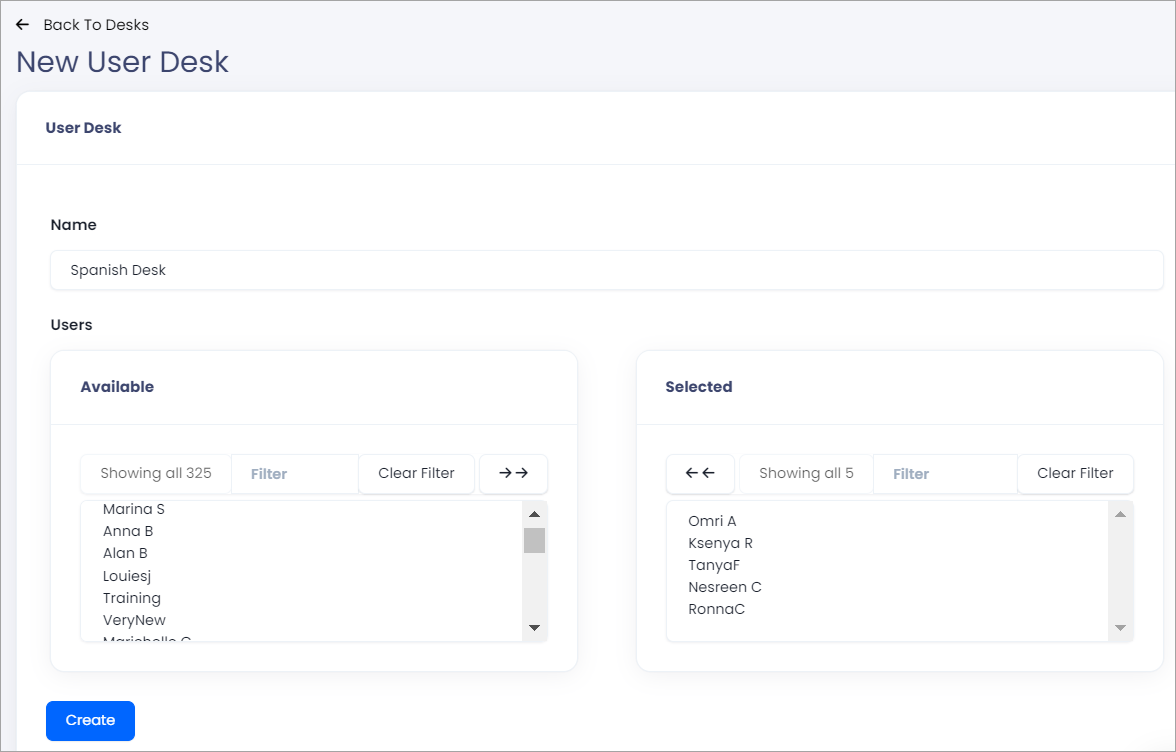
Adding a user desk
-
Add existing users to the newly created desk. To add a user, click the user name in the Available box.
Also, you can click the user name in the Selected box to remove the user from the desk. You can use the double arrow buttons to select all users in the Available or Selected boxes. -
Click Create.
NOTE
- You can add users to the desk later.
- When adding agents to the desk, please make sure that you also select relevant team leaders and managers who need to access their agents' data.
To edit user desks:
- Go to the Desks tab.
- Find the desk and click the Edit button in the Actions column.
- Modify the desk name and/or select or deselect users.
- Click Save.
Updated 6 months ago