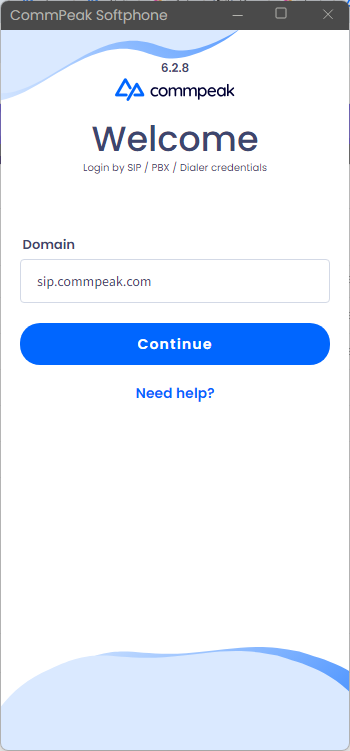
Learn about installation and the options to log in to standalone CommPeak Softphone.
To start working in the standalone CommPeak Softphone, install the software, and then sign in using PBX Stats, SIP or CommPeak Dialer/Cloud PBX credentials.
System Requirements
PC Specs
Minimum
Recommended
OS
Windows 7 and above or Ubuntu 18.04 LTS
Windows 10 latest build or Ubuntu LTS latest build
CPU
Intel Core 2 Duo/Pentium 4 64Bit
Intel I3/I5/I7 64Bit
RAM
4GB
8GB and above
Storage
Min. 200MB free
Min. 200MB free
Internet connection
Wired-cable broadband connection
Wired-cable broadband connection
Sound card
Any
Any
Headphones/ Microphone
Any with USB
Any with USB
Installation
CommPeak Softphone is normally installed silently on PCs within corporate networks.
Otherwise, you can download and install it manually via the installation files for Windows or Linux.
SIP credentials and a domain from your account at the CommPeak Portal
user credentials and the domain from CommPeak Portal or CloudPBX.
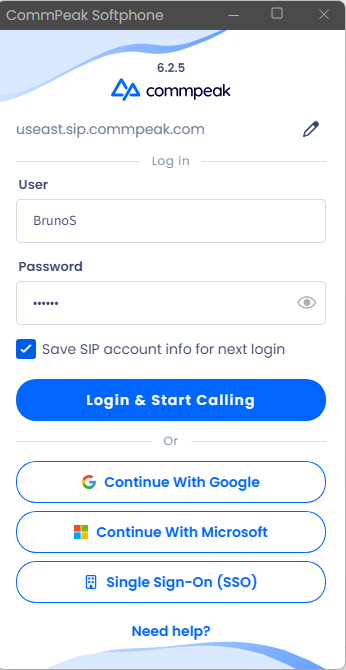
Once the domain name is provided, the Softphone login system allows you to select one of the below options to authenticate with the login methods supported for your domain:
Login with your username & password
Continue with Google
Continue with Microsoft
Single Sign-On (SSO).
Softphone SSO login options
To find the relevant data and start your work, complete the following steps:
Option 1: PBX Stats
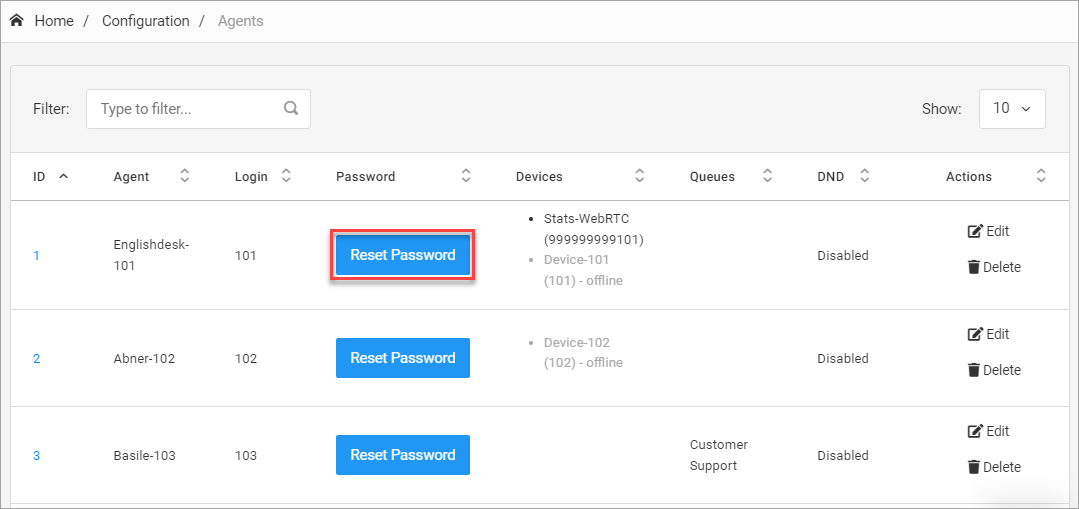
Go to PBX Stats > Configuration > Agents. On this page, the data in the Login column corresponds to the User field in the Softphone.
Click Reset Password in the Password column.
Reset Password button
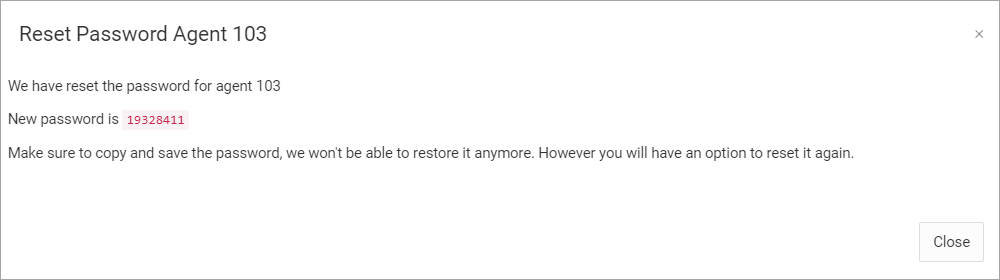
Copy the new password in the following window.
New password screen
Start the CommPeak Softphone application. In the start window that opens, fill in the fields as follows:
User: enter data from the Login column.
Password: enter data from the Password column, and if you want to save the password, select the checkbox below.
Domain: specify your domain name followed by .stats.pbx.commpeak.com . To save the entered data, select the Save SIP account info for next login checkbox.
Click the Login & Start Calling button.
Option 2: SIP
In your account at CommPeak Portal, go to Setup > SIP Accounts.
Setup page
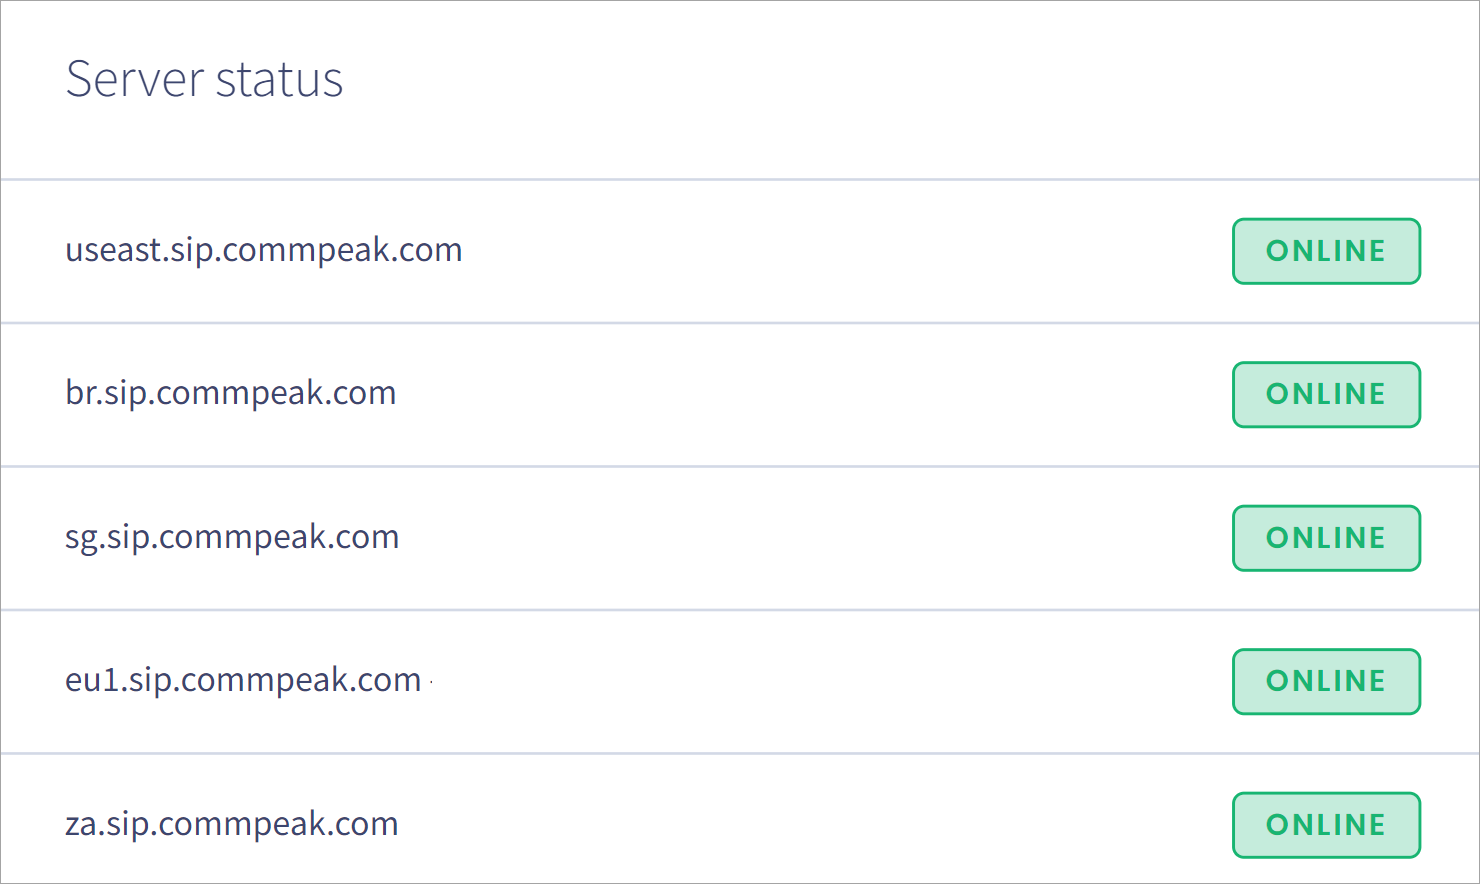
Find the necessary account and click the eye icon under Username/IP in a SIP account line to show the username. If you forgot the password, click Reset Password to get an email with a reset link. Scroll down to the Server status section:
Server status page
Launch the CommPeak Softphone application. In the start window that opens, fill in the fields as follows:
User: fill in data from the Username/IP field.
Password: enter your SIP account password.
Domain:
specify your desired regional domain to sign in, e.g. useast.sip.commpeak.com
or enter sip.commpeak.com and it will detect your region automatically. To save the entered data, select the Save SIP account info for next login checkbox.
Click the Login & Start Calling button.
👍
TIP
You can perform a self-test for echo and DTMF functionality by dialing 07777712125552665 from any SIP account in the CommPeak Portal.
Using this special phone number is free of charge and available to all SIP clients.
Option 3: Dialer / Cloud PBX
❗️
IMPORTANT
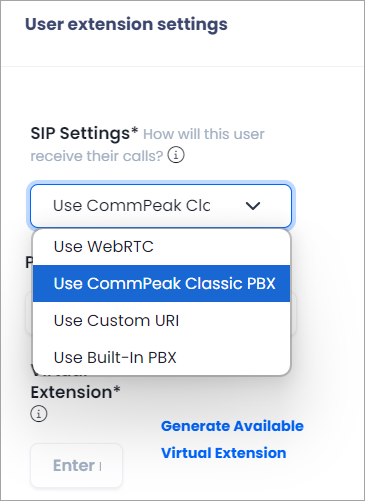
To use the remote CommPeak Softphone with your Dialer or Cloud PBX account, make sure that for your user in the Dialer or Cloud PBX, the Use CommPeak Classic PBX option is chosen in SIP Settings.
Use CommPeak Classic PBX option
Log in to your account with the following credentials:
User: your username in the CommPeak Dialer or Cloud PBX.
Password: your password in the CommPeak Dialer or Cloud PBX.
Domain:<domain>.td.commpeak.com.
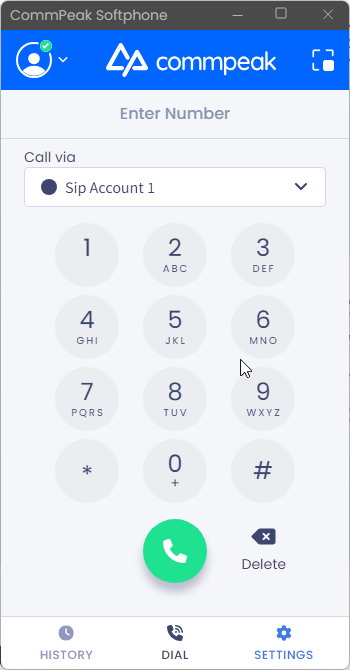
Click Login & Start Calling to open the Dial tab.
Dial tab
Login Error Codes
Error code
Error Message
Description
401
Please check username or password
The username or password entered is incorrect.
405
Unknown temporary error
A temporary, unidentified error occurred. Please try again later.
406
The user has reached the maximum number of allowed concurrent sessions.
The user has exceeded the limit of active sessions and must log out from another device to proceed.
422
Missing credentials
One or more required login credentials were not provided.
423
Please reset your password
The user must complete the password reset process before they can log in.
424
User blocked from direct login
This user is restricted to logging in through Google, Microsoft, or SSO only. Direct username/password login is not allowed. Check this page to learn more.
425
User setup with 2FA that does not support remote login