Messaging Inbox
Learn how to create, manage, and optimize SMS and WhatsApp conversations using Dialer's Messaging Inbox.
CommPeak Dialer Messaging Inbox is a powerful instrument for controlling and streamlining messaging across multiple channels, such as SMS and WhatsApp Business.
TIPCommPeak Dialer customers can also manage calls (both VoIP and WhatsApp Business) directly within the Dialer Inbox.
Check the Making Inbox Calls article to learn more.
This guide provides a detailed overview of the Inbox feature, including how to enable and set it up and how to create, manage, and optimize SMS and WhatsApp conversations with your audience.
Login to Inbox
To open the inbox:
- Click on your name in the upper right panel.
- Then, select Messages Inbox.
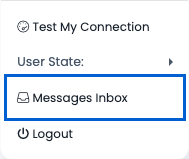
Messages Inbox menu
IMPORTANTAgents can access Messages Inbox only if you have at least one active messaging channel on your account.
Inbox dashboard
Methodology
- Conversation is a streamlining message between an agent and a contact/lead.
- Each conversation is related to the lead or contact.
- Each conversation is related to one or more desks (teams) according to the agent desks list and can be assigned to one agent.
- The GLOBAL desk (team) name is the default team to which conversations are assigned when messages are sent/received without relation to agents.

Streamlining messages
Understanding Permissions
- Agent: all users in the account related to the inbox user role.
- Has permission to show only conversations that are assigned to him, meaning conversations that he starts.
- Can create new conversations (sending manual messages to phone numbers) via all your account available messaging channels.
- Manager: users with permission to real-time page (shift managers) related to inbox manager role. They have all agent permissions and:
- Allowed access to all conversations related to their desks (teams).
- Allow access to all conversations that relate to desk "GLOBAL".
- Allow assigning conversations from 2i and 2ii to an agent who is a member of the same manager desks (teams). This means this agent will get access to the conversation, and the previous agent assigned to the conversation will no longer have access.
- Phone numbers are masked according to the user mask phone role permissions.
- Inbox supports multiple languages and opens with agent language settings.
Managing Inbox Conversations
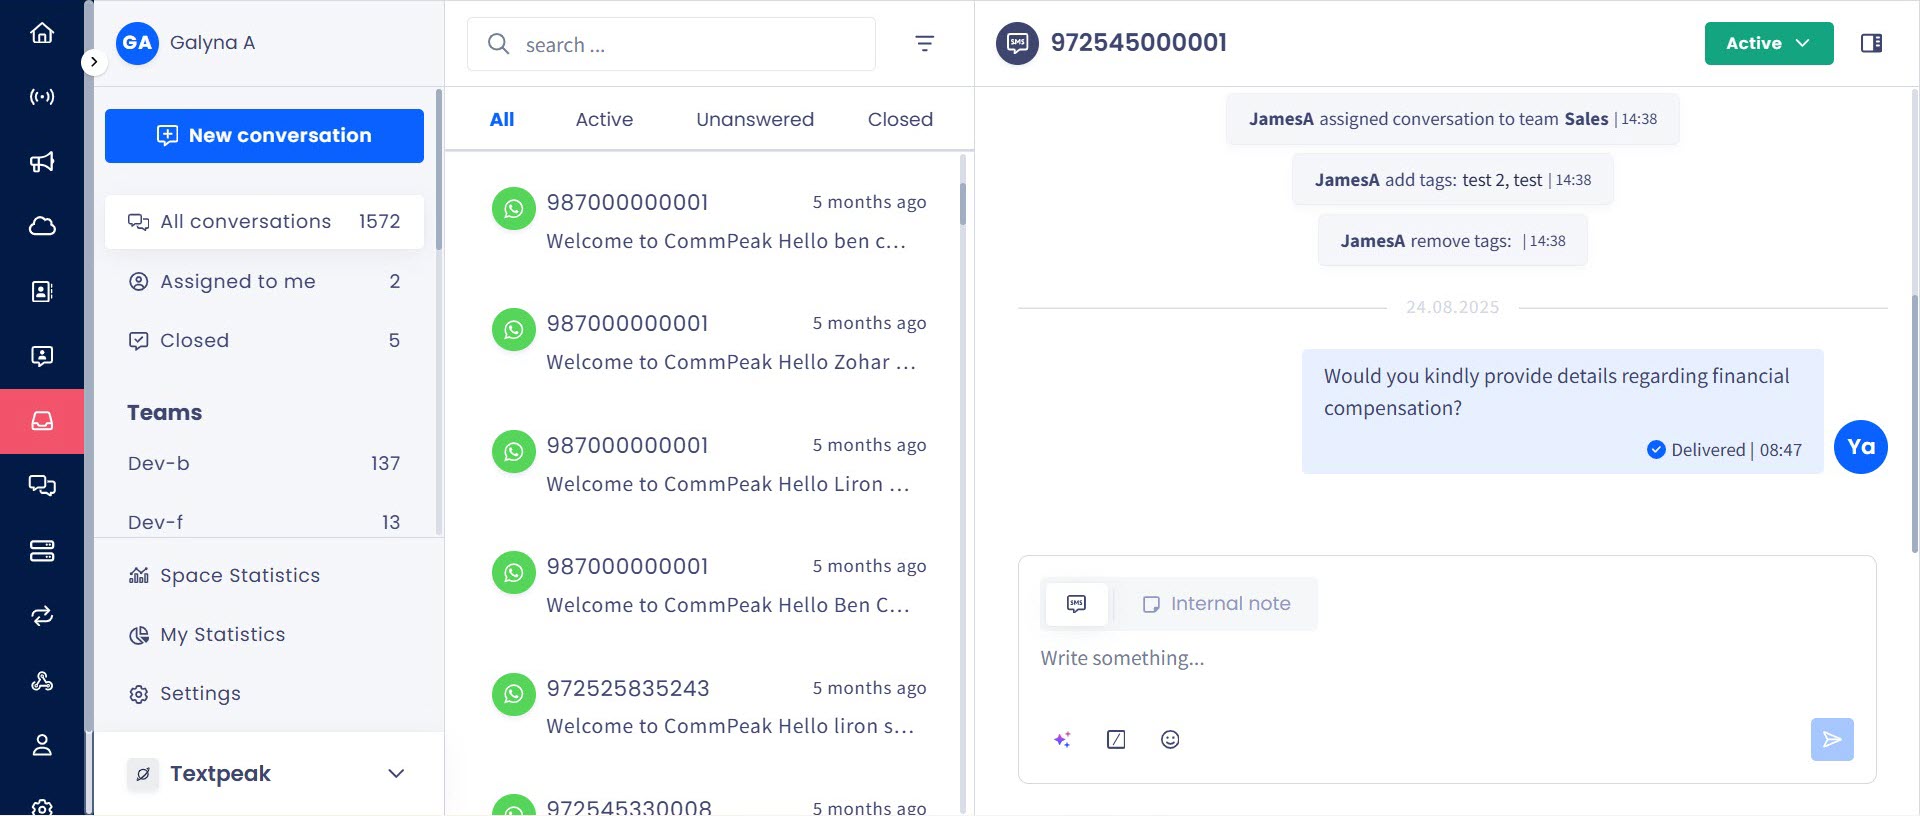
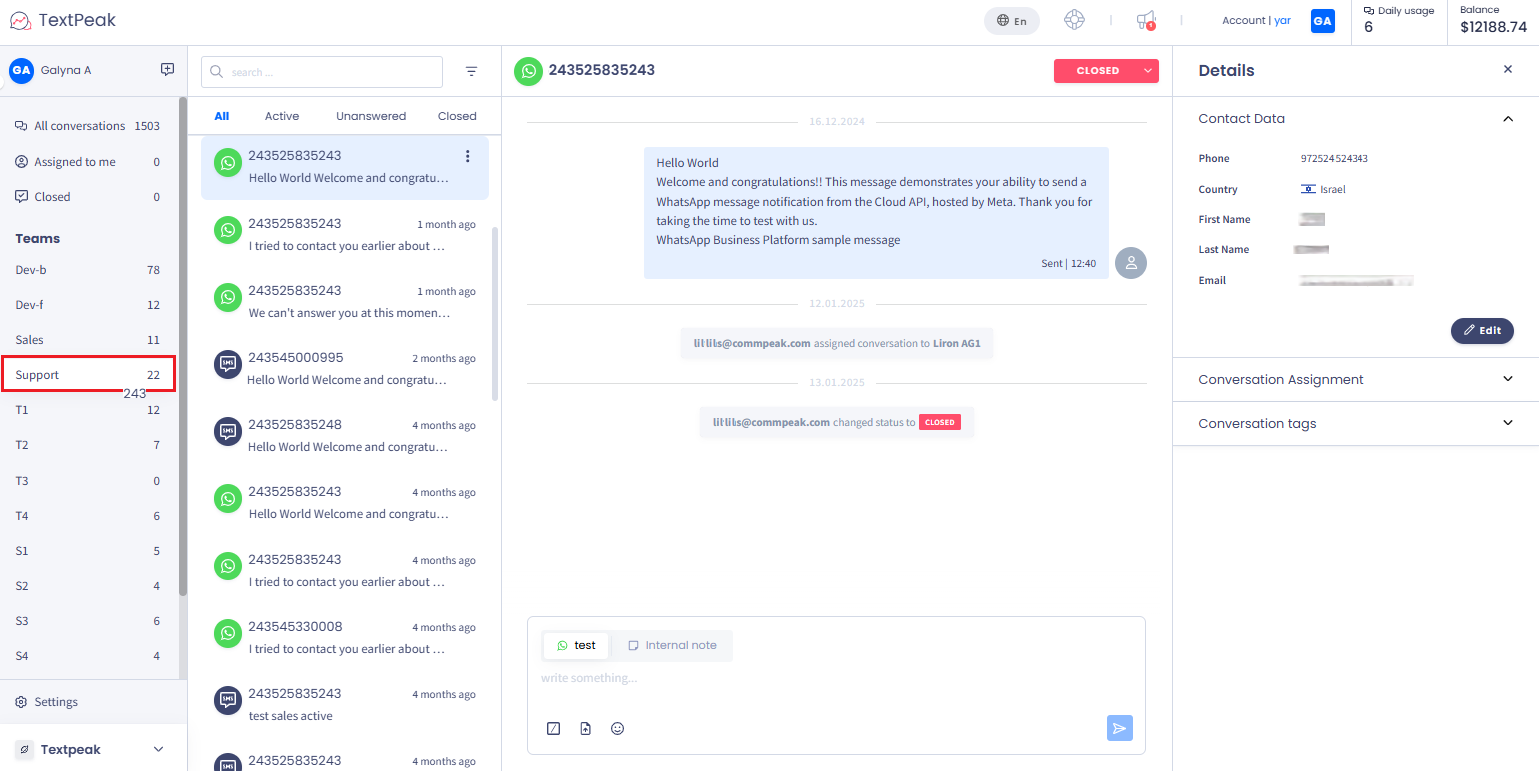
A click on the conversation will open the timeline box, which contains the history of all its messages and events.
Every conversation has a platform icon (SMS, WhatsApp) shown next to its name, both on the Conversations list and in the conversation timeline.
Inbox conversations dashboard
Below, the message box with the editor is shown where you can write messages to customers or leave internal notes for other agents.
The sidebar Details section on the right contains contact data and information about the conversation assignments and tags.
Creating New Conversations
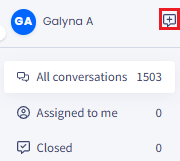
To create a new conversation:
- Click the plus button next to your account name.
Create new conversation button
- In the New conversation dialog box, click to select the sender and assigned team from the drop-down menus, then enter the phone number.
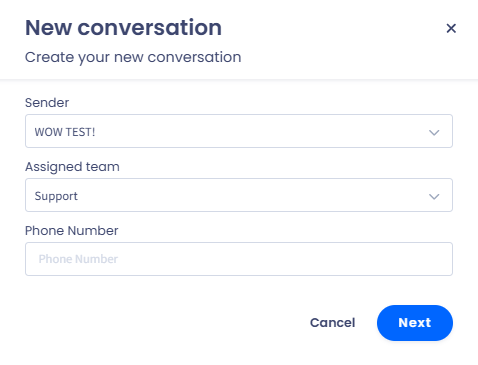
New conversation dialog box: conversation details
NOTEAgents have no access to your Sender IDs list.
Therefore, when starting a new conversation, an agent can select the sender profile only and the system automatically selects one of its senders based on the country and the daily limit.
- Click Next.
- Provide the message text and click Send Message.
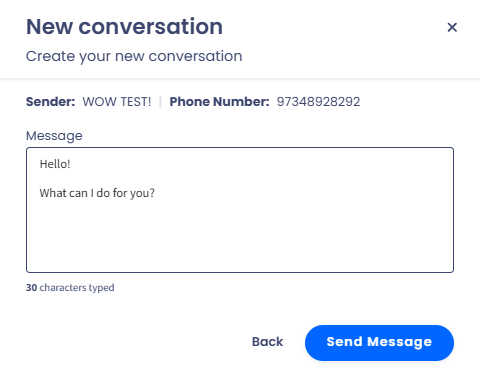
New conversation dialog box: message text editor
- The message is sent, and the conversation is added to the Conversations list.
Conversation Timeline
In the conversation timeline box, agents can review the history of this conversation in chronological order, including:
- all messages shown with the time stamp and their status (Sent, Read, etc.)
- badges with information about any past event, for example, changing status or adding tags
- internal notes shown with the time stamp
- avatars of the agents involved in the conversation.
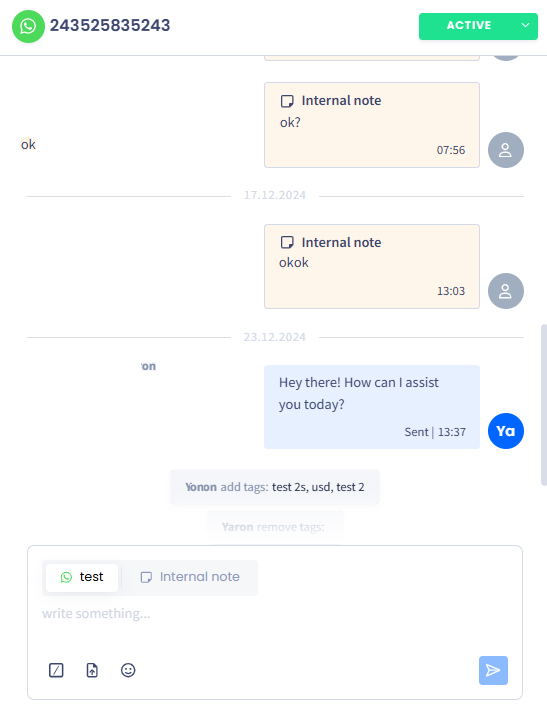
Inbox conversation timeline and message editor
Managing Messages
Below the conversation timeline is the message box, where inbox agents can write messages to customers under the Sender Profile tab or switch to the Internal note tab to leave notes for other agents or managers.
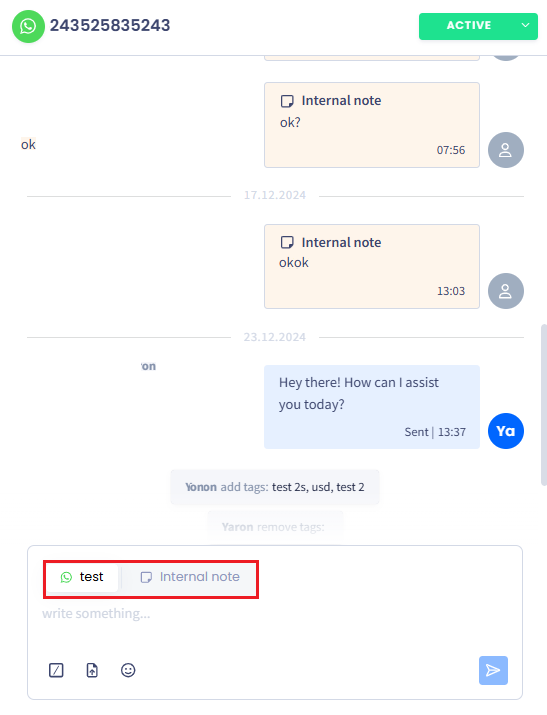
Switching between the Sender Profile and Internal note tabs
NOTEInternal notes can only be accessed by the agents assigned with the corresponding permissions.
While writing your message, you can also select to do the following (left to right):
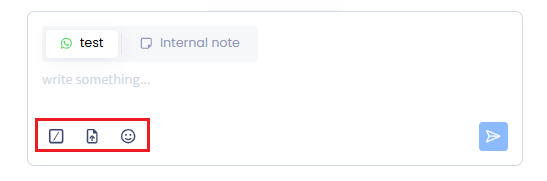
Message editor options
- add a canned template
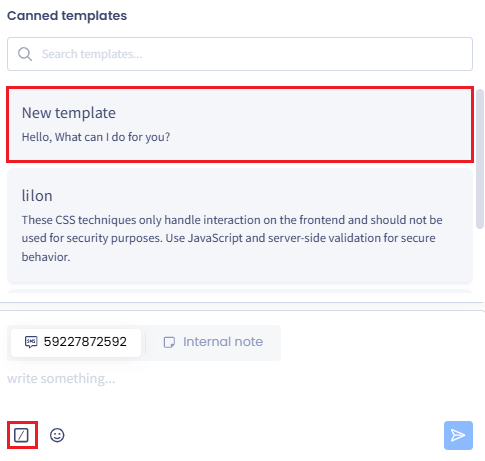
Selecting a canned template
- attach a file (only for WhatsApp)
- insert an emoji.
When finished, click to send the message. If needed, you can undo sending.
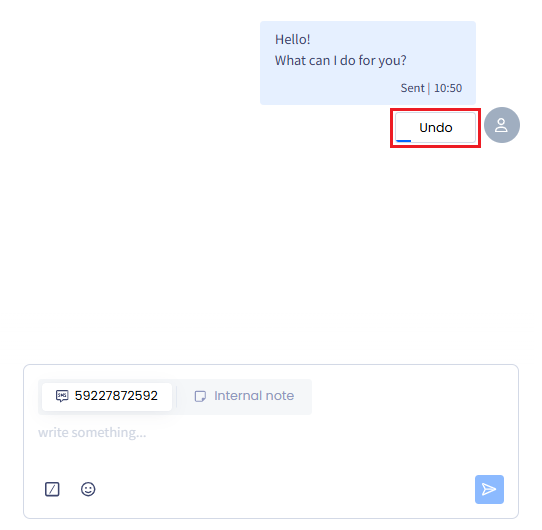
Message sending Undo button
Need to restrict file sharing?Inbox Managers can disable the sending of docs and media in WhatsApp Business conversations. Reach out to CommPeak support for assistance setting this up.
Details
In the Details section, you can:
- create and manage inbox contacts
- assign or reassign conversations to teams and agents
- create and edit conversation tags.
Managing Conversation Assignments
To edit conversation assignments:
- Expand the Conversation Assignment section and click Edit.
- Click to open the drop-down menus and select the teams and agents you want to assign to this conversation.
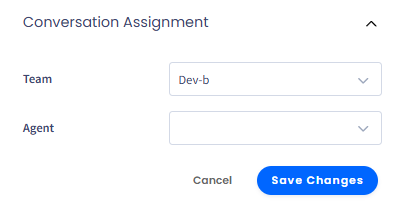
Editing conversation assignment
- Click Save Changes.
Managing Conversation Tags
To edit conversation tags:
- Expand the Conversation tags section and click Edit.
- Click to open the drop-down menu and select the tags you want to add.

Adding conversation tags
- Click Save Changes.

Saving added tags
- The tags are saved and can be used in conversations.
Filtering Conversations
-
To sort conversations, select one of the following options:
- All conversations - review all conversations available to them
- Assigned to me - review the conversations that are assigned to them only
- Closed - review the conversations closed by them.
Conversation sorting options
-
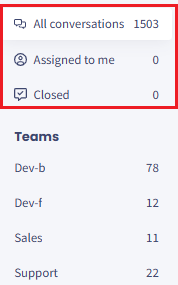
If several teams are created under your account, you can review conversations assigned to the specific team by selecting the needed team under Teams.
Selecting teams
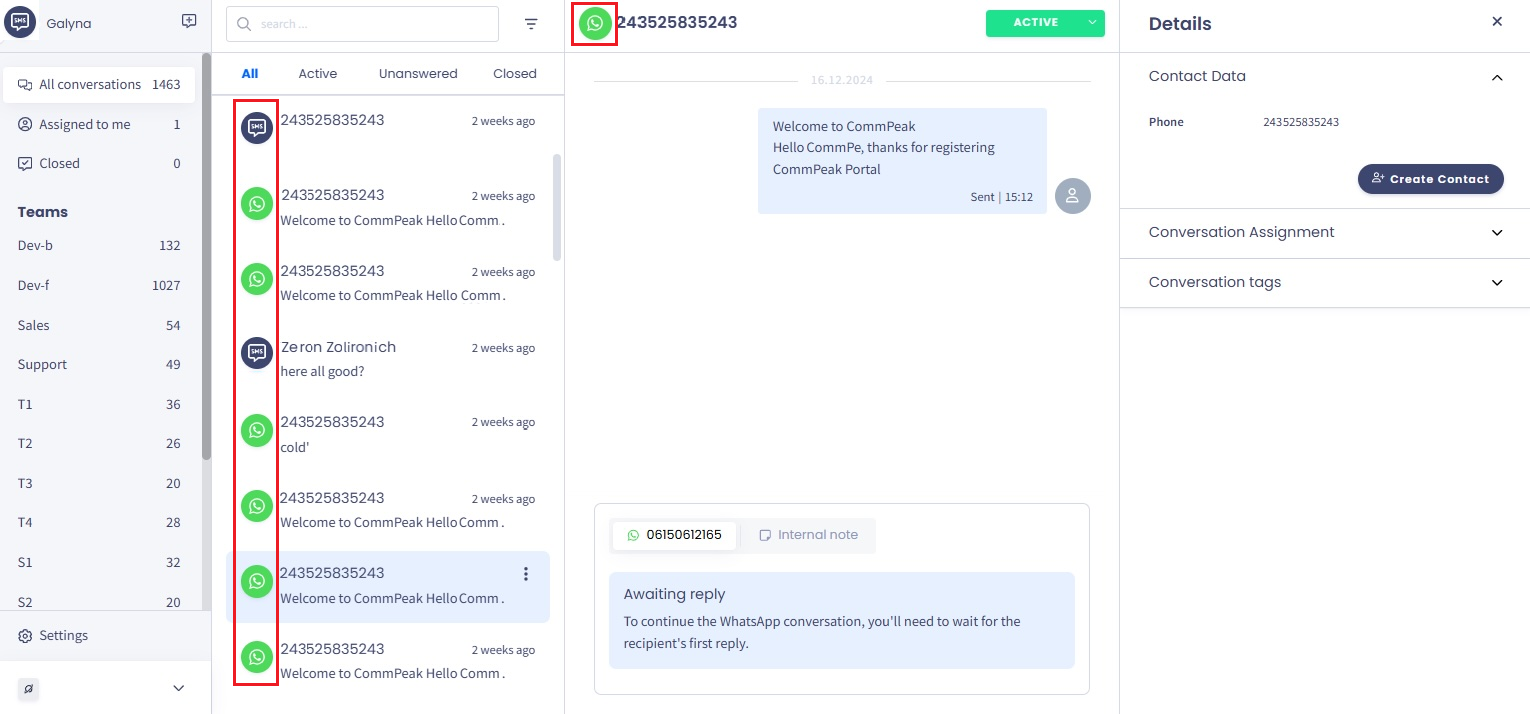
- You will see the list of the sorted conversations in the Conversations menu on the right. Every conversation is shown with the platform icon (SMS, WhatsApp), contact name/number, last message, and a three-dot menu button to update the conversation status.
Conversation Statuses
Every new conversation that starts via Inbox or via automated rules via CommPeak Dialer, is automatically generated with the Unanswered status. Once the contact answers the message, its status updates to Active, and the conversation is automatically added to the Active tab, ready to be processed by the agent.
- To additionally filter your conversations by statuses, select one of the four tabs:
- All - review all conversations available
- Active - review the conversations that are currently active
- Unanswered - review the unanswered conversations
- Closed - review the closed conversations.
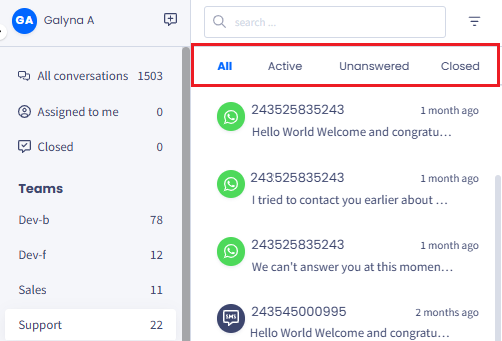
Conversations Statuses Tabs
- You can search conversations by contact name or message text. You can also filter to show conversations with unread messages by clicking the button next to the Search field. A list of conversations will be returned, each with the platform label (SMS, WhatsApp, or Telegram), contact name or number, date, and the label showing the number of unread messages.
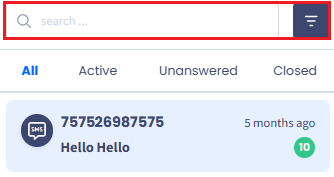
Search field and Filter button
- Click the Filter button to open more filters to view conversations, for example, Unread or Within 24 hours (like those that allow free WhatsApp Business text messages).
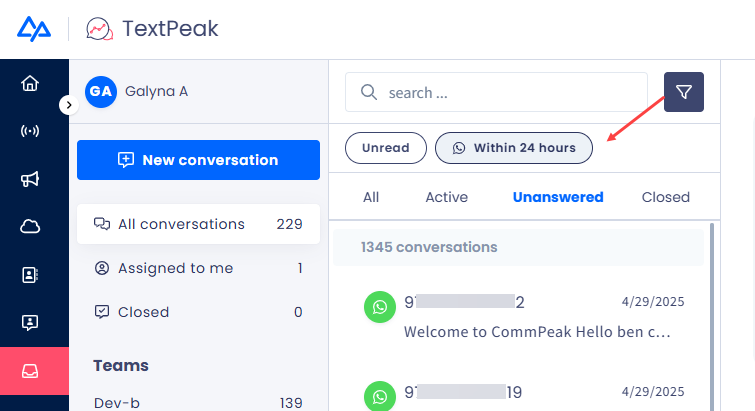
Filter options
Note, that the 24-hour window for free-text messages is renewed every time the contact sends a new message.
- To update the conversation status from the Conversations list, hover over a conversation, click the three-dot menu button on the right, and select the new status to assign it to the conversation.
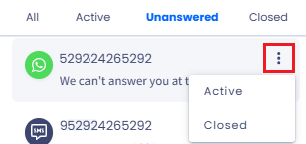
Assigning a new status to conversation
- You can also update the status from the conversation thread box by clicking the arrow button and selecting the new status to assign to the conversation.
Updating conversation status
NOTEYou cannot change the active or closed conversation's status back to Unanswered.
- To copy and share a conversation link, click the Copy URL button next to the the conversation status badge.
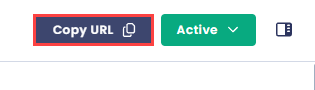
Copying conversation link
Updated 5 months ago