Follow this guide to set up WhatsApp Business channels in PBX Cloud. Learn how to generate a WhatsApp Business access token and connect your account to enable secure, real-time messaging through the platform.
Creating a WhatsApp Business Channel
📘
NOTE
The Messaging Inbox provides handling of the WhatsApp Business Channel and message viewing
To create a WhatsApp business channel:
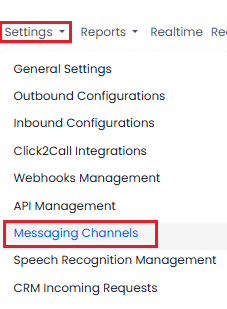
Go to Settings > Messaging Channels.
Settings > Messaging Channels tab
Click Add New Channel.
From the Type drop-down list, select Whatsapp Business.
Provide a dedicated channel Name to present the business logic messages you send through this channel.
Add Allowed IPs only if you have specific IP addresses that should be permitted for this integration. If you don’t have any specific IPs to restrict access, leave the field unchanged and make sure the value 0.0.0.0/0 remains to allow access from all IPs.
Ensure the new channel is Activated.
Click Create.
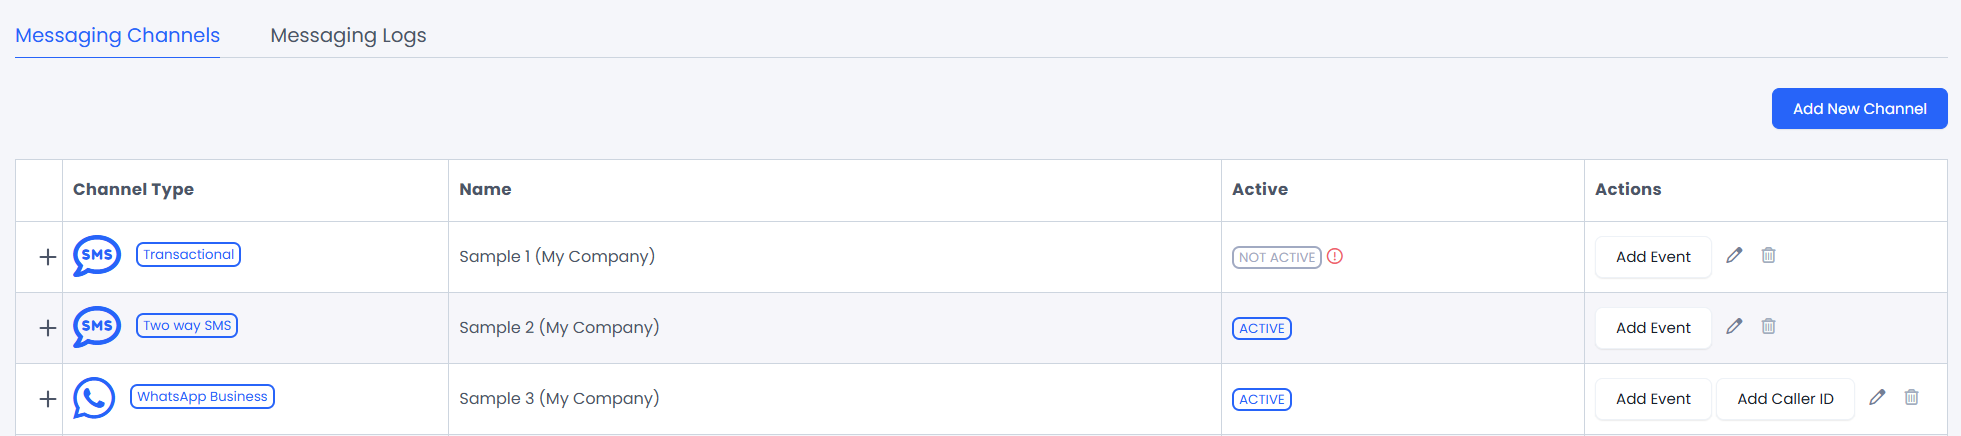
Now, a new channel is created and added to the Messaging Channels table with the following information on all existing channels:
Messaging Channels page, showing the existing configured channels
Shows whether the Message Channel is currently active or inactive
Actions
Add Event - Create a New Event related to specific channel
Edit Channel - Edit the specific Messaging Channel
Add Caller ID - Add a new Caller ID to the channel (Available only on WhatsApp Business)
Delete channel - Opens a pop-up window where you can confirm or cancel the deletion
📘
NOTE
If you experience any issues while configuring your channel, please submit a request. Our support team will help you set up your first business channel.
Creating a New Event
Within each channel, there is an Actions column. Under this column, select Add Event and click it to create a new event.
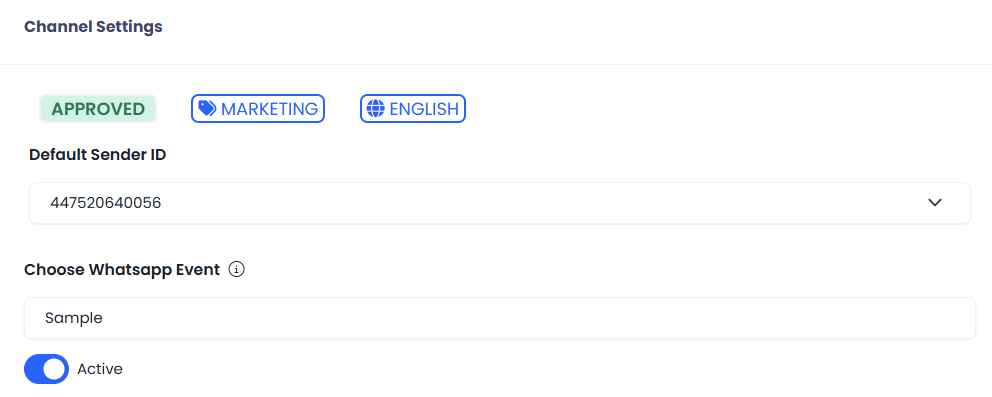
The Channel Settings section allows you to configure the following:
Channel Setting section under the New/Edit Event page
The upper section contains three fields that display information received from Meta. The first shows whether the template is approved by Meta - if it is, the status APPROVED appears in green. The second indicates the category of the template, and the third field specifies the language.
Default Sender Caller ID: Select the caller ID for this event from the available options in the drop-down list (if any are available).
WhatsApp Event: Choose the desired message template from the drop-down list.
Active Status: Specify whether this event should be marked as Active or not.
Next, you will find the Template Settings section.
❗️
IMPORTANT
Note that WhatsApp templates can’t be changed from the CommPeak Dialer side: you can only map the relevant placeholders inside to make the content more personal for the receiver.
In addition, there is an option to add buttons, which can be configured to perform specific actions such as initiating a call or opening a webpage.
Is Public - Enabling this option will allow agents to use the event when connecting with a lead during a call. The event will appear on the agent’s call page; however, agents will not be able to edit the message.
Limit amount of the WhatsApp messages per same call - If the Is Public option is enabled, this field becomes mandatory. Here, you need to specify how many times the agent can trigger the event by sending an event body message to the callee during the same call.
This setting helps prevent agents from sending multiple event messages and spamming your audience.
Click on Create once done.
Adding a Caller ID (WhatsApp Calls)
You can add Caller IDs to the Messaging Channel by clicking the Add Caller ID button. This allows you to select your WhatsApp Caller ID for both outbound and inbound calls.
For inbound calls, you need to connect your Caller ID to an existing IVR or create a new one. Outbound calls are handled through Click2Call.
Add Caller ID button
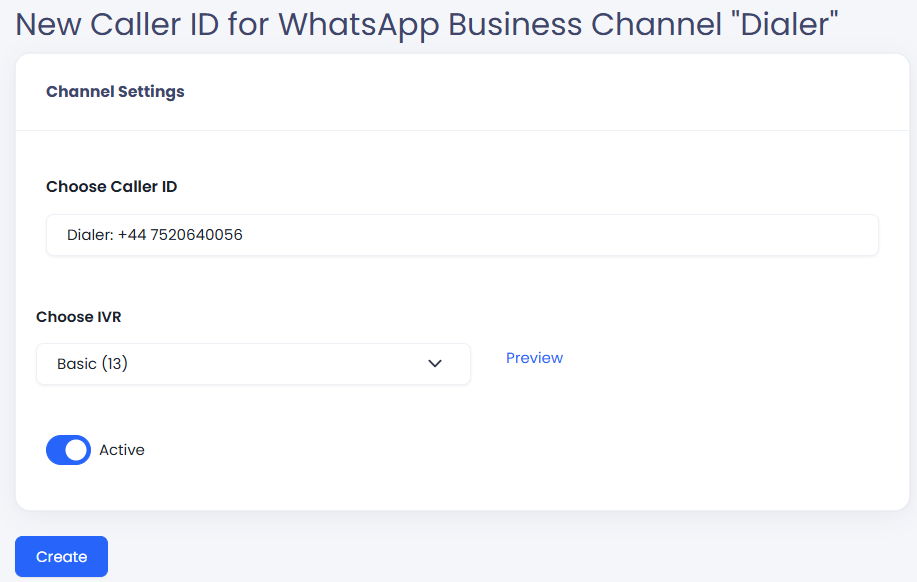
Choosing Caller ID
To add a new Caller ID, select the desired Caller ID, assign it to an IVR, and enable the Active toggle to activate it. Click "Create" once done.
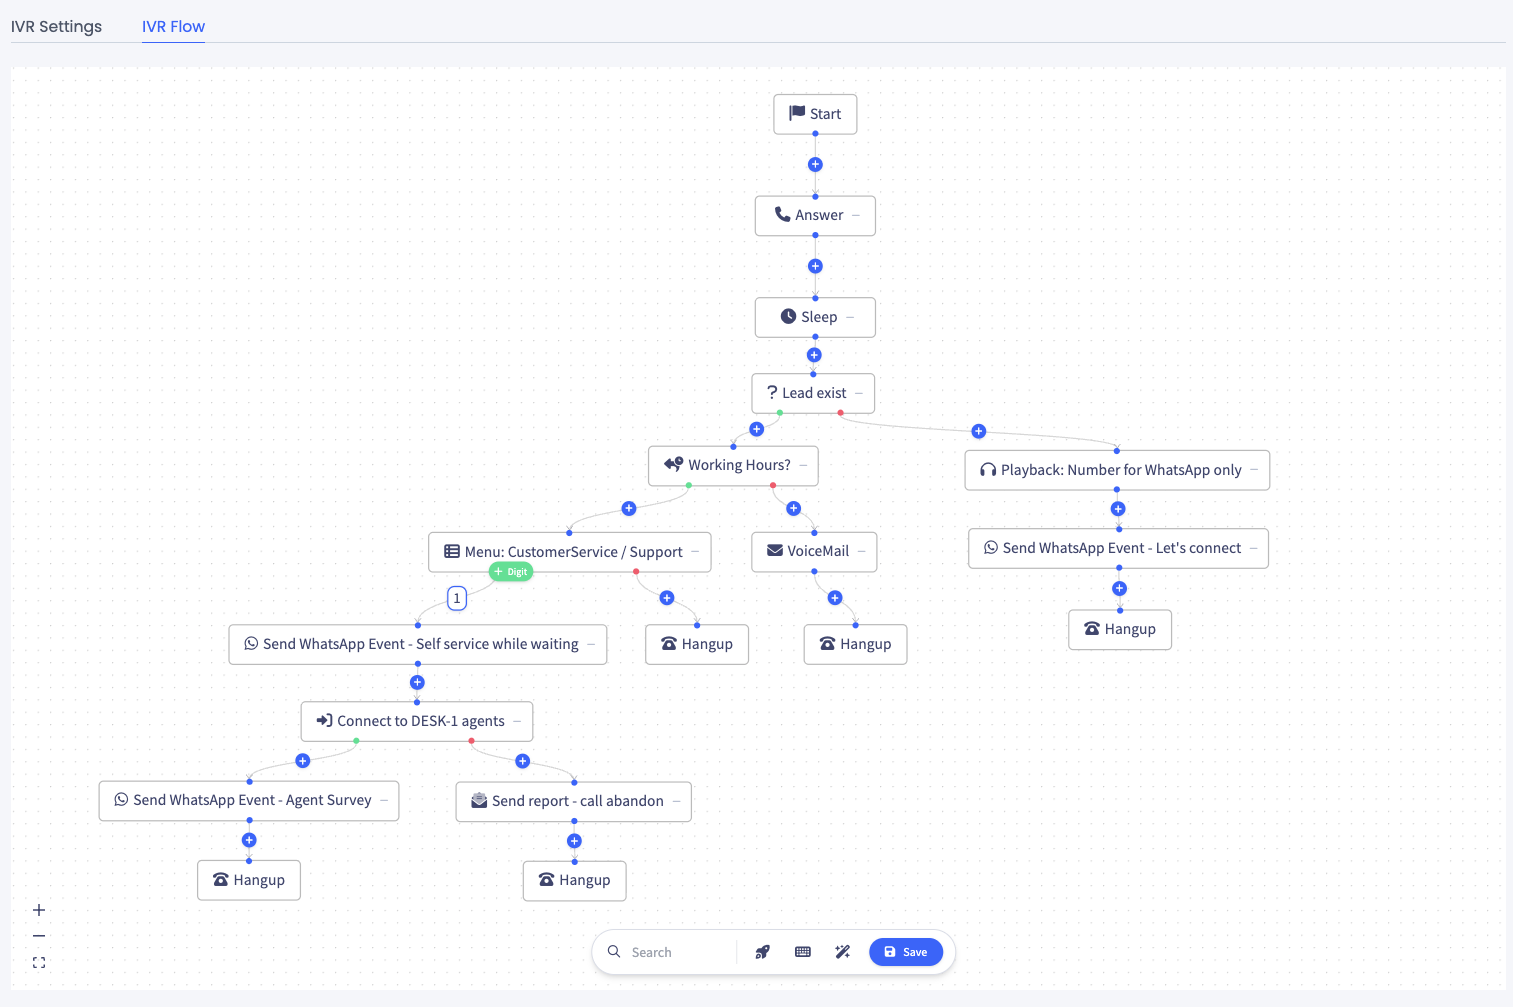
From now on, all WhatsApp inbound calls will redirect to your IVR flow. You can set your own logic according to the Inbound configurations.
Example of Inbound IVR flow setup, handle calls according to working hours, execute WhatsApp events while waiting for an agent.
📘
Know the Meta WhatsApp Calling Prerequisites
Before you get started with calling, ensure that:
Your business number is in use with Cloud API (not the WhatsApp Business app)
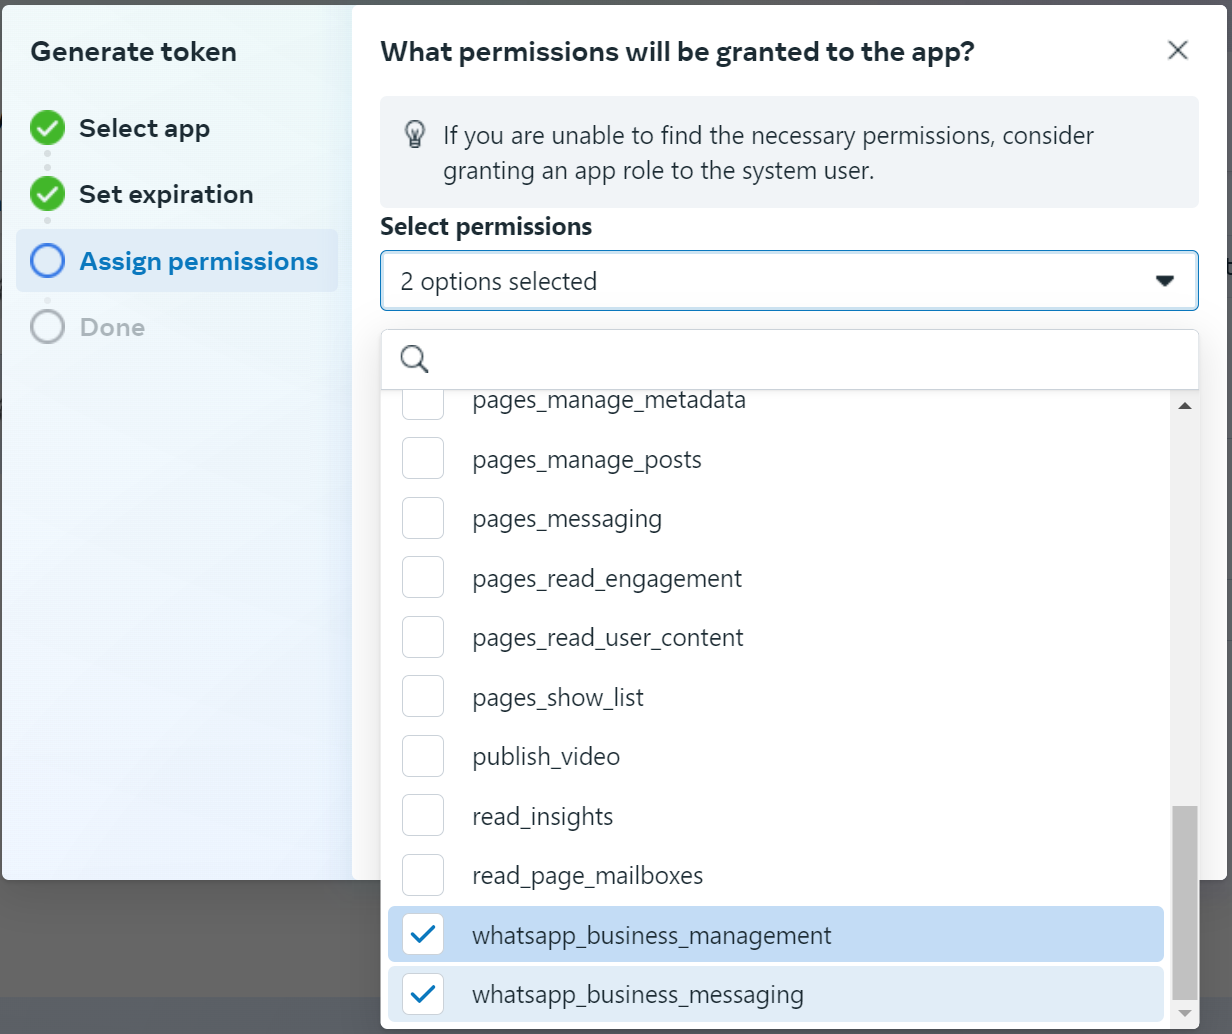
This app should have messaging permissions (whatsapp_business_messaging) for the business number.
The business must have a messaging limit of at least 2000 business-initiated conversations in a rolling 24-hour period.
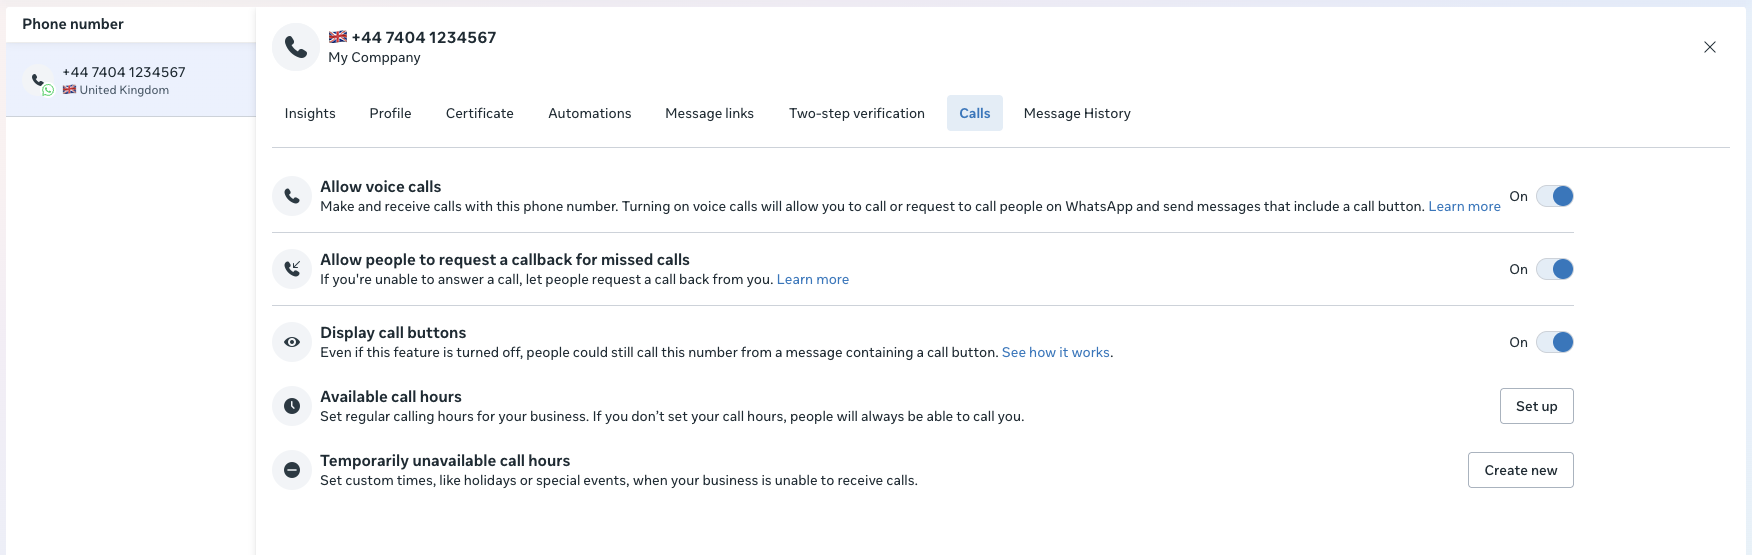
Enable Calling features on your business phone number
Availability: Business-initiated Calling (BIC) is currently available in every location Cloud API is available, except the following countries: USA, Canada, Turkey, Egypt, Vietnam, Nigeria. The business phone number’s country code must be in this supported list. The consumer phone number can be from any country where Cloud API is available.
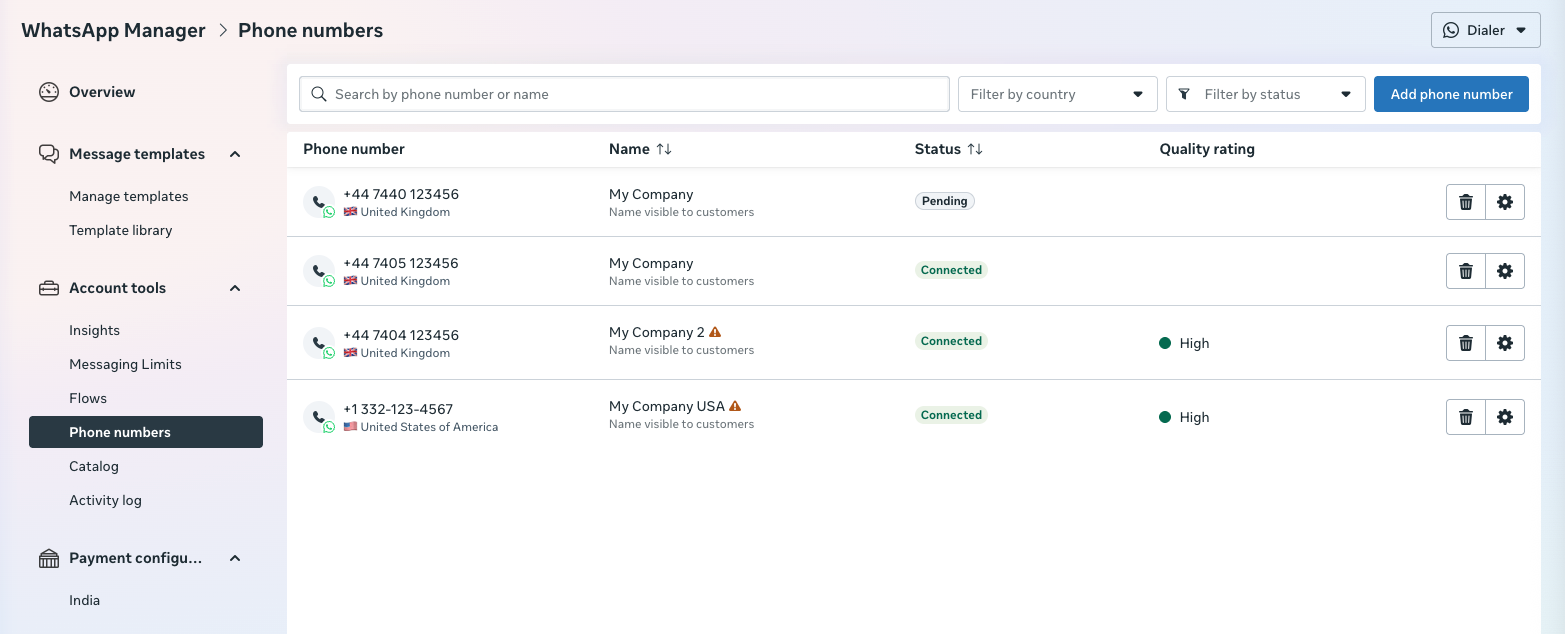
Your numbers shoud shows under "Phone numbers":
WhatsApp Manager phone numbers list
Ensure your number is active for calls. If it isn’t, register the number, enable two-step verification, and verify it’s available for templates before using it for calls.
Activating number for making calls
Understanding the Messaging Channel Table Page
On the main Messaging Channels page, you can click the + button next to Channel Type or select an event name to view the list of existing events for any channel.
List of existing events for the Messaging Channel
The list will display the following information:
Column
Description
ID
Event ID
Name
The event name
Default Sender Number
The default number for sending event messages
Category
The template Category, as defined and received from Meta
Language
The template Language, as defined and received from Meta
Meta Status
This information is received from Meta. Once the template is activated by Meta, it is stated as APPROVED
Active
Channel event status (Active) or (Not Active)
Public
Indicates whether the event will be visible to agents on the Agent Call page
Actions
Test - opens a pop-up window displaying the test stream - Edit - edit the specific event - Delete - opens the popup window to confirm or cancel the action
In addition, you can also view the list of the existing caller IDs:
List of existing Caller IDs
The list includes the following details:
Column
Description
ID
The ID of the Caller ID
Name
The Caller ID name
Default Phone Number
The phone number
Number ID
Serial number as provided by Meta
Active
The status of the Caller ID - active or not
Actions
Test - the option to test the caller ID - Edit - Edit the specific Caller ID - Delete - opens the popup window to confirm or cancel the action
Testing the Caller ID
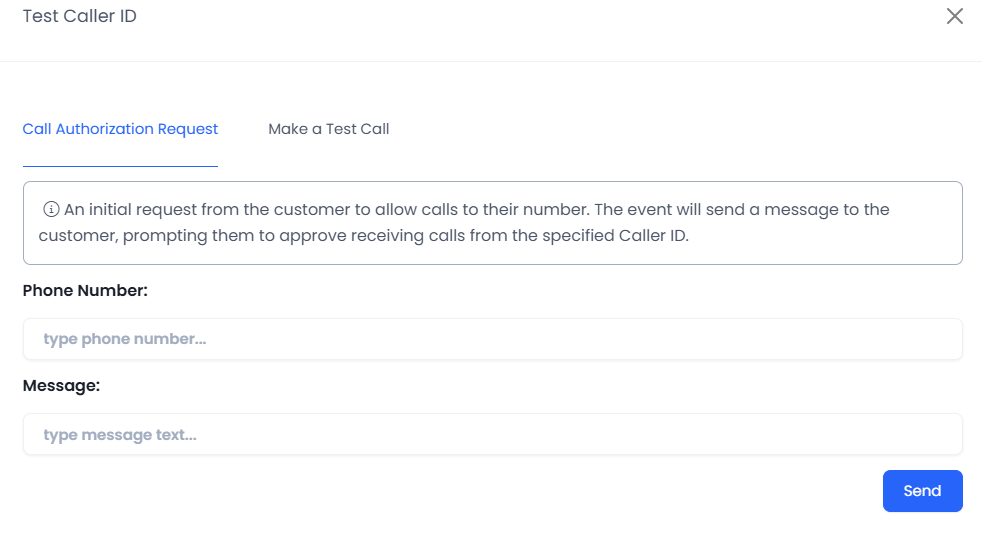
The Caller ID can be tested by clicking the Test button. The test consists of two parts, each involving a separate action:
Call Authorization Request - This sends an initial request to the customer, asking for permission to receive calls from the specified Caller ID. The system sends a message prompting the customer to approve calls from this number.
Test Caller ID - Call Authorization Request
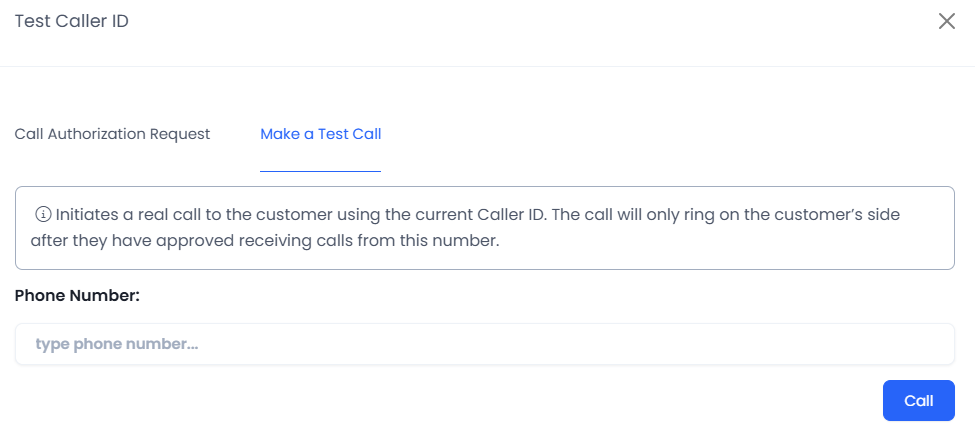
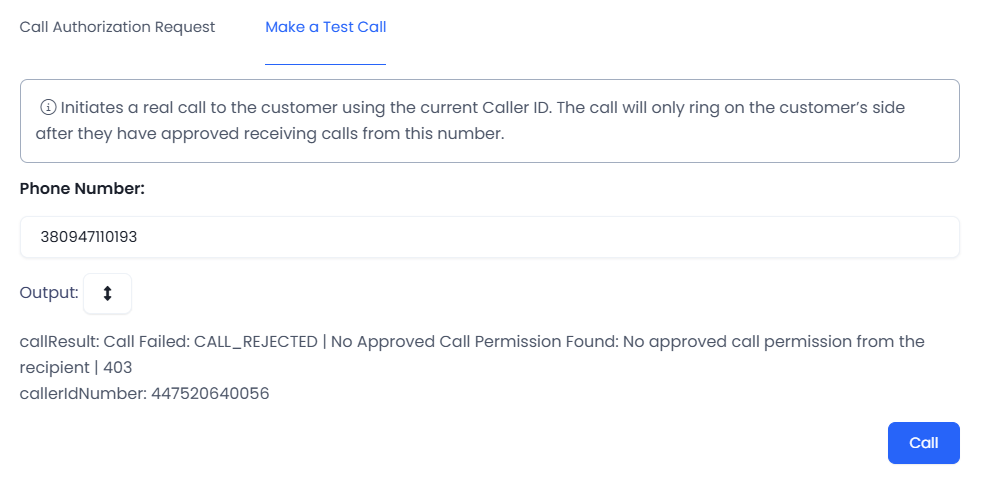
Make a Test Call – Once the authorization is approved, a real test call is initiated to the customer using the current Caller ID (Please note, the call will ring on the customer’s side only after they have approved receiving calls from this number).
Test Caller ID - Make a Test Call
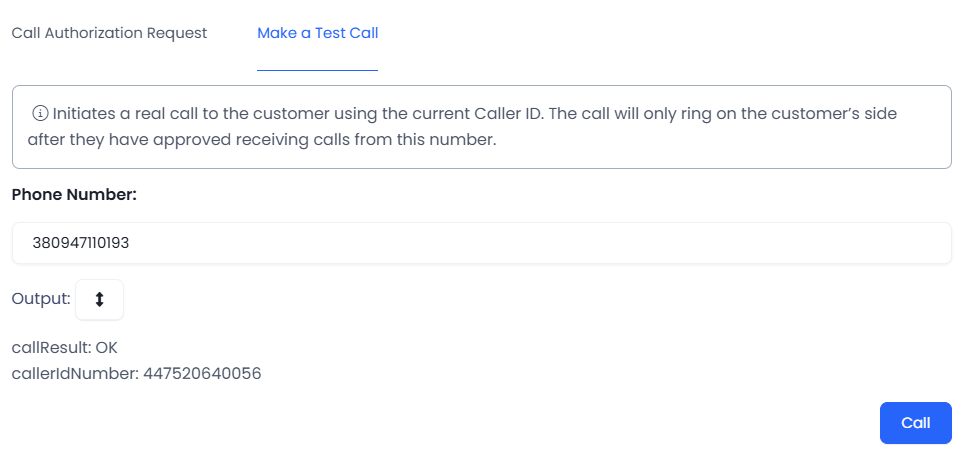
Optional Caller ID Test Results
The test call can return one of two results: OK or Call Failed. Whenever the result is Call Failed, the system also displays the reason for the failure. See examples of the test call results below:
Test call result: OK, indicating that the call was completed successfully
Test Call result: Call Failed, indicating that no call permission was granted from the customer’s side.
Therefore, the call could not be completed.
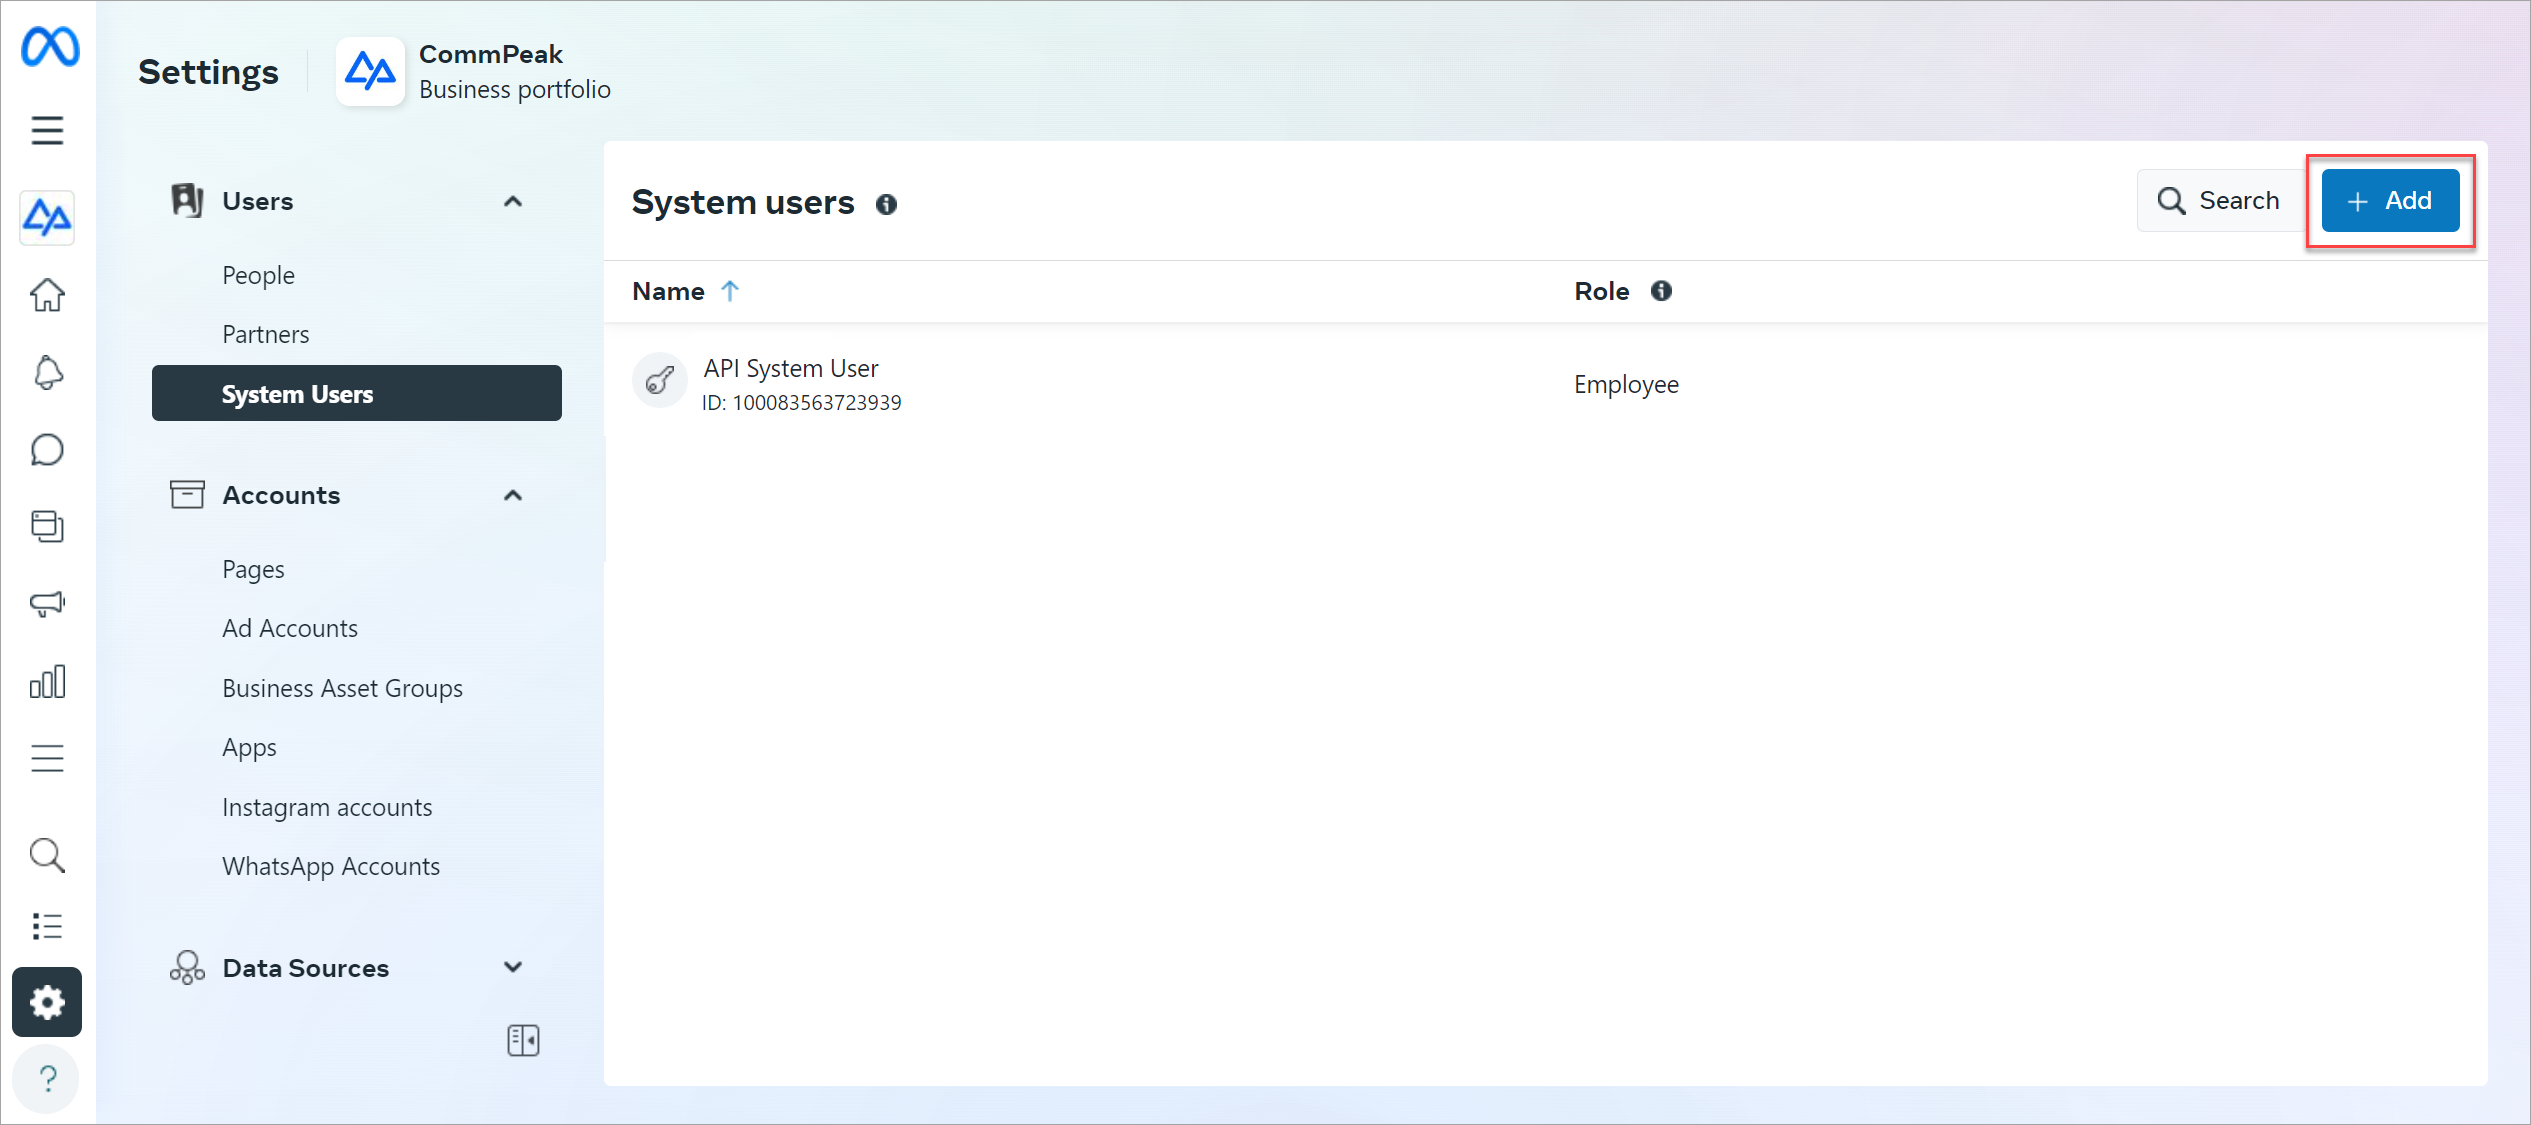
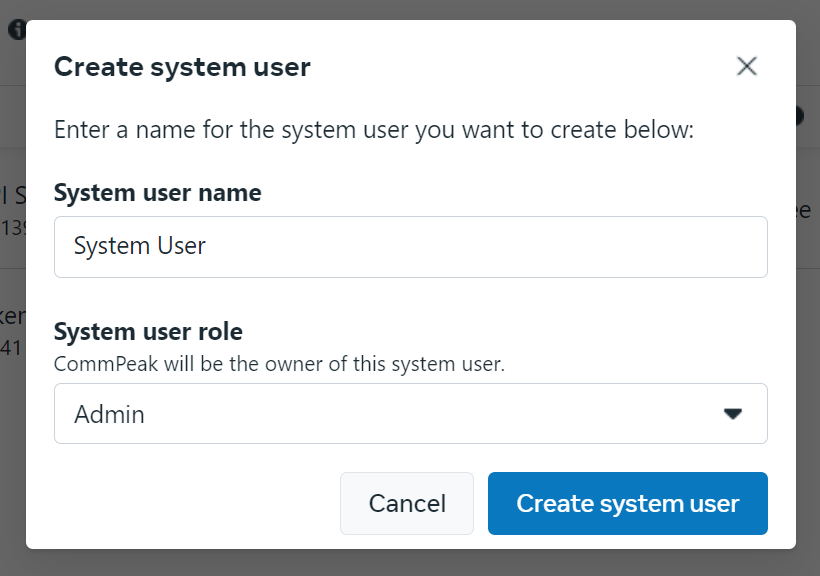
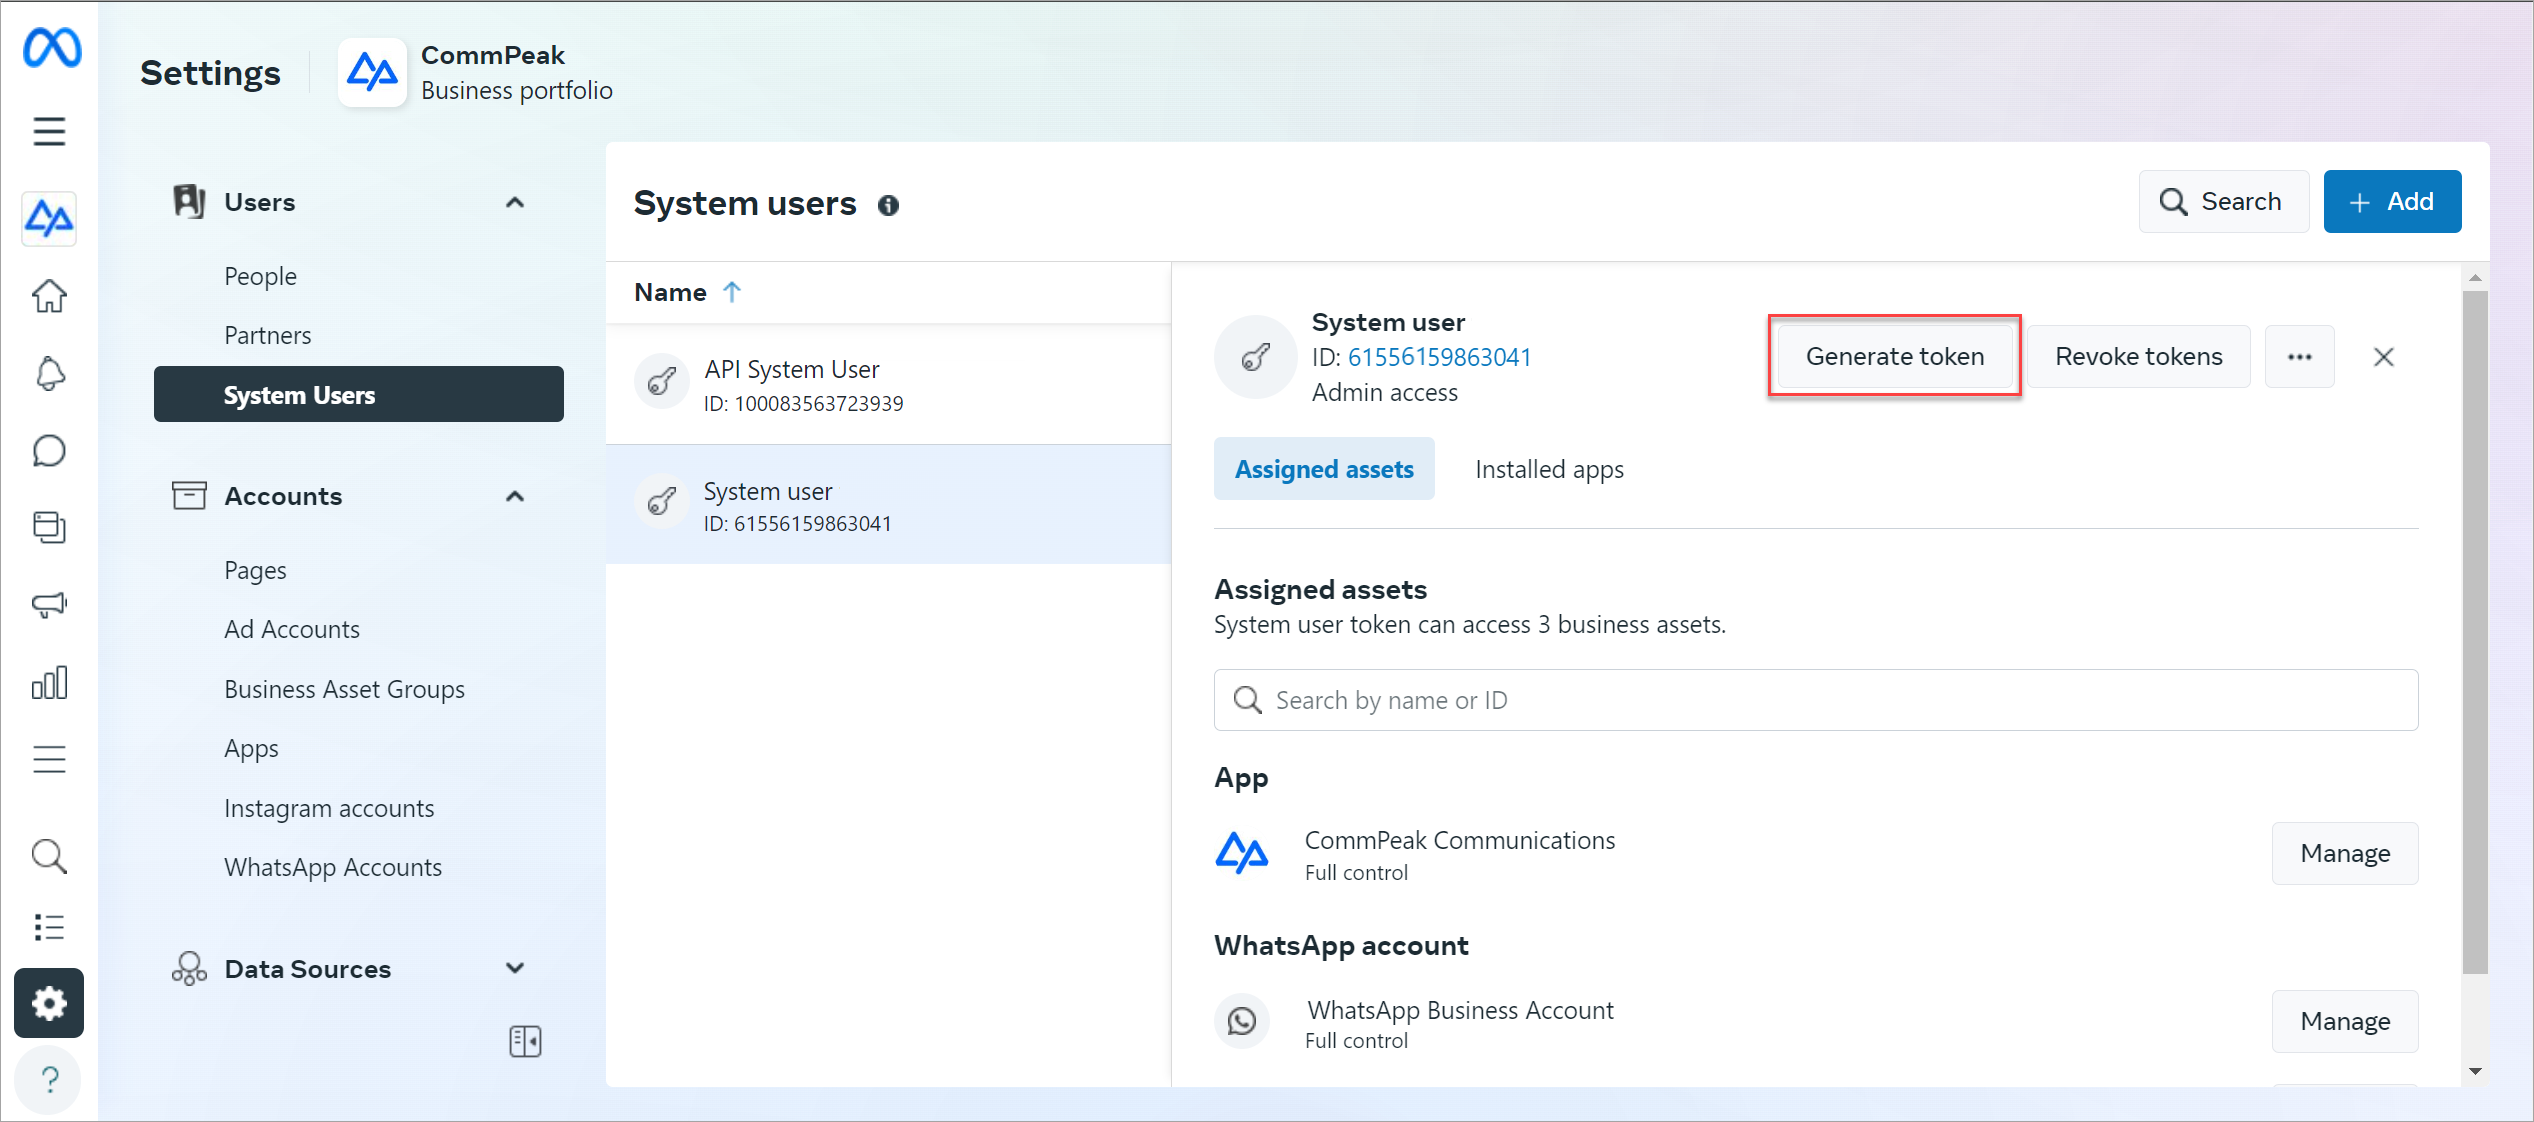
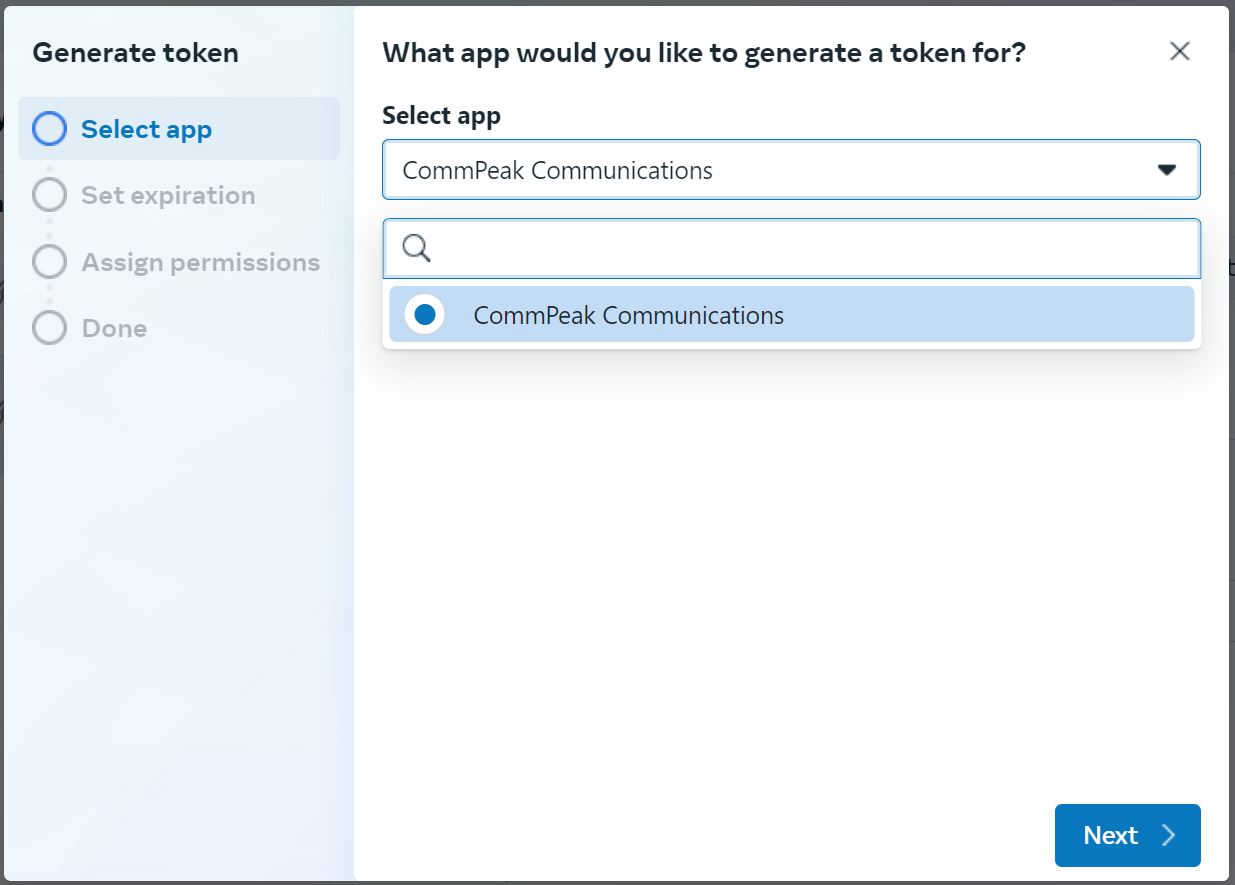
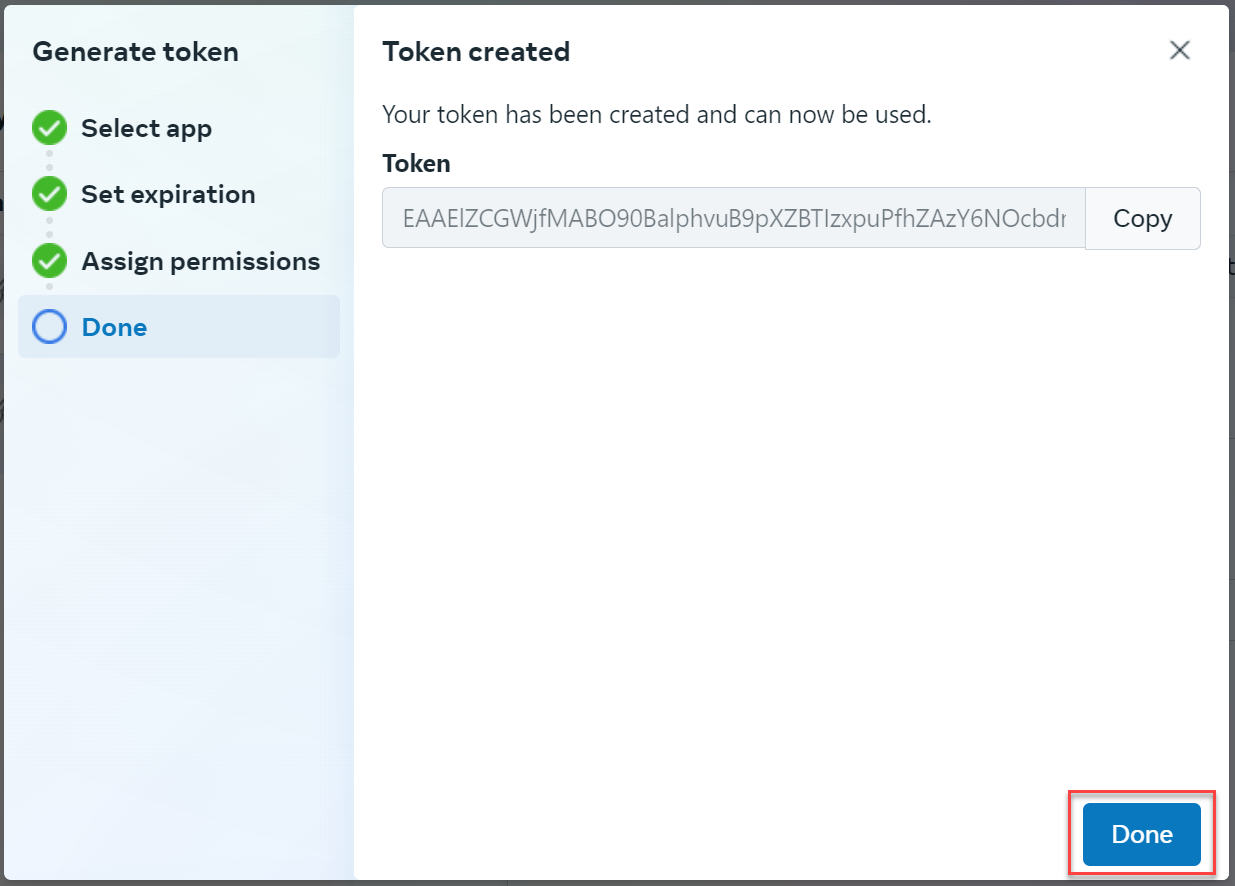
Generating a WhatsApp Business Token
As one of the steps of creating a WhatsApp channel, you need to enter a WhatsApp Business token and your WhatsApp Business ID.
You will also learn how to configure webhooks in your app to be alerted at WhatsApp-related actions.