Creating Transactional Channels
Learn how to create transactional channels from the CommPeak Dialer.
The Messaging channels feature allows you to manage and create transactional streams directly from the dialer.
Creating Transactional Channel
To create a Transactional channel:
- Go to Settings >Messaging Channels .
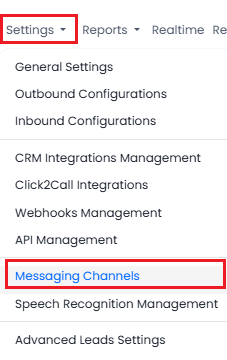
Settings > Messaging Channels tab
- Click Add New Channel.
- From the Type drop-down list, select SMS.
- Provide a dedicated channel name to present the business logic messages to be sent through this channel.
- For the Channel Type field, select Transactional.
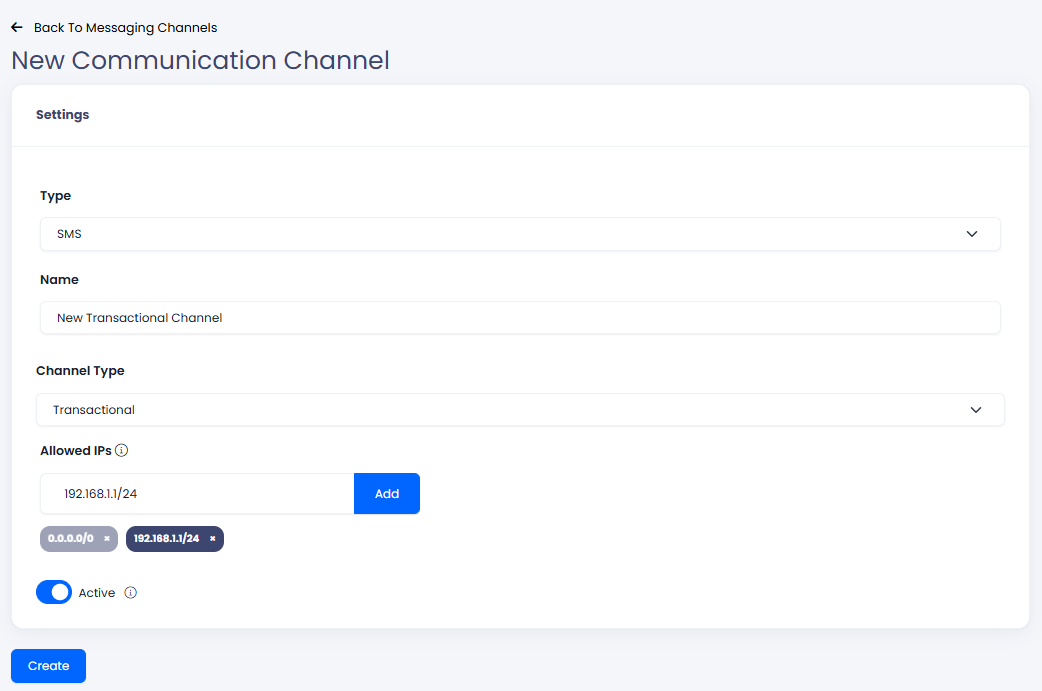
Creating new Transactional Channel
- Click Create.
- A new channel is created and added to the Messaging Channels table with the following information on all existing channels:
| Column | Description |
|---|---|
| Channel Type | A messaging channel type:
|
| Name | A messaging channel name |
| Active | Modify the channel status by enabling (Active) or disabling (Not Active) it. |
| Actions |
|
- Click the + button next to Channel Type or select the event name to view the list of existing events for any channel with the following information:
| Column | Description |
|---|---|
| ID | Event ID |
| Name | A messaging event name |
| Default Sender Number | The default number for sending event messages |
| Active | Channel event status (Active) or (Not Active) |
| Public | Status to inform that the event will be shown to agents on the agent call page |
| Actions |
|

New Transactional Channel
NOTEIf you have issues configuring your channel, please submit a request and our support team will be happy to help you configure your first business channel.
Adding New Transactional Event
To add a new event for your channel, in the New Event for SMS Channel wizard, fill in the necessary information to complete each step.
Step 1: Channel Settings
Start with entering channel details:
- Default Sender ID - select your allowed sender from the drop-down list or use search.
NOTEIf you have issues with selecting the correct Sender ID, please submit a request and our support team will be happy to help you configure your first channel event.
- Active - set the channel status by enabling (Active) or disabling (Not Active) it.
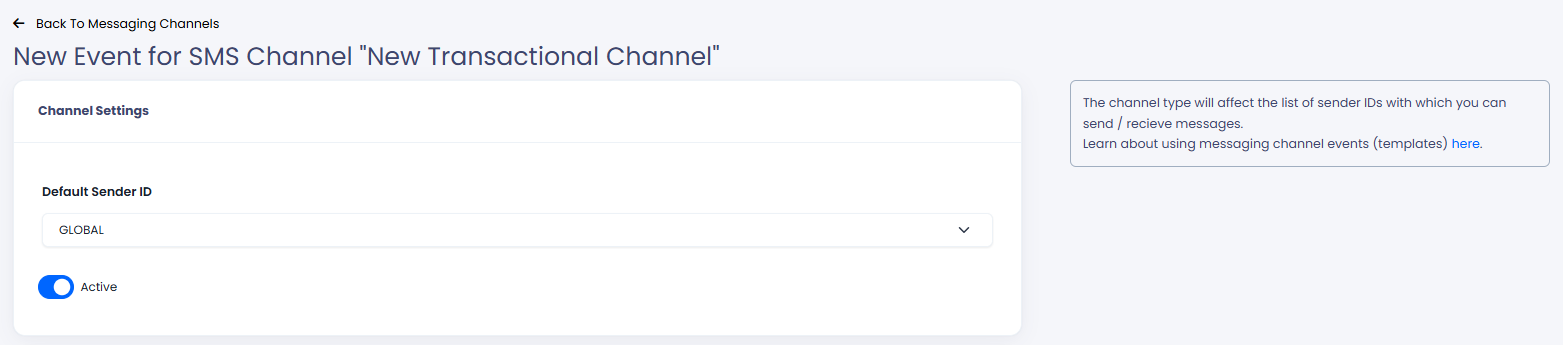
Channel Settings section
NOTEThe GLOBAL desk (team) name is the default team to which conversations are assigned when messages are sent/received without relation to agents.
Step 2: Message Content
Enter event data to create a customized SMS by using the relevant preset examples and a real-time message preview on the right:
- Event name - create a meaningful name to present the action/reason for the message.
- Body - the message content to send to your audience. You can set your own SMS text or use the placeholders to make the content more personal for the receiver. In addition, the SMS message editor supports Unicode characters, allowing for the inclusion of emojis to enhance message engagement.
Understanding SMS Character Limits
The character limit for your message is defined by how the text is encoded. Generally, your content will be processed using one of the following two standards:
- Standard Text (GSM-7): When using standard English letters, numbers, and basic symbols, you have a limit of 160 characters. If this limit is exceeded, the message is split into segments of 153 characters each.
- Special Character Text (Unicode (UCS-2/UTF-16)): If you add even one "special" character - like an emoji, a unique symbol, or non-Latin scripts (for example Arabic or Ukrainian), the limit for a single message drops to 70 characters. If this limit is exceeded, the message is split into segments of 67 characters each.
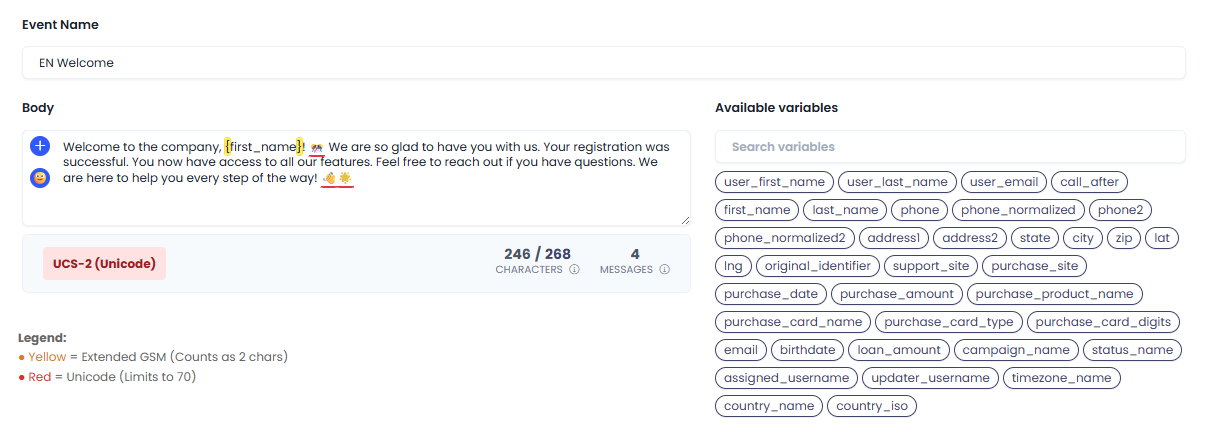
Event Message Settings using Unicode standard (Special characters included)
Enter your content directly into the Body message box. You can also insert available variables to personalize the text for each recipient.
Below the message box, the interface displays the encoding type currently in use: either GSM-7-bit or UCS-2 (Unicode). This section also tracks your total character count and the number of segments/SMS your message will be divided into.
To help you monitor your character limits, the text in the Body message box will highlight specific characters:
Yellow Highlight: Indicates Extended GSM characters (these count as 2 characters each).
Red Highlight: Indicates Unicode characters (these trigger the 70-character limit).
Message Example Preview
The following example demonstrates character limits based on Standard Text (GSM-7) encoding:
In this example, the message is split into two parts because it exceeds the 160-character limit. Once exceeded, the system divides the message into segments of 153 characters each.
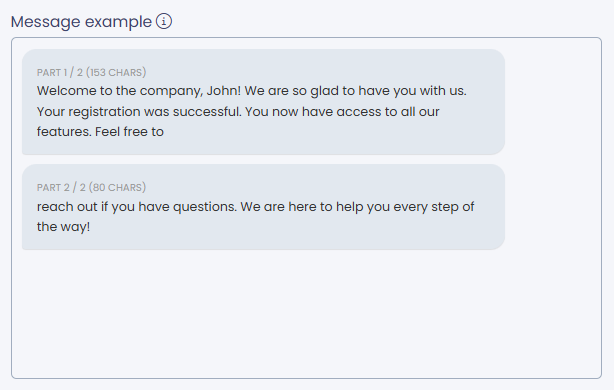
Message Preview using Standard text (GSM-7)
The next example demonstrates character limits based on Special Character Text (Unicode) encoding:
In this case, the message is split into four parts due to the inclusion of special characters (emojis), which reduces the single-message limit to 70 characters. Exceeding this threshold forces the message into segments of 67 characters each.
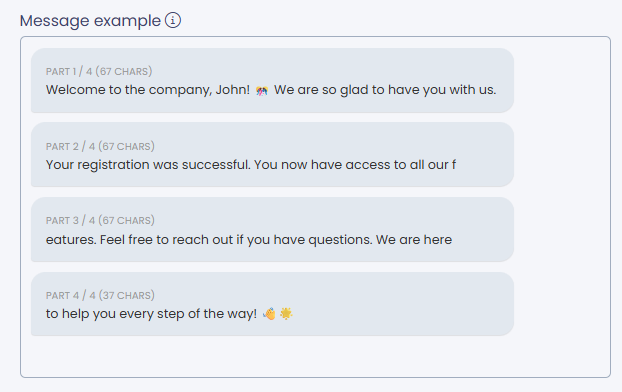
Message Preview using Unicode standard including special characters
The following example features the text that utilizes the Unicode standard rather than Latin-based encoding. Since Cyrillic characters are unique and fall outside the GSM-7 set, the message is restricted to the 70-character limit, resulting in a four-part split of 67 characters per segment.
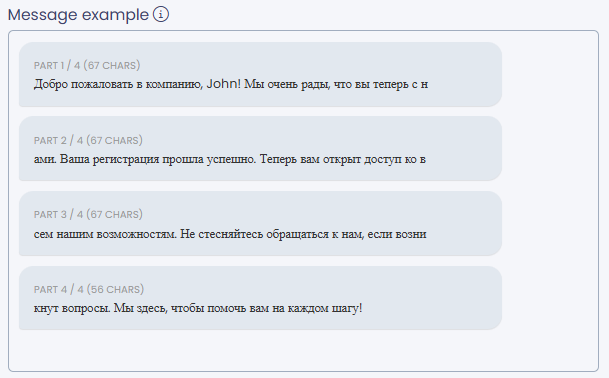
Message Preview using Unicode standard including Russian language letters
In addition, you can enable few more optional configurations:
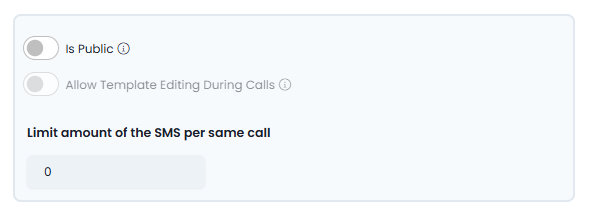
Additional optional settings
- Is Public - enable this option to mark templates as "Public" without allowing agents to change the text. This ensures your brand voice and compliance remain consistent across every message you send.
- Allow Template Editing During Calls - enable this option to allow agents to access and modify the event template before sending the message to a lead. This feature enables message personalization while ensuring consistency with predefined templates.
- Limit amount of the SMS per same call (mandatory) - define how many times the agent triggers the event by sending an event body message to the callee on the same call. This setting is defined to prevent spamming your audience.
Step 3: Scheduling Event
Enable the Send SMS only in the specific hours option if you want to limit sending message hours to your leads according to the lead country/timezone.
In the Sending Hours (lead's local time) section that pops up, choose the SMS sending hours by country according to your default timezone.
NOTE
- Be aware that we detect related countries according to a lead timezone, therefore, make sure you cover the entire list of relevant countries. For example, Vatican Time Zone is not included in Italy. For more details on how to set calling times across multiple timezones, check the Default Timezones Management article.
- Messages defined to be sent outside the allowed timeframe will be queued and sent within the next allowed timeframe.
Manage Calling Days (Optional):
You can specify the days on which the call hour restrictions will apply.
To configure this, enable the toggle and select the desired days. Only the selected days will follow the defined call hour settings and enforce the restriction accordingly.
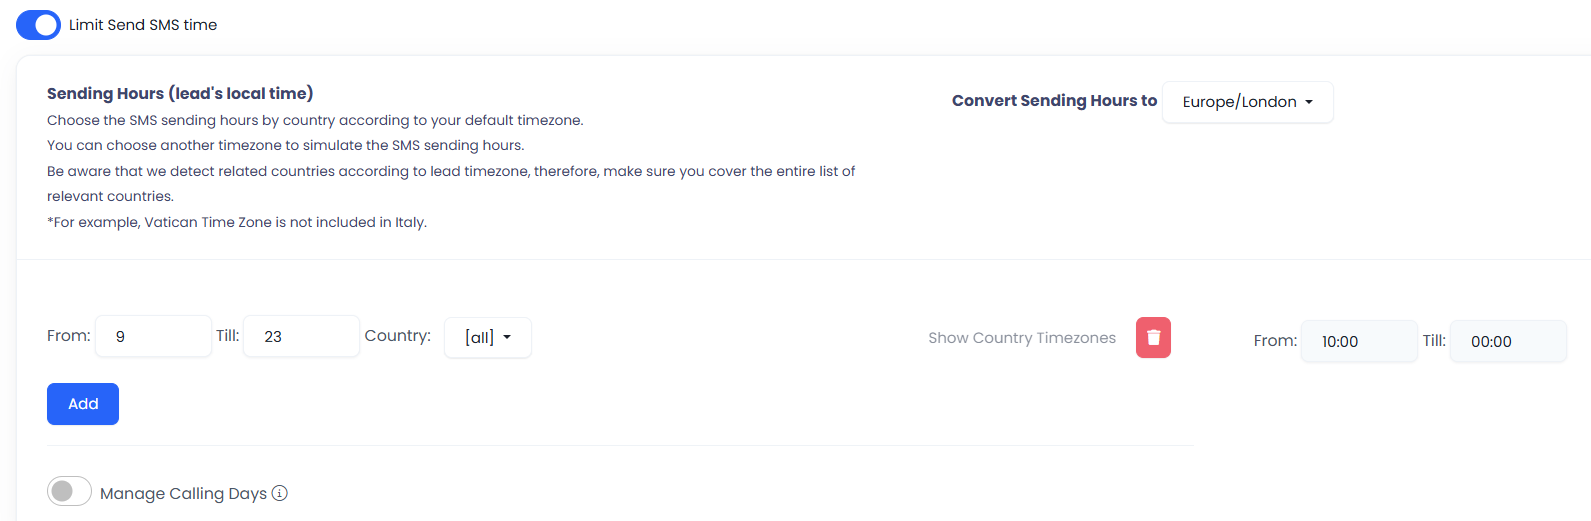
Sending Hours settings

Manage Calling Days
Step 4: Creating Event
Finally, click Create. The new event will appear on the list of existing events in your messaging channel.
Click the + button next to Channel Type or select the event name to view the list of existing events for any channel with the following information:
| Column | Description |
|---|---|
| ID | Event ID |
| Name | A messaging event name |
| Default Sender Number | The default number for sending event messages |
| Active | Channel event status (Active) or disabling (Not Active) it |
| Public | Status to inform that the event will be shown to agents on the agent call page |
| Actions |
|
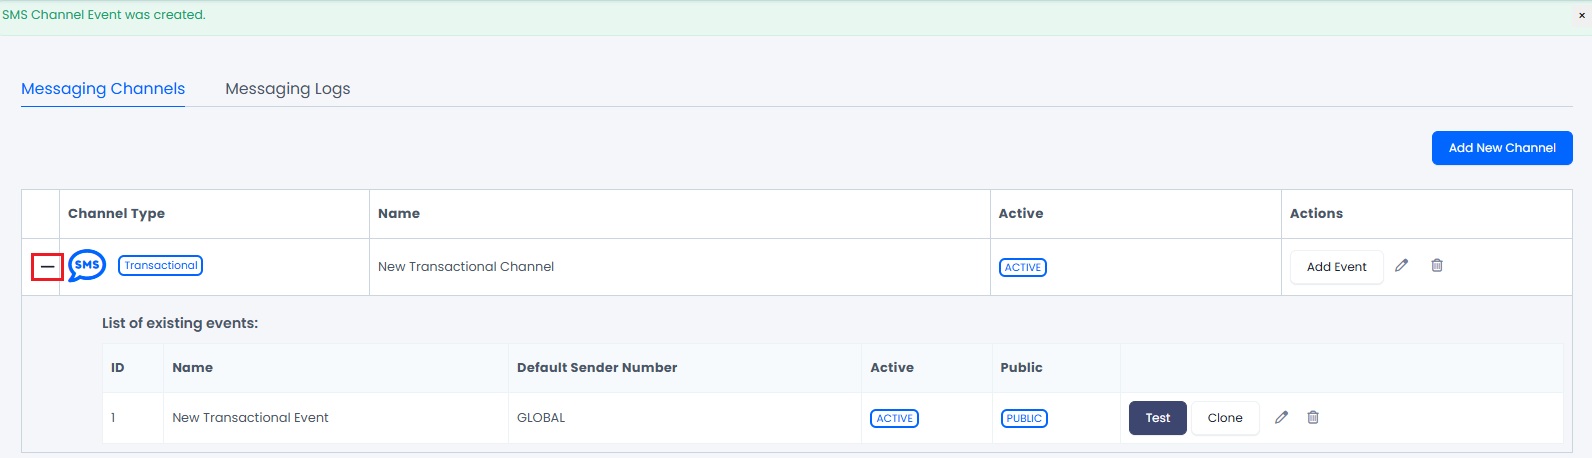
Messaging channel with the list of existing events
Updated 6 months ago