

Notifications
Edit your CommPeak notifications settings: select notification types and recipients to receive updates about CommPeak account events like balance threshold warnings, daily usage reports, and rate updates.
The Notifications tab in Settings controls which account events trigger an email and who receives it. You invite recipients, assign each one to notification groups, and every recipient confirms the invitation before any email is sent.
Video tutorial
Choose which CommPeak account notifications you receive by email, and invite other people to receive them with you. Email notification settings live in the Notifications tab of your account settings.
NOTERecipients you invite confirm by email before CommPeak sends them anything. Until they accept, CommPeak sends nothing to their address.
Viewing Portal notifications
The CommPeak Portal sends notifications for these account events:
- Account activity.
- DID numbers verified or renewed.
- Cloud PBX activated or suspended.
- Recurring payments processed.
- Invoices paid, and more.
To see all portal notifications:
-
Click the bell icon in the top bar.

Viewing CommPeak Portal notifications
-
In the window, that opens click See all notifications.
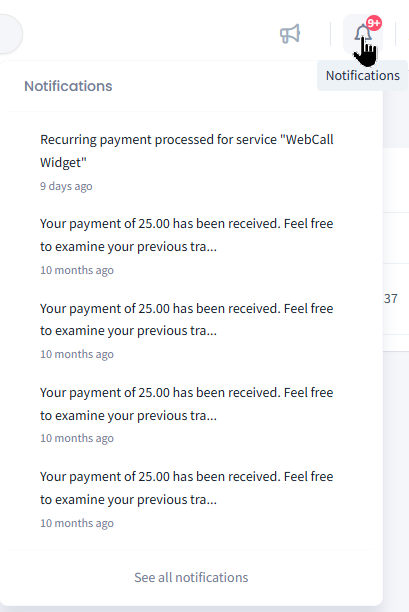
Notifications window
- The Notifications page opens.
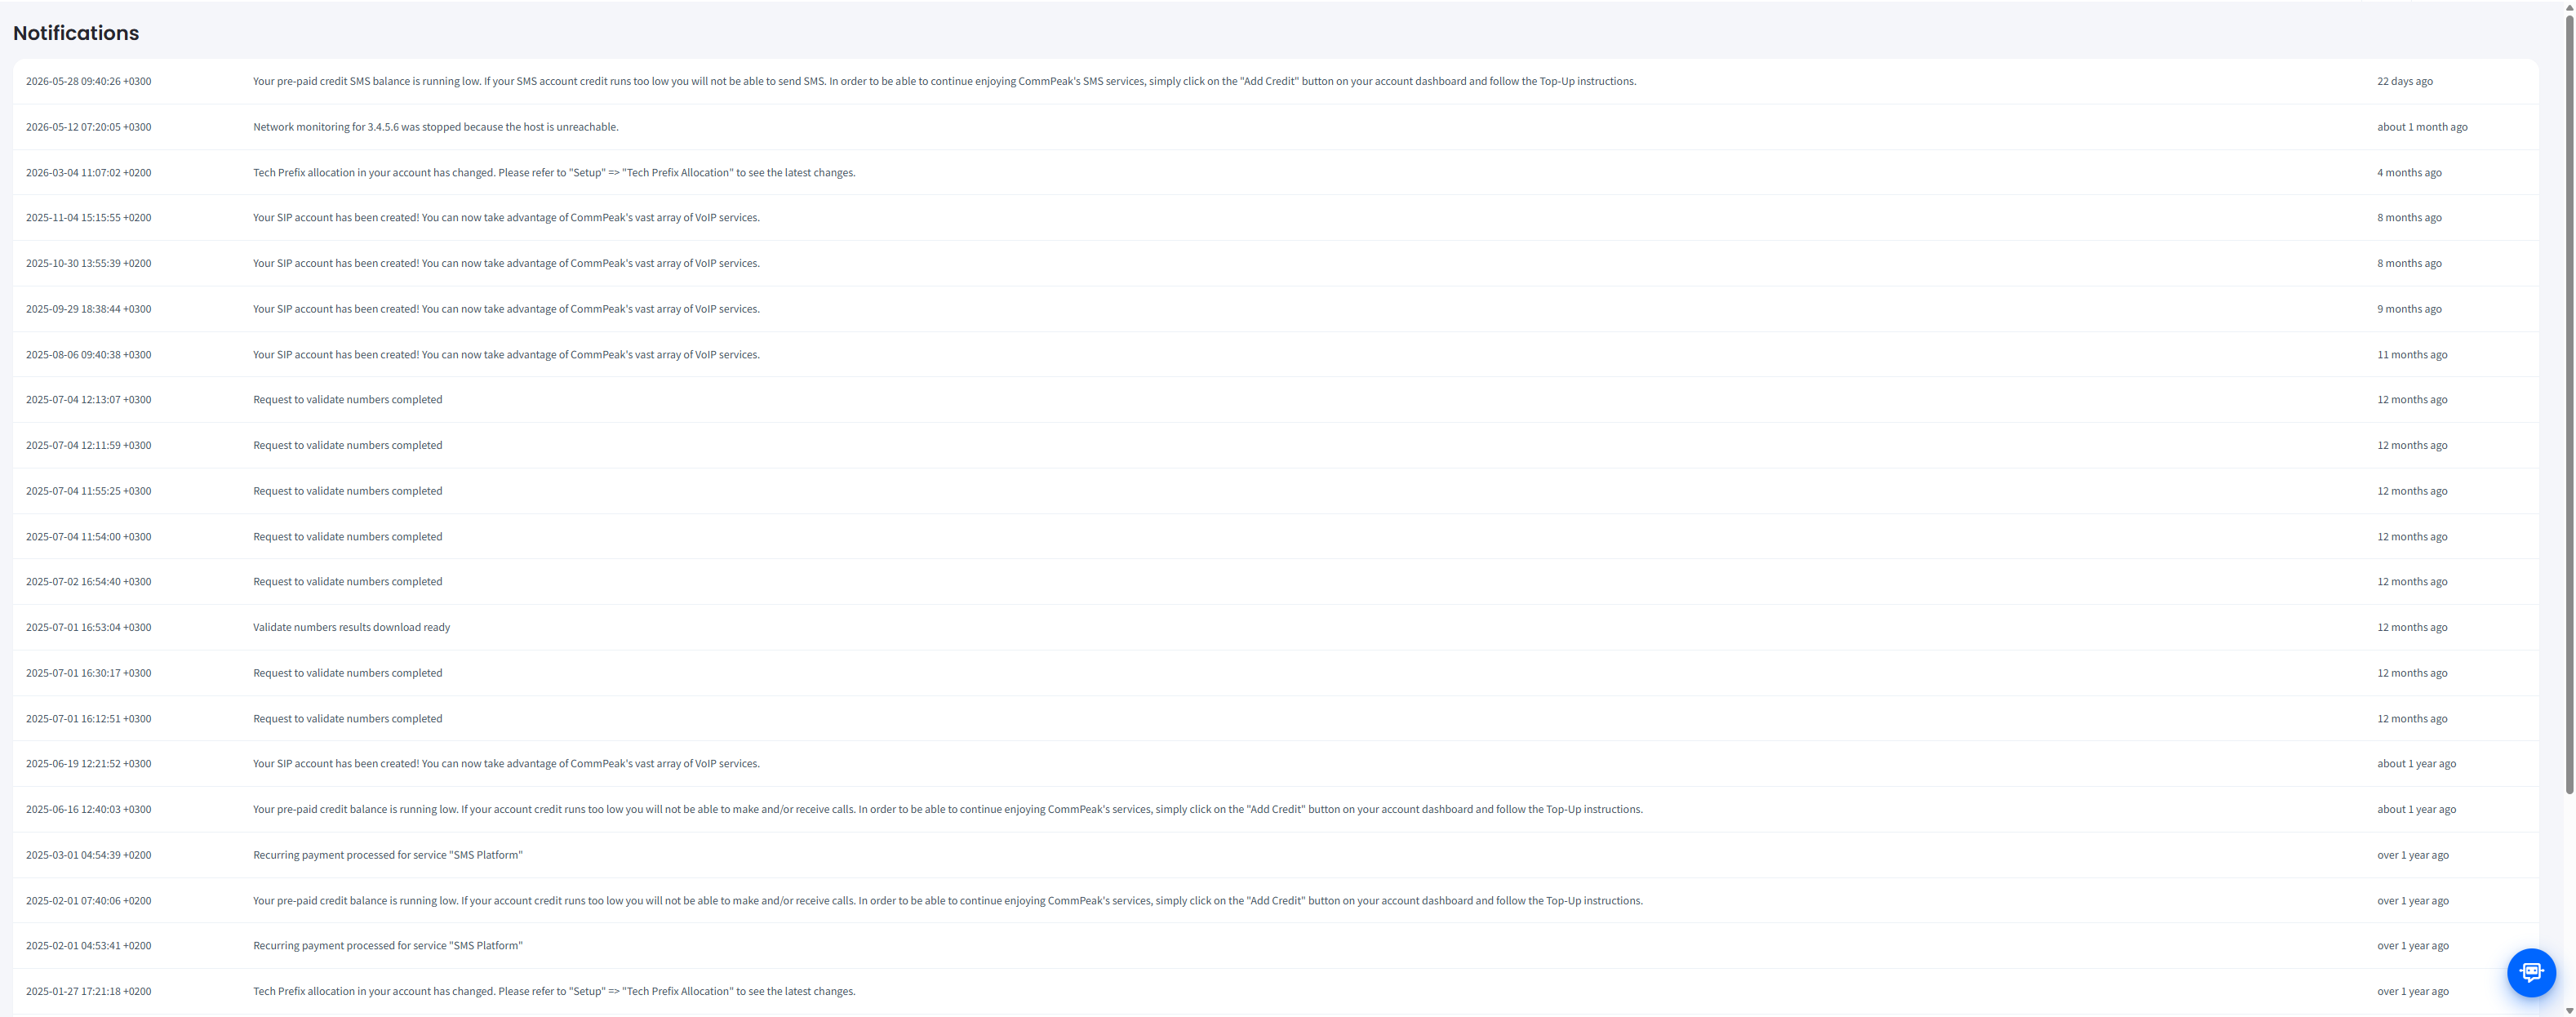
Notifications page
Opening the notifications tab
Email notification settings sit in your account settings, separately from the portal notifications above.
To open the Notifications tab:
- Log in to CommPeak Portal.
- Expand the Settings section in the main menu.
- Click the Notifications tab.
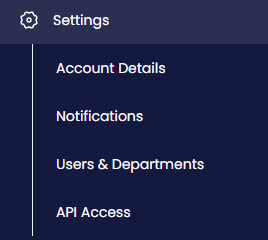
Settings > Notifications tab
Choosing which notifications you receive
The Notify me about.. section controls the notifications CommPeak sends to you, the account owner. Turn each one on or off with its toggle, then click Save changes.
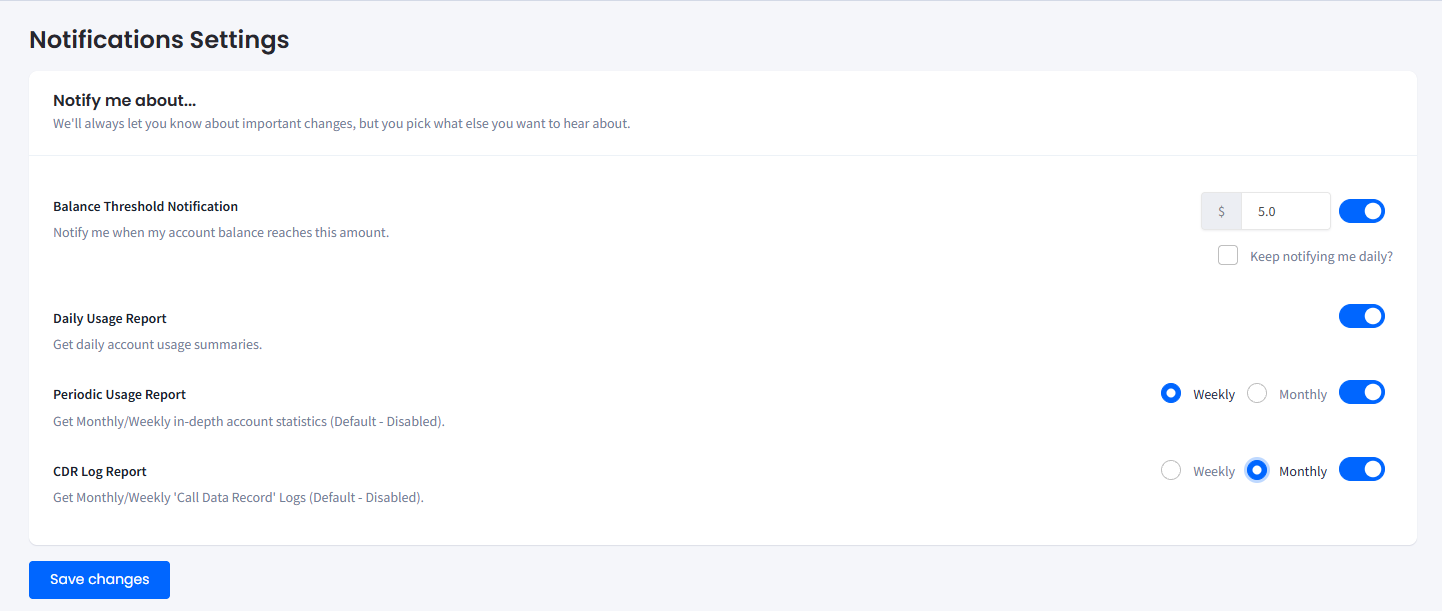
Notifications >Notify me about... section
The section includes the notifications described below.
| Notification | What it sends |
|---|---|
| Balance Threshold Notification | An alert when your account balance reaches or drops below an amount you set. Enter the amount in the field beside the toggle. Select Keep notifying me daily to get a reminder every day until you top up the balance. |
| Daily Usage Report | A daily summary of your account usage. |
| Periodic Usage Report | In-depth account statistics: click the toggle to choose whether to receive detailed account statistics weekly or monthly. |
| CDR Log Report | Call Detail Record (CDR) logs: click the toggle to define if you want to receive a call data record log and how often. |
These toggles apply only to your own address. To send the same notifications to a colleague or a shared mailbox, invite them as a recipient instead - see Notifications Settings.
Notification groups
Recipients subscribe to groups rather than to individual notifications. Each group bundles related notifications, so you assign a recipient once instead of maintaining a list per notification type. A recipient can belong to one group, two, or all three.
The table below describes each group and what it contains.
| Group | Notification | What it covers |
|---|---|---|
| Analytics & Monitoring | Daily Report | Frequent activity summaries |
| Analytics & Monitoring | Weekly/Monthly Report | High-level trend overviews |
| Analytics & Monitoring | Monitoring Report | Spam-check results for your DID Numbers |
| Service Updates & Renewals | Rates update | Voice and SMS rate changes |
| Service Updates & Renewals | Recurring Services/DID Notifications | Upcoming payments for recurring services and DID Number renewals |
| Service Updates & Renewals | Account & access changes | SIP/FTP credentials and Caller ID status updates |
| Billing & Invoicing | Low Balance | Balance threshold reminders |
| Billing & Invoicing | Payments & Invoices | Payment receipts, invoices, and billing updates |
Adding an email recipient
Recipients receive notifications at their own address. They confirm the invitation first, and they can change or cancel their subscription at any time without going through you.
- Log in to CommPeak Portal.
- Click your account name in the top-right corner.
- Select Account Details > Notifications.
- In the Email recipients section, click + Add recipient.
- Enter the recipient's name. A person's name or a team name both work; for example, Finance dept.
- Enter their email address.
- Under Subscriptions, select the groups the recipient should receive.
- Click Send invitation.
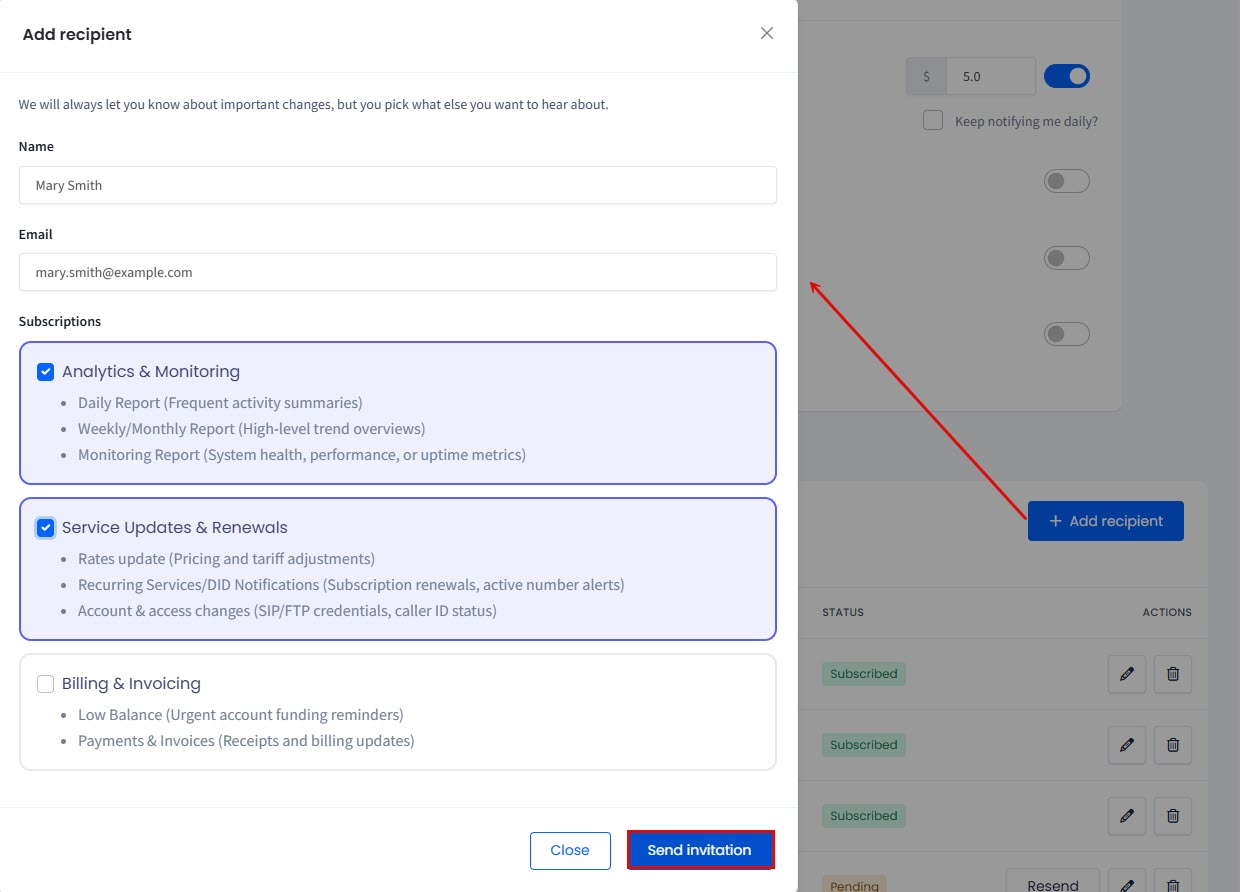
Add recipient dialog, with the Analytics & Monitoring and Service Updates & Renewals groups selected.
The recipient receives an invitation email with an Accept & Subscribe button. No notifications are sent until they accept.
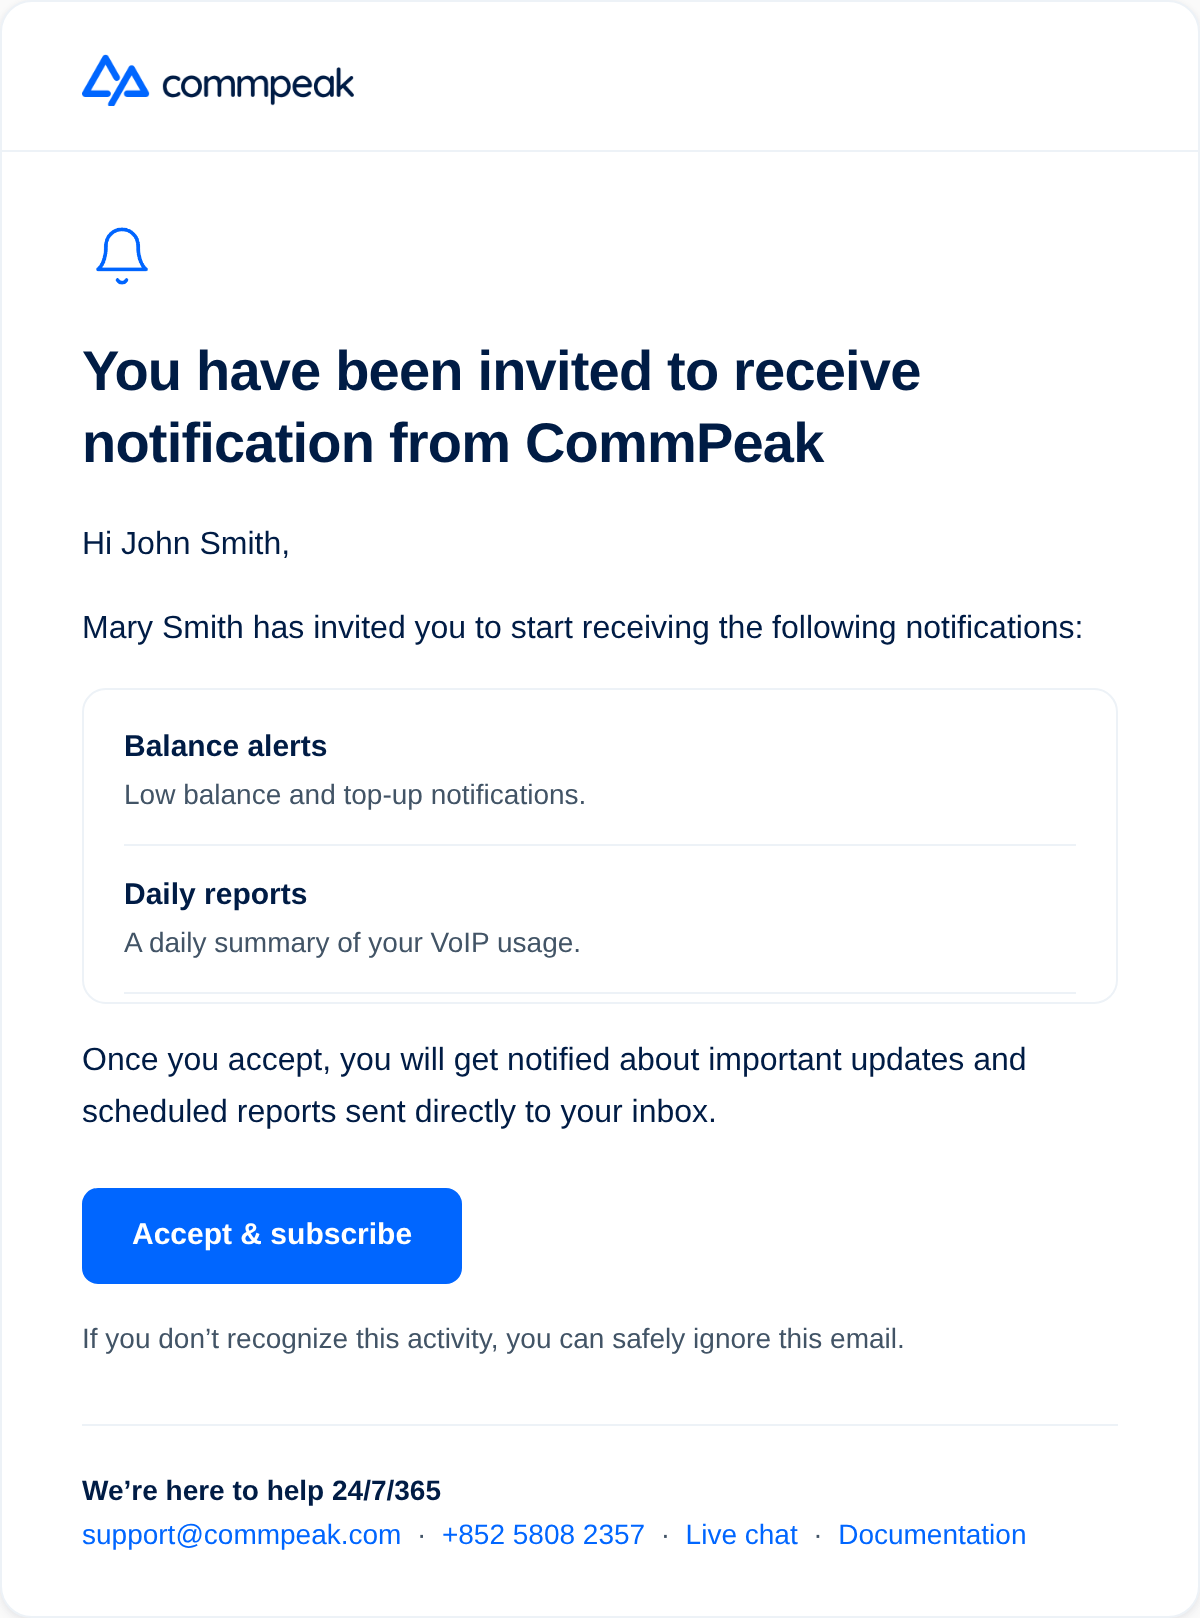
Invitation email
IMPORTANTA recipient's email address cannot be changed after the invitation has been sent. To correct a typo, remove the recipient and invite them again.
Invitation statuses
The Status column in the Email recipients table reports where each recipient stands.
The table describes the four statuses.
| Status | What it means | Notification emails sent? |
|---|---|---|
| Invitation sent | Shown for the first hour after the invitation goes out | No |
| Pending | An hour has passed and the recipient has not accepted yet | No |
| Subscribed | The recipient accepted the invitation | Yes, for their assigned groups |
| Unsubscribed | The recipient opted out of notification email | No |
NOTEInvitation sent changes to Pending automatically after one hour. A recipient has to accept before any notification email reaches them.
Resending an invitation
A Resend control appears on Pending rows. To send the invitation again, find the recipient in the Email recipients table and click Resend.
Invitation sent rows show no Resend control, since the invitation has been out for less than an hour.
For more on the one-hour rule, see Why Does My Recipient Show as Pending?.
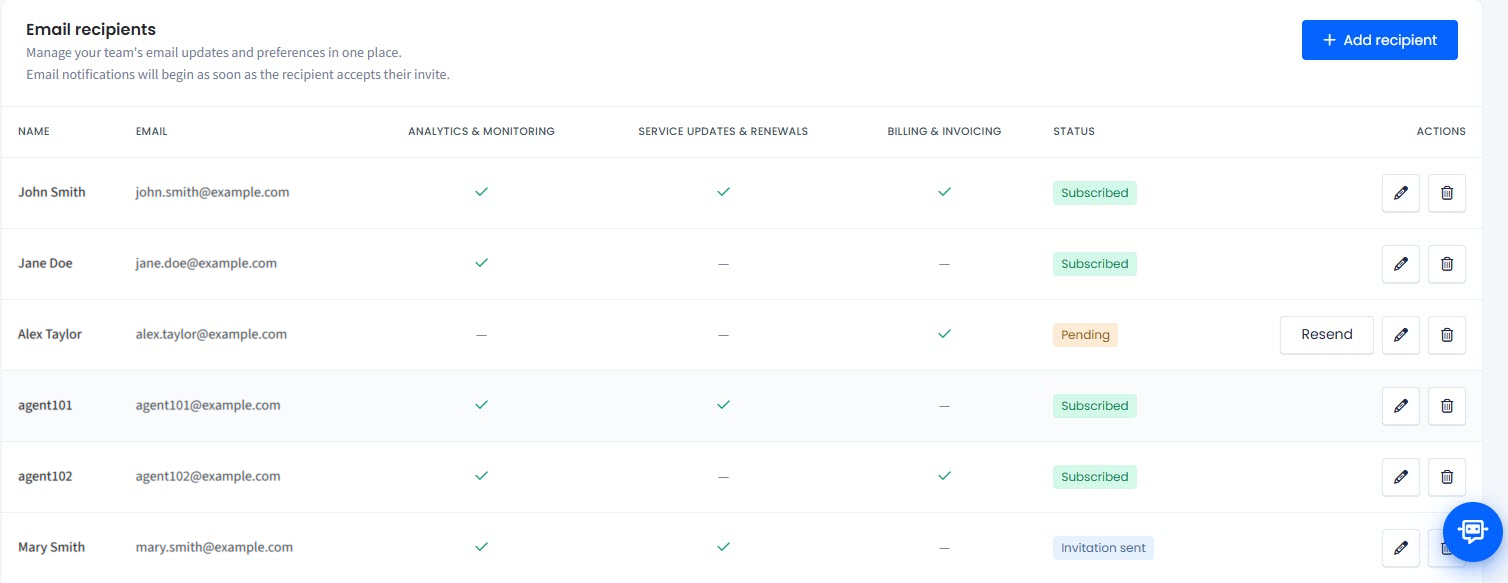
Email recipients table, showing the Subscribed, Pending, and Invitation sent statuses and the Resend action.
IMPORTANTOnce a recipient unsubscribes, only they can resubscribe. Re-inviting the same address does not restore their subscription - they have to opt back in from a CommPeak email themselves.
Editing or removing recipients
You can change a recipient's name and their assigned groups at any time.
- In the Email recipients table, click the edit icon on the recipient's row.
- Update the Name, or change which groups you have selected under Subscriptions.
- Click Save changes.
CommPeak locks the email address once you send the invitation. To change an address, remove the recipient and invite them again with the new one.
To remove a recipient, click the delete icon on their row. They stop receiving notifications immediately, and you can invite them again later.
Notification delivery and time zones
Routine notifications are delivered according to each recipient's timezone, so a recipient in Berlin and a recipient in New York receive their daily report at the same local hour.
Three notifications do not follow the recipient's time zone:
- Low Balance
- Monitoring Report
- Recurring Services/DID Notifications.
NOTETime zone scheduling applies per recipient, not per account. Changing one recipient's time zone does not affect anyone else on the list.
Managing a subscription as a recipient
Every notification email includes a Manage subscriptions link in the footer. Recipients use it to adjust their own subscription without going through the account owner.
From that link, a recipient can:
- Unsubscribe from all notification email.
- Opt out of individual notification groups.
A recipient can only unsubscribe from the groups assigned to them in the invitation. Their status in the Email recipients table changes to Unsubscribed when they opt out of everything.
Unsubscribing belongs to the recipient, so re-inviting the same address leaves the recipient Unsubscribed. To start the email again, ask them to click Manage subscriptions in any CommPeak email they still hold and turn their groups back on.
WARNINGAn unsubscribed recipient stops receiving notification email for the groups they opted out of. Check the Status column if someone reports missing notifications.
TIPAfter making all the necessary changes, make sure to click Save changes at the bottom of the page.
For more on reversing an unsubscribe, see Can I Resubscribe Someone Who Unsubscribed?
Updated 3 days ago