Creating a Single User
Create a user account in your PBX system, set up user information, assign groups and roles, and configure extension and security settings.
You can create users one by one or add multiple users at once from a CSV file.
From the following instructions, you will learn about creating one account for a single new user in CommPeak Cloud PBX, assigning a group and a role to them, and making SIP settings for the user.
Also, learn how to add users in bulk.
To create a user account:
-
Expand the Users tab and select User Management.
-
You will see the list of existing users. Click Create New User.
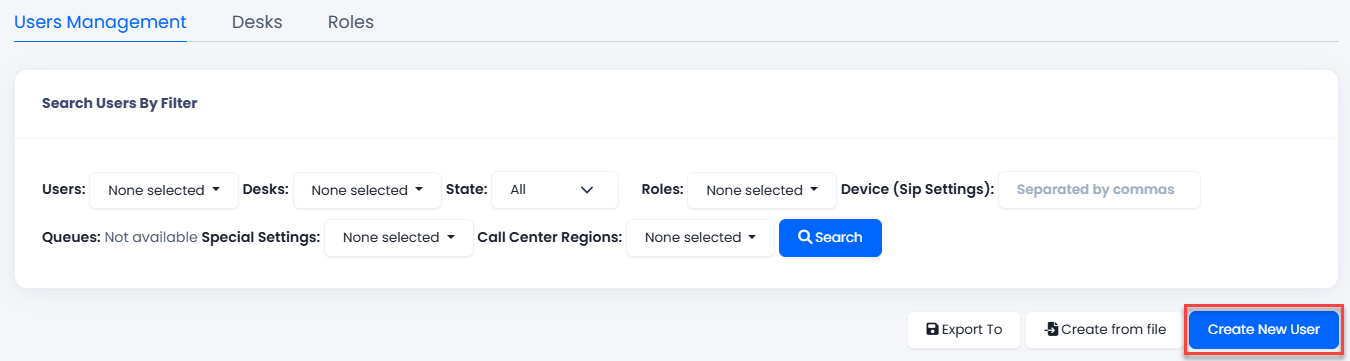
Users Management tab
-
On the New User page that opens, fill in the fields as explained in the sections below.
NOTEThe fields marked with an asterisk (*) are mandatory.
User General Info
At the top of the New User page, you will see the general settings:
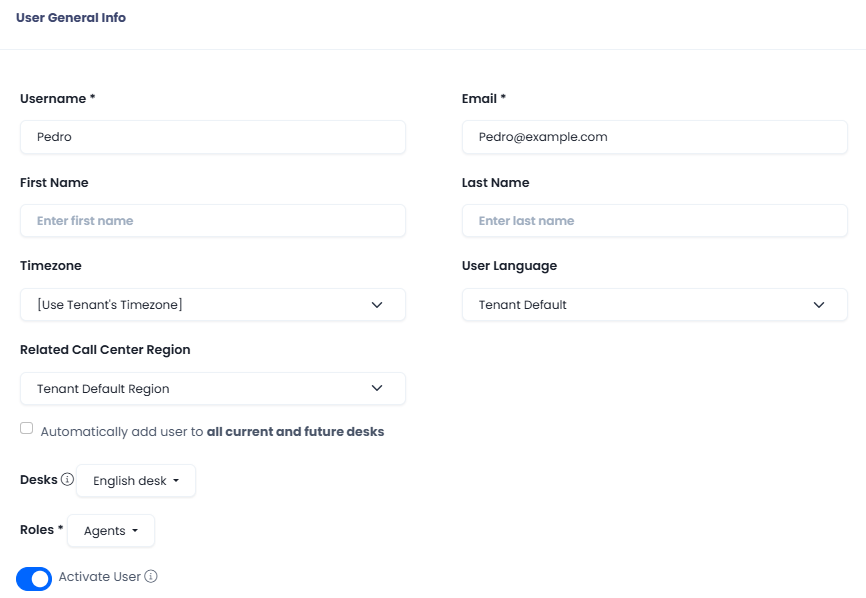
General details of the user
| Field | Description |
|---|---|
| Username | Enter the name of the user in the system. |
| Enter the user's email. | |
| First Name | Specify the first name of the user. |
| Last Name | Specify the last name of the user. |
| Timezone | Select a timezone from the list or leave the default value - the timezone set for the entire tenant. |
| User Language | Select a language from the list or leave the default value - the language set for the entire tenant. |
| Related Call Center Region | Assign the user to a call center region in the |
| Automatically add user to all current and future desks | Select this checkbox to include the user in all the existing desks and those to be created in the future. |
Desk s | Assign groups by language, experience, or any other criteria to which the user will belong. |
| Roles | Assign a set of permissions to the user. |
| Activate User | Select the check box to make the user active. |
User Extension Settings
Here, you define how the users will receive calls, set their extensions within the PBX, and configure other advanced settings.
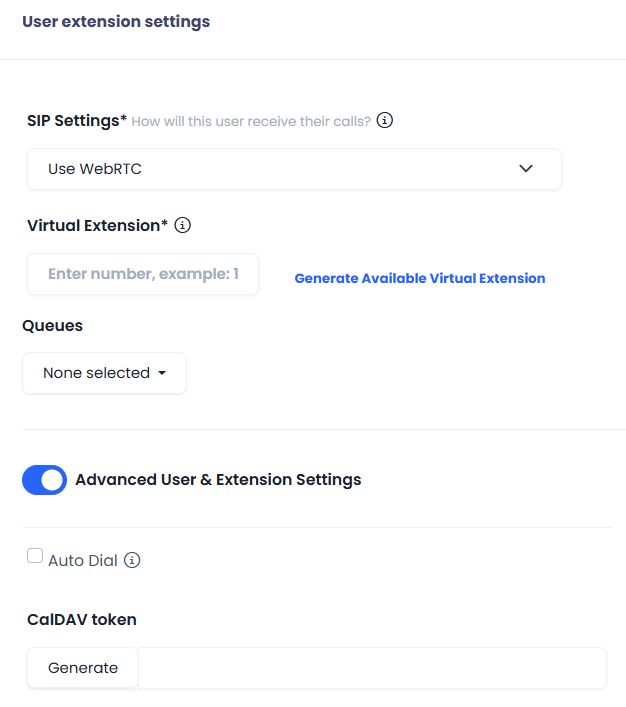
Extension settings of the user
| Field | Description |
|---|---|
| SIP Settings | Here, specify how the user will receive their calls:
|
| Virtual Extension | Enter a unique number that will be used inside the PBX, or click Generate Available Virtual Extension for the system to generate the number for you. The field is mandatory. The virtual extension allows agents to call one another, transfer calls internally, and perform conference calls of up to 5 people with internal and external participants. |
| Queues | Assign the user to one or more queues if queues are configured in your Dialer. |
| Advanced User & Extension Settings | Click on the toggle to expand the advanced settings. |
| Auto Dial | Select this checkbox to allow the user to work in the auto-dialing mode. |
| CalDAV token | Specify the existing token or click Generateto create a new one. This token can be used to sync the account in Dialer with the user's calendar so the user can see their planned meetings. The feature works with Outlook and other webmails, such as Thunderbird, though it doesn't support Google Calendar. |
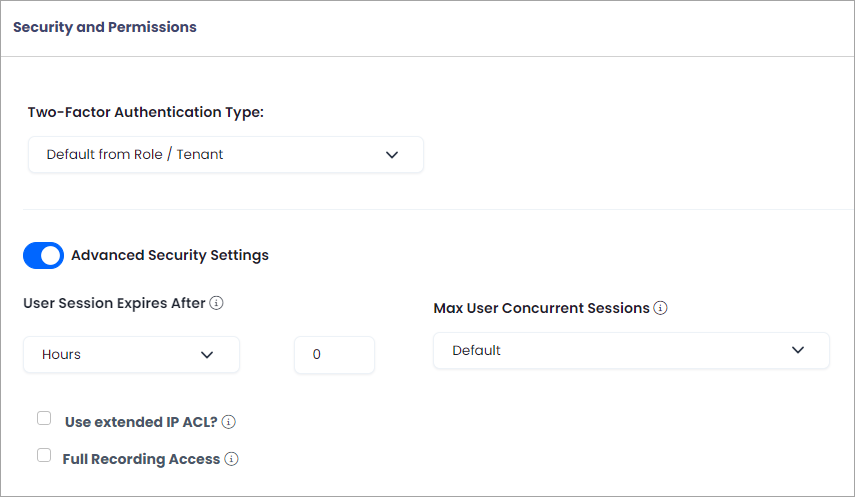
Security and Permissions
In this section, you can configure an authentication type for the user and other security settings.
Security and permission settings
| Field | Description |
|---|---|
| Two-Factor Authentication Type: | Leave the default value - the authentication type set for the role and the entire tenant, or choose one from the drop-down list:
|
| Advanced Security Settings | Click on the toggle to expand the advanced settings. |
| User Session Expires After | Specify in how much time the user will be logged out. See the tooltip for more details. |
| Max User Concurrent Sessions | Specify the number of sessions that the user will be able to log in to at the same time. See the tooltip for more details. |
| Use extended IP ACL? | Select the checkbox to allow the user to access the system via extended IPs. See the tooltip for more details. |
| Full Recording Access | Select the checkbox to give the user full recording access. See the tooltip for more details. |
After completing all the settings, click Add User at the bottom of the page.
Updated 6 months ago