Leverate Click2Call
Step-by-step instructions for integrating your Leverate CRM with CommPeak Click2Call, enabling seamless call functionality from within your CRM.
Complete the following steps to make calls from your Leverate CRM using the CommPeak Dialer or Cloud PBX Click2Call integration.
Step 1: Register with Leverate
-
For registration, please navigate to the appropriate web page based on your CRM version:
VoipCloud version 365: https://voipcloud365.tradingcrm.com/Account/Register.
VoipCloud version 9: https://voipcloudv9.tradingcrm.com/account/register. -
Fill in the registration form:
User Name: your Dialer or Cloud PBX subdomain
Email: <your Dialer/Cloud PBX subdomain>@commpeak.com
Password: create a new password and confirm it.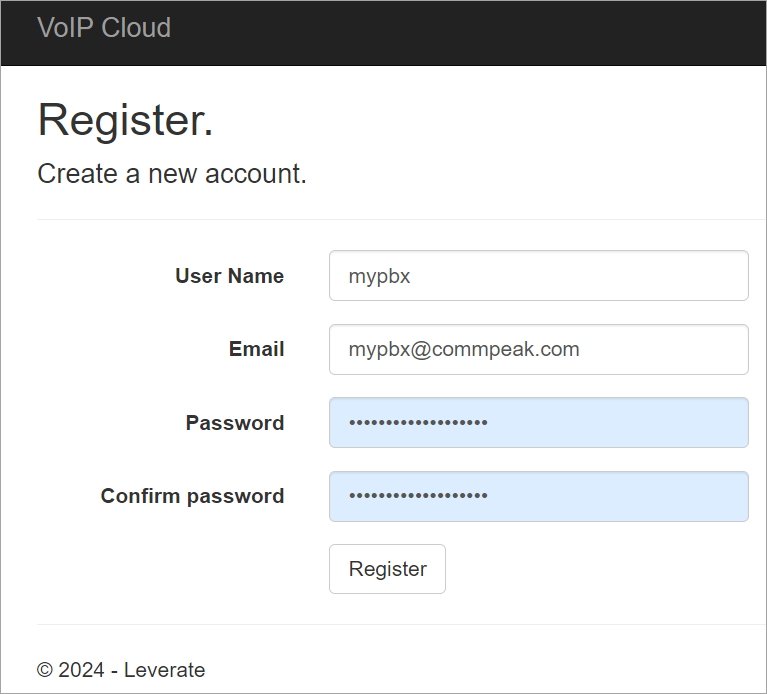
Leverate registration form
-
After you click Register, the system will generate your secret key. Copy the key.
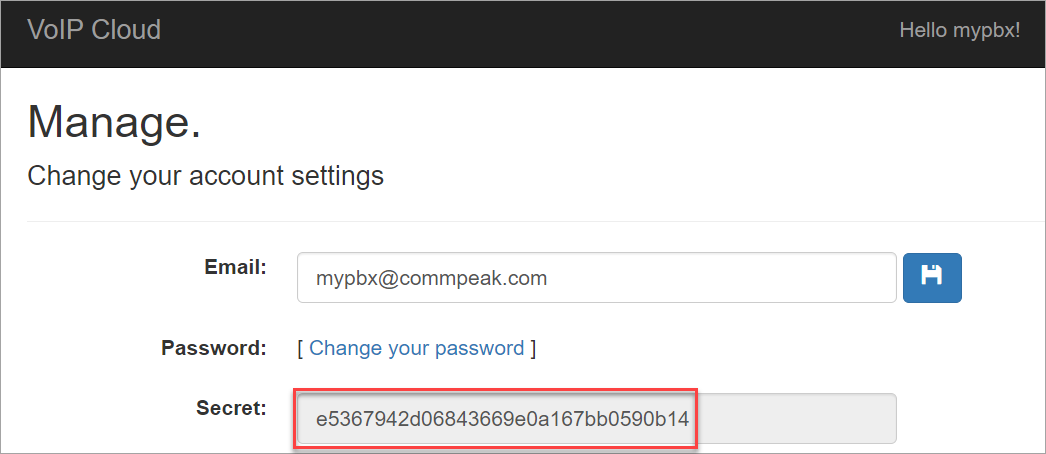
Secret key
Step 2: Add Click2Call Integration
-
In your CommPeak Dialer or Cloud PBX, go to Settings > Click2Call Integrations and click Create New Click-to-Call.
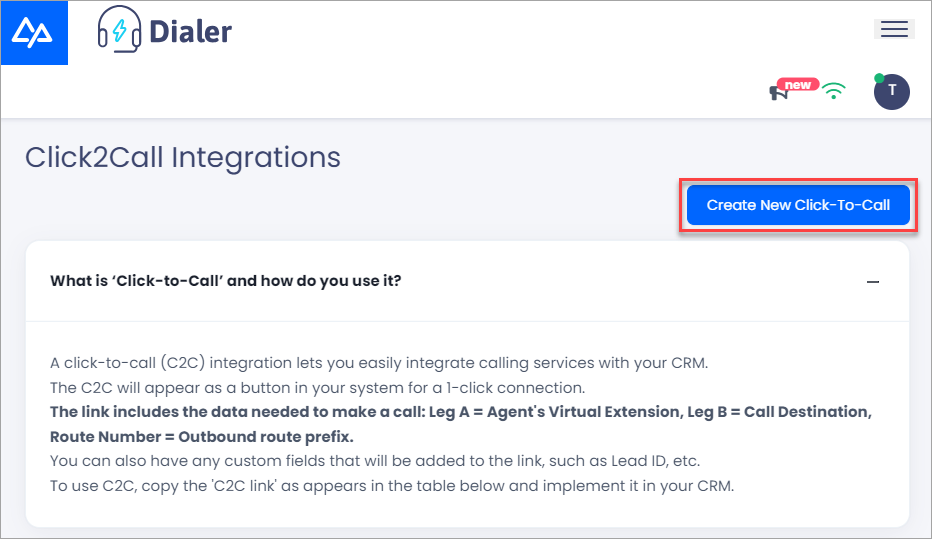
Create New Click2Call button
-
Enter data for your new integration:
-
CRM name: select Click-To-Call VoipCloud V9 or Click-To-Call VoipCloud V365.
-
AllowedIPs: enter the IP addresses you want to authorize for Click2Call integration, separated by commas.
-
C2C secret: enter the secret key you copied in Step 1.
-
C2C apiCode: your New Generation PBX subdomain.
-
Custom C2C Fields: the default parameters available for updates with the Leverate side are shown. Contact the support team or your Dialer manager if you would like to use other parameters.
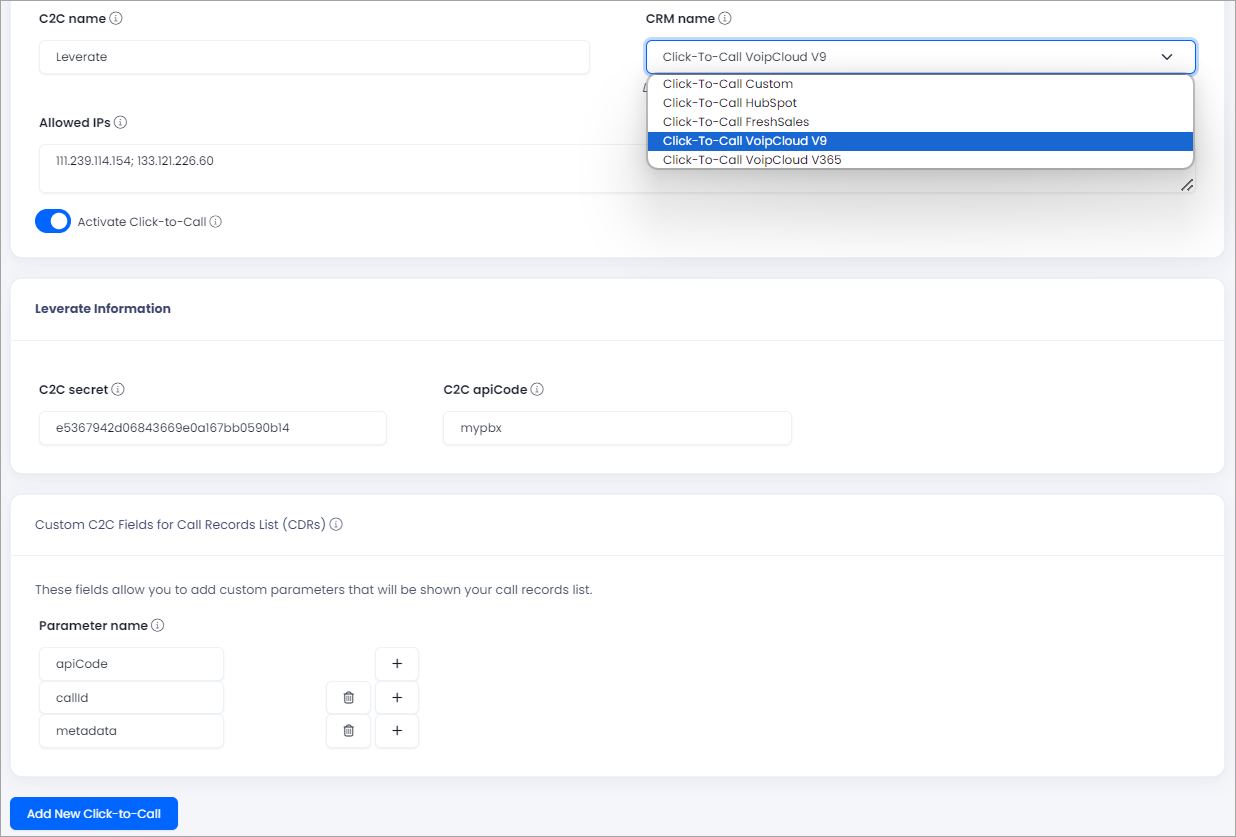
Click2Call settings
-
Click Add New Click-to-Call to finish.
-
The system will generate an integration link. Click the copy button to copy the link to your clipboard.
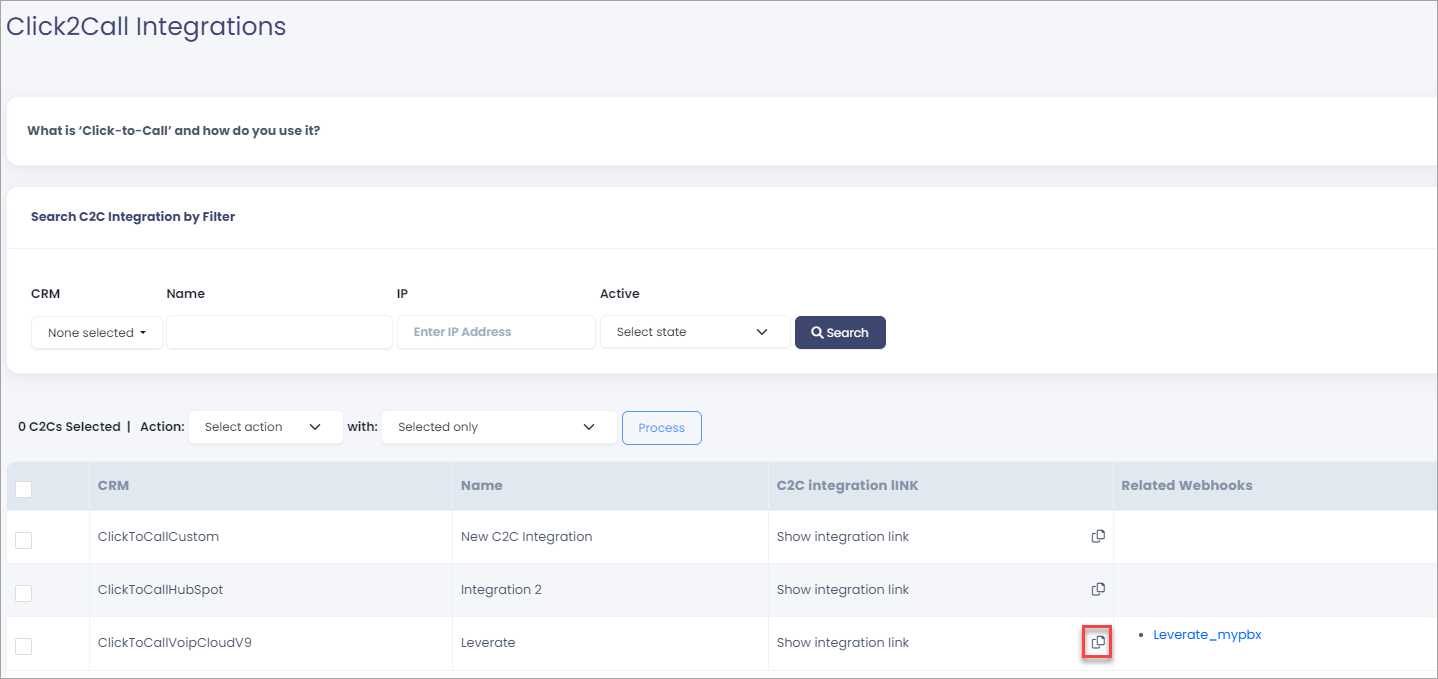
Integration link copy button
Step 3: Complete Integration on the Leverate Side
Return to the Leverate page and enter the link for both the autodialer and the started fields. Then click the save buttons.
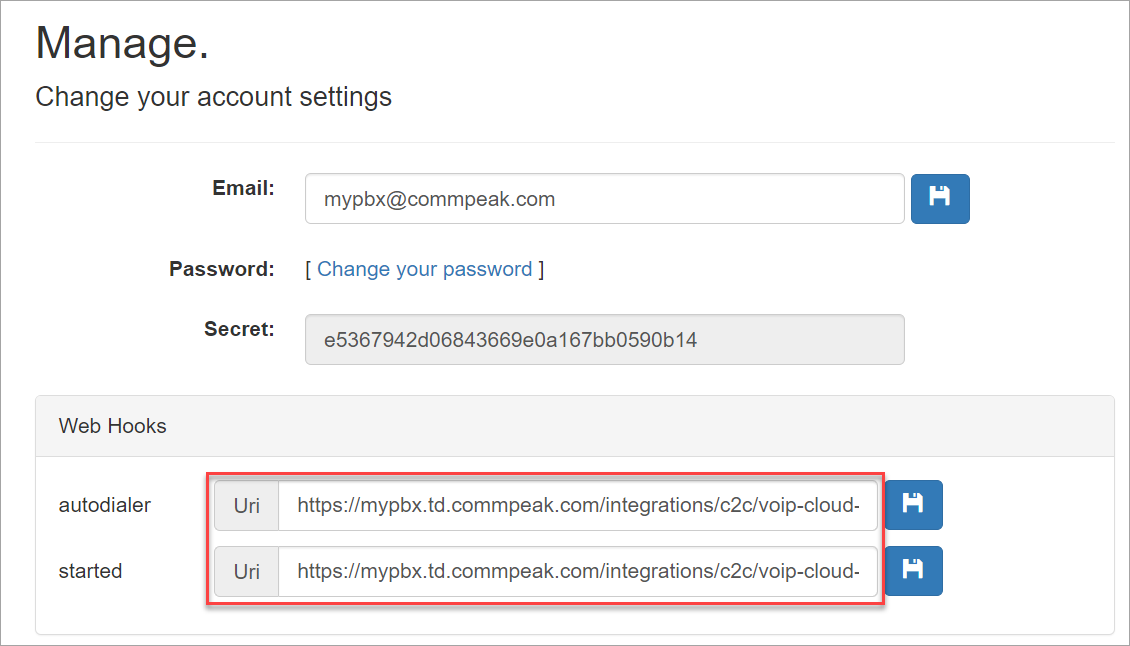
Leverate account settings
Step 4: Share IP Addresses
Share the following Dialer API proxy IP addresses with Leverate:
139.162.210.68
178.162.221.234
195.201.253.155
Making Calls
Once the installation is complete, follow the steps below to call your leads.
-
In your Leverate account, navigate to Accounts and click the lead you wish to call. Click Call Primary.
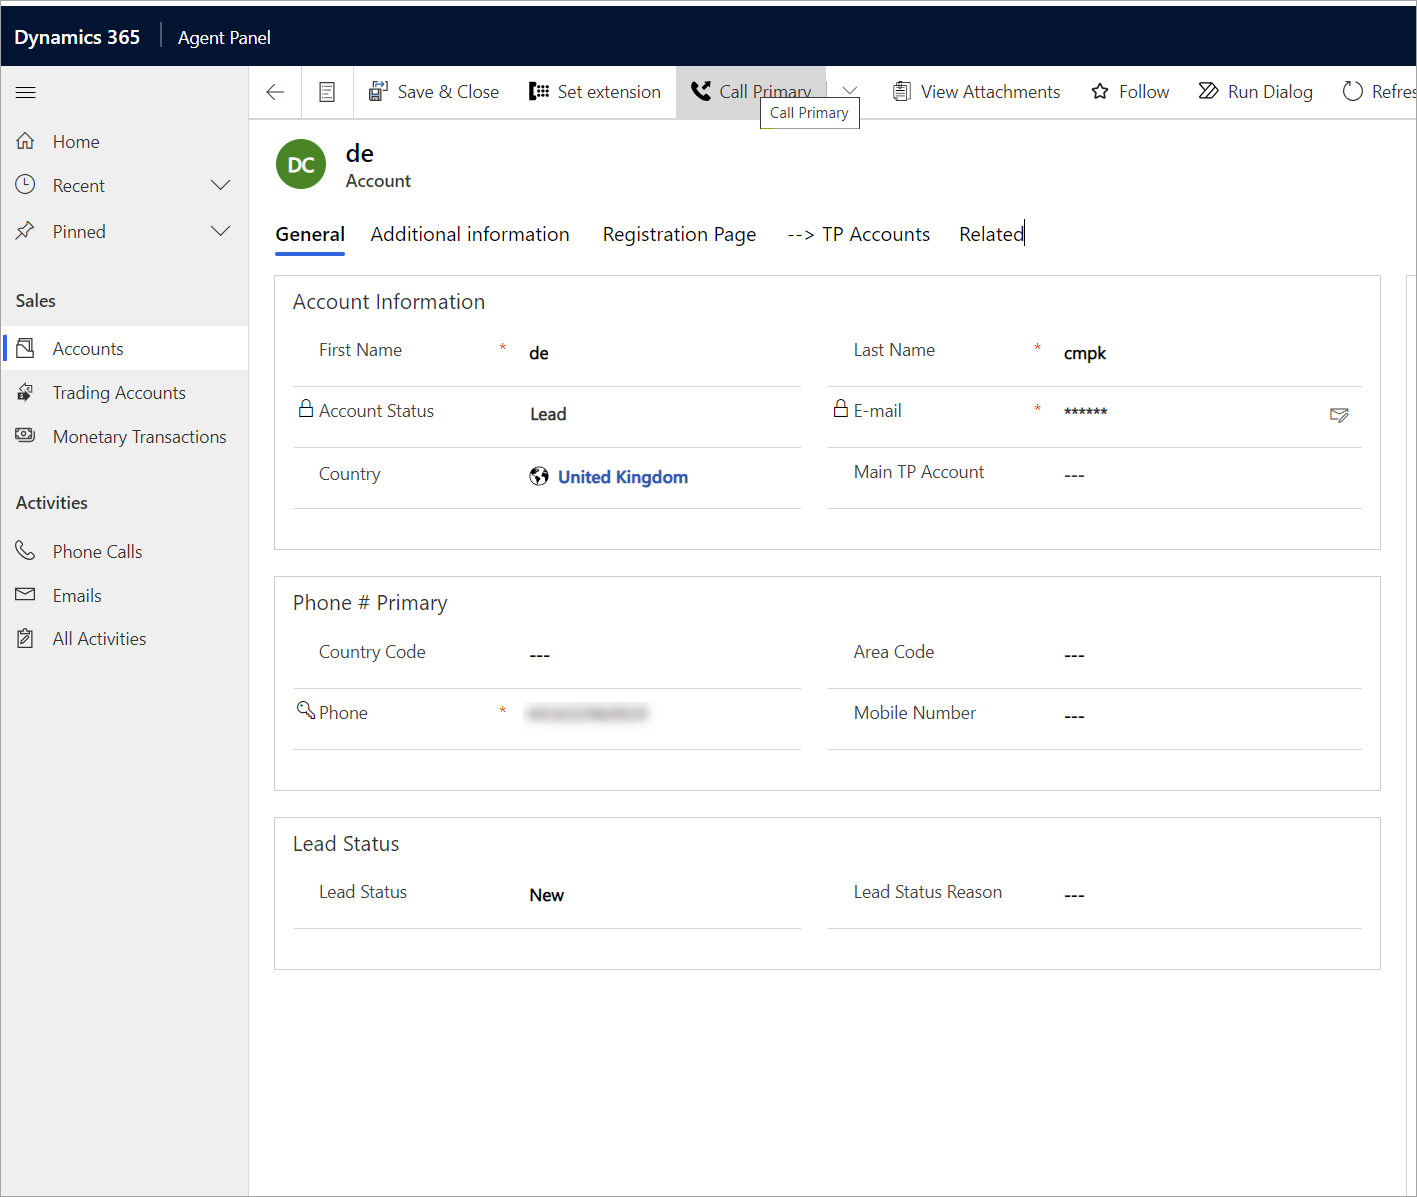
Call Primary button
-
Log in with your Dialer or Cloud PBX credentials.
-
If you have more than one suggested phone number, select the needed one in the drop-down list. Then click Start a call.
-
The system will initiate a call to your softphone client. We are using the built-in softphone. The incoming call looks as follows:
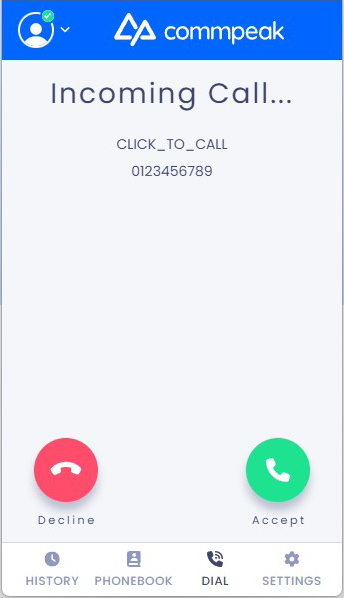
Click2Call incoming call
-
Click accept to answer the call.
-
Once you accept, the system will call your lead.
-
After the lead answers, a call will be established.
IMPORTANTEnsure that your IPs are included in the Public Recordings ACL to access call recordings via the CRM widget.
Updated 6 months ago