Creating Marketing Streams
This article will walk you through creating a marketing SMS stream step by step.
Video Tutorial
The Streams API in the CommPeak multi-channel messaging platform provides marketing routes to send customers Promotional SMS, product update announcements, and more.
To start creating a marketing SMS stream:
- Log in to TextPeak in your browser.
- Click Streams API in the main menu on the left.
- On the page that opens, click Create Stream API.

Create Stream API button
- Then, expand SMS and choose SMS Marketing in the pop-up window.
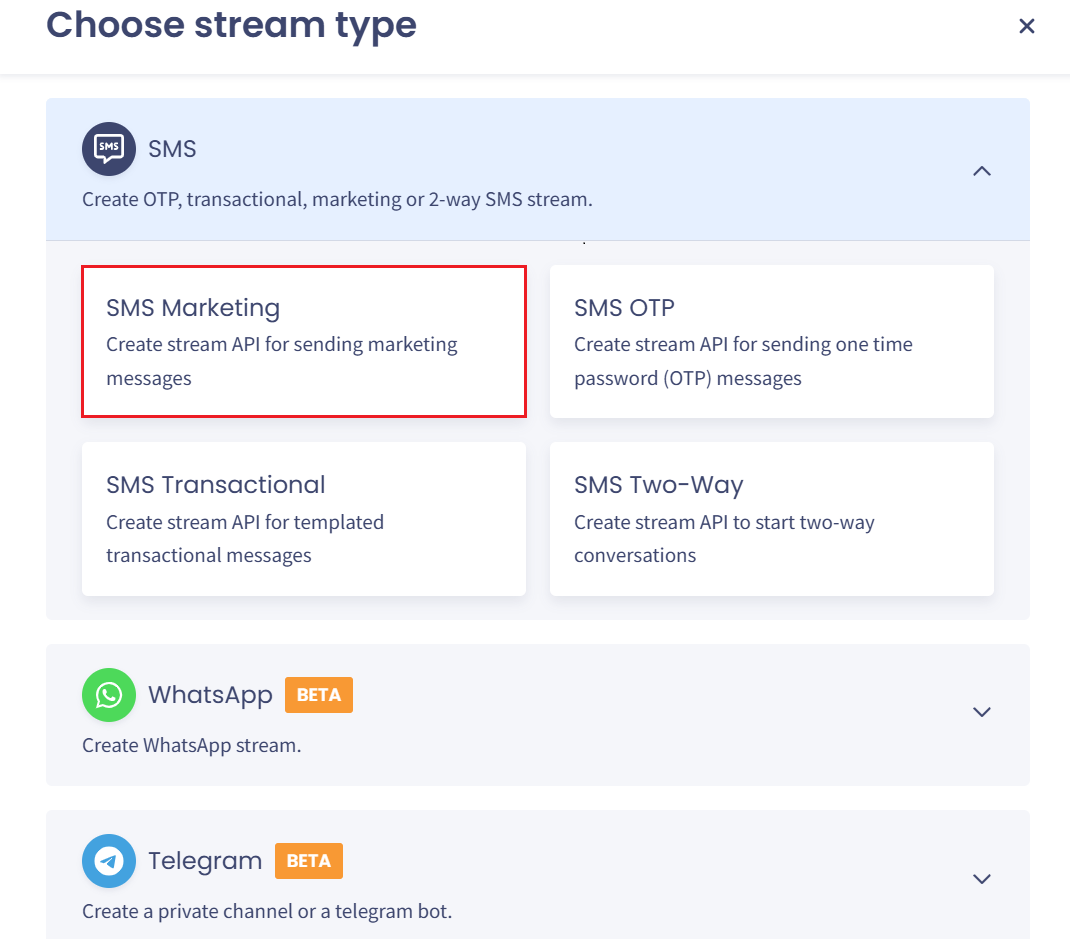
Stream type options: SMS Marketing
The Create New Stream wizard will load. Fill in the necessary information to complete each step.
Step 1: Stream API Details
Start with entering stream details.
- Stream API name - enter a meaningful name to locate the stream quickly.
- Stream API description - provide more information that will be visible when you open the stream.
- Enable IPACL - optionally, select the checkbox to limit access to the stream. Then, in the Add IP field, add one or more IP addresses from which you will make API calls. To add an IP, enter it and click Add
- Tags - create tags and apply them immediately to categorize your streams and quickly find the ones you need (optional). To add a tag, enter it in the field and then select from the drop-down.
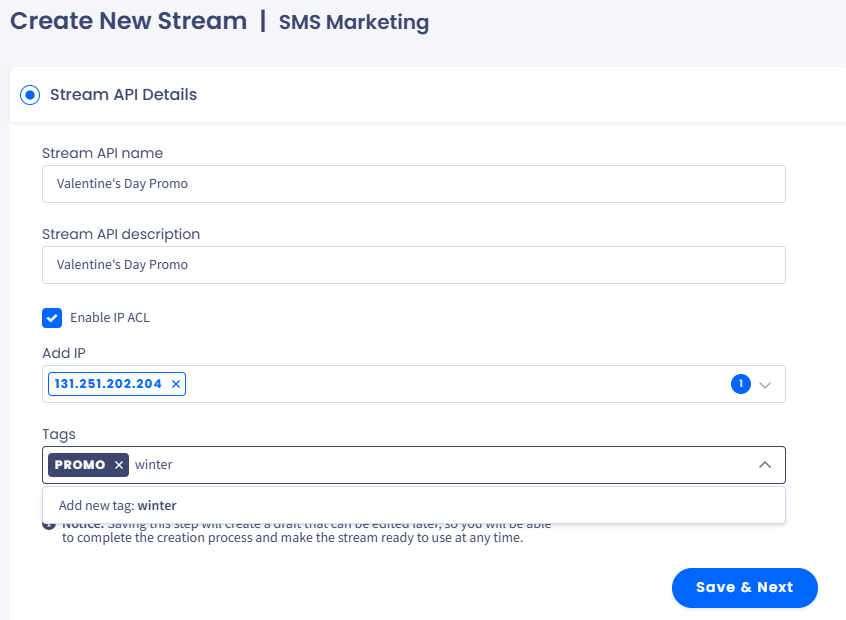
Create New Stream page
Click Save & Next to proceed to the next step.
NOTEYou can save the stream as a draft on each step and then complete the rest at any time later.
You can also enable the Demo Sending option to create a demo channel that simulates messaging flows without sending real messages. This option is available for any stream type and can be useful for testing and development use cases.
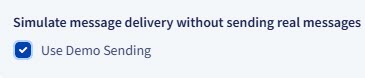
Enabling the Demo Sending option
NOTECheck the Creating Demo Channels section to learn more.
Step 2: Stream Summary
You can review stream details here.
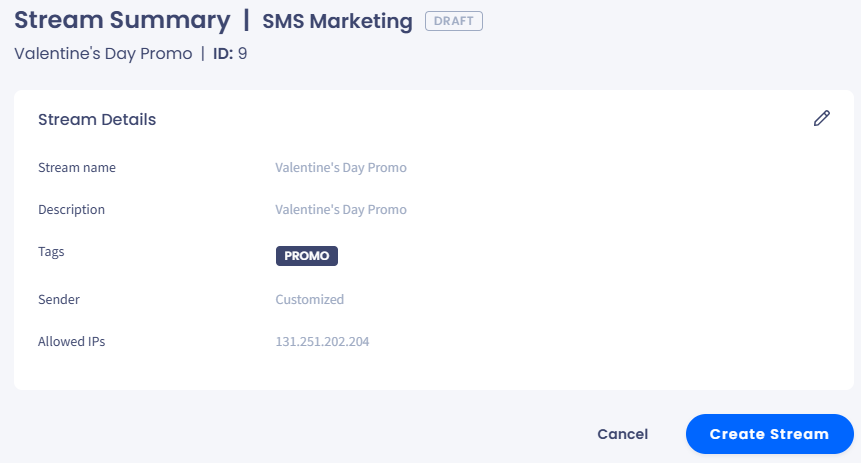
Stream Summary section
On the right, the API requests' preview is available. You can copy the endpoint or request body right away.
-
Send Request
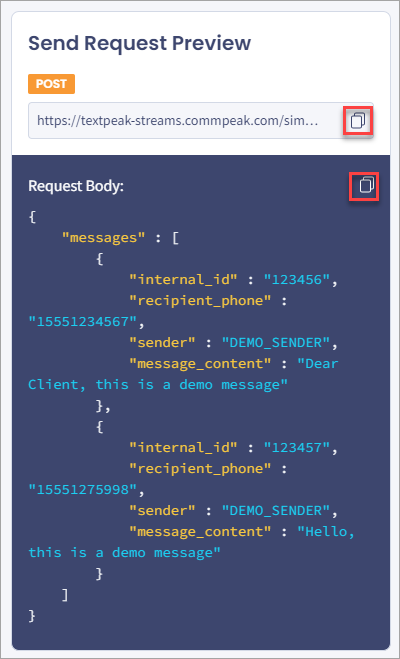
Send Request Preview section
-
Status Request

Status Request Preview section
After you click Create Stream, a pop-up appears. You can copy your authorization token here.
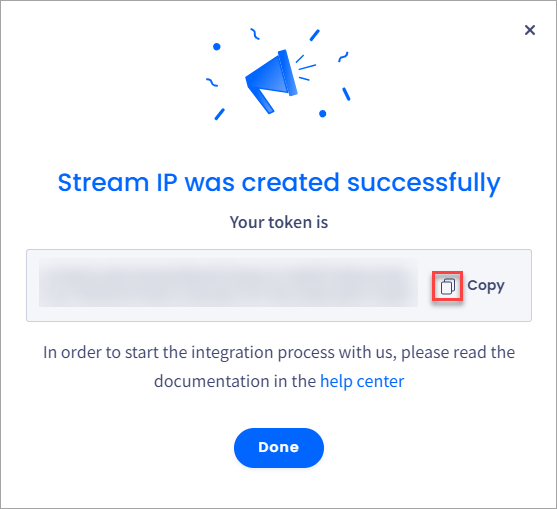
Stream IP was created successfully window
Finally, click Done. The new stream will appear at the top of your Streams API table.
Updated 2 months ago