Creating Voice Streams
Set up a voice stream to deliver OTPs and other voice-based notifications over a dedicated SIP account.
The Streams API in the CommPeak multi-channel messaging platform supports voice streams, which deliver one-time passwords and other voice-based notifications to your recipients over a dedicated SIP account.
A voice stream creates a SIP account behind the scenes in your CommPeak environment. You select a Caller ID from the numbers already available under your CommPeak Portal, and the stream becomes available to select as a Voice channel provider in the Omnichannel OTP Configurations.
NOTEA voice stream is currently scoped to OTP delivery. The underlying SIP account is a regular one and may support additional use cases in the future.
Creating Voice Streams
To create a voice stream:
- Log in to TextPeak in your browser.
- Click Streams API in the main menu on the left.
- Click Create stream API in the top right corner.

Create Stream API button
- In the Choose stream type dialog, expand Voice and select it.

Stream type: Voice option
- The Create New Stream | Voice page opens.
- Complete each section to set up the stream.
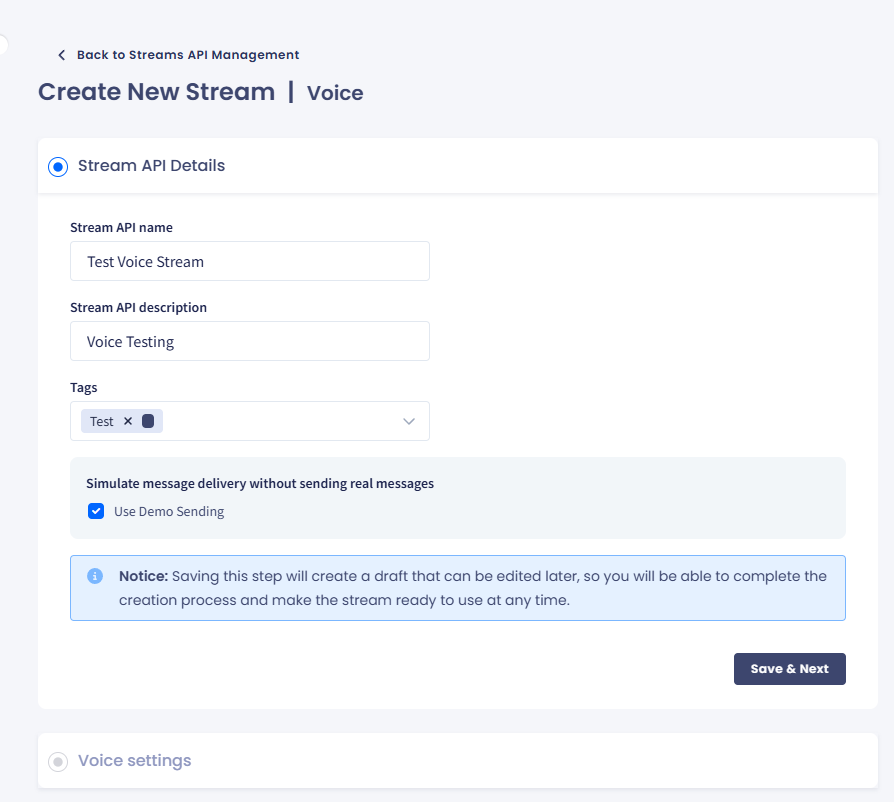
Step 1: Stream API Details
- Enter the basic stream information:
-
Stream API name: enter a meaningful name to locate the stream quickly.
-
Stream API description: optionally, provide more information that will be visible when you open the stream.
-
Tags: optionally, create or select tags to categorize your streams. To add a tag, enter it in the field and select it from the drop-down list.
Create New Stream: Voice page
- To test the stream without sending real calls, select Use Demo Sending under Simulate message delivery without sending real messages.
- Click Save & Next.
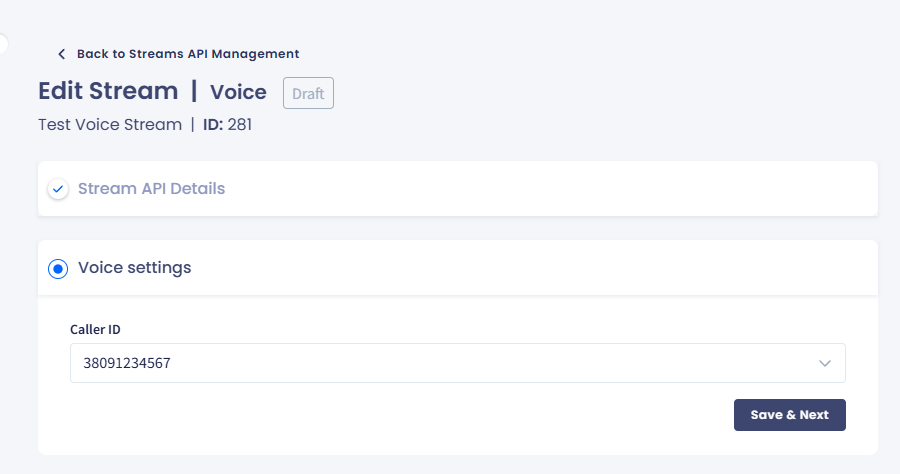
Step 2: Voice settings
Choose the Caller ID that recipients see when they receive a voice call from this stream.
- Open the Caller ID drop-down list.
- Select a number from the list of numbers configured under your CommPeak portal: this will automatically create a dedicated SIP Account.
Voice settings section
- Click Save & Next.
Caller ID sourceThe drop-down lists numbers configured under your CommPeak Portal account.
To add new numbers, see the DID Numbers documentation.
- Review the stream details and voice settings and confirm by clicking Create stream.

Stream summary page
- In the popup window that appears, click Confirm.
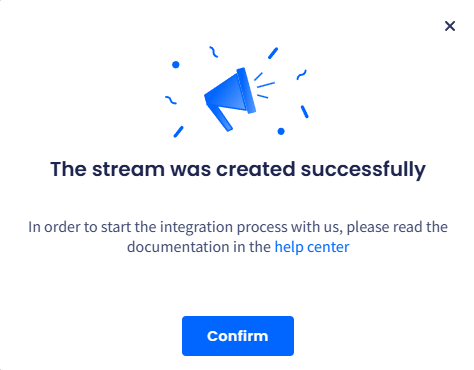
Stream was created successfully message
- The voice stream is created and appears at the top of your Streams API table. It's now available to select as the voice channel provider in your Omnichannel OTP Configurations.
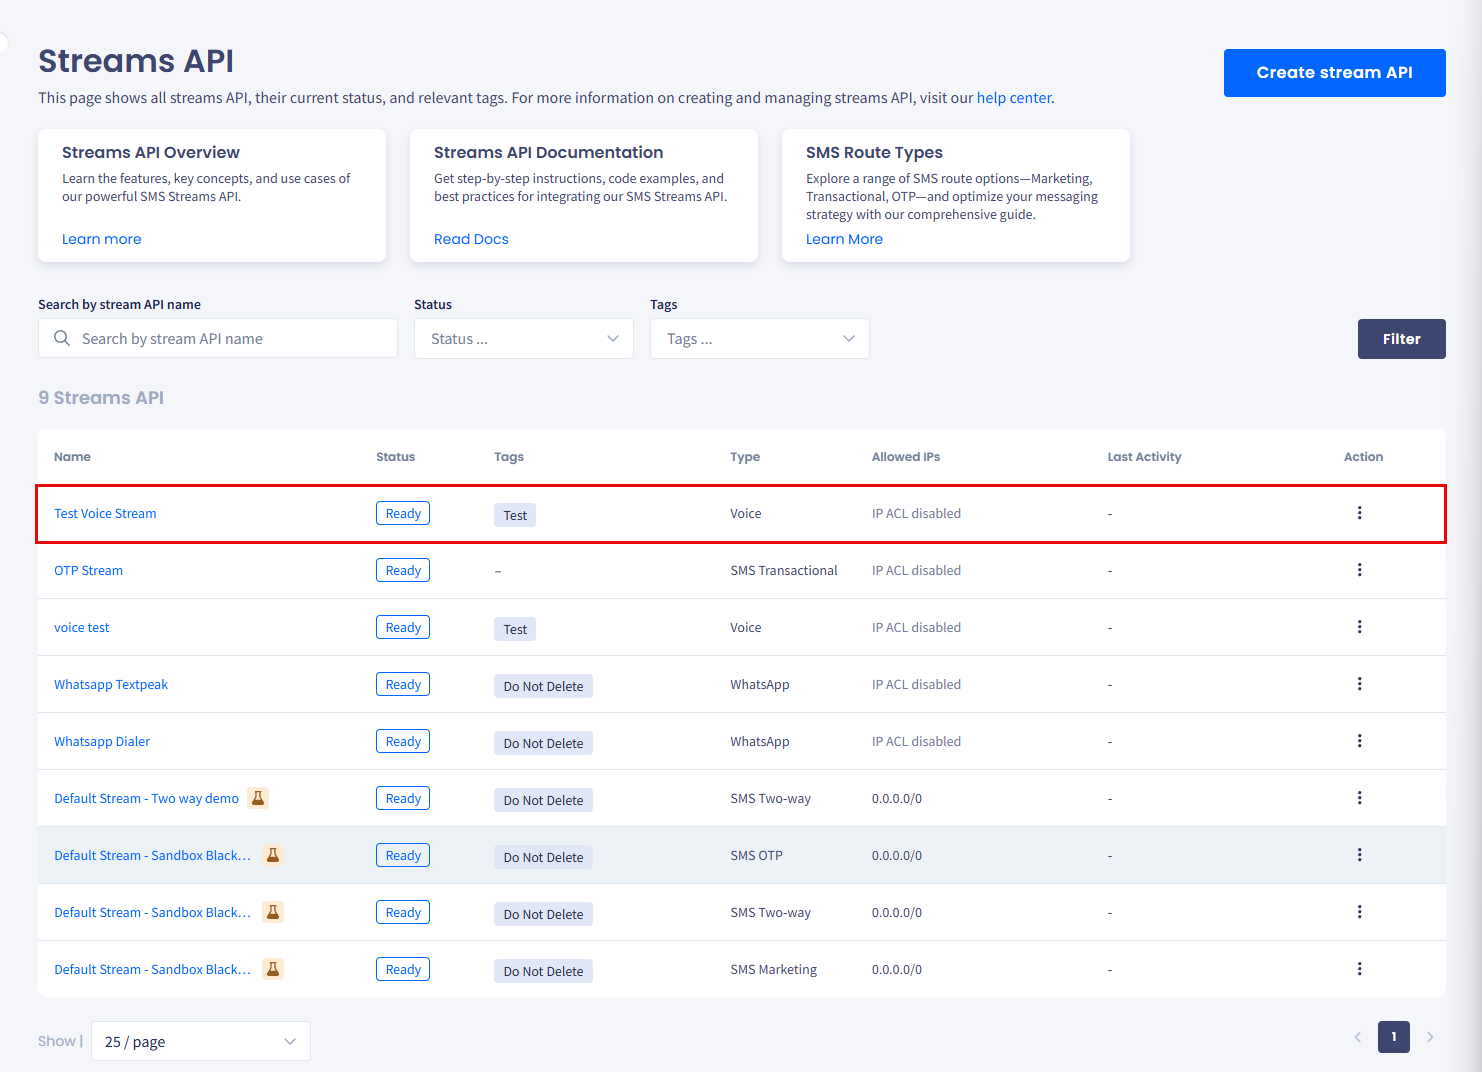
Streams API table
LIMITATIONYou can't delete the SIP account that a voice stream creates. Editing options for its rules are limited.
Related articles
Updated 8 days ago