Setting Voicemail for DID Numbers
Configure a voicemail message to play to customers when their call goes to voicemail due to incorrect DID forwarding or unreachable destination.
The DID Voicemail feature allows you to handle cases with failed incoming calls to your DID numbers. You can play messages for your customers when DID forwarding is incorrectly defined, or the configured destination is unreachable. In such cases, the call will go to the voicemail if the dialed DID number has a playback defined.
You have the option to either upload an audio file or enter a text, select a language and voice, and generate a greeting yourself.
The system will automatically play these messages to the customers and record voicemails. Subsequently, it will dispatch the recordings to the email addresses indicated in your Voicemail Playbacks settings.
All recordings are accessible within the Voicemail Report tab.
Configuring Voicemail Playbacks
To configure a voicemail playback:
- In your CommPeak account, go to the DIDs > Voicemail Playbacks tab.
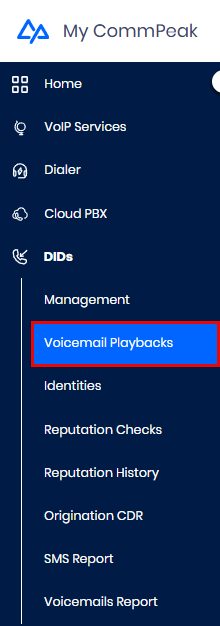
DIDs > Voicemail Playbacks tab
- Click the Add Voicemail Playback button to create a new voice playback.
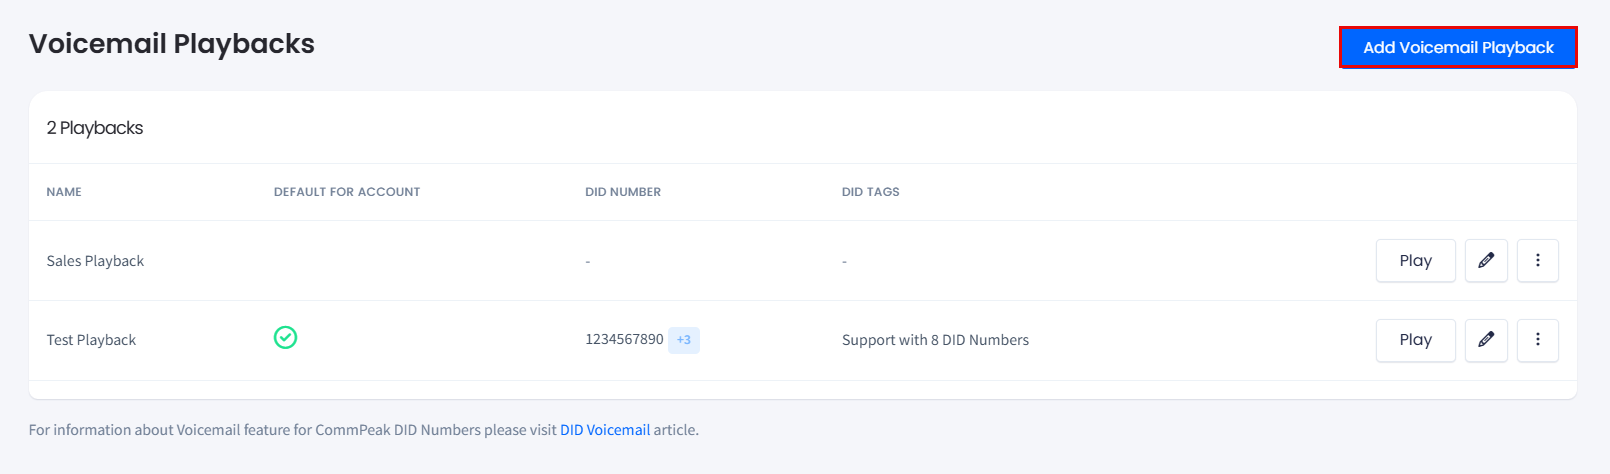
Voicemail Playbacks page
-
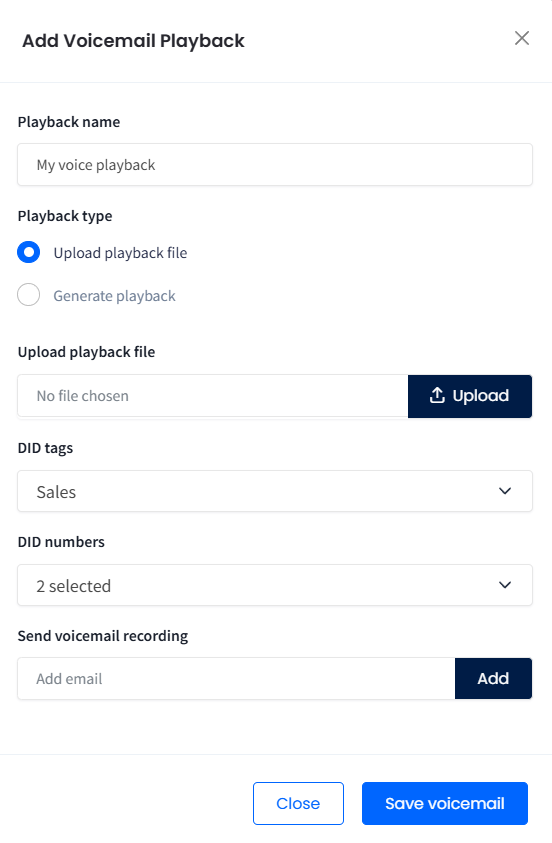
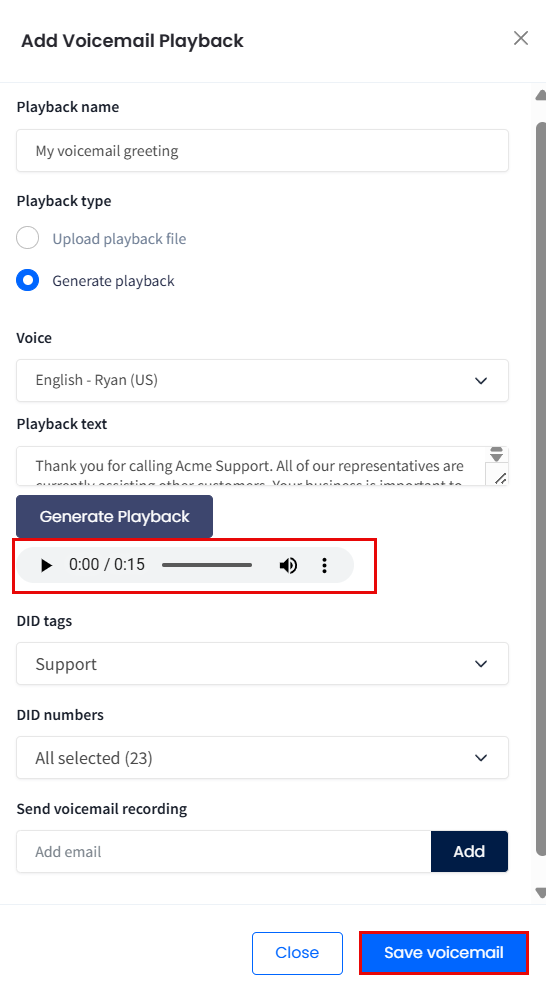
Complete the fields in the Add Voicemail Playback panel as follows.
-
Enter a meaningful title for your playback configuration.
-
Add a greeting message from a file or convert it from text:
-
Option 1. Use a ready file: Click Upload and select a .wav audio file from your drive.
Uploading a voicemail playback
-
Option 2. Convert text to sound: Select your language and voice, enter text for your message (resize the text field, if needed), and click Generate Playback.
-
Play the message to verify it sounds as expected.
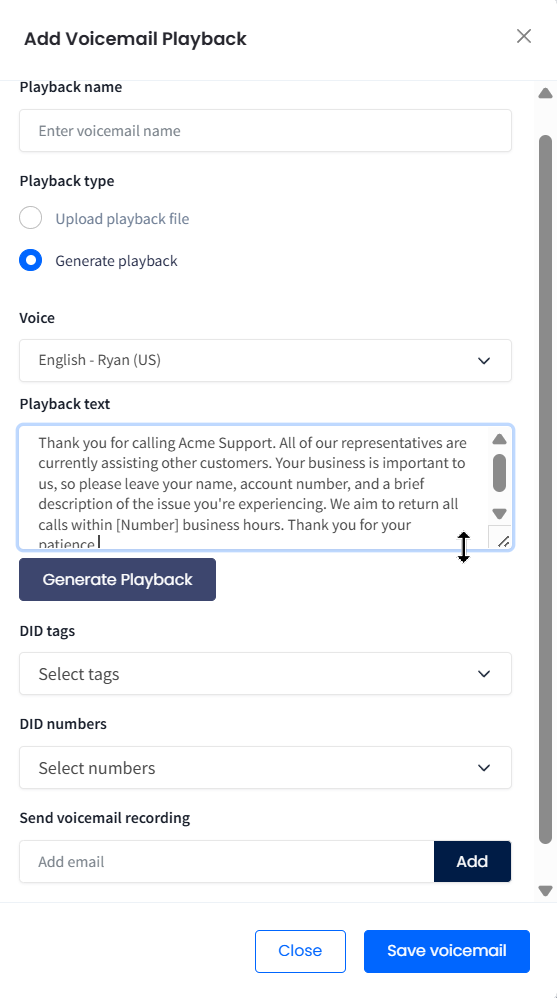
Generating a voicemail playback
-
Select the DID tags you want to add the the playback.
-
Indicate the DID numbers for which you'd like to set the playback. You can choose to add either the assigned tags, the numbers, or both. Use the drop-down menus to select your preferred items or opt for Select all to include all of them.
-
Add email address(es) where you wish to receive the recordings. To add an email address, enter it and click Add.
-
Finally, click Save voicemail.
Playing a generated file
-
-
Your newly added playback will appear on the page.
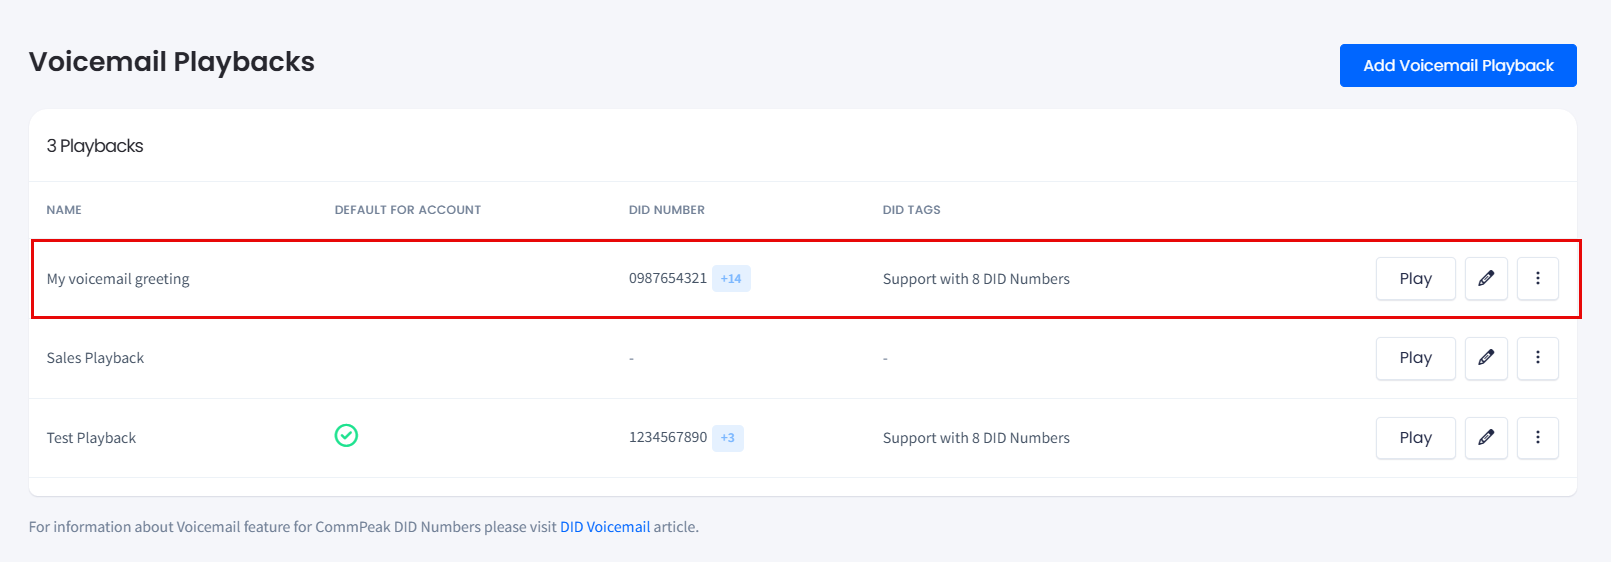
Playback added
You can create more playbacks for different DID numbers if needed.
Playing Voicemail Playback
Click the Play icon to preview how the recording will sound to your customers. While the audio is playing, you can use the on-screen controls to:
- Manage Playback: Pause, resume, or mute the audio as needed.
- Adjust Volume: Use the slider to find a comfortable listening level.
- Change Speed: Click the three-dot icon on the right to increase or decrease the playback speed.

Playing the voicemail playback
Changing Settings
- To set the default playback for all DID numbers in your account, click the three-dot action icon located on the right and select Set as default playback.

Setting a default playback for an account
- Click the three-dot action icon and select the edit icon to include additional DID numbers, delete existing ones, adjust email addresses, or modify other preferences.
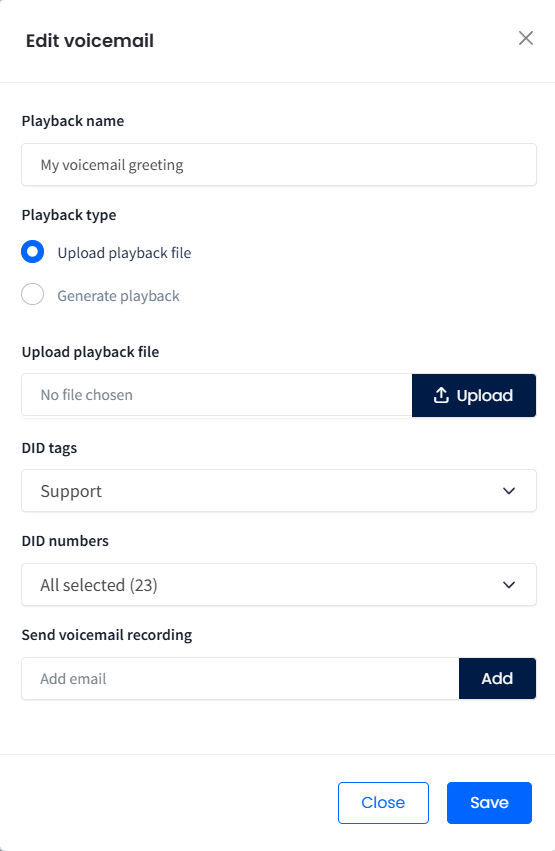
Editing voicemail playback
- To delete the playback, click the three-dot action icon located on the right and select Delete.
Viewing Received Voicemails
In the Voicemail Report page, you can see all reports of voicemails that the system recorded and sent to specified email addresses, including the sender's number (Caller ID), delivery time, and delivery email address(es).
To search for specific data:
- Apply the following filters:
- virtual number
- caller ID
- a preset or custom date range.
- Click Search. You will see the report output on the screen.
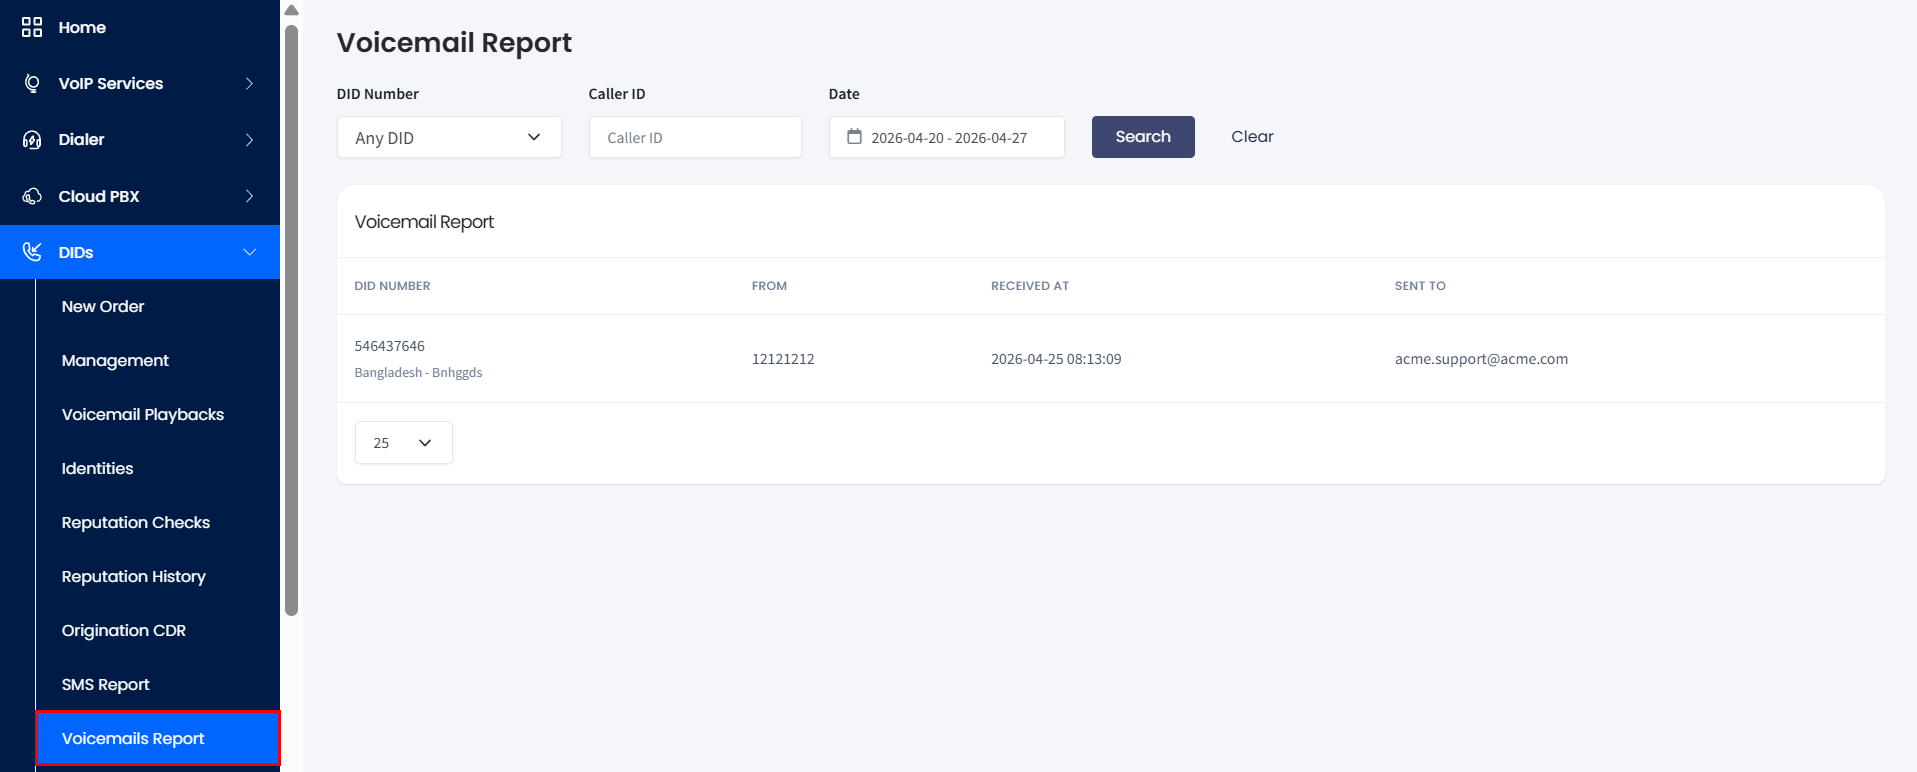
Voicemails Report page
- To clear the search results, click Clear.
Updated 3 months ago