Mass User Creation
Create multiple users in CommPeak Cloud PBX from a file: learn about the necessary file format, field mapping, and upload process.
You can create multiple users at once from a .csv file with user details.
.csv File Example
Here, you can find a CSV file example with both mandatory and optional columns.

.csv file example
Rules for Creating the .csv File
-
Size: the size should not exceed 500 users per file.
-
Mandatory Header: the file must contain a header to recognize from which columns to pull the data.
-
Columns:
- mandatory columns are Username, Email, Role (if users being added have different roles), and SIPSettings
- you can use the option to generate virtual extensions and let the system do it. Or you can upload your own extensions. In such a case, the file must also contain the column with virtual extensions
- optional are Desk, First name, and other columns, depending on your choice of users in one file.
-
SIP options: If you want to use SIP options other than WebRTC, the .csv file should contain the relevant data, as you will see in the SIP Settings below.
-
Role or desk:
-
If you are creating users with the same role or desk, you don't need to add columns with roles or desks, as you will use data from the Cloud PBX
-
If you create users with different roles or desks, add IDs from the Cloud PBX to the relevant columns. Copy data from the ID columns on the following pages and enter the IDs in the .csv file:
-
desks: Users > Users Management > Desks tab
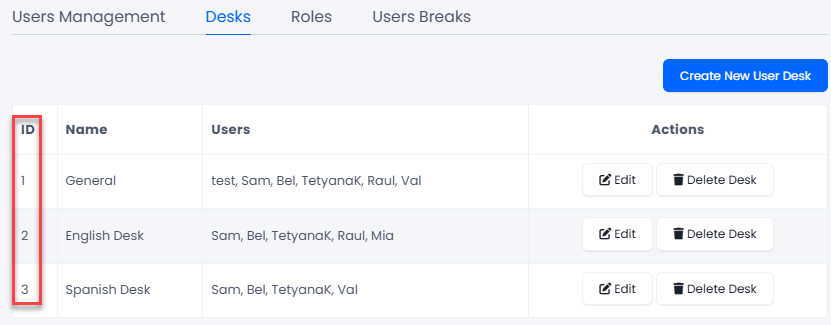
Desks tab
-
roles: Users > Users Management > Roles tab

Roles tab
-
-
Creation Steps
Once the file with user data is ready, you can upload it to the system.
To create multiple users:
-
Go to Users > Users Management.
-
Click Create from file in the top-right of the Users Management page.
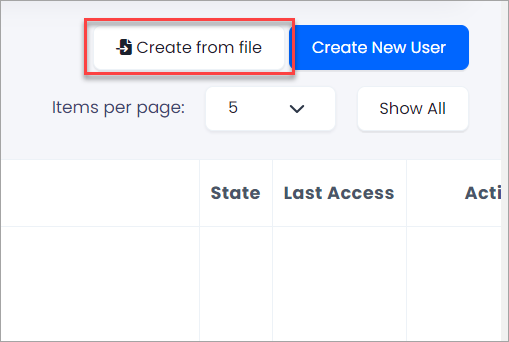
Create from file button
-
Drag and drop a file or browse for it. Click Upload.
Ignore First Line: This checkbox is enabled by default. When selected, the system will skip the first row of your CSV file during import. Enable this option if your file includes a header row (e.g., column titles like "Username", "Email", etc.) to prevent it from being processed as user data.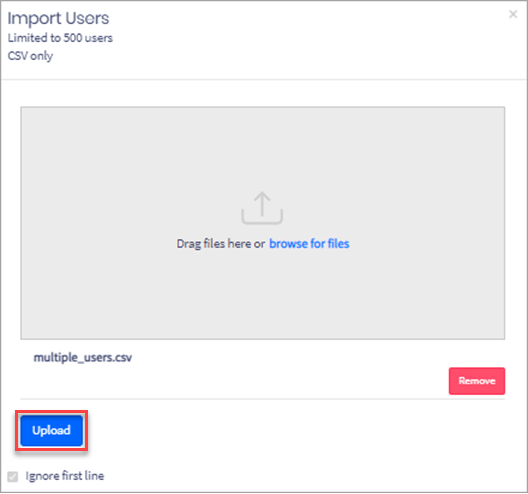
Uploading a file
-
Map four required fields with file columns:
-
Username, Email - select the relevant column name from the drop-down list:
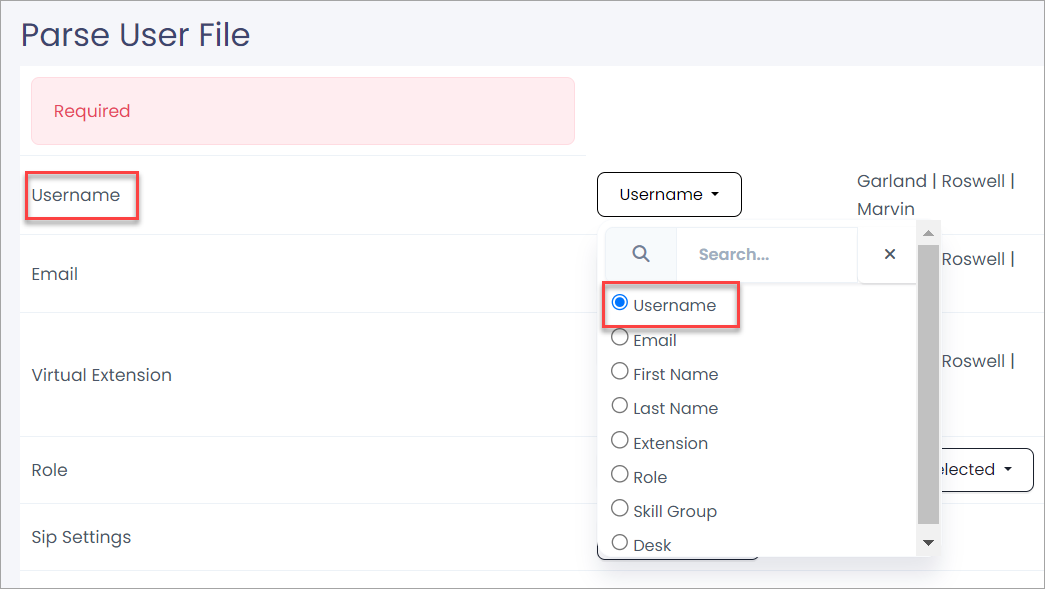
Selecting the Username column
-
Virtual Extension - select the appropriate column name from the drop-down list.
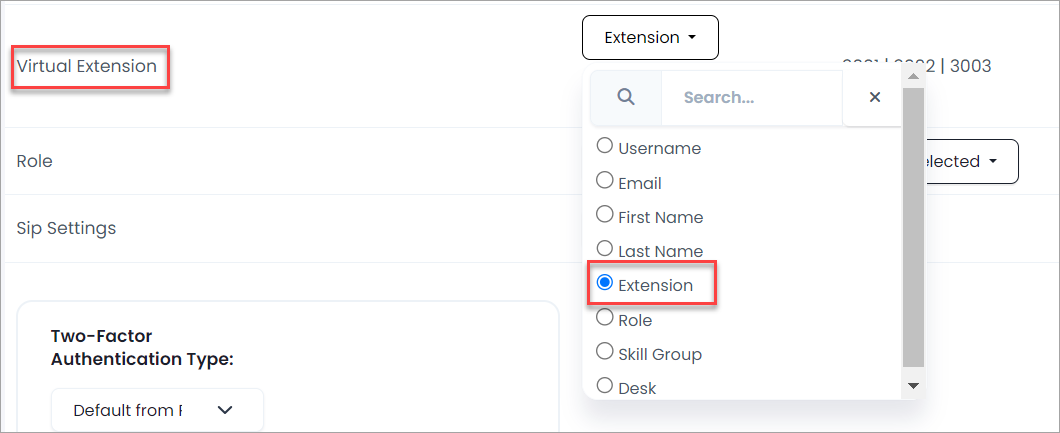
Selecting the Extension column
Otherwise, you can select the checkbox below the drop-down list, and the system will generate the next available virtual extension numbers for you.

Selecting the option to generate virtual extensions
-
Role:
-
If creating users with the same role, select From Dialer in the first drop-down list. Then select a role in the second list:
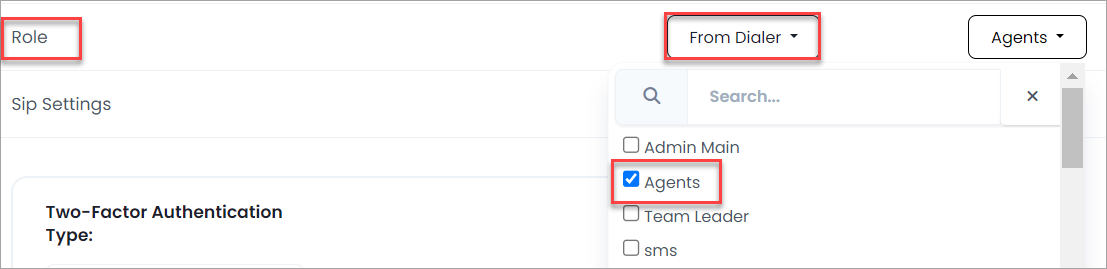
Selecting the same role for users
-
to assign different roles, make sure the file contains role IDs from the Dialer, then select the relevant column in the drop-down list:
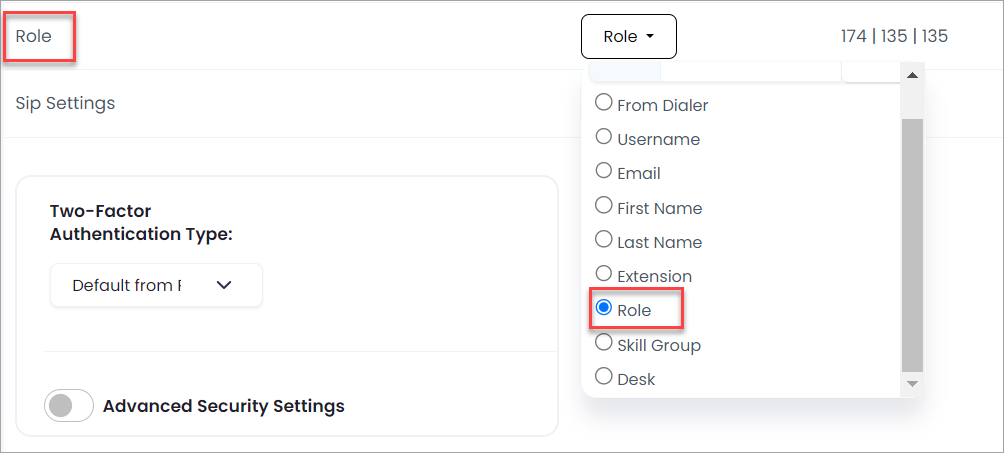
Selecting the Role column
-
-
SIP Settings:
-
the default option is Use WebRTC to call using the softphone built into the CommPeak Dialer.
If you want to set other options, the .csv file with user details should contain the relevant data.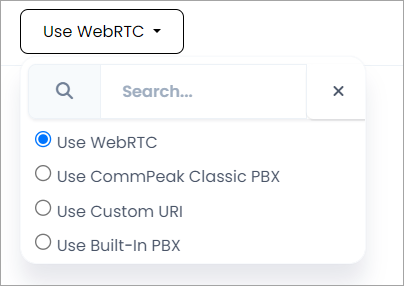
Use WebRTC option
-
Use CommPeak classic PBX - call via an existing CommPeak PBX domain. In this case, you select the needed domain in the drop-down list.
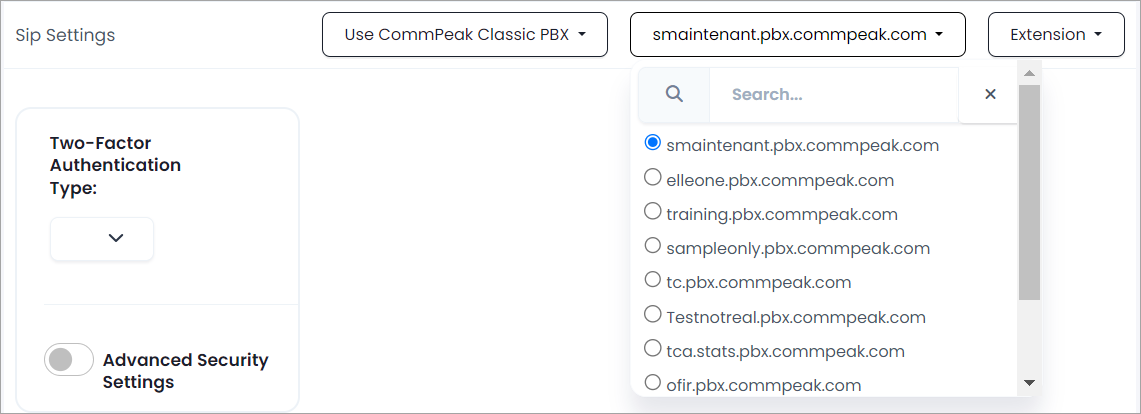
The classic PBX option
You should also have a column with PBX device (extension) numbers in your file. It can either be the same column as you used for the Virtual Extension field, or you can create a separate column for it.
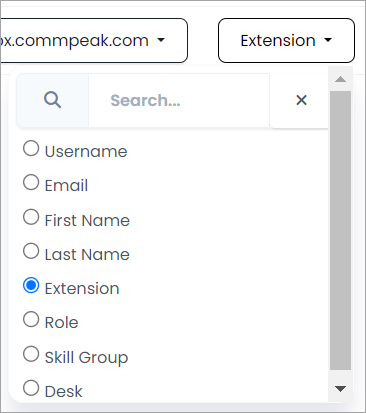
Extension column
-
Use Custom URI - call via a third-party, external PBX. In your file, each user must have a link that includes a PBX domain and a device.
-
Use Built-in PBX - call via the built-in PBX; no further action is required.
-
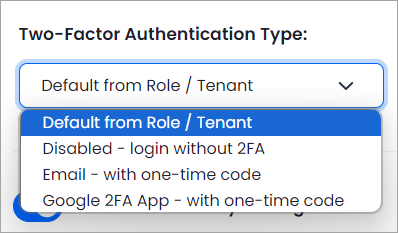
- Select the authentication type:
-
Default from Role/Tenant - use the default setting for the role. If no role settings are available, the default settings for the tenant will be used.
-
Disabled - login without 2FA - apply no login security enhancements.
-
Email - with one-time code - enable email validation using a temporary password.
-
Google 2FA App - with one-time code - enable login validation using the Google Authenticator app.
2FA options
-
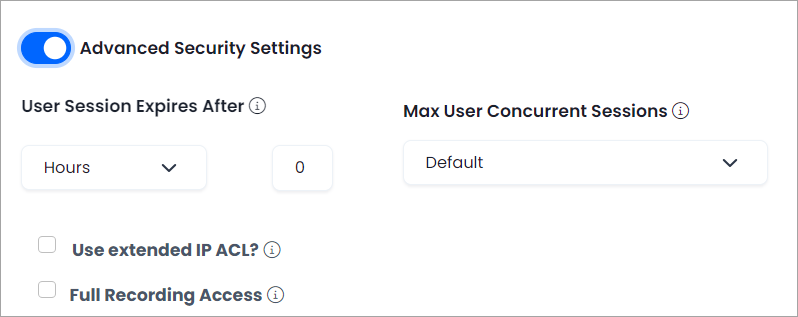
Optionally, click the toggle switch and add advanced security settings. See tooltips for explanations.
Advanced security settings
-
Map the optional fields as needed. For desks, follow the same logic as for roles. Either assign all users to the same desk or map the relevant data from the .csv file.
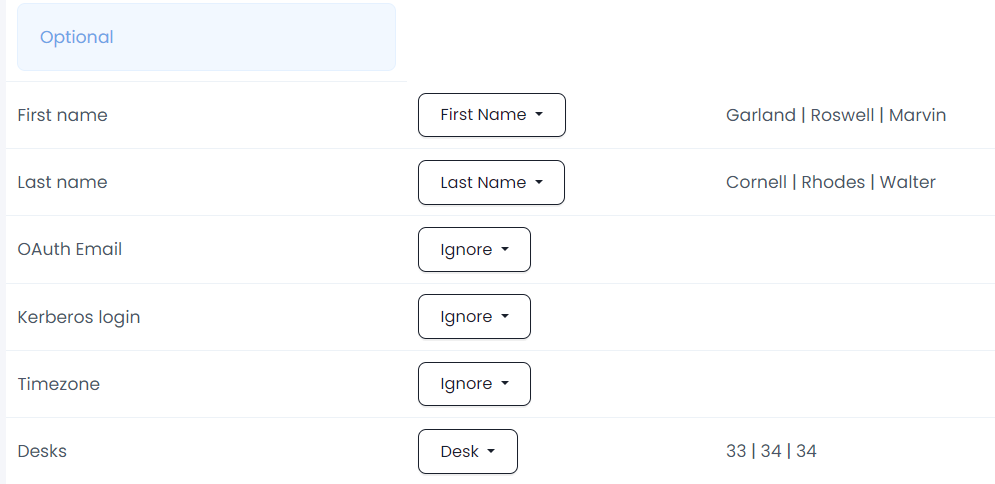
Mapping optional fields
-
If you are going to use an IP phone or a softphone that doesn't accept symbols other than digits, select the Generate user passwords with digits only (not recommended) checkbox.
-
Click Import Users.
Upload Result
After the file has been uploaded, the system will inform you about the number of uploaded or duplicate users and errors with validation or missing user details.
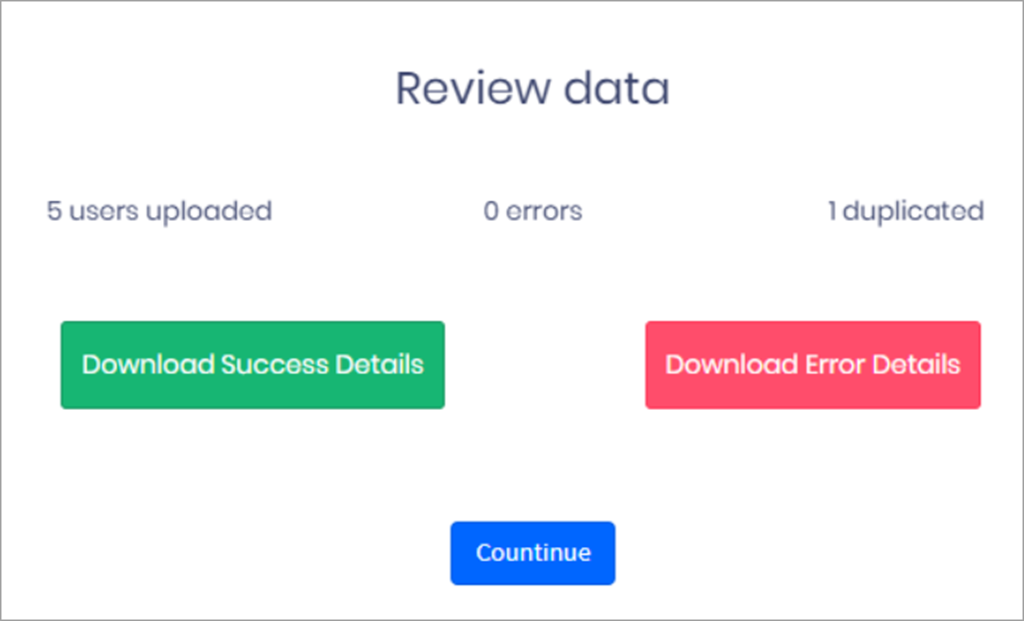
Upload result
-
Click Download Error Details to view and fix the errors, such as removing duplicates. Then, repeat the upload.

State error details
-
Click Download Success Details to save a .csv file with temporary user passwords.

Temporary passwords
After you click Continue, new users will appear in the user table.
IMPORTANTIf you fail to download the success details with temporary passwords, you will need to reset passwords one by one on the Users Management page.
Updated 6 months ago