After you submit the questionnaire, the CommPeak support team reviews your request and provisions the PBX.
📘
NOTE
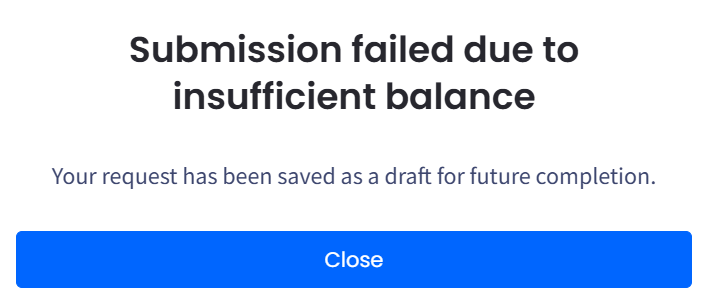
Ensure that you have sufficient account balance to cover PBX setup costs, DID numbers, and any call charges. If the balance is too low, the PBX request will be saved as a draft and not submitted:
Insufficient balance notification
Ordering a PBX
To start ordering a PBX:
In the CommPeak Portal, expand Cloud PBX in the main menu on the left. Then click PBX Instances.
Click Order your first PBX if no PBX instance exists, or select Order PBX Instance in the top-right corner.
Order PBX Instance button on the page
Submit the required information by completing the following steps.
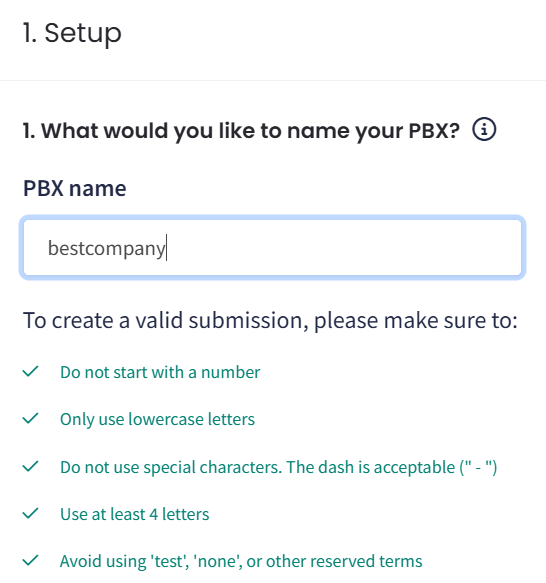
Step 1: Setup
Enter a PBX name that reflects your company's activities and avoid using generic names unrelated to your organization.
Question 1: PBX name
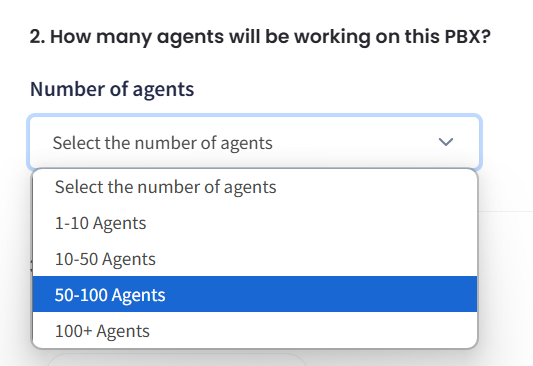
Choose the number of agents who will be operating on this PBX.
Question 2: number of agents
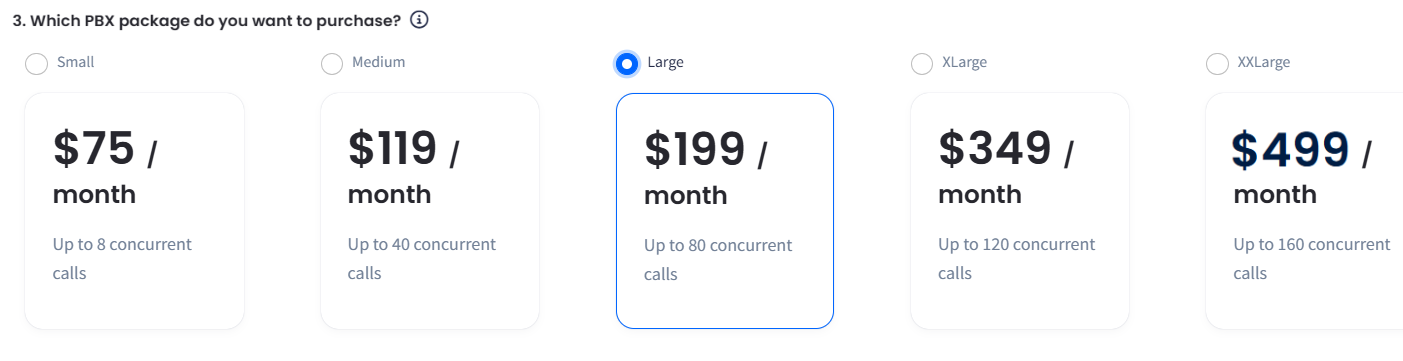
Select the PBX size based on the expected number of calls. Contact support if you require a larger size.
Question 3: PBX size
❗️Exceeding the recommended call capacity for the chosen package may affect the call quality.
Click Save and continue.
Step 2: Call Center and Location
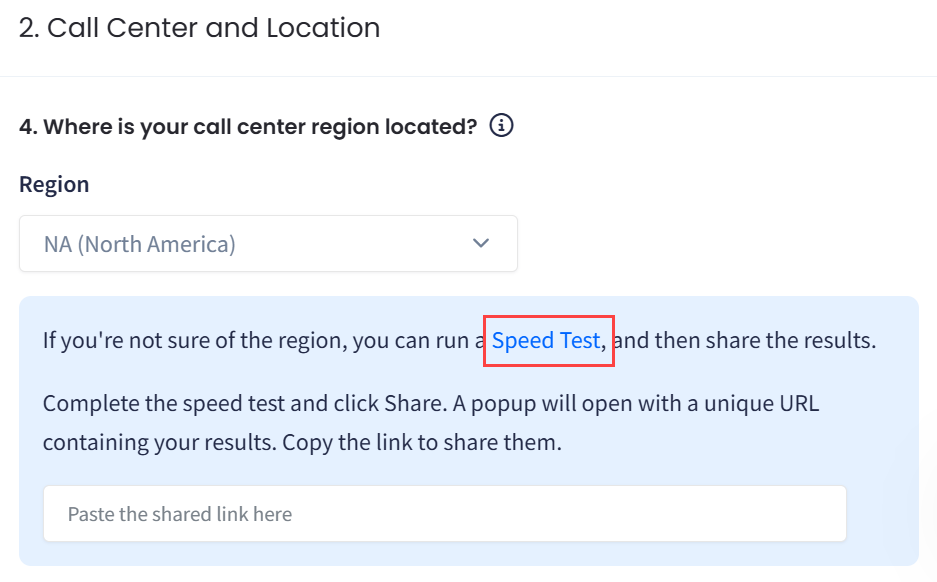
Choose your call center region.
If you know your region, select it from the drop-down list
The test will open in a new tab. When completed, click Share and copy the link.
Question 4: copying the speed test result
Then paste it to share the result.
Question 4: sharing the speed test result
❗️Using a VPN may affect call routing. Using shared VPN IPs across call centers can impact the reported location, potentially requiring adjustments to PBX numbers or settings.
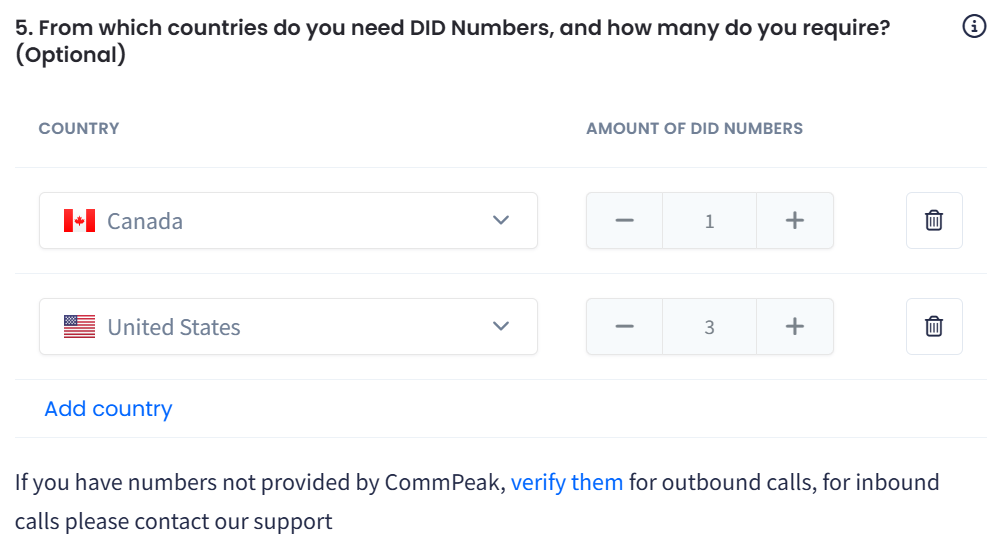
Decide which DID numbers you wish to use.
You have the option to order DIDs from CommPeak. Add countries and choose the number of DIDs.
Select whether you plan to call the displayed countries.
Question 6: specific countries you are planning to call
❗️In some countries, regulations may require specific numbers to be used as Caller IDs or place restrictions on their use.
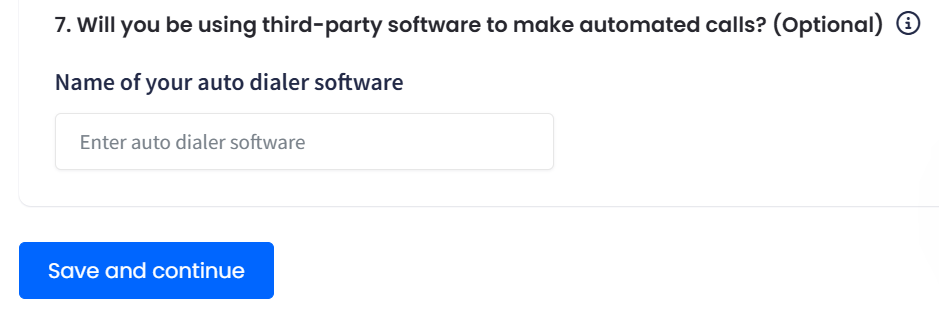
By default, CommPeak Softphone will be configured to make calls. Optionally, specify whether you wish to use a third-party softphone (such as Zoiper, Bria, or MicroSIP).
Question 7: third-party softphones
Click Save and continue.
Step 3: Technical Configuration
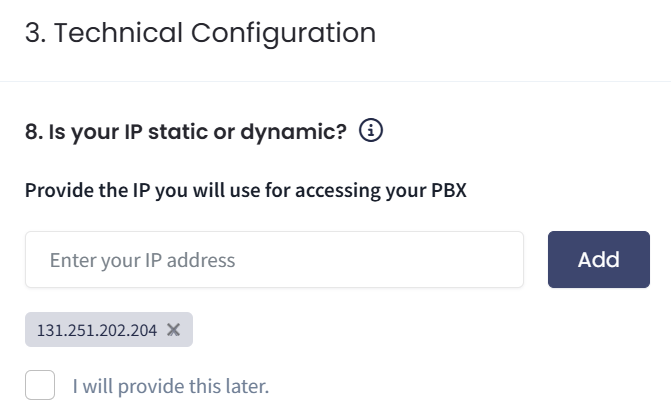
Provide the IP address you will use for accessing the PBX. Alternatively, you can provide it later (select the checkbox).
Question 8: IP address for accessing the PBX
❗️For better security, consider using static IP addresses from your ISP or VPN provider. They allow for precise access control. In contrast, dynamic IPs change over time and require broader access permissions, which can increase security risks.
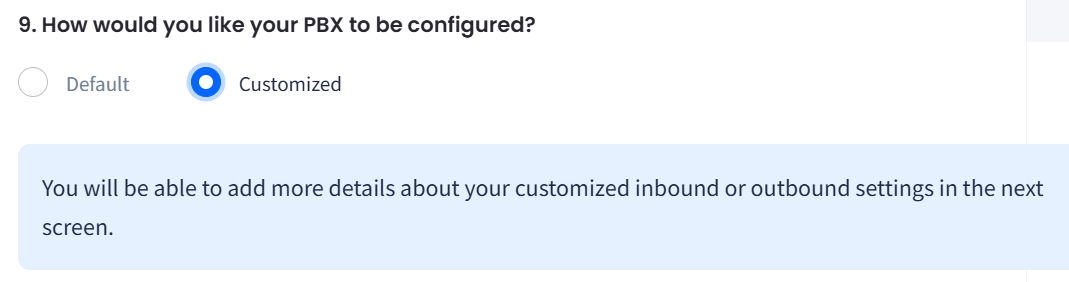
Specify a PBX type:
Default or
Customized - you will be prompted to provide additional details in the next step.
Question 9: default or customized PBX type
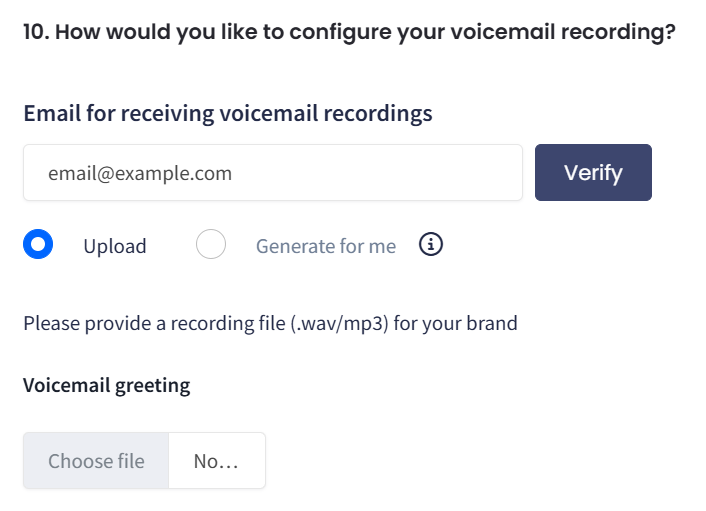
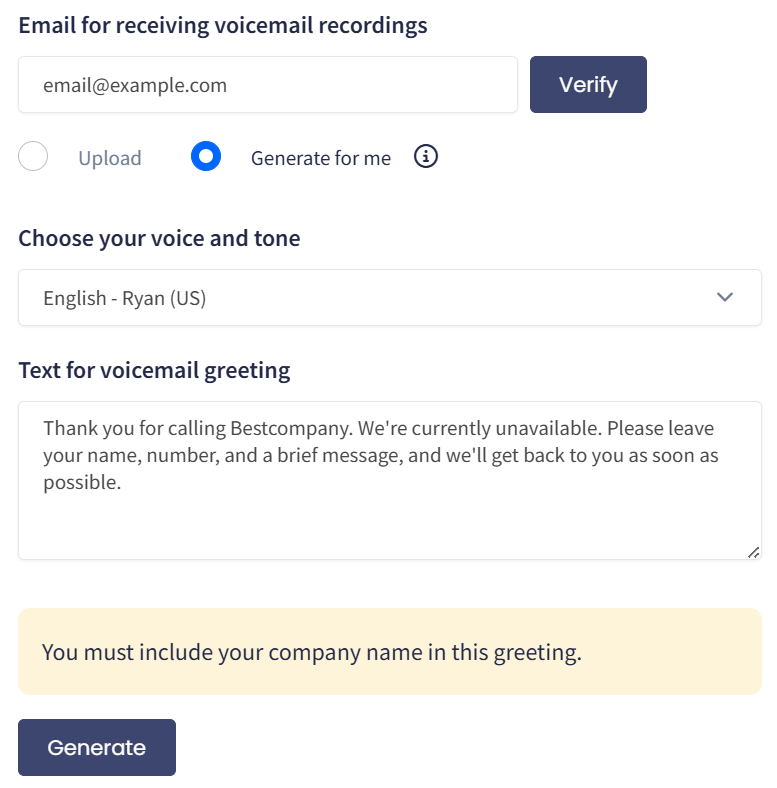
Provide and verify an email address to which we will forward voice recordings if you haven't verified it yet. After you click Verify, a message with an OTP code will be sent to it. Enter the code to complete the verification.
Select voice recording options by uploading a greeting file or allowing the system to generate one for you.
Upload an audio file for a greeting. Choose the file on your computer and click Open.
Question 10: uploading a greeting file
If you don't have any audio file for voicemail, click Generate for me, select a voice, and enter the text. Then click Generate. The system will convert it to audio.
❗️Make sure to include your company name in the greeting text.
Question 10: generating playback
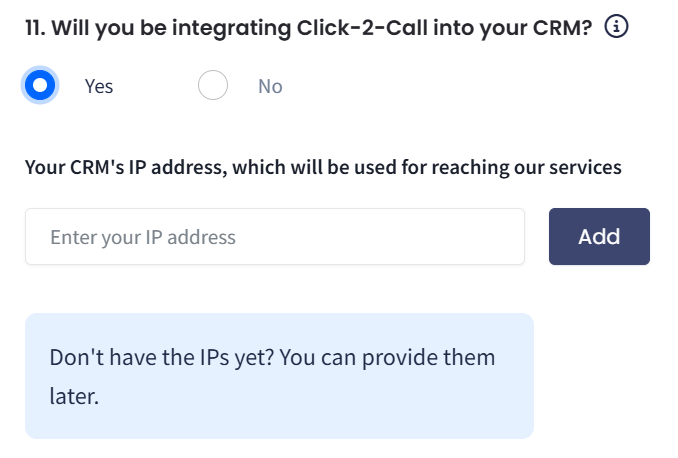
If you want to integrate Click2Call into your CRM, select the corresponding option and provide your CRM's IP address.
Question 11: Click2Call integration
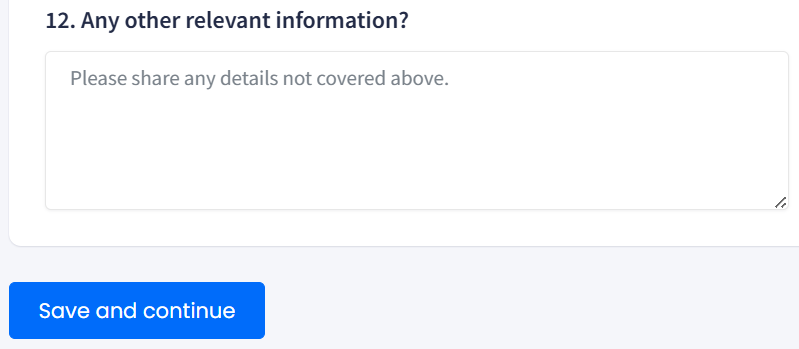
Provide any additional information about your PBX not covered by the questions.
Question 12 (default PBX option): additional information
Finally, click Place your PBX order.
❗️If you selected the Customized option in step 9, click Save and continue to proceed to step 4.
Step 4: Customizations
If you need a customized system, answer additional questions:
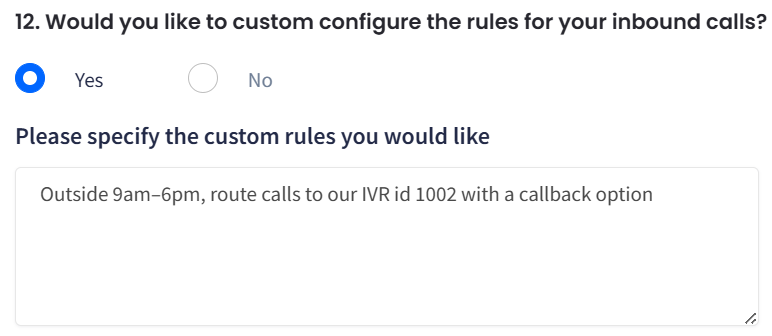
Describe custom rules for inbound calls.
Question 12 (customized PBX option): rules for inbound calls
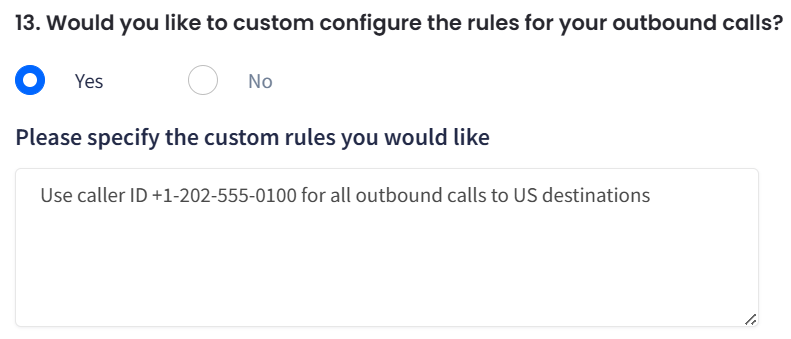
Describe your custom rules for outbound calls.
Question 13 (customized PBX option): rules for outbound calls
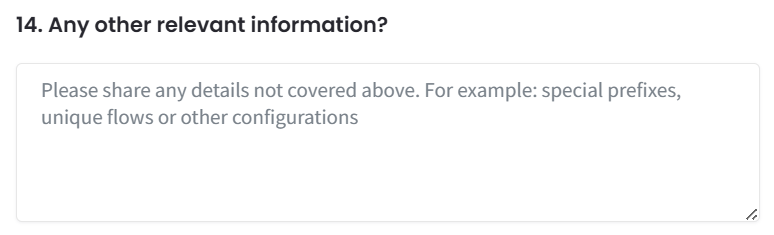
Provide any additional information about your PBX not covered by the questions.
Screenshot with question 14 (customized option): additional information
Click Place your PBX order.
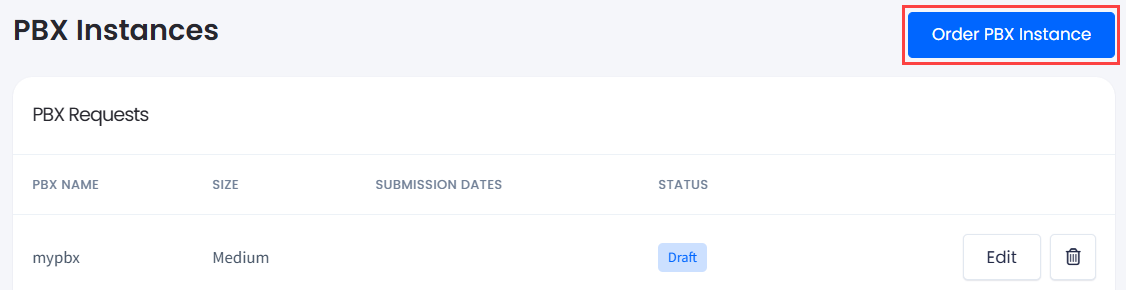
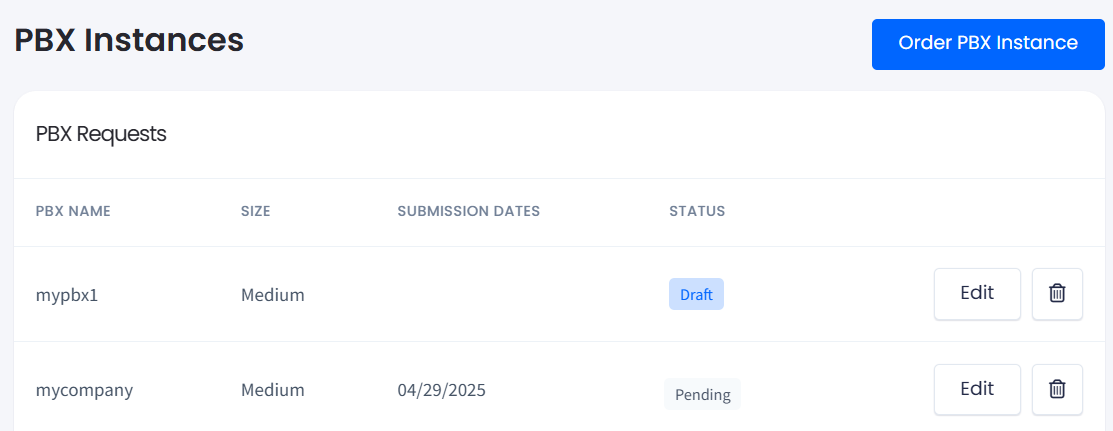
PBX Requests
Once you've ordered your Cloud PBX, you can track the status of your request in the PBX Requests section:
Draft: You started the questionnaire but haven’t completed all the steps. Click Edit to renew the process.
Pending: The PBX request has been submitted and is being processed by the CommPeak support team.
PBX Requests section
Completed requests will appear below in PBX Instances.