Working with Webhooks
Steps to start working with webhooks in the CommPeak SMS platform.
What is a Webhook?A webhook is a way for an application to immediately deliver real-time data to other applications. It’s more efficient than APIs: APIs send requests and receive responses, while webhooks don’t require requests. They send data when it’s available.
Video Tutorial
You can set up webhooks in the CommPeak SMS platform and configure it to send data to an external system. For example, when you get an incoming message, the platform can forward the message data to any third party to perform analysis and take further action.
To access the TextPeak Webhooks tab options:
- Log in to TextPeak in your browser.
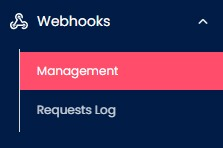
- In the main TextPeak menu, select the Webhooks tab.
To configure webhooks, expand Webhooks in the main menu and go to Management.
Webhooks tab
Here, you can view a table with your data on webhooks and apply search filters:
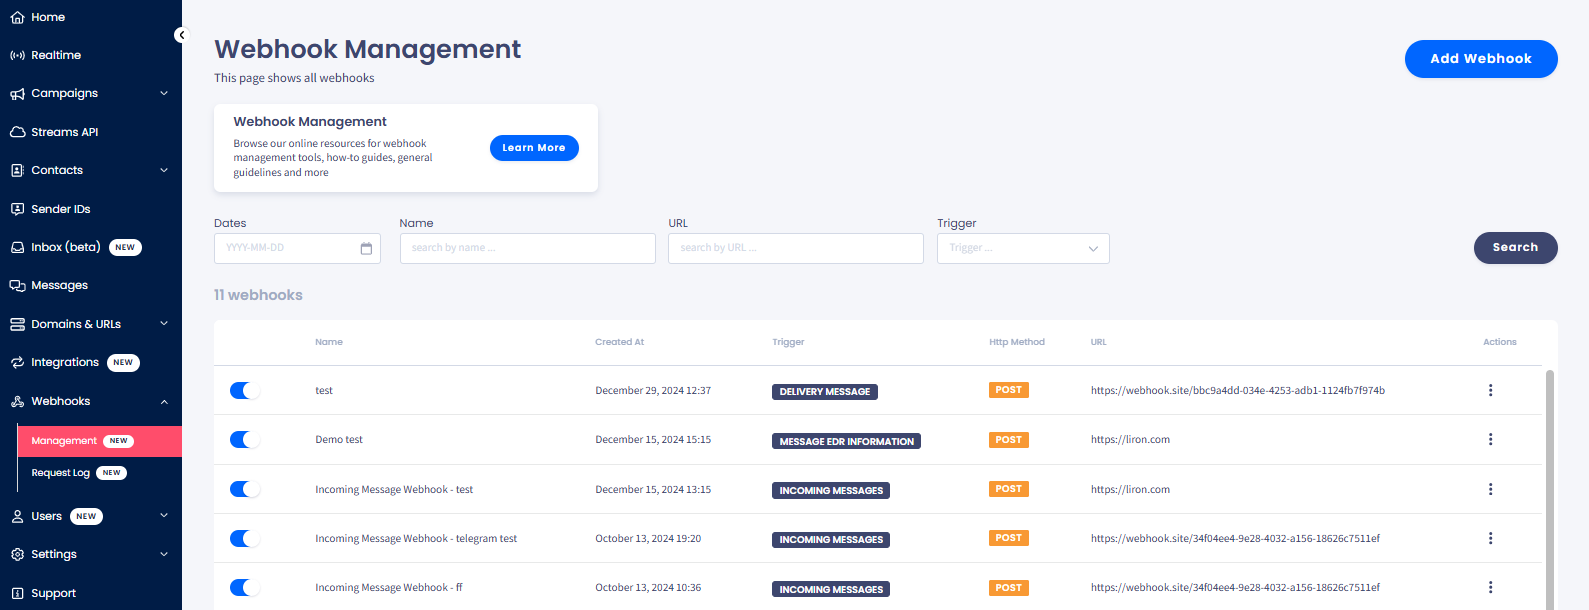
Webhook Management page
If you'd like to turn off a webhook temporarily, you can use the slider control at the beginning of the row.
Besides editing and deleting a specific webhook, the Actions column lets you test this webhook and display a request preview.
Click the three-dot icon to open the menu with the following webhook management options:
- Test webhook
- Request Preview
- Edit Webhook
- Delete.

Webhook management options
Select Test webhook to send a request to the configured endpoint with the match trigger structure and dummy data.
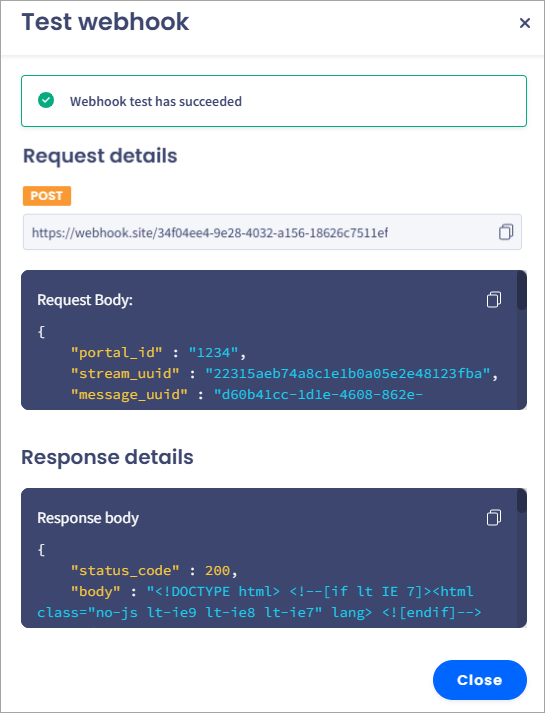
Webhook test details
To create a webhook:
-
Click Add Webhook at the top-right of the page.
NOTEIf you haven't added any webhooks yet, click Add Webhook on the empty page.
-
The Create new webhook form will load. Fill in the details and configure the new webhook.
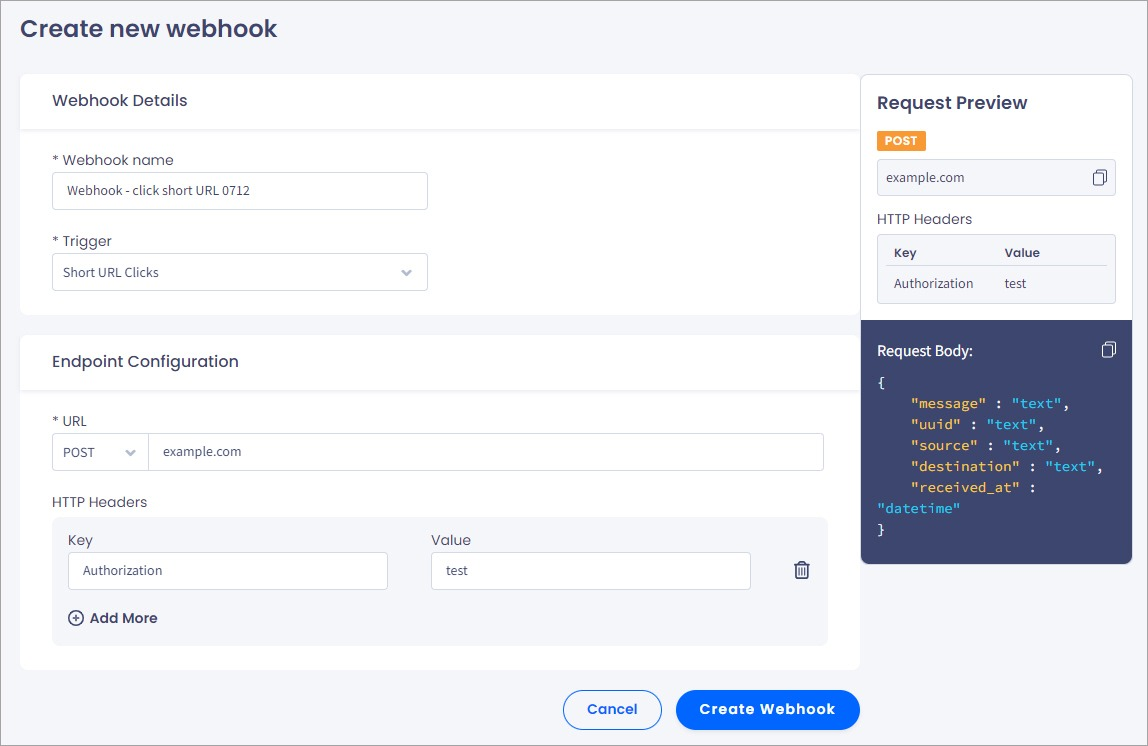
Create new webhook form
-
In Webhook Details, enter a name and select a trigger:
-
Webhook name: enter a meaningful title to locate the webhook quickly.
-
Trigger: choose from the drop-down list whether you want to trigger it by an incoming or delivery message, a Short URL click, or message EDR information (extended data about the message).
-
In Message status change (for delivery or EDR information message types only), select how you want to receive notifications:
-
Single: receive a status change notification for every message
-
Bulk: aggregate status change notifications in batch requests for every 100 messages to avoid the risk of being flagged as an attack by some servers.
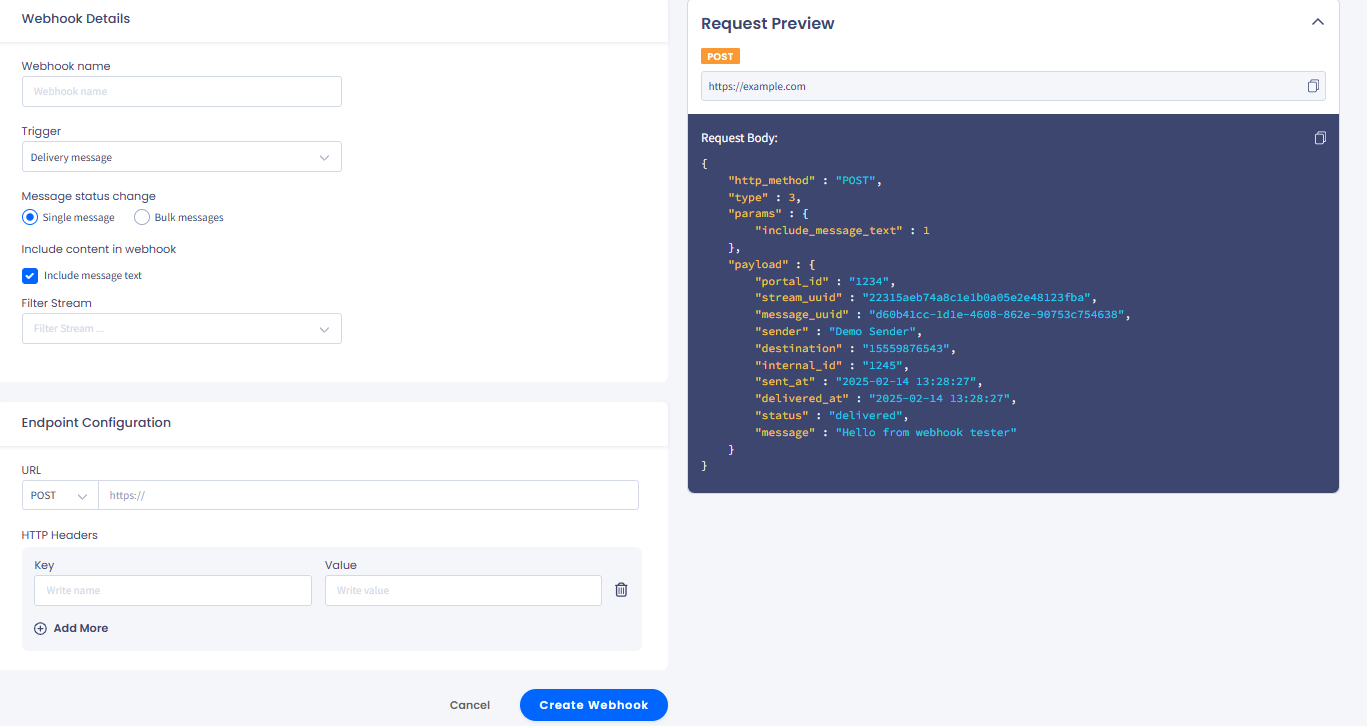
Create new webhook form with the Include message text option enabled
-
-
Include message text (for delivery message types): enable to include the message text in the delivery messages request.
-
Filter Stream (for incoming, delivery, or EDR information message types only): select a stream API or several streams for which you want to create webhooks.
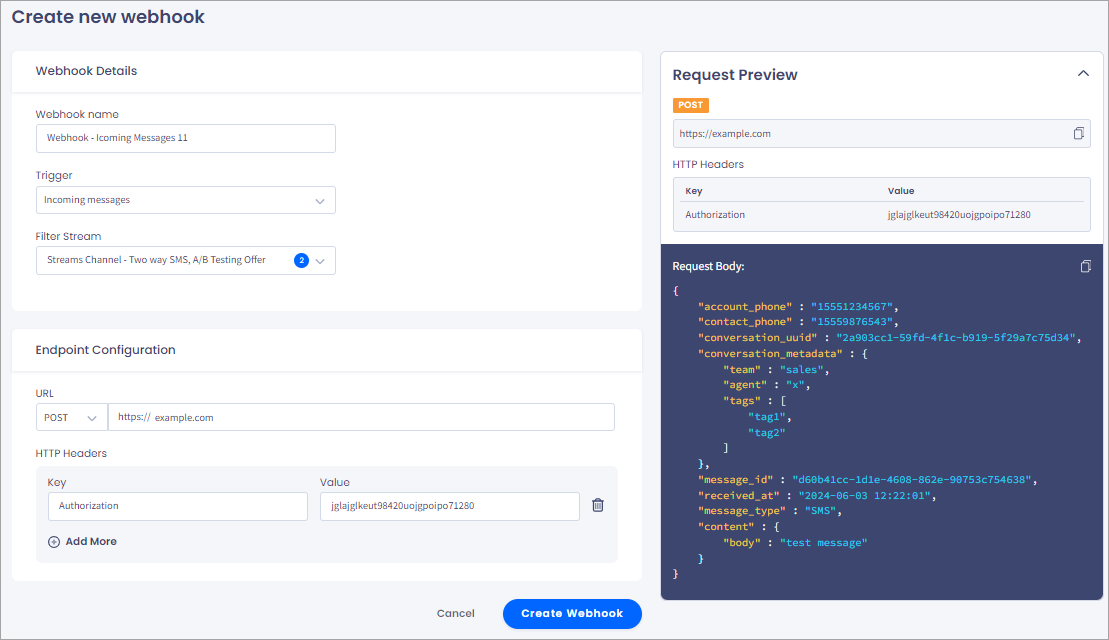
Create new webhook form highlighting the Filter Stream field filled with data
-
NOTEIf the WhatsApp Business stream is selected, the structure of the messages API is updated to include conversation data and WhatsApp data for both outbound and inbound messages.
-
In Endpoint Configuration, enter the endpoint URL. Optionally, add HTTP headers.
- URL: select the GET or POST method and enter the URL to which you want to send data
- HTTP Headers: optionally, enter the key name and value.
- The requests' preview is available on the right. You can copy the request body immediately.
- Click Create Webhook.
Updated 25 days ago