

General Settings
Learn how to configure the Inbox general settings: rename your space, block incoming media by type, stop agent uploads, set the undo window, scope conversation search, and close inactive conversations automatically.
Configuring inbox general settings
The General Settings page controls how your TextPeak Inbox space is named, what media reaches your agents, and how conversations behave. This article walks you through each option and what it changes for your agents.
NOTEOnly Inbox admins and Inbox managers can open General Settings. For a breakdown of what each role can do, see the Inbox Role Permissions page.
To access the General Settings tab options:
- In your browser, log in to TextPeak with manager access privileges.
- In the main TextPeak menu, select the Inbox tab.
- Click Settings at the bottom of the Inbox sidebar.
- In the Workspace group, click General Settings.
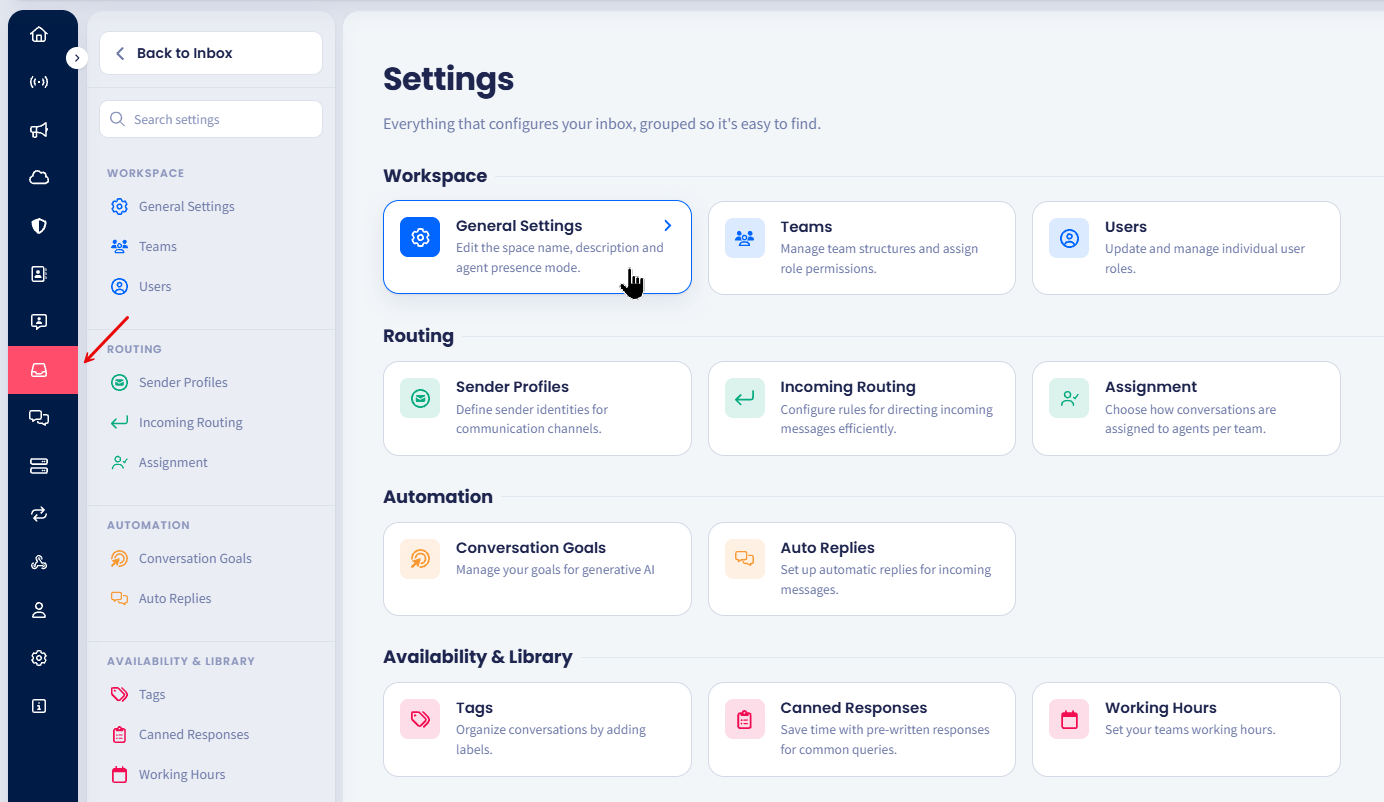
General Settings tab
Every option on this page applies to the whole space.
Naming your space
The space name identifies your Inbox across TextPeak and appears in the space switcher at the top of the Inbox sidebar. If you run more than one space, a clear name saves your agents from working in the wrong one.
-
In the Space name field, enter a name for the space.
-
In the Space description field, enter a short description of what the space is for. This option is not required.
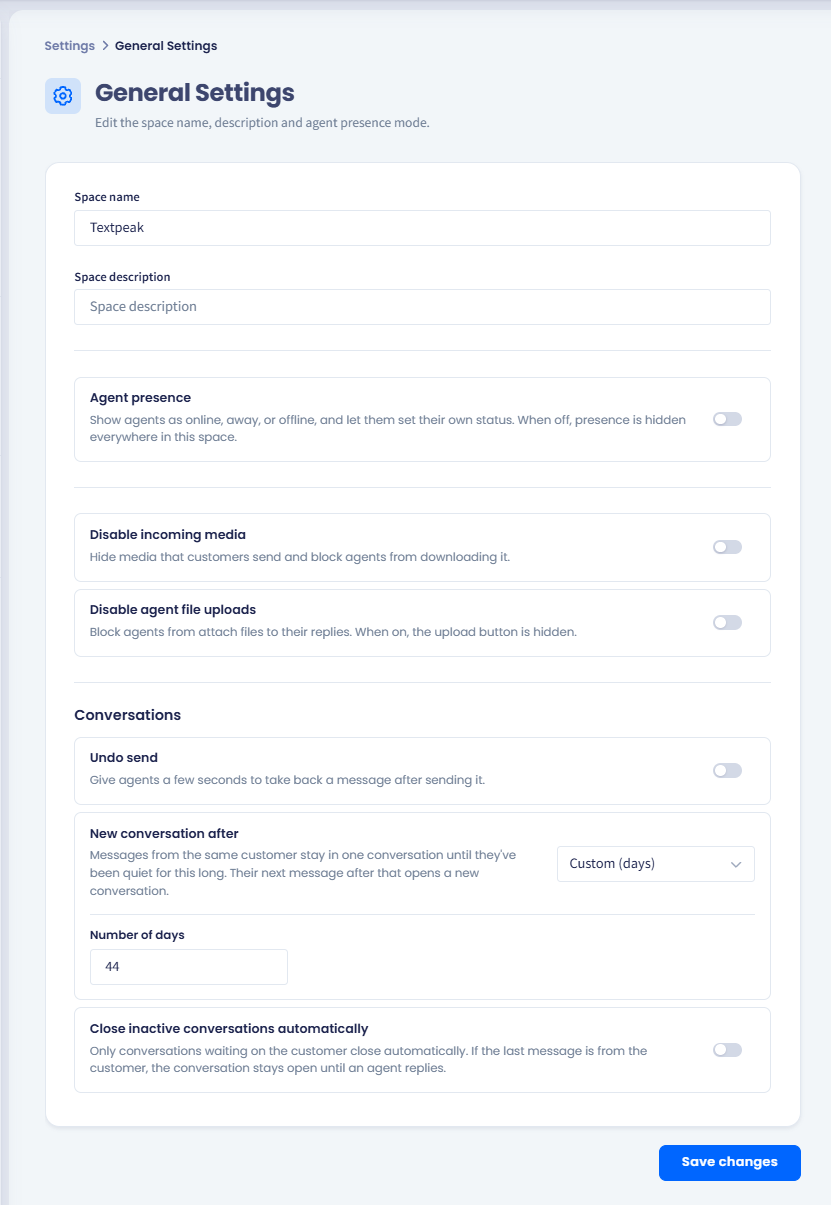
Inbox General Settings page
Turning on agent presence
Turn on Agent presence to show agents as online, away, or offline, and to let them set their own status. TextPeak does not assign new conversations to an agent who is Offline.
- In General Settings, turn on Agent presence.
- Optionally, under Automatic away mode, turn on either or both timers and set how long an agent can be inactive before their status changes.
- Click Save changes.
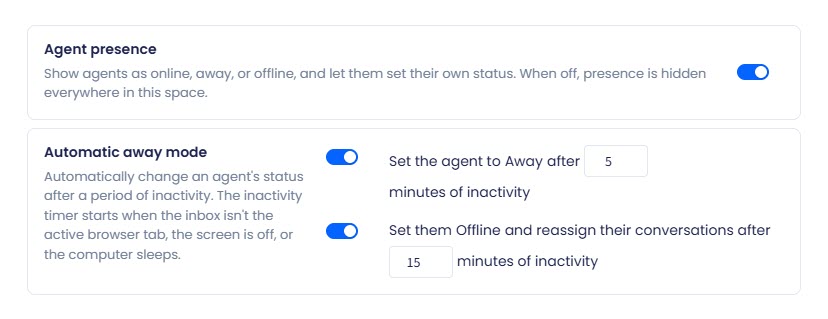
Inbox Agent presence toggle
Agent presence is off by default, and it applies to your whole space rather than to individual teams. Turning it off hides presence everywhere in the space.
IMPORTANTThe second automatic timer sets an agent Offline and returns their open conversations to the queue. Set it long enough that a short break does not cost an agent their conversations.
For what the statuses mean, how the timers behave, and how to change an agent's status from the Users and Teams pages, see the Agent Presence page.
Blocking incoming media
Turn on Disable incoming media when your agents should not receive files; for example, if your company handles sensitive data or wants to limit what agents can download. Blocked media is hidden from agents in the space, and downloads are refused.
-
Turn on the Media restrictions toggle. The Block these types options appear.
-
Clear the checkbox for any type you want to let through. All four types are blocked by default:
Type What it covers Images Photos and other image files. Videos Video files. Documents Files such as PDFs and spreadsheets. Contacts Contact cards shared through the channel.
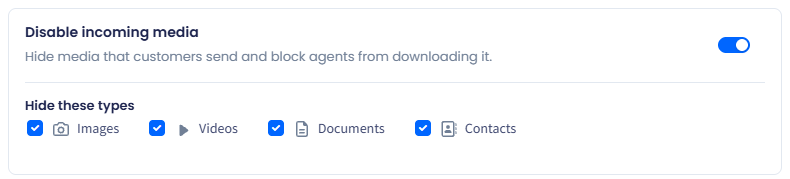
Media restrictions with all four types under Hide these types selected.
IMPORTANTMedia restrictions apply to media arriving from your contacts. To stop agents from sending files out, use Disable agent file uploads instead.
Stopping agents from sending files
Turn on Disable agent file uploads to remove the ability to attach files to outgoing messages. Agents can still send text.

Disable agent uploads toggle
Letting agents undo a sent message
Enable Undo gives agents a short window to pull back a message after clicking send. Leave it off if you would rather every message leave immediately.
- Turn on the Undo send toggle. The Seconds to undo field appears.
- In Seconds to undo, enter how long agents have to undo a sent message. The default is 5 seconds.
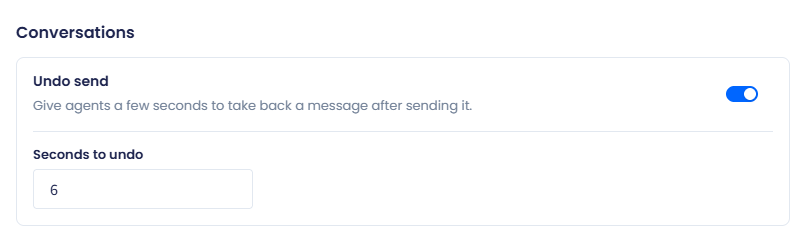
Enable Undo with a five-second Undo window (seconds) value.
WARNINGThe undo window delays delivery by the number of seconds you set. A long window slows down every outgoing message, so keep it short.
For the agent's side of this option, see the Agent's Guide: Managing Conversations page.
Setting when a new conversation starts
In New conversation after, you can define the time period for the following situation: there is not activity on a particular conversation for the set time but then a new incoming message arrives from the same contact on the same channel and sender. In this case, this new message will be added to a new conversation.
-
Click to select a period: 1 day, 3 days, 1 week, 1 month, 3 months, 6 months, 1 year, or 2 years.
-
To set your own period, select Custom (days) and enter the number of days.
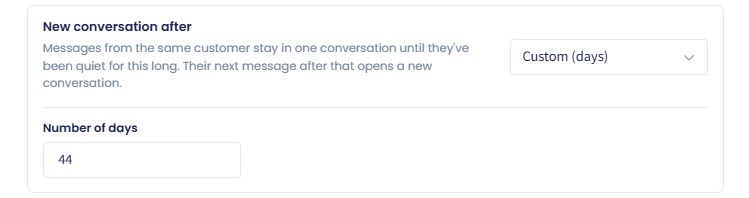
Setting custom search time
Closing inactive conversations automatically
Set a period of inactivity after which TextPeak changes a conversation's status to Closed, so conversations nobody is working on do not sit open indefinitely.
Only conversations waiting on the customer close automatically. If the last message came from the customer, the conversation stays open until an agent replies, however long it waits.
-
In General Settings, turn on Close inactive conversations automatically.
-
In Close after, enter a number and select Days, Hours, or Minutes.
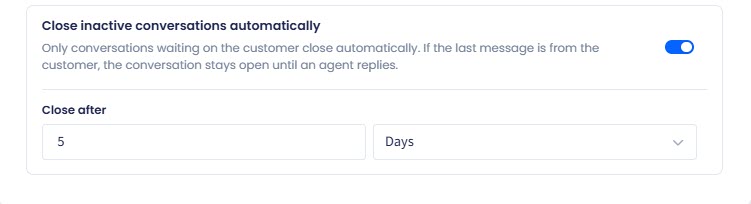
Setting when to automatically close conversations
-
Click Save changes.
IMPORTANTThis setting applies only to conversations created after you save it. TextPeak never closes conversations that are already open, however long they have been inactive.
Setting a two-day period does not close a conversation that has been open for three days. It closes conversations that start after you save the setting and then go two days without activity.
NOTEClose inactive conversations automatically and New conversation after both measure inactivity, but they do different things. Automatic closing changes the status of the existing conversation. New conversation after decides whether a later incoming message joins that conversation or starts a fresh one.
Agents can still close a conversation by hand at any time, and automatic closing does not change how they do it. For the full status model, see Conversation statuses.
When all the space settings are in place, make sure you click the button below to save all the changes.
TIPA long period gives agents more history to search. A short period returns results faster and keeps old conversations out of the way.
For the rest of the manager options, see the Manager's Guide: Inbox Settings page.
Updated 3 days ago