WebCall Widget: In-page VoIP Calls
Check out what a WebCall Widget is and how it works to place in-page VoIP Calls directly from your website.
The CommPeak WebCall Widget allows you to embed a Click-to-Call button directly onto your website. Using standard WebRTC protocols, it transforms any browser into a functional phone, routing calls through a SIP destination to your your PBX or VoIP infrastructure. This allows visitors to connect with your sales or support teams instantly, without ever leaving your page.
Creating Your WebCall Widget
Before integration, you must create a widget and configure it within your CommPeak account.
To create a widget:
- Navigate to the WebCall Widgets page under the VoIP Services section in the CommPeak Portal.
- Click Create WebCall Widget.
- Fill in the following fields:
- Widget Name: A recognizable name to identify this specific widget.
- Destination (SIP URI): The target address where calls connect. This must be a valid SIP URI in the format <extension>@<server>:<port> (e.g., [email protected]:5060).
- JWT Secret: A secure key used to authenticate the widget. Click Generate to create a secure secret automatically.
- Customize the widget appearance in the Widget Settings section; a live preview is provided for your convenience.
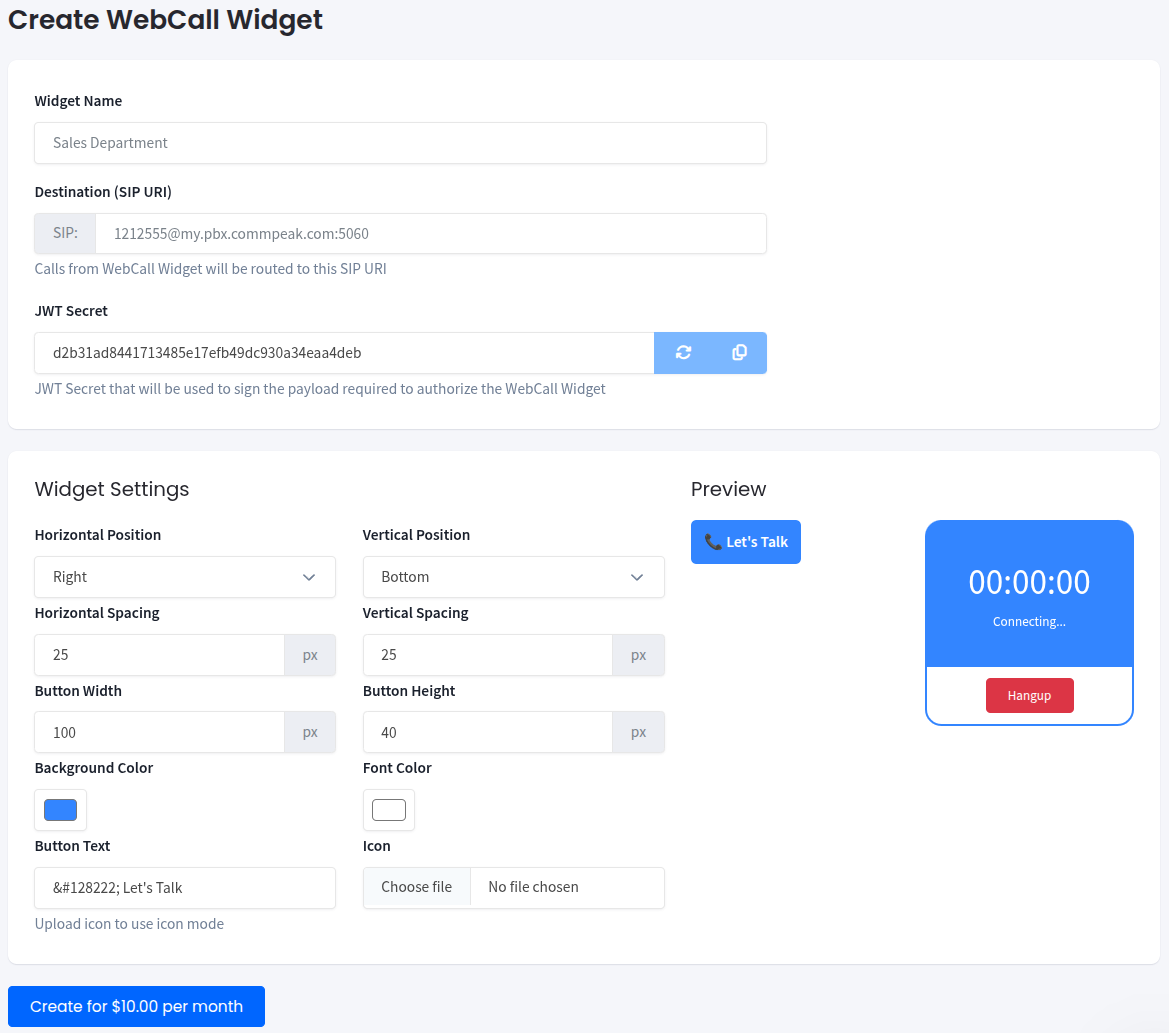
WebCall Widget creation form
Integrating WebCall Widget Into Your Web Page
Integration involves two main parts: setting up a backend authentication endpoint and adding the JavaScript snippet to your frontend.
Preparing JWT Token Generation Endpoint
To prevent unauthorized use, CommPeak requires JWT authentication. You must implement an HTTP endpoint on your server that issues a signed JWT to authenticate the widget.
The JWT token's payload must include:
- sub: The UUID of the WebCall Widget (found on the WebCall Widgets page under VoIP Services)
- exp: The token expiration timestamp (we recommend setting it to 10 seconds).
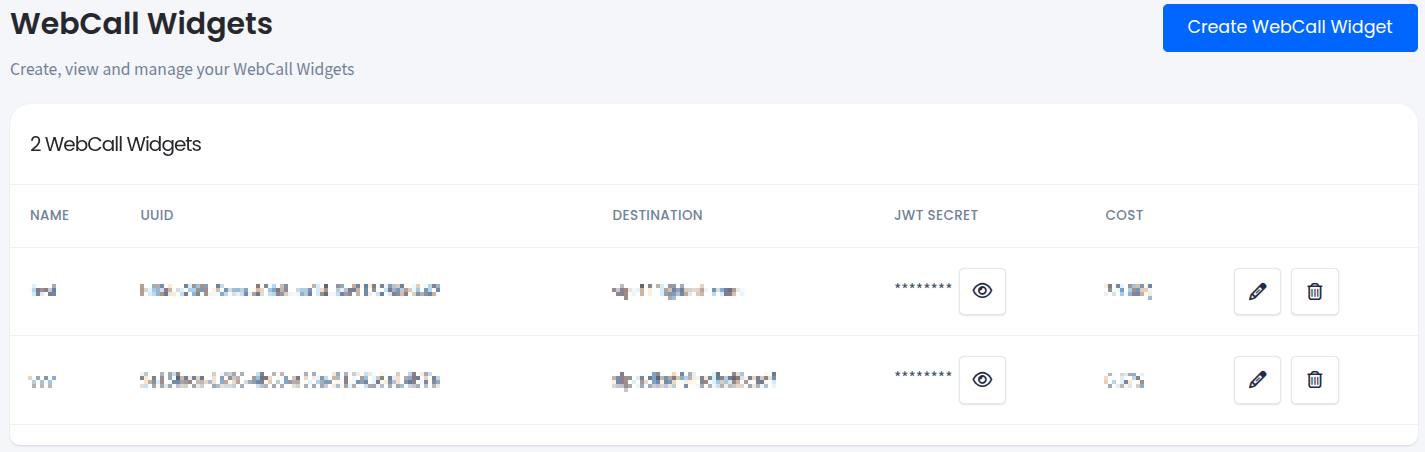
WebCall Widgets page
Implementation Examples
You can use any library found on the official JWT site. Below is a specific implementation using Ruby and PHP. Note that we are using SHA256 algorithm for JWT signature. Response should be JSON with data key attribute holding the generated JWT token.
def webcall_jwt
  # UUID of the WebCall Widget and expiration set to 30 seconds from now
  payload = { sub: 'bf6da209-6cea-40b8-aa14-6a913286d442', exp: Time.now.to_i + 30 }
  # JWT Secret used to sign the token
  secret = 'secretSignKey'
  # Generate a signed JWT
  token = JWT.encode(payload, secret, 'HS256')
  # Return the signed JWT within the response body
  render json: { data: token }
end
function generateJwt(): String {
$signingKey = "secretSignKey";
$header = [
"alg" => "HS256",
"typ" => "JWT"
];
$header = base64UrlEncode(json_encode($header));
$payload = [
"exp" => time() + 10,
"sub" => "bf6da209-6cea-40b8-aa14-6a913286d442"
];
$payload = base64UrlEncode(json_encode($payload));
$signature = base64UrlEncode(hash_hmac('sha256', "$header.$payload", $signingKey, true));
$jwt = "$header.$payload.$signature";
return $jwt;
}
function base64UrlEncode($text): String {
return str_replace(['+', '/', '='], ['-', '_', ''], base64_encode($text));
}
echo json_encode(["data" => generateJwt()]);
Using CommPeak's Webcall Widget
Copy the snippet below into your HTML. Make sure to replace the placeholders with your actual Webcall Widget UUID, JWT endpoint URL and request method:
<script src="https://my.commpeak.com/web_calls/embedded_widget/<UUID>.js"></script>
<script>(function(window, document) { new window.CommPeakWebCallWidget.Widget('<JWT ENDPOINT>', '<JWT METHOD>').init();})(window, document);</script>
This snippet will inject CommPeak's Webcall Widget activation button into the page:
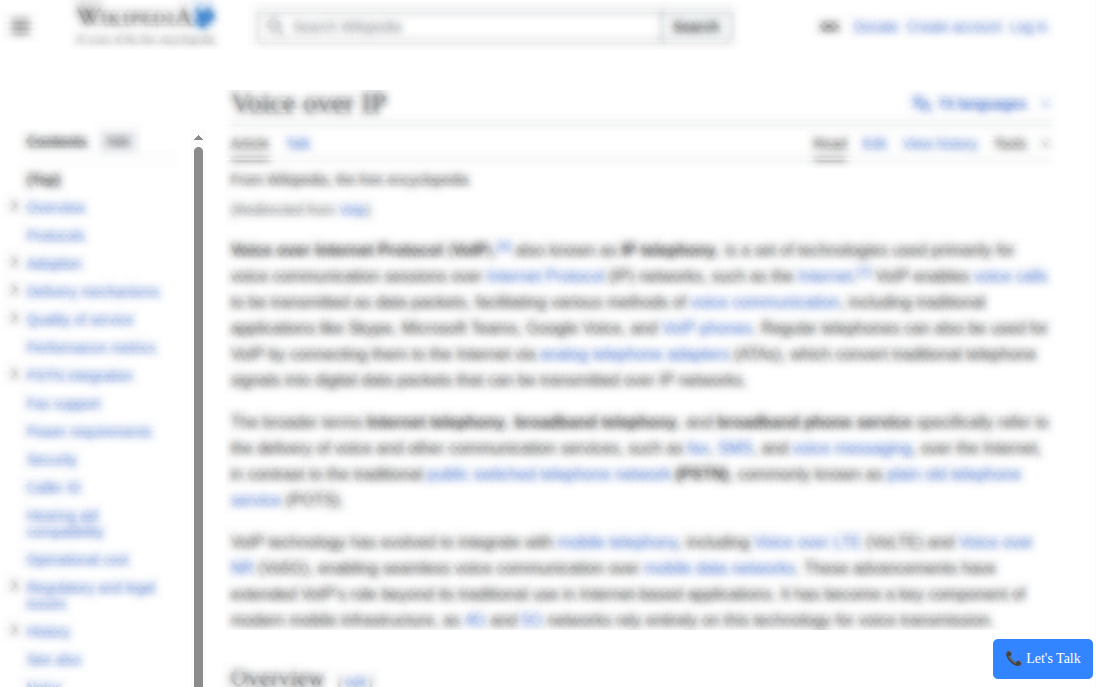
Example of CommPeak's Webcall Widget Button
Once clicked the widget will be expanded to the In Call state.
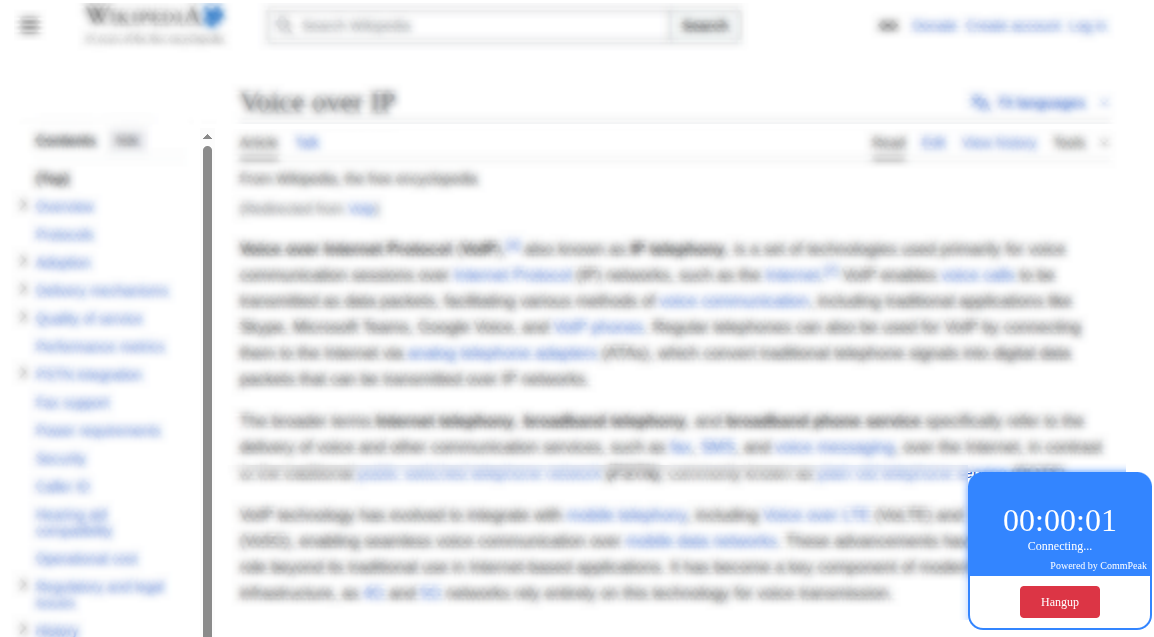
In call stats of Webcall Widget
Advanced usage by issuing a call from JavaScript
Adding JavaScript Initialization Snippet
After setting up your JWT generation endpoint, add the following JavaScript snippet to your webpage to handle the widget loading logic. This script fetches the JWT from your endpoint and initializes the CommPeak call script.
NOTEThe below code is provided as an example; feel free to adapt the implementation to fit your specific requirements.
(function(window, document) {
  // Widget initialization code
  window.CommPeakWebCallWidget = window.CommPeakWebCallWidget || {};
  window.CommPeakWebCallWidget.loadCallScript = function(jwtEndpointUrl, jwtEndpointMethod) {
    var req = new XMLHttpRequest();

    req.responseType = 'json';
    req.open(jwtEndpointMethod, jwtEndpointUrl);
    req.addEventListener('load', function(_event) {
      // in 1st step we are returning JSON response with "data" attribute holding the signed JWT
      var token = req.response.data;
      // importing the CommPeak WebCall Widget script with JWT token
      var scriptElement = document.createElement('script');
      scriptElement.src = `https://my.commpeak.com/web_calls/embedded-${token}.js`;
      scriptElement.async = true;
      scriptElement.defer = true;

      (document.head || document.body || document.documentElement).appendChild(scriptElement);
    });

    req.send();
  };
})(window, document);
Initiating a Call
To start a voice call, invoke the loadCallScript function. You can trigger this via a button click or a page load event:
// Replace parameters with your actual ones
window.CommPeakWebCallWidget.loadCallScript('/webcall_jwt', 'GET');
Sending DTMF
To send DTMF use the following code snippet.
// single DTMF
var dtmf = 3;
// multiple DTMF
var dtmf = '123#';
// options (optional) - send as RFC2833
var options = { 'transportType': 'RFC2833' };

// options parameter can be ommited
window.CommPeakWebCallWidget.callInProgress && window.CommPeakWebCallWidget.sendDTMF(dtmf, options)
Hanging Up a Call
To terminate an ongoing call, use the following command:
window.CommPeakWebCallWidget.callInProgress && window.CommPeakWebCallWidget.hangUp()Passing Custom Attributes to Calls (Optional)
You can pass custom metadata to the call by initializing the window.webCallUserProfile object prior to triggering the call. Attributes will be forwarded to Webcall destination as SIP headers "X-W-[key]: [value]".
window.webCallUserProfile = { "oid": "XYZ123", "name": "John Doe", "phone": "12125551234" };
// Will add following headers:
// X-W-oid: XYZ123
// X-W-name: John Doe
// X-W-phone: 12125551234
Attribute phone in case provided will be used as Caller ID of the call.
JavaScript Events Handling (Optional)
The WebCall Widget emits events that allow you to track call progress in your UI. Every event payload includes the UUID of the widget.
The list of supported events:
| Event | Description |
|---|---|
web_call:connecting | Fired when the voice call is being initialized. |
web_call:progress | Fired when the originating voice call gets a ringing signal from destination (optional). |
web_call:accepted | Fired when the call is answered by the receiving party. |
web_call:failed | Fired if the call fails (check the cause field of the event payload for details). |
web_call:ended | Fired when the call is terminated. |
Adding the Webcall Widget to an IVR Flow
In addition to embedding the Webcall Widget directly on a website, it is also possible to assign a specific Webcall Widget to an IVR flow on your CommPeak Dialer or Cloud PBX platforms. This allows inbound Webcall calls to enter a predefined IVR logic.
You can find more information about it in the IVR Elements guide.
Updated 4 months ago