Setting Up a SIP Trunk in FreePBX
This guide provides step-by-step instructions on how to add a new SIP trunk in FreePBX.
After signing up with CommPeak and getting your SIP account credentials, your next step is registering your SIP account in CommPeak Softphone, a third-party application, or with your IP phone to make your first call.
TIPYou can also use the Built-in CommPeak Softphone with your JWT-enabled SIP accounts to place calls right from your browser. You can read more in the Built-in Softphone for JWT-Enabled SIP Accounts article.
Video Tutorial
TIPWith CommPeak Softphone, you get an enterprise-level tool without installing any third-party software.
IMPORTANTIf you're using third-party SIP clients (not CommPeak's Softphone), you must manually enable SRTP (Secure Real-Time Transport Protocol) when using TLS for SIP transport. This ensures media encryption and compatibility.
This document will guide you on how to add a new SIP trunk in FreePBX.
Prerequisites
Make sure you have the following:
-
an installed and running FreePBX server
-
a SIP account from CommPeak
The SIP credentials and domain details that you need are available in your account at CommPeak Portal in Setup > SIP Accounts: -
User - click SHOW under Username/IP in a SIP account line
-
Password - click Reset Password if you forgot it
-
Domain - sip.commpeak.com
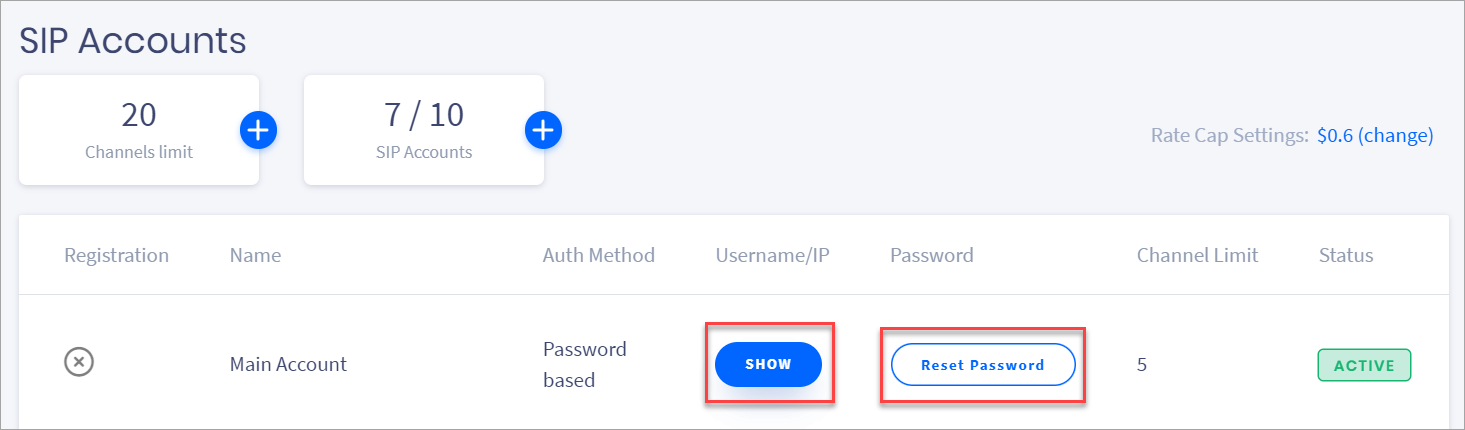
SIP account data in CommPeak Portal
Adding a SIP Trunk
Step 1: Access FreePBX
Open a web browser and navigate to your FreePBX server's IP address or domain. Log in to the server with your admin credentials.
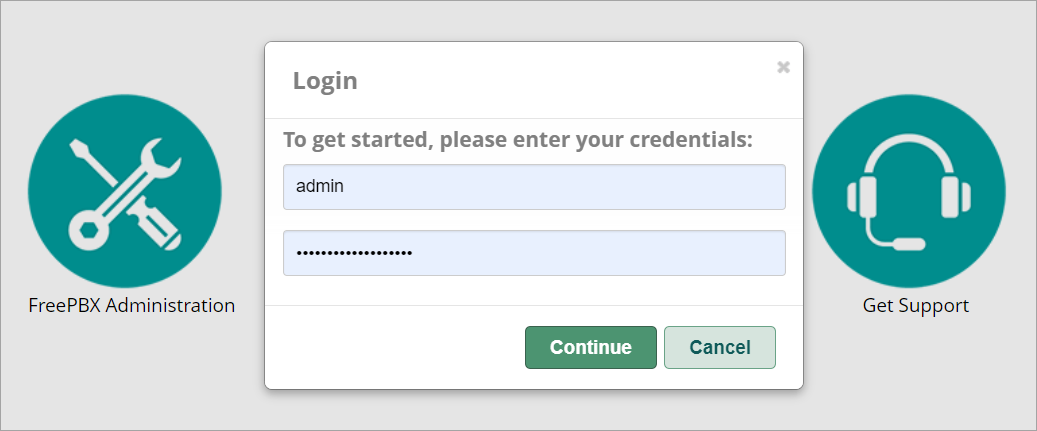
FreePBX login section
Step 2: Navigate to Trunk Management
Once logged in, go to the top menu and hover over Connectivity. In the drop-down menu, click Trunks.
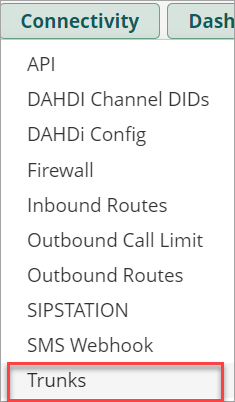
Connectivity section in the FreePBX top menu
Step 3: Add SIP Trunk
Click the Add Trunk button on the Trunks page, then select Add SIP (chan_pjsip) Trunk.
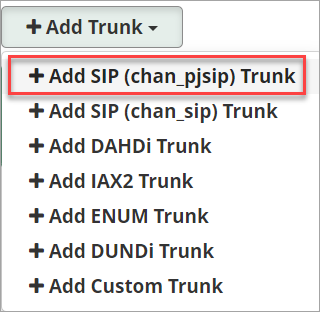
Add SIP Trunk option
Step 4: General Settings
Enter the following data on the General tab:
-
Trunk Name: enter any name for the trunk, e.g., MyTrunk
-
Outbound CallerID: this is your Caller ID
-
Maximum Channels: this is the maximum number of simultaneous calls you can have; leave it blank for no limit.
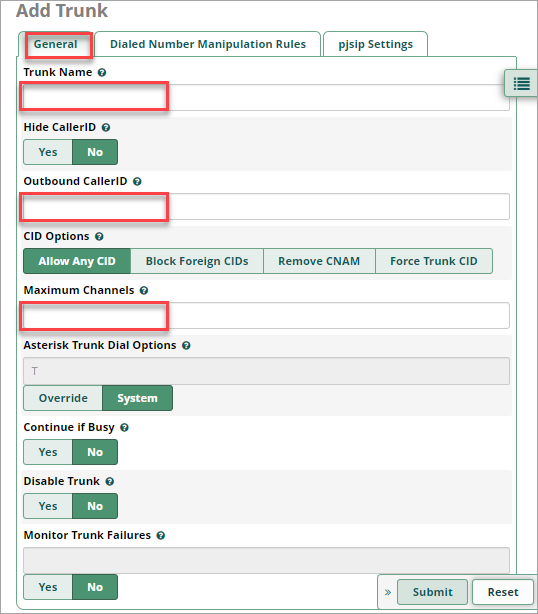
General tab of the trunk configuration
Step 5: pjsip Settings
Enter the following data on the pjsip Settings tab:
-
Username: this is your SIP username
-
Secret: this is your SIP password
-
SIP Server: this is your SIP domain
-
Context: set this to from-internal, which ensures the trunk acts as if calls are originating from internal extensions
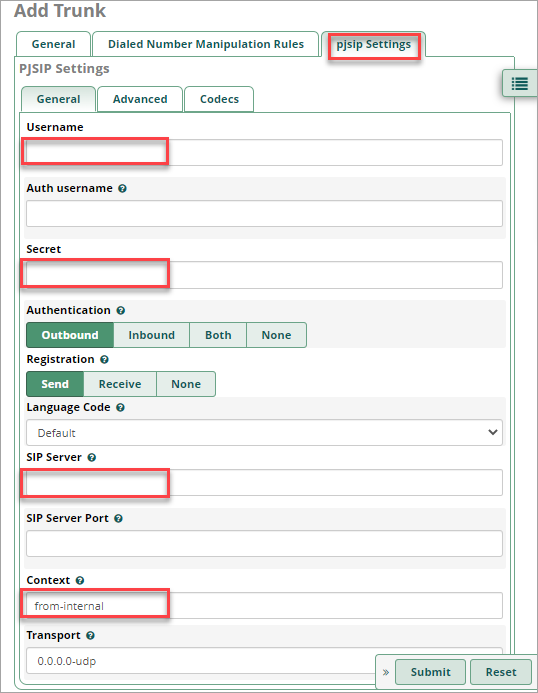
Settings tab of the trunk configuration
Step 6: Codecs
On the pjsip Settings tab, scroll down to Codecs and allow the _ulaw_and alaw codecs.
Setting codecs in the trunk configuration
Click the Submit button at the bottom of the page to save your changes.
Step 7: Apply Changes
Click the Apply Config button at the top of the page to apply the changes.
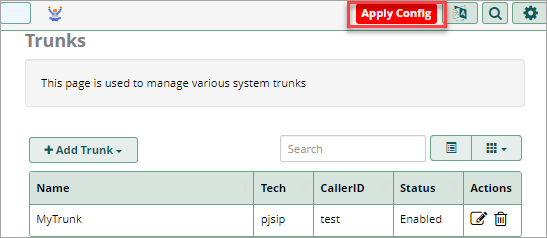
Applying config changes
Step 8: Configure Outbound Routes
To use this trunk for outbound calls, you must configure outbound routes.
-
Go to Connectivity > Outbound Routes.
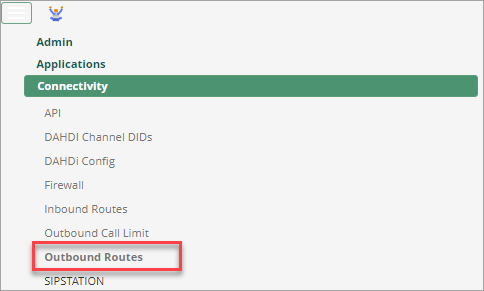
Connectivity section in the trunk settings
-
Click Add Outbound Route.
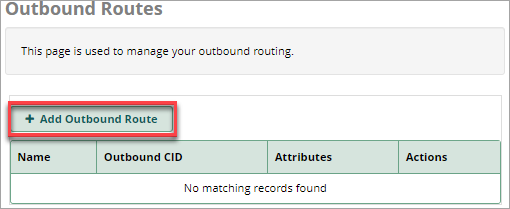
Adding an outbound route
-
Provide a route name. In the Trunk Sequence section, select your new trunk.
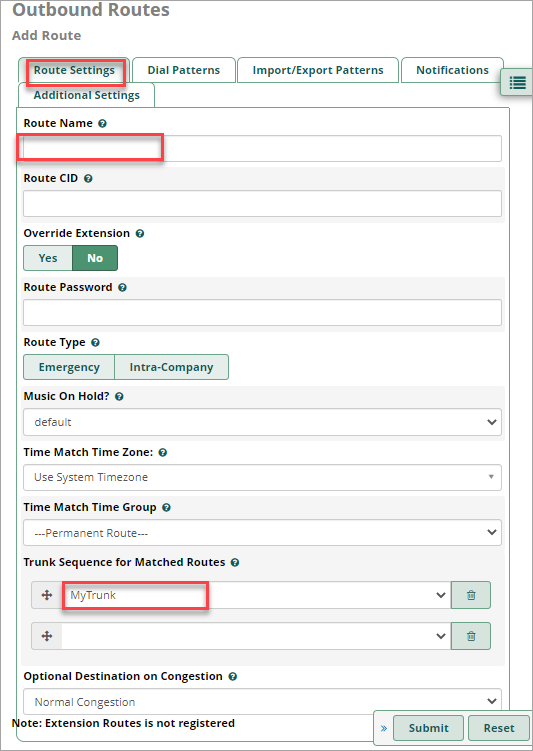
Outbound route settings
-
Add patterns for the numbers you want to route in the Dial Patterns section.
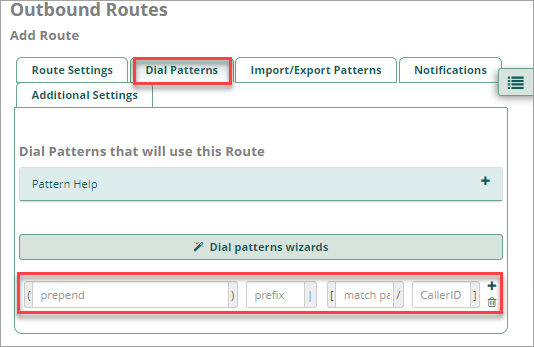
Outbound route dial patterns
-
Click the Submit button at the bottom of the page to save your changes. Then click Apply Config at the top-right again.
Step 9: Test the SIP Trunk
Finally, you can make a test call to verify that everything works correctly. You can do this from a registered SIP device (Softphone or IP Phone) configured to use your FreePBX server.
Troubleshooting
If you encounter any issues, go to Reports >Asterisk Logfiles in your FreePBX to view logs for troubleshooting.
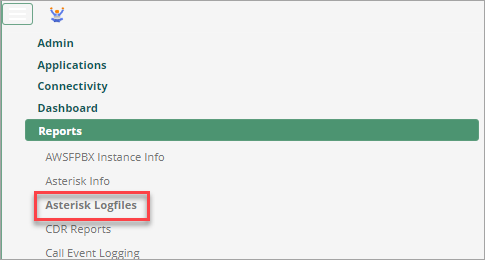
Asterisk logfiles in Reports
Updated 6 months ago