

WebChat
Learn how to build a WebChat widget in TextPeak, brand it, embed it on your site, and rotate the HMAC secret that signs visitor data.
A WebChat channel is an embeddable live-chat widget that you place on your website or app so visitors can start a conversation with your agents. This article walks you through building a widget on the Channels > WebChat page in TextPeak, embedding it on your site, and managing its signing secret.
NOTEConversations that arrive through a WebChat widget land in the TextPeak inbox alongside every other channel. Set up the routing under Inbox settings before you publish the widget, so incoming chats reach the right team. See Incoming Routing.
Opening the WebChat channel list
- Log in to TextPeak in your browser.
- Click Channels in the main menu on the left.
- The Channels page opens and lists every channel type, with the number of channels you have created under each one.
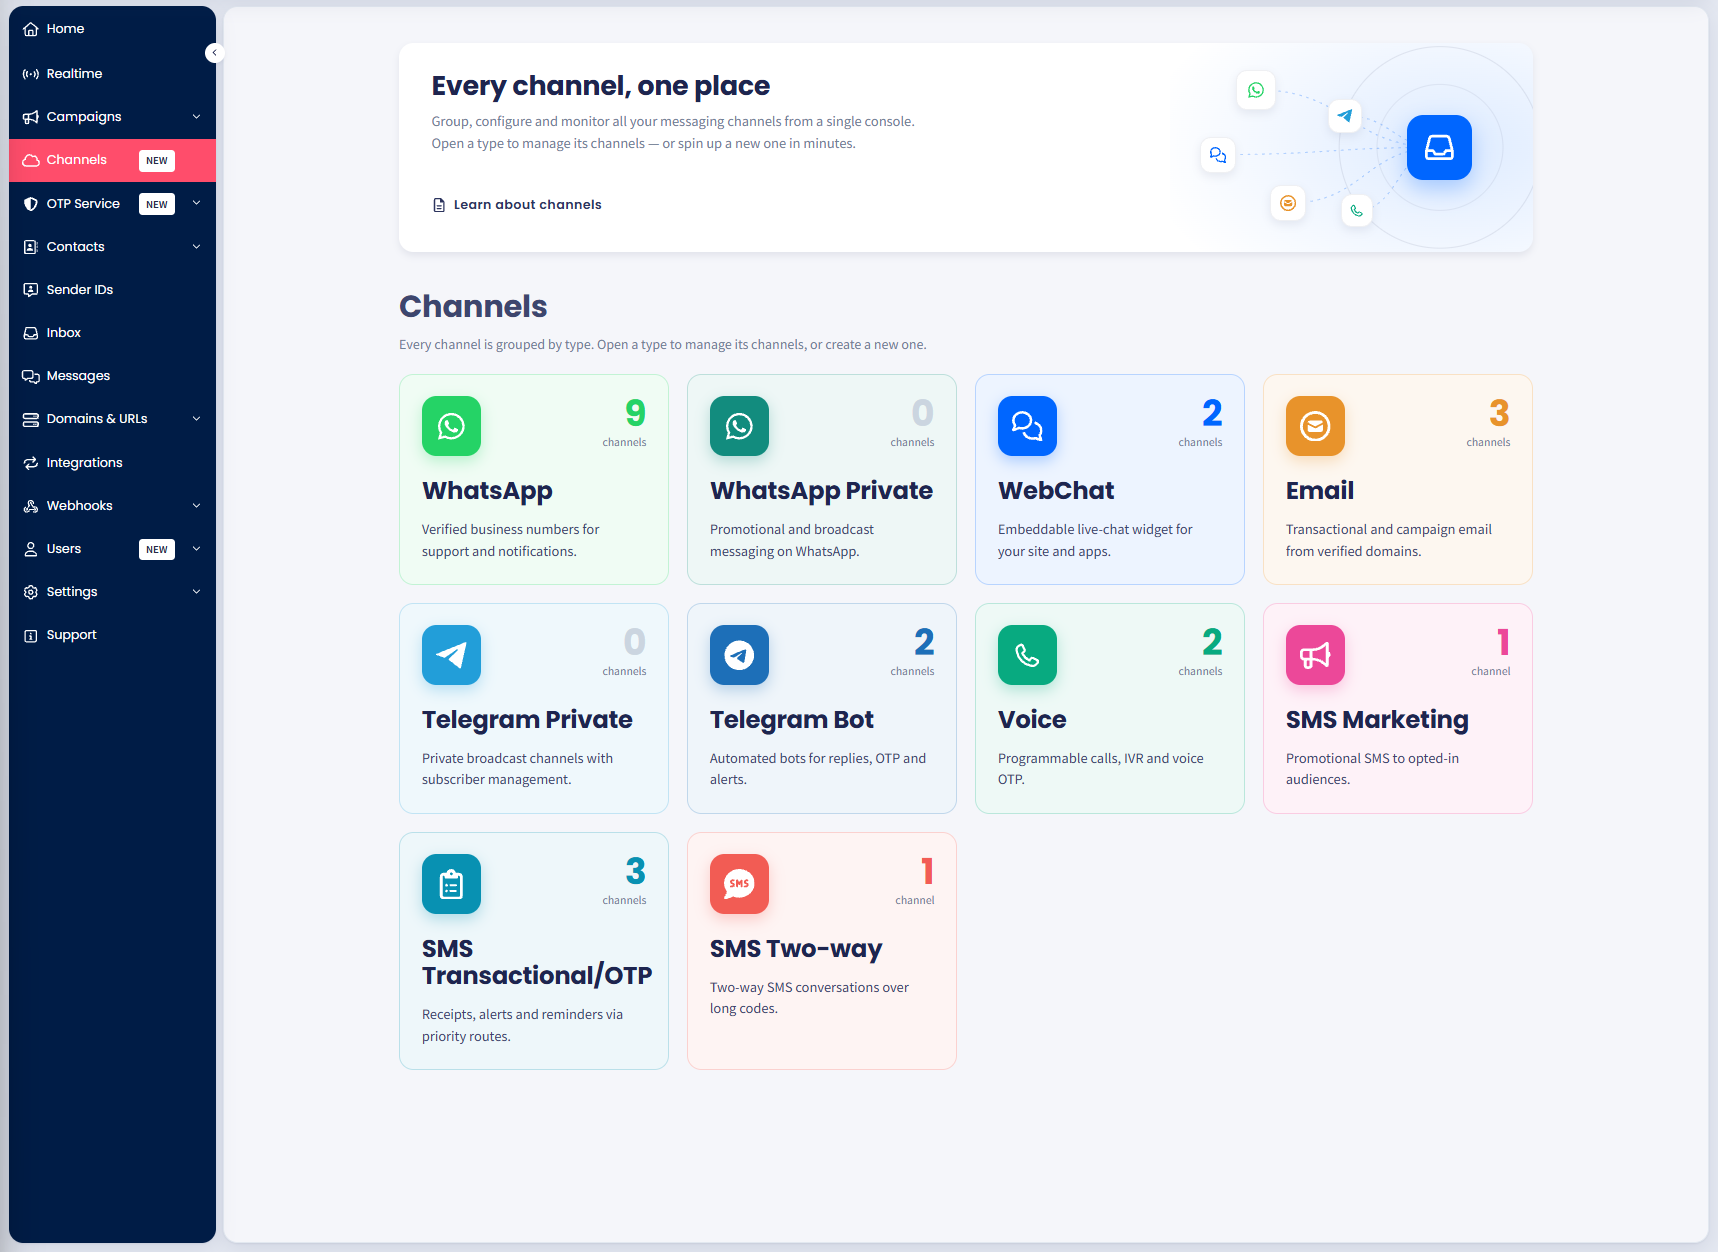
The Channels page in TextPeak
- Select the WebChat card.
- The WebChat channels page lists every widget on the account.
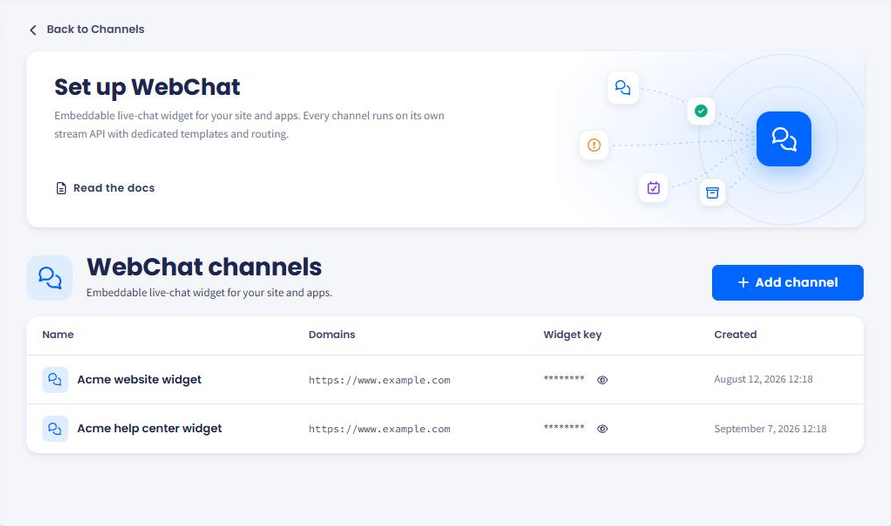
The WebChat channels page
Refer to the following table for the columns in the list.
| Column | Description |
|---|---|
| Name | The widget name you entered when you created it. |
| Domains | The origins allowed to embed this widget. |
| Widget key | The public key the embed snippet uses. Click the eye icon to reveal it. |
| Created | Date and time the widget was created. |
Naming the widget and allowing its domains
Click Add channel to open the builder. It has three columns: a numbered step list on the left, the form for the selected step in the middle, and a live preview of the widget on the right that updates as you type. The four steps are Widget details, Content, Appearance, and Placement, and you can move between them with the step list or by scrolling the form.
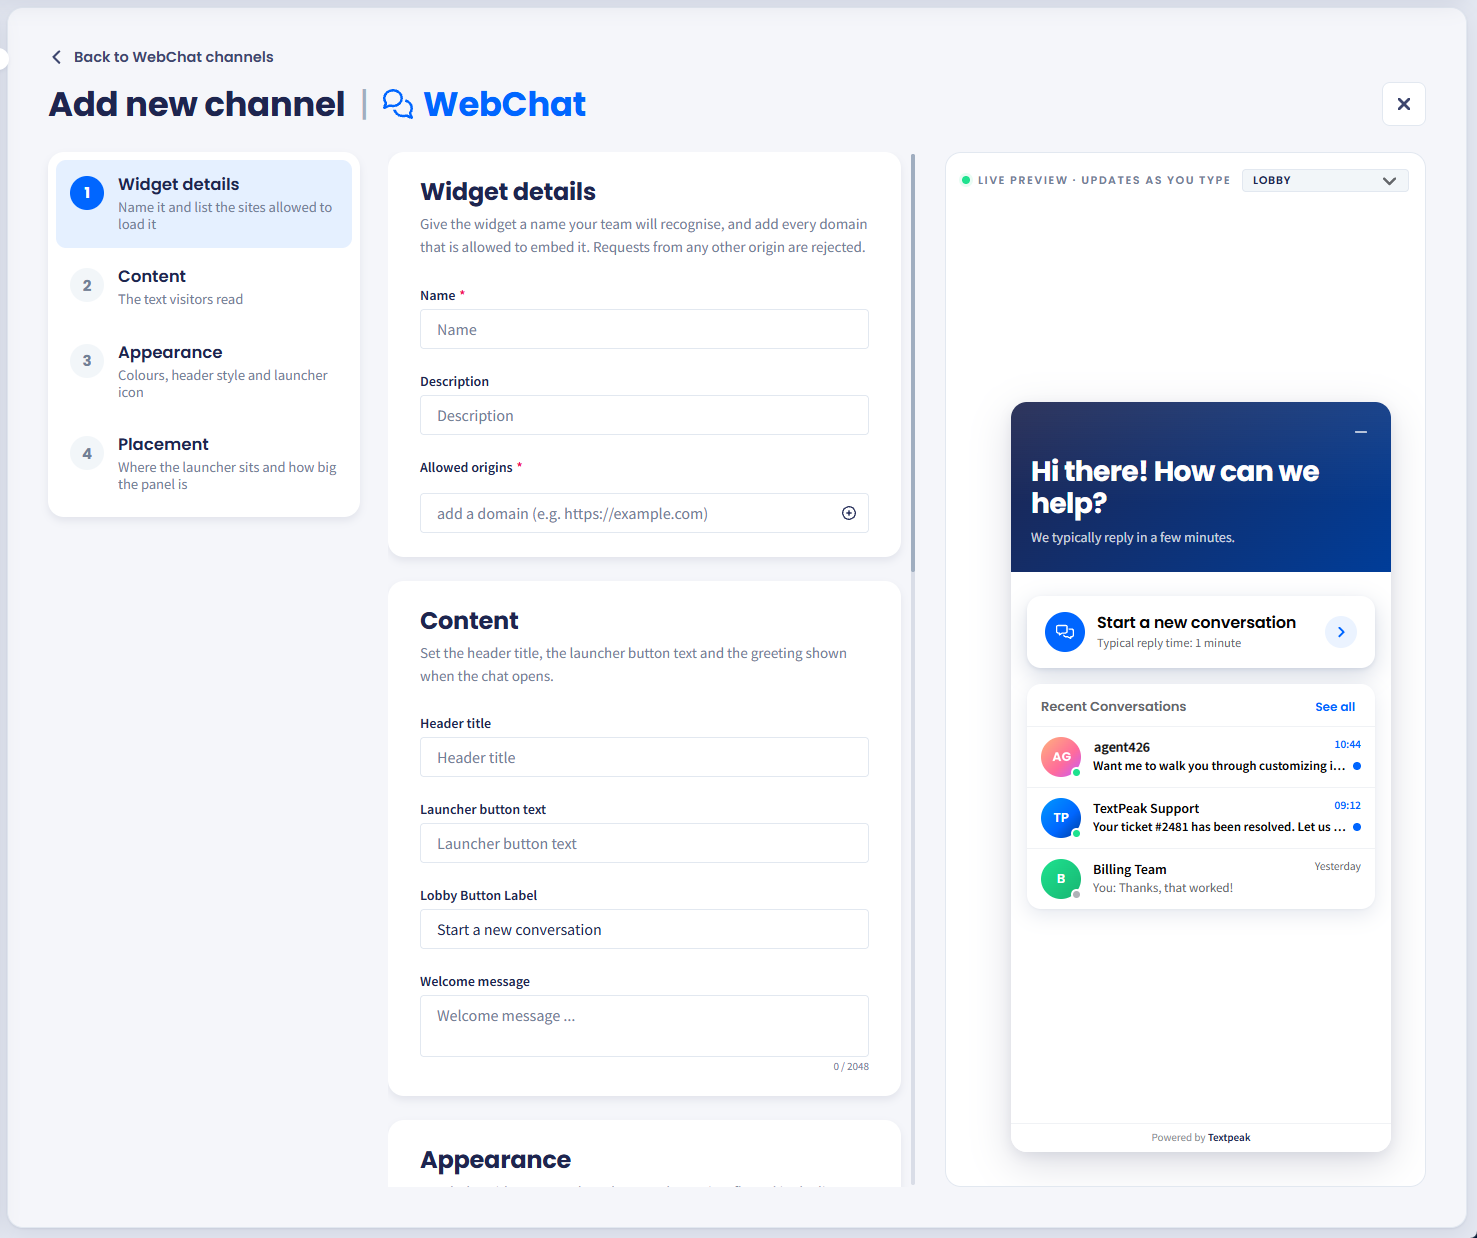
Widget details, with the live preview on the right
- In Name, enter a name your team will recognize, such as
Website support widget. - In Description, note what the widget is for.
- In Allowed origins, enter each domain that may embed the widget, including the protocol, such as
https://www.example.com. Press Enter to add it, and repeat for every domain.
WARNINGRequests from any origin that is not on the list are rejected. Because the widget runs in the visitor's browser, this list is what stops another site from loading your widget and passing itself off as you. Add every subdomain and every staging host you need before you go live.
Setting the widget text
The Content section holds the wording the visitor sees.
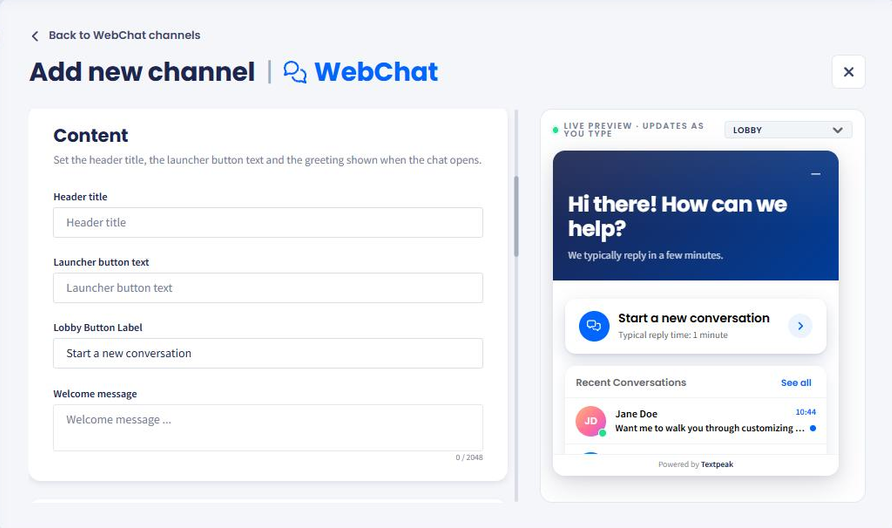
The Content section
| Option | What it sets |
|---|---|
| Header title | The heading at the top of the open chat panel. |
| Launcher button text | The label on the button that opens the widget. |
| Lobby Button Label | The label on the button that starts a conversation, for example Start a new conversation. |
| Welcome message | The greeting shown when the chat opens. Up to 2,048 characters. |
Matching the widget to your brand
The Appearance section controls colors and icons. Every change appears in the live preview beside the form.
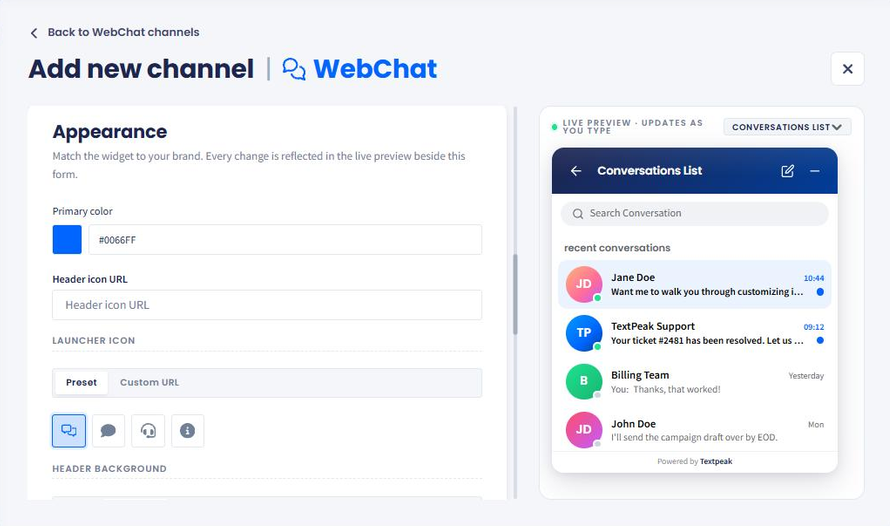
Appearance, showing Primary color and LAUNCHER ICON
- Set Primary color to your brand color, either with the swatch or by entering a hex value such as
#0066FF. - In Header icon URL, enter the address of the image you want in the panel header.
- Under LAUNCHER ICON, choose Preset and pick one of the four supplied icons, or choose Custom URL and point to your own image.
- Under HEADER BACKGROUND, choose Solid, Gradient, or Image. A gradient takes a From color, a To color, an Angle, and a Stop position.
- Under HEADER TEXT COLOR, choose Auto to let TextPeak pick the readable option, or force Light or Dark.
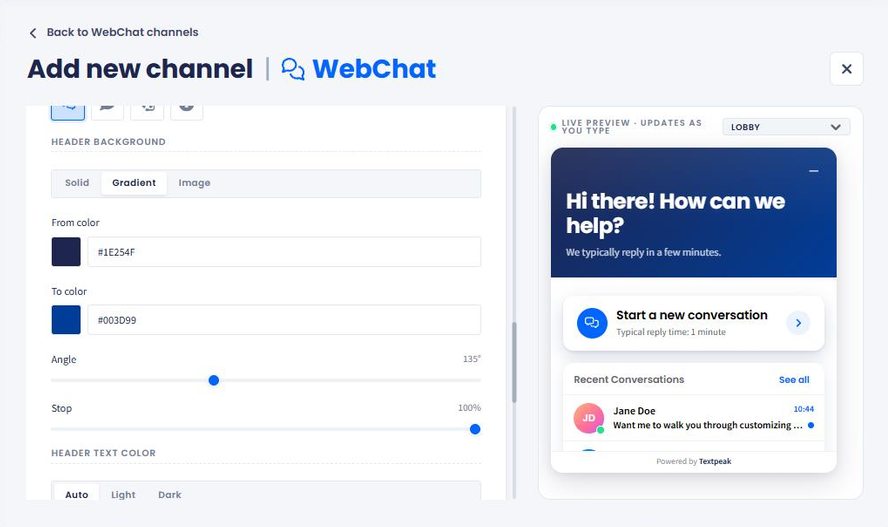
HEADER BACKGROUND, set to Gradient
Positioning the widget on the page
The Placement section anchors the launcher and sizes the chat panel.
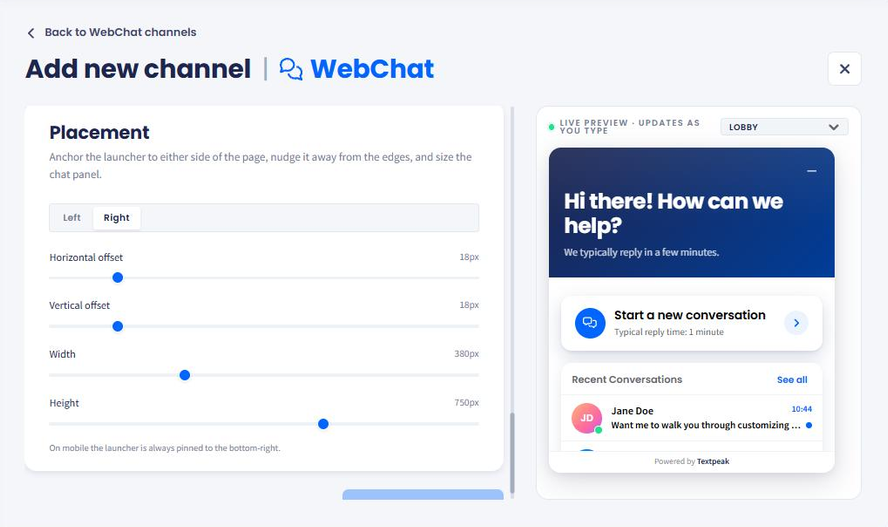
The Placement section
- Choose Left or Right for the side of the page the launcher sits on.
- Drag Horizontal offset and Vertical offset to move the launcher away from the edges. Both default to 18px.
- Drag Width and Height to size the chat panel. They default to 380px and 750px.
NOTEThe widget is responsive, so the panel adapts to the visitor's screen size. On mobile the launcher is always pinned to the bottom right, whichever side you choose here.
Checking the widget in the live preview
The preview selector above the widget switches between the three states a visitor moves through, so you can check the wording and colors in each one before you publish.
- Lobby shows the greeting and the button that starts a conversation.
- Conversations List shows the visitor's previous conversations.
- Chat shows an open conversation with an agent.
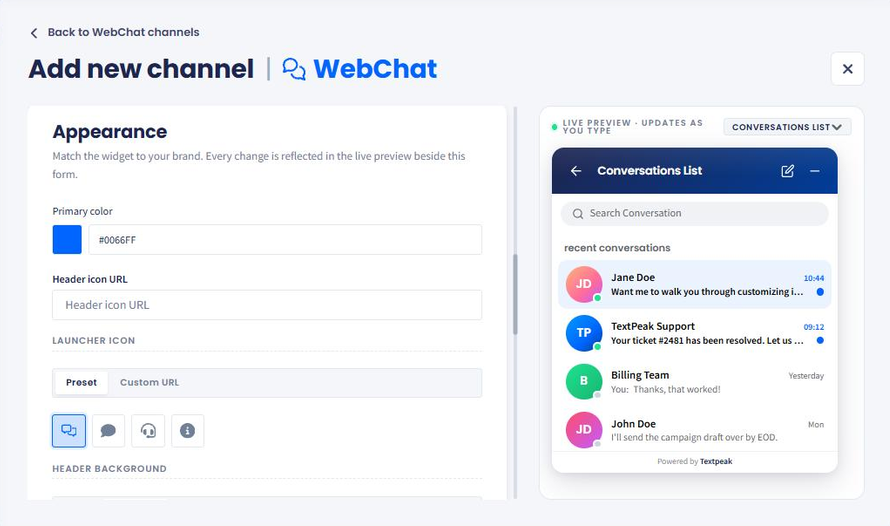
The live preview set to Conversations List
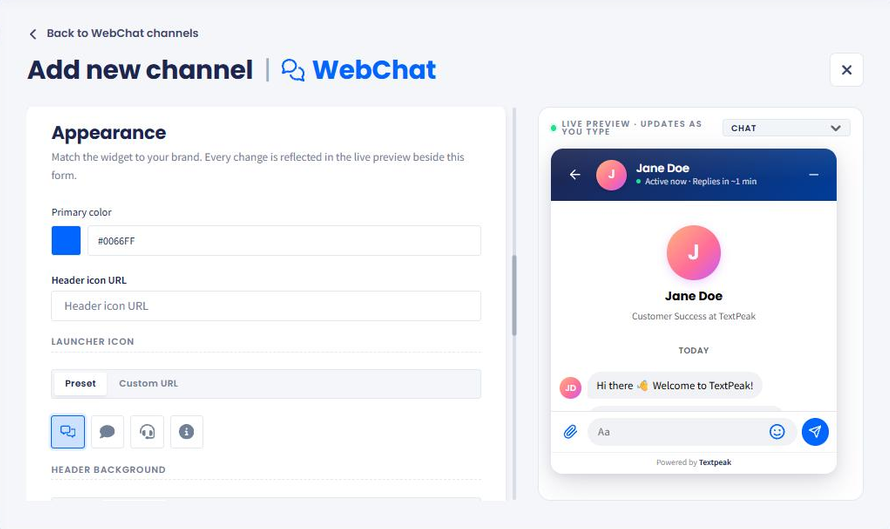
The live preview set to Chat
When the preview looks right, click Create widget.
Embedding the widget on your site
- Open the widget from the WebChat channels list.
- In Channel management, click Show embed code.
- Click Copy snippet, then paste the snippet into the
<head>of every page the widget should appear on.
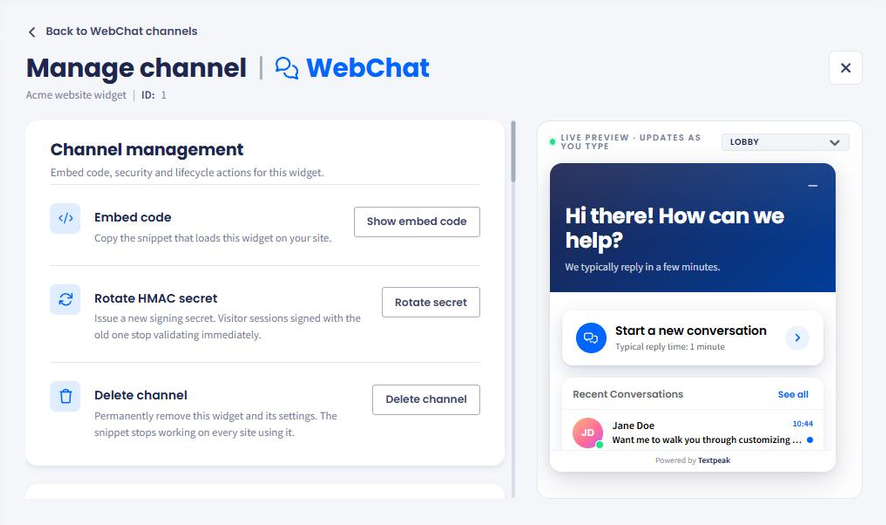
Channel management for a WebChat widget
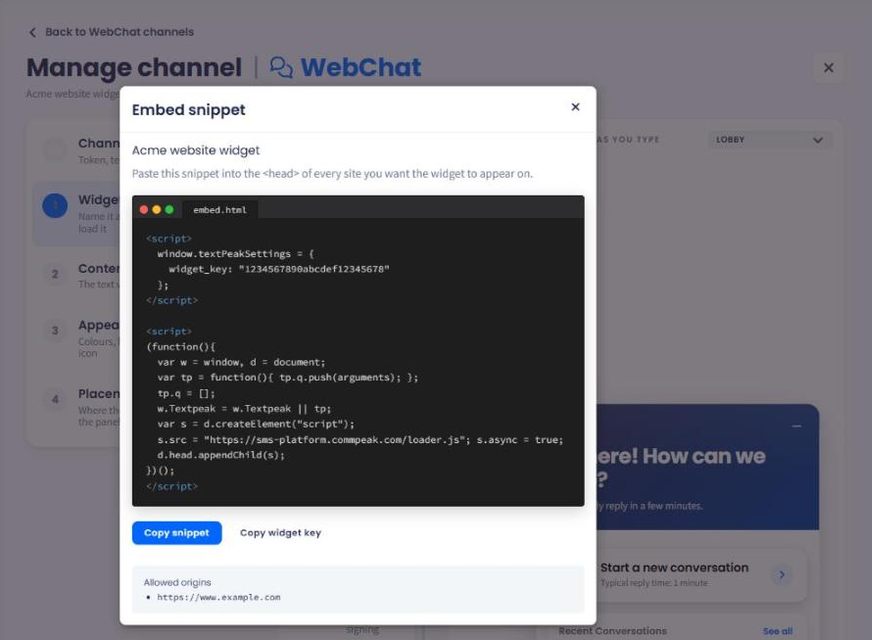
The Embed snippet dialog
The snippet sets widget_key and loads the widget script. The dialog also lists the allowed origins, so you can confirm the site you are pasting into is on the list.
<script>
  window.textPeakSettings = {
    widget_key: "1234567890abcdef12345678"
  };
</script>

<script>
(function(){
  var w = window, d = document;
  var tp = function(){ tp.q.push(arguments); };
  tp.q = [];
  w.Textpeak = w.Textpeak || tp;
  var s = d.createElement("script");
  s.src = "VERIFY: production loader URL"; s.async = true;
  d.head.appendChild(s);
})();
</script>
NOTEThe widget key is public and identifies the widget. It is not a secret, and the allowed origins list is what protects the widget from being embedded elsewhere.
Rotating the HMAC secret
Alongside the widget key, each WebChat channel has an HMAC secret. Your site uses it to sign the visitor details it passes to TextPeak, so the platform can confirm the data came from you and has not been altered in the browser.
To issue a new secret, open the widget, then click Rotate secret in Channel management, shown earlier in this article.
WARNINGVisitor sessions signed with the old secret stop validating as soon as you rotate. Update the signing code on your site in the same change window.
Deleting a widget
Click Delete channel in Channel management to remove the widget and its settings. The snippet stops working on every site that uses it, and the action cannot be undone.
For the other channel types and the actions they share, see TextPeak Channels.
Updated 9 days ago