

Managing Portal API Keys
Create, view, edit, and delete the API keys that authenticate the CommPeak Portal API and, with full access, other CommPeak APIs.
An API Key is a secret code that identifies your application when it calls CommPeak APIs. It authenticates requests to the CommPeak Portal API and, with full access, to other services such as the Dialer API and Lookup API, all through https://api.commpeak.com. You can create several keys, for example one per integration, and delete any of them at any time.
NOTEYou can create API keys only after your customer account is fully activated. Until then, the Add API key button is unavailable.
Tokens on the Speech API Tokens and Lookup API Service tabs are deprecated. Use an API key from the API Keys tab instead.
Create an API key
To create an API key:
Log in to My CommPeak
Log in to My CommPeak.
Open API Access
Expand Settings in the main menu and open the API Access tab.
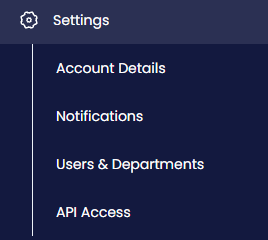
Settings menu tab
Open the API Keys tab
Select the API Keys tab.
Add a new key
Click Add API key in the top-right corner of the page.
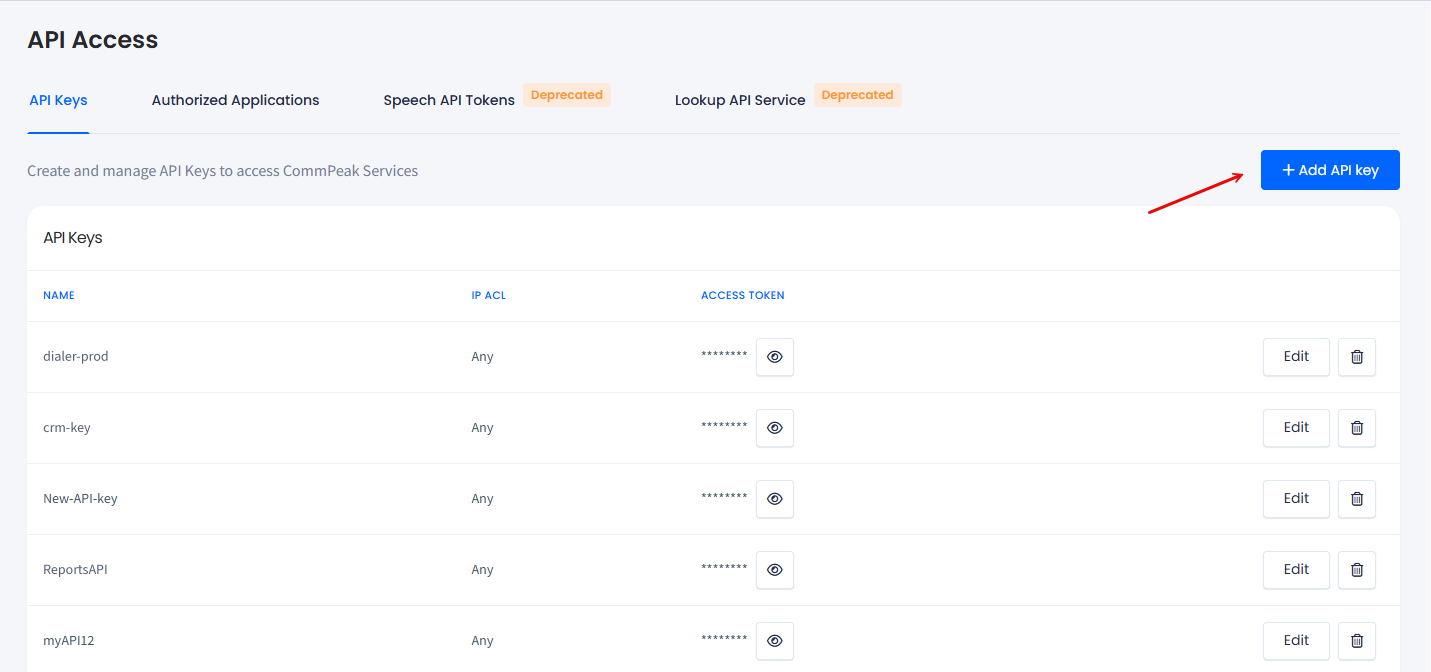
The API Keys page
Name the key
In the Create API Key panel, enter a Name that helps you recognize the key later.
Select a default SMS stream
Optional: select a Default SMS Stream for SMS sent with this key.
Select a SIP account for calls
Optional: select a SIP Account for Calls. Only JWT-enabled SIP accounts can be selected. Calls placed with the key are originated as this account and authenticated with a JWT signed for it.
Set the access level
Under Access, choose what the key can do:
- Full access (all services): on by default. The key can use the Dialer, Lookup, and SMS Platform services as well as the Portal API. Turn it off if the key only needs the Portal API.
- Read-only (Portal API only): turn it on if the key only needs to view data. A read-only key cannot create, change, or delete anything through the Portal API, but placing calls stays available. Other services enabled for the key are not affected.
Restrict the key by IP address
Optional: under IP ACL, restrict the key to specific IP addresses (an access control list, or ACL). Enter an address in IP-only CIDR format, for example 203.0.113.10/32 for a single IP address, and click Add. Repeat for each address. Leave the list empty to allow requests from any IP address.
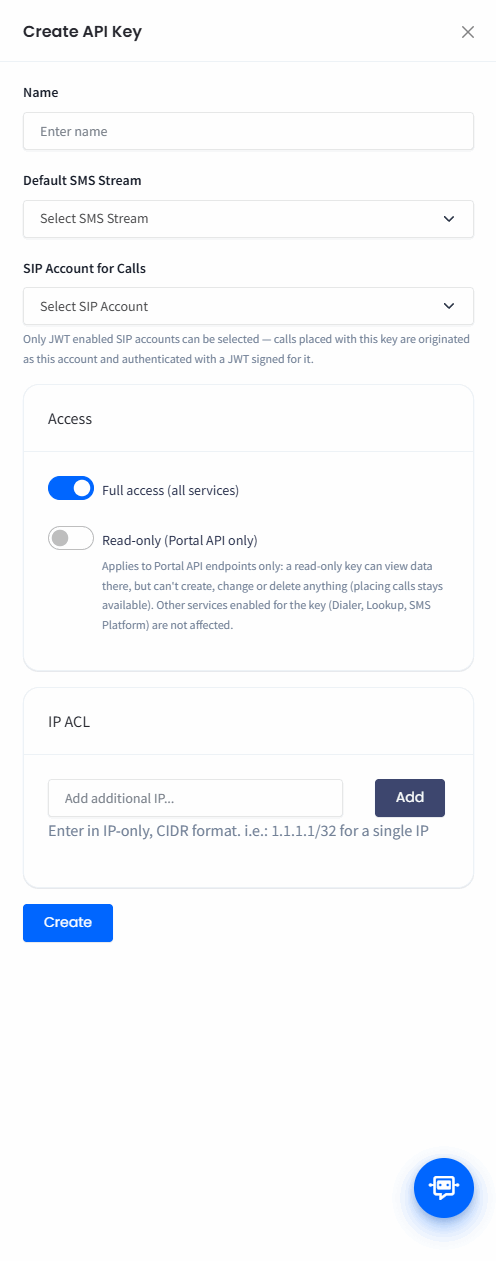
Creating an API key
Create the key
Click Create, then re-enter your account password to confirm.

Confirm your identity with your account password
The new key appears in the list on the API Keys page, together with its services and IP ACL.
View an access token
For security, access tokens are hidden by default and shown as ********.
To reveal an access token:
Click the eye icon
On the API Keys page, click the eye icon next to the key.
Confirm your password
Confirm your identity with your account password. The token appears in the Access Token column.
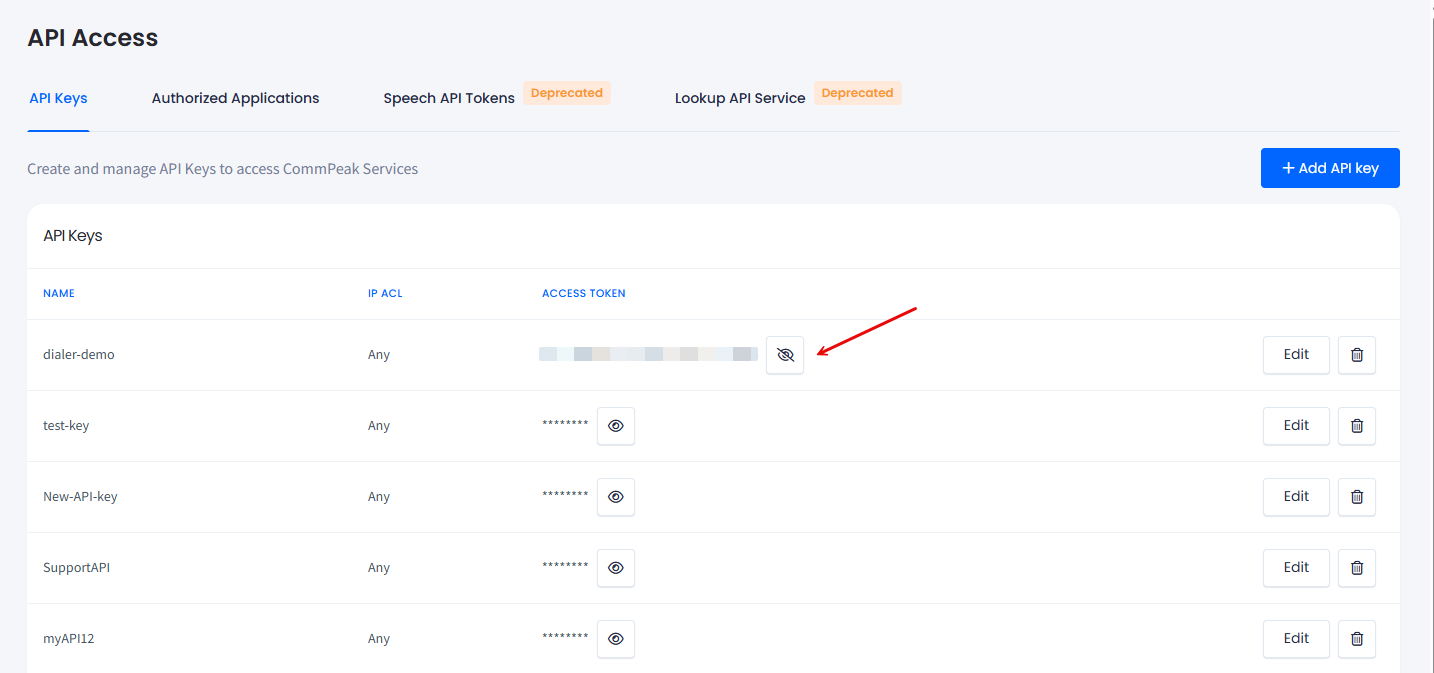
Revealing an access token
To hide the token again, click the eye icon.
Keep your access token privateTreat your access token like a password. Anyone who has it can use the API on your behalf. Use IP ACL to limit which IP addresses can use the key, and turn off Full access (all services) for keys that only need the Portal API.
Edit or delete an API key
To edit an API key:
Open the key
On the API Keys page, click Edit next to the key.
Change the settings
In the Edit API Key panel, change the fields you need: Name, Default SMS Stream, SIP Account for Calls, Access, or IP ACL.
Save the changes
Click Save changes.
To delete an API key, click the trash icon next to it. Deleting a key is permanent, and any application that uses it loses access immediately.
TIPTo replace a key without downtime, create the new key first, update your applications to use it, and then delete the old one.
Next steps
To make your first request with the new key, see Getting Started with CommPeak APIs. For the full list of endpoints, see the Portal API overview.
Updated 6 days ago