Access Control Lists
Configure IP address, FQDN, and country-based access controls for your domain. Learn how to enable the feature, add entries, filter, and manage access for various types of connections.
Video Tutorial
This feature allows you to limit access to the CommPeak Dialer or Cloud PBX domain by the user's IP address, fully qualified domain name (FQDN), and country.
To change whitelisting settings for your domain, in the Settings menu, go to General Settings and switch to the Access Control Lists tab.
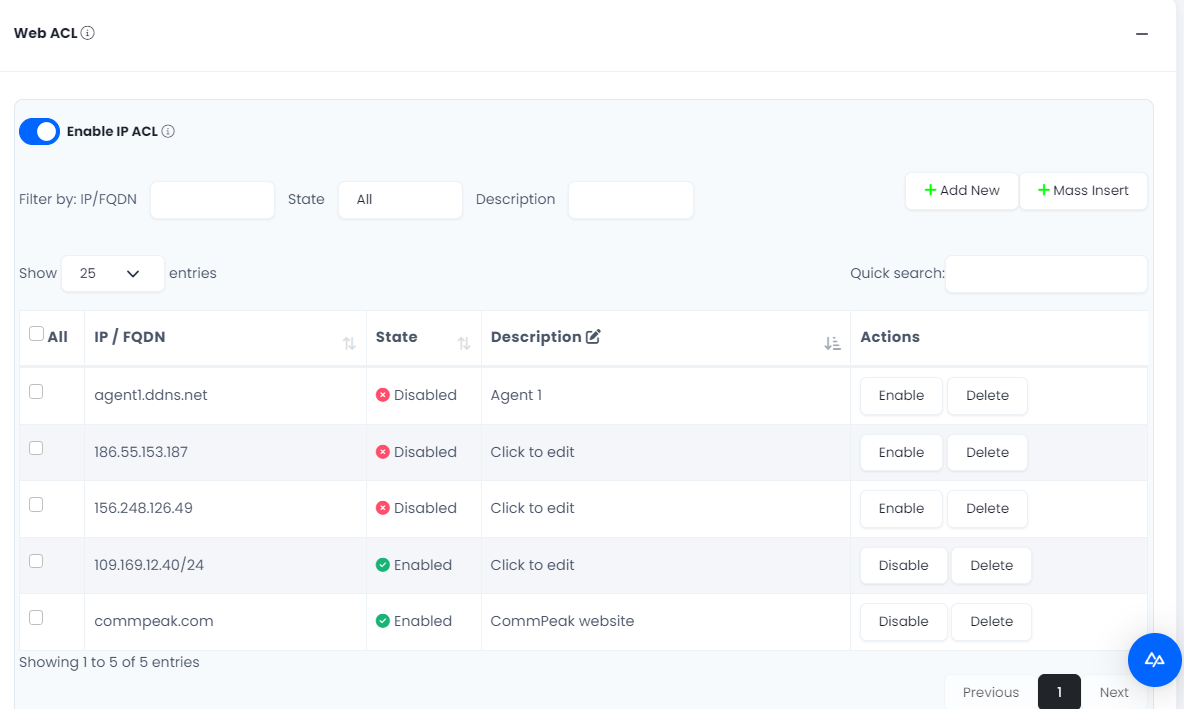
Web ACL section
Enabling the Feature
To use the feature, move the Enable IPACL toggle to the right.
When enabled, the IP addresses and FQDNs outside the list of allowed ones will be blocked. If disabled, access will be open to any IP.

Enable IP ACL toggle
Adding New Entries
To add a new allowed IP address or FQDN:
Click the Add New button, or to add multiple entries, click Mass Insert.

Add New entries button
Then, in the window displayed, specify the IP address/FQDN or multiple ones, add a description (optional), select the state of the new entry/ies — Enable or Disable, and click Add.
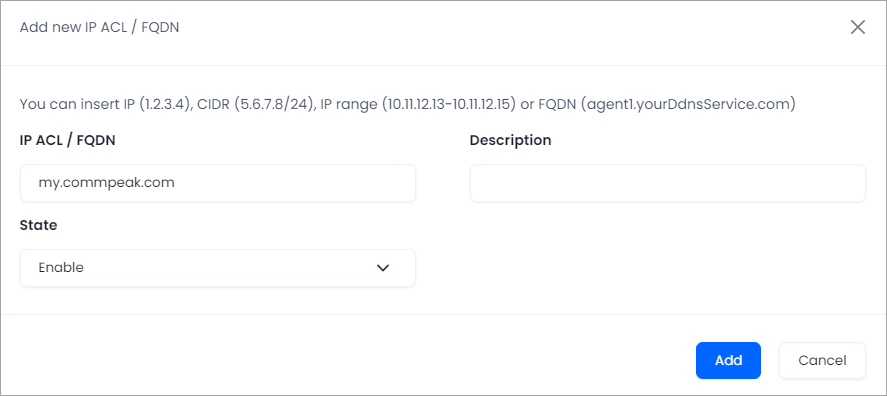
Specifying IP ACL/FQDN
The entries will be added to the list.
IMPORTANTRemember to include your own IP address / FQDN in the list before saving your settings. Otherwise, you will not be able to access the Dialer or Cloud PBX.
When should you use an FQDN?
Use an FQDN if you have a dynamic IP Address.
EXAMPLEYou want to limit the access to the Dialer or Cloud PBX, so that agents can log in from their workplaces only, but their IP addresses are dynamic. Then you specify their FQDNs, which will remain the same even if their IPs change.
TIPIf you hover the cursor over an FQDN, you will see the related IP address.
Filtering and Searching
You can filter the visible entries by IP/FQDN, state, and description.
To apply the filter, just enter the needed text or select the required option.
Alternatively, you can search for the necessary entry by typing your request in the Quick search field.

Filtering and searching entries
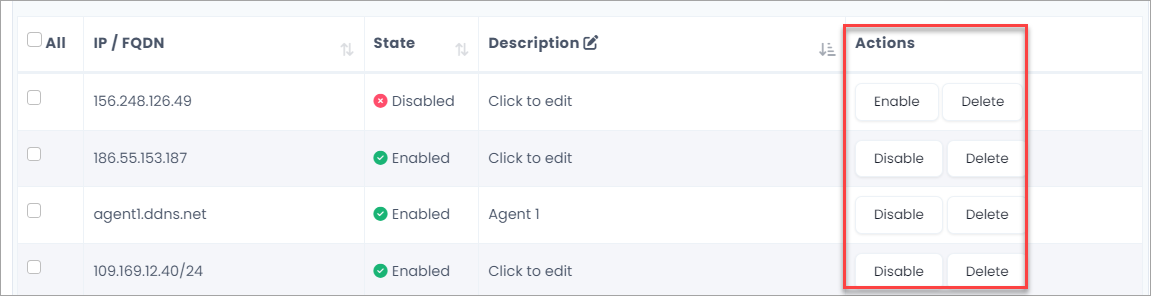
Enabling, Disabling and Deleting Entries
IPs or domain names can be enabled, disabled, and deleted per entry or in bulk.
To perform one of these actions for a single entry, on the entry line, click the Disable (Enable) or Delete button and confirm the action.
Enabling, disabling, and deleting entries
For bulk actions:
-
Place a checkmark on as many lines as you need.
-
Select an action under the list.
-
Choose if you want to apply it to the selected entries or all entries.
-
Click Process.
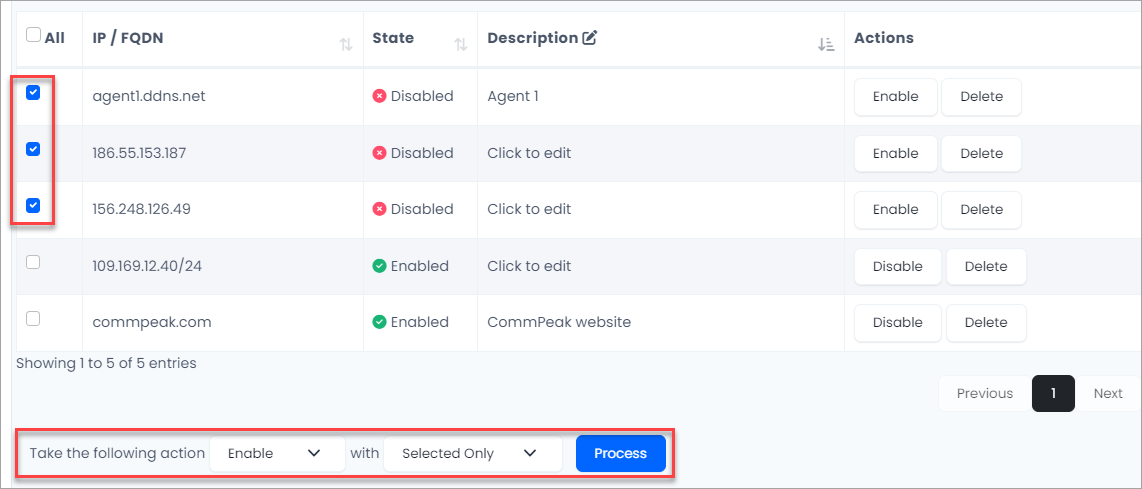
Bulk actions
Filtering IPs by Countries
There is an option to allow access to your system from selected countries only. To use it, move the Countries IP ACL toggle to the right and choose one or more countries from the drop-down list.
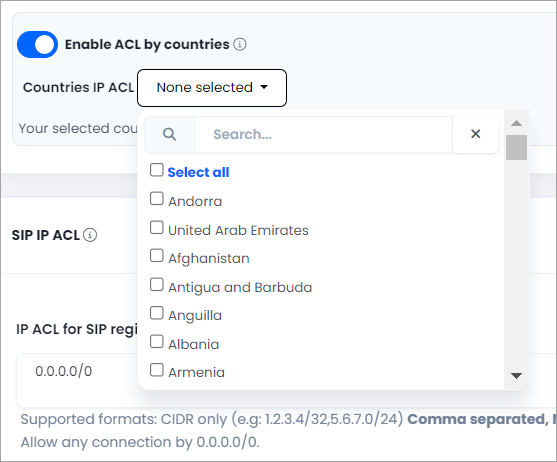
Enabling ACL by countries
You can use both the list of allowed IPs and IP filtering by country.
EXAMPLECall center agents are working from Country A, and the manager is located in Country B.
You can add the agents' IP addresses, which are in Country A, to the list of allowed ones. At the same time, you can select Country B as the country with allowed access and NOT include Country A in the list.
SIP IP ACL
Utilize this setup for devices, softphones, WebRTC, and other SIP connections to authorize designated IP addresses for initiating calls and managing inbound traffic allowances. Ensure that IP addresses are added in CIDR format, along with their respective subnet masks.
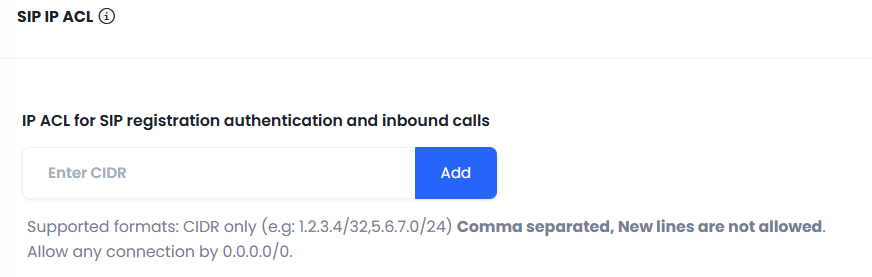
IP ACL for SIP registration authentication
IMPORTANTFor security reasons, we recommend adding the IP addresses of managers or team leaders only.
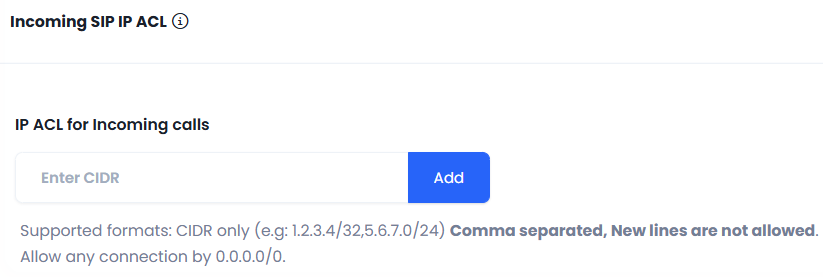
Incoming SIP IP ACL
Use this section to manage the access control list for incoming calls. It defines which IP addresses are authorized to initiate calls to the dialer. Only IPs added to this list will be allowed to send incoming calls; all others will be blocked. Enter IP addresses in CIDR format (e.g. 1.2.3.4/32, 5.6.7.0/24), comma separated. To allow any incoming connection, use 0.0.0.0/0.
Incoming AIP IP ACL section
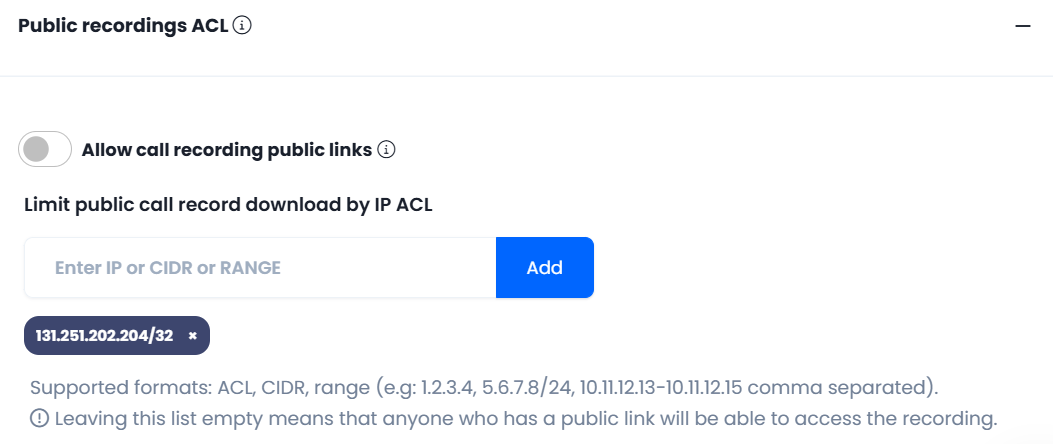
Public Recordings ACL
Move the toggle to the right if you intend to authorize third-party downloads of your call record files via associated links. Afterward, specify the IP addresses you want to include in the whitelist.
Ensure to input IP addresses in CIDR format or IP range, accompanied by their respective masks.
Configuring ACL for downloading public recordings
NOTEAn empty list implies that individuals with a public link have unrestricted access to the recordings.
Updated 6 months ago