

Custom Views
Learn how to save a set of Inbox filters as a custom view, build a view from channel, filter, team, and tag criteria, and manage the views in your sidebar.
Creating custom inbox views
A view saves a set of filters under a name you choose and shows the matching conversations in your sidebar in real time. Instead of rebuilding the same filter every morning, you build it once and select it in a click. This article walks you through creating and managing your views.
Creating a view
Views live in the VIEWS section of the Inbox sidebar.
-
In the main TextPeak menu, select the Inbox tab.
-
In the VIEWS section of the sidebar, click the plus icon to open Manage views.
-
Click Create new view.
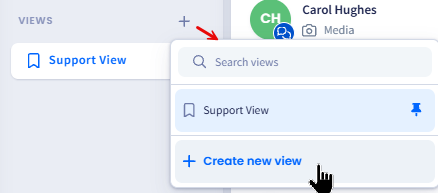
Create new view button
-
In View Name, enter the name you want the view to show under in your sidebar.
-
Click Add filter and select a criterion: Channel, Filters, Teams, or Tags.
-
In the Select... drop-down for that criterion, select the values you want. Each criterion accepts more than one value, and Select All and Clear All let you set the whole list at once.
-
Repeat steps 5 and 6 for every criterion you want in the view. To drop a criterion, click the cross beside its row.
-
Click Save.
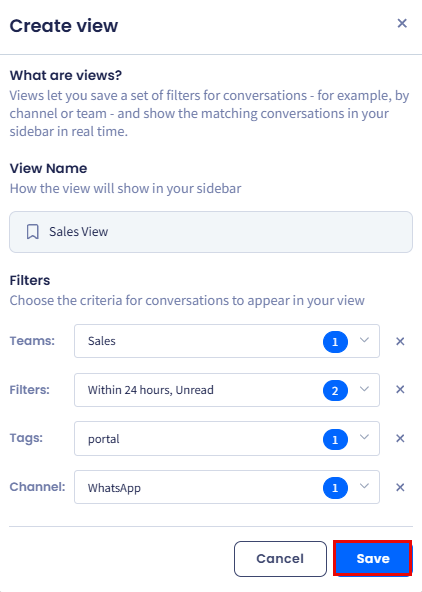
Creating a custom view
The view appears in the VIEWS section of the sidebar. Select it to load the conversations it matches.
NOTEA view is a live filter, not a saved list. Conversations move in and out of it as their channel, team, tags, and state change.
Criteria you can add
A view can combine any of the four criteria described below.
| Criterion | What it matches |
|---|---|
| Channel | The channel the conversation arrived on: WhatsApp or SMS. |
| Filters | The conversation filters [link] also available behind the filter icon above the conversation list, including status and assignment. |
| Teams | The teams whose conversations the view covers. |
| Tags | The tags applied to the conversation. |
TIPName views after the work they represent rather than the filters they hold. Needs a first reply is easier to scan in a sidebar than Unanswered + Unassigned.
Finding and selecting a view
-
In the VIEWS section of the sidebar, click the plus icon to open Manage views.
-
Enter part of the name in the Search views field.
-
Select the view you want.
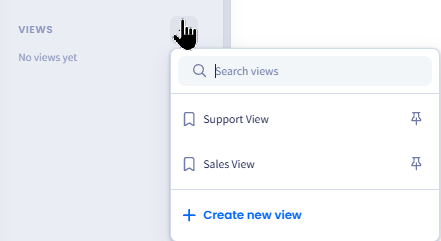
Selecting views window
Pin the views you have already created to appear directly in the VIEWS section, so you can select them without opening Manage views first.
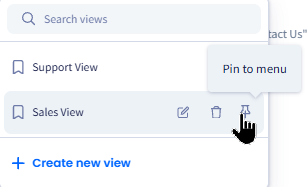
Pinning views
Selecting a view does not change your layout. If you would rather scan many conversations at once, combine a view with the table layout - see the Table Layout page.
Editing or deleting a view
-
Open Manage views from the VIEWS section of the sidebar.
-
Select the view you want to change.
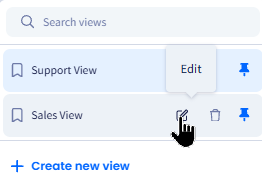
Editing views
-
Update the name or the criteria, then click Save. To remove the view, delete it.
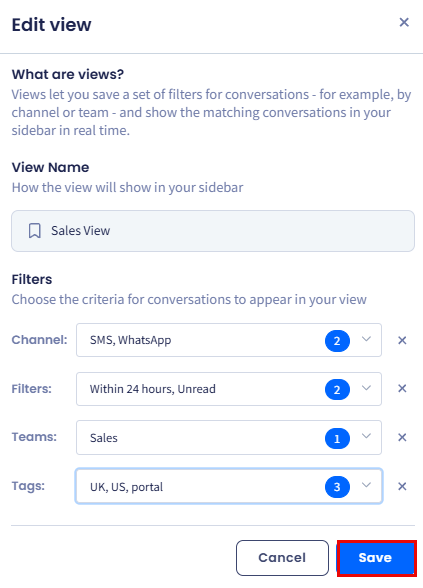
Updating views
Deleting a view removes only the saved filter set. The conversations it covered are untouched.
For the filters available outside a view, see the Agent's Guide: Managing Conversations page.
Updated 3 days ago