Trunks
Manage and configure SIP trunks for connecting the Cloud PBX with external media servers. Learn how to create, test, and assign trunks to routing rules.
A SIP Trunk is a connection to another media server that supports the SIP protocol. We create trunks between the Cloud PBX and an outside provider, PBX, or POP.
After creating trunks, you can use them in dialing routes for a specific country, user group, or lead.
Managing Existing Trunks
You can find trunks in Settings > Outbound Configurations on the Trunks tab.

Trunks tab
By default, you have at least one main trunk set, and you can add more.
On the Trunks page, you can see a table with all created trunks.
| Column | Explanation |
|---|---|
| ID | The trunk ID |
| Trunk Name | The trunk name |
| Uri | To see the full trunk URI, hover over the Show URIlink. To copy the trunk URI, click the copy icon. |
| State | This shows whether the trunk is used as a primary, backup, or failover trunk or if it is disabled. |
| Assigned Rules | The number of the routing rules using the trunk. To see the list of prefixes/user groups using the trunk, hover over the number. |
| Actions |
|
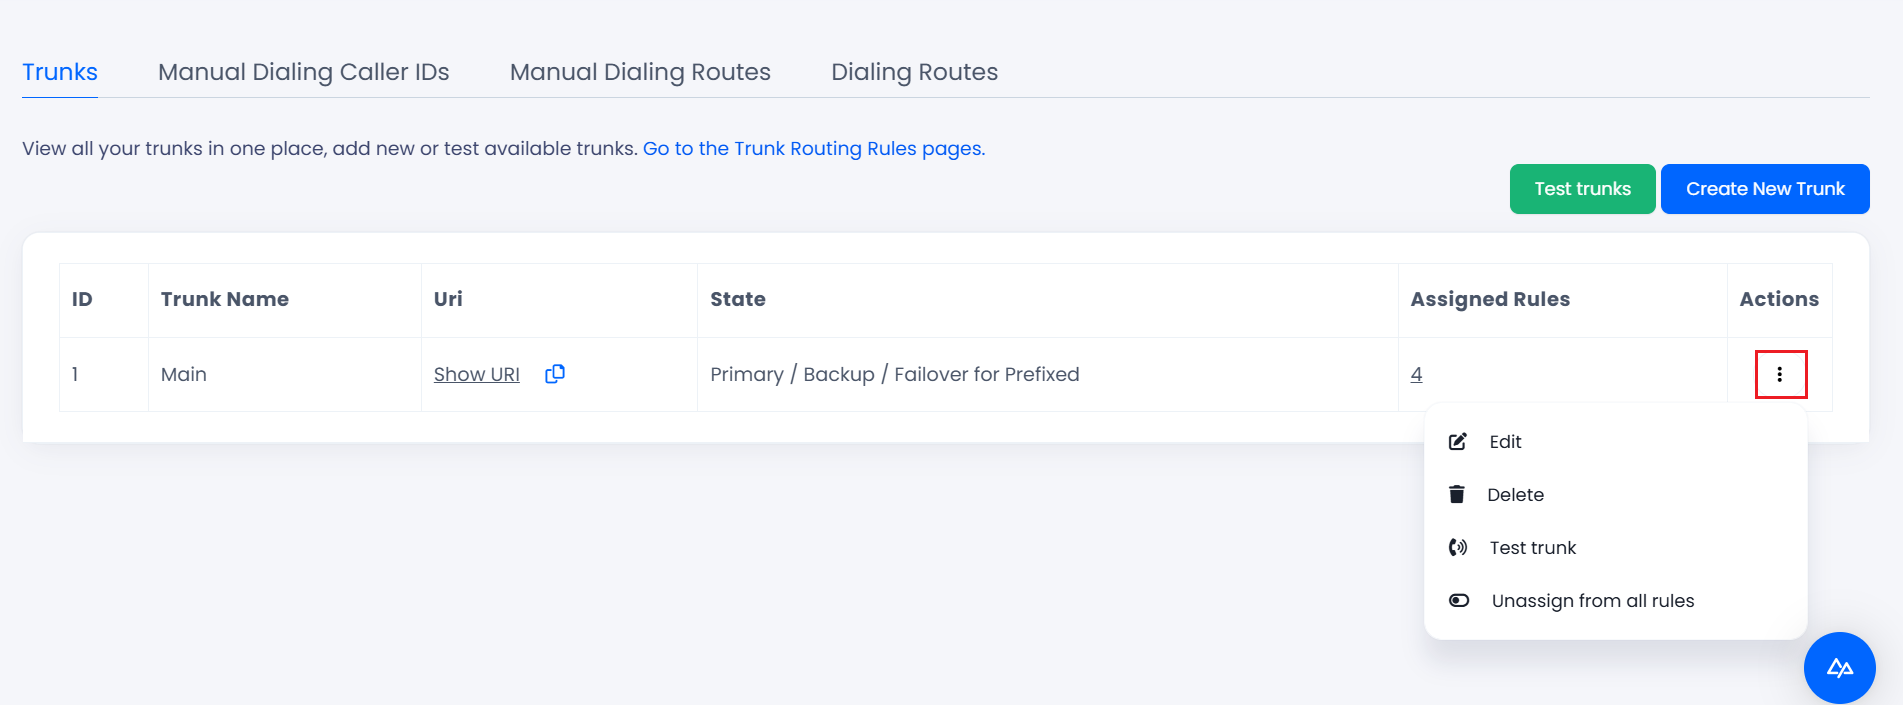
Trunk actions
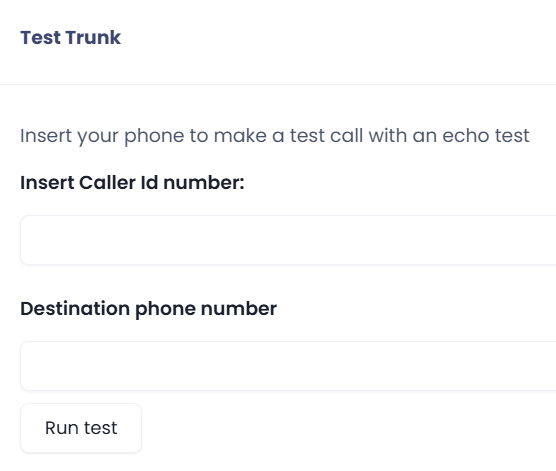
Testing Trunks
You can test your trunks to check if they work properly.
You can open the tester by clicking the Test trunks button on the Trunks page. Alternatively, select Test trunk in Actions for the needed trunk. The testing feature is also available as one of the steps of trunk creation.
To test a trunk:
-
Open the trunk tester. It will appear in a pop-up window.

Test trunk simulator
-
Enter a caller ID.
-
Specify the destination phone number.
-
Click Make test call. You will get a notification with the response.
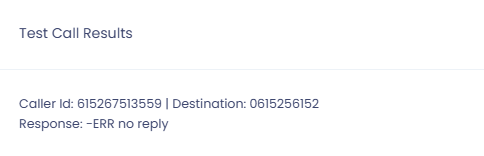
Trunk testing result
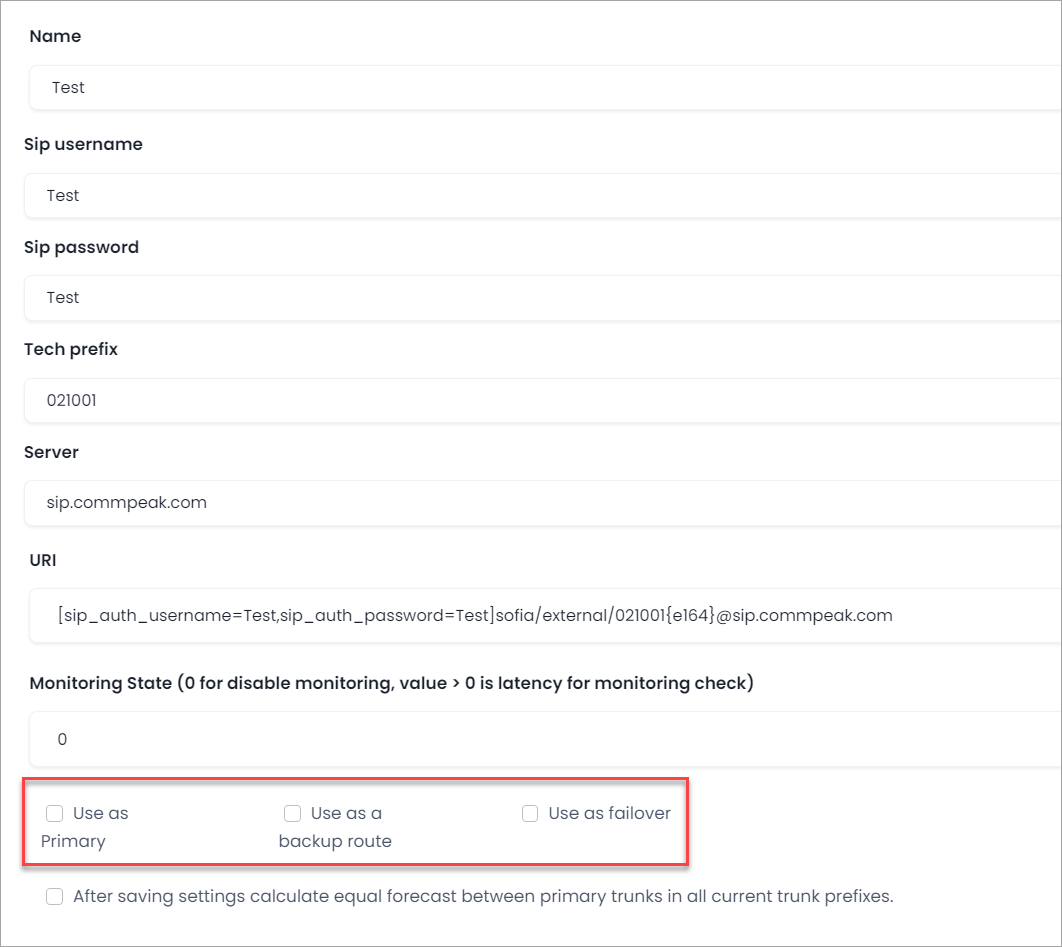
Creating a New Trunk
To create a new trunk:
- Click Create New Trunk at the top right of the page.

Trunks tab with Create New Trunk button
-
Add the trunk name, SIP username, SIP password, tech prefix, and server.
-
The trunk URI will be formed from the SIP username, password, tech prefix, and server.
-
Select how you are going to use the trunk: as a primary, backup, or failover route.
-
Select the checkbox for equal load distribution among primary trunks within each routing rule.
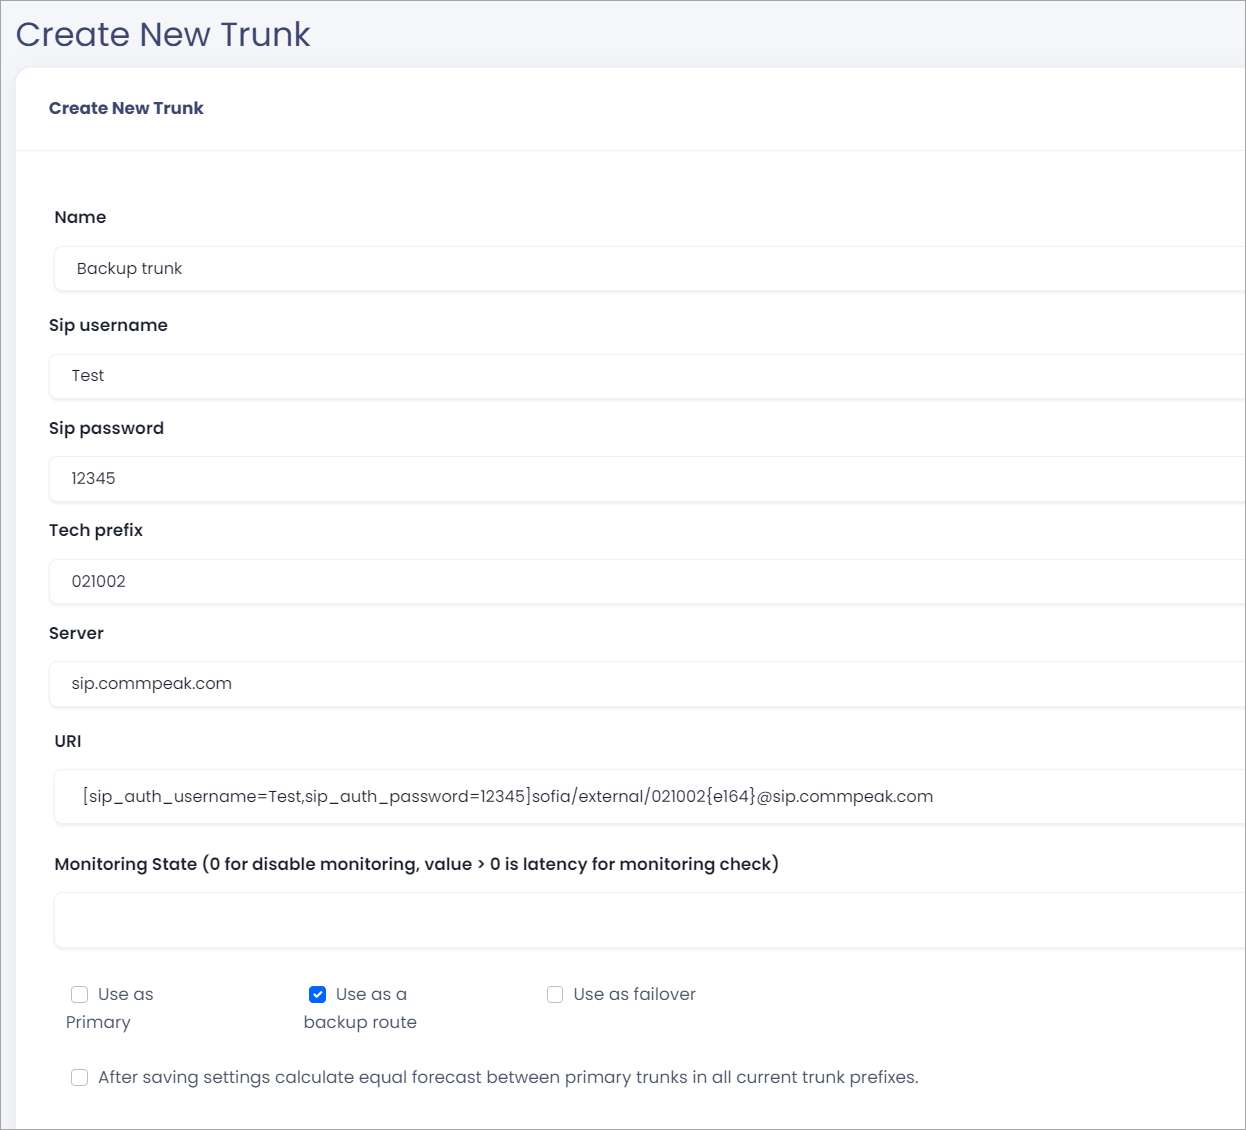
Trunk settings
-
Assign the trunk to one or more rules from the drop-down lists, depending on how you will use it.
- Prefix Rule - rules based on country prefixes
- Route Rule - rules combining trunks that have the same settings and restrictions.
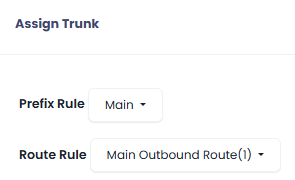
Assign Trunk section
-
Test the trunk by inserting a Caller ID number.
-
Specify the destination phone number and click Run test.
Testing trunk
- You will get a notification with the response.
- Click Create at the bottom of the page.
The new trunk will be added to your trunk list.
Disabling a Trunk
To disable a trunk on all the routing rules, select Actions >Edit, then remove checkmarks from all the checkboxes.
Removing checkboxes for a trunk
However, if you want to remove a trunk from a specific routing rule, go to Dialing Routes and, under Actions, click Unassign trunk from this rule.
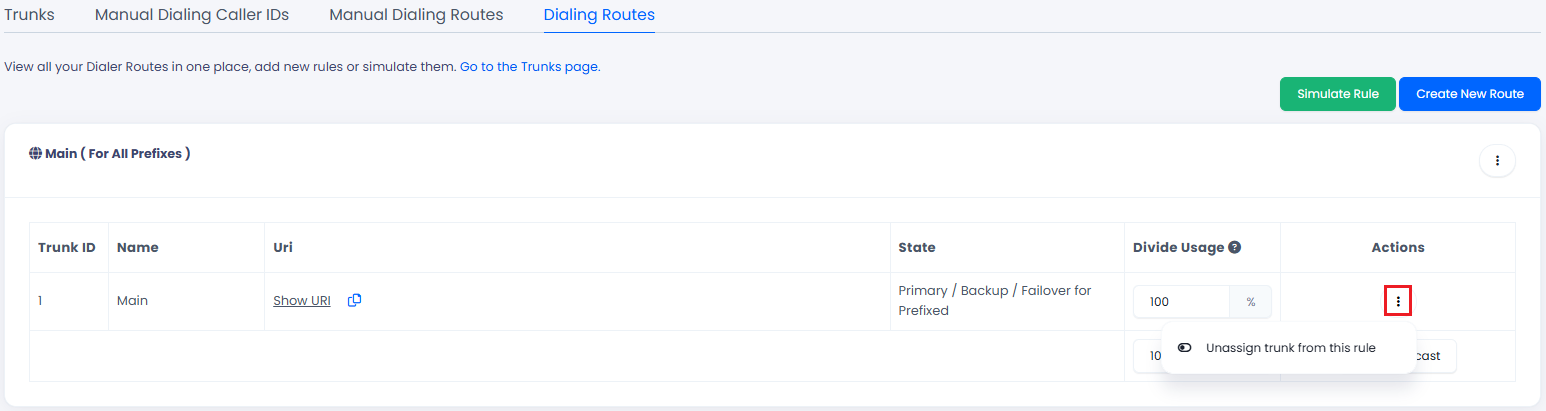
Option to unassign a trunk from the rule
Updated 6 months ago