On the Role Permissions page, you can view roles existing in your TextPeak account and add new ones. To access the page, log in to TextPeak in your browser with manager access privileges and expand Users in the main menu, then click Role Permissions.
In TextPeak, the roles and permissions are divided into two sections, accessible via the Platform and Inbox tabs. Every user can hold one or two distinct roles, one for each section.
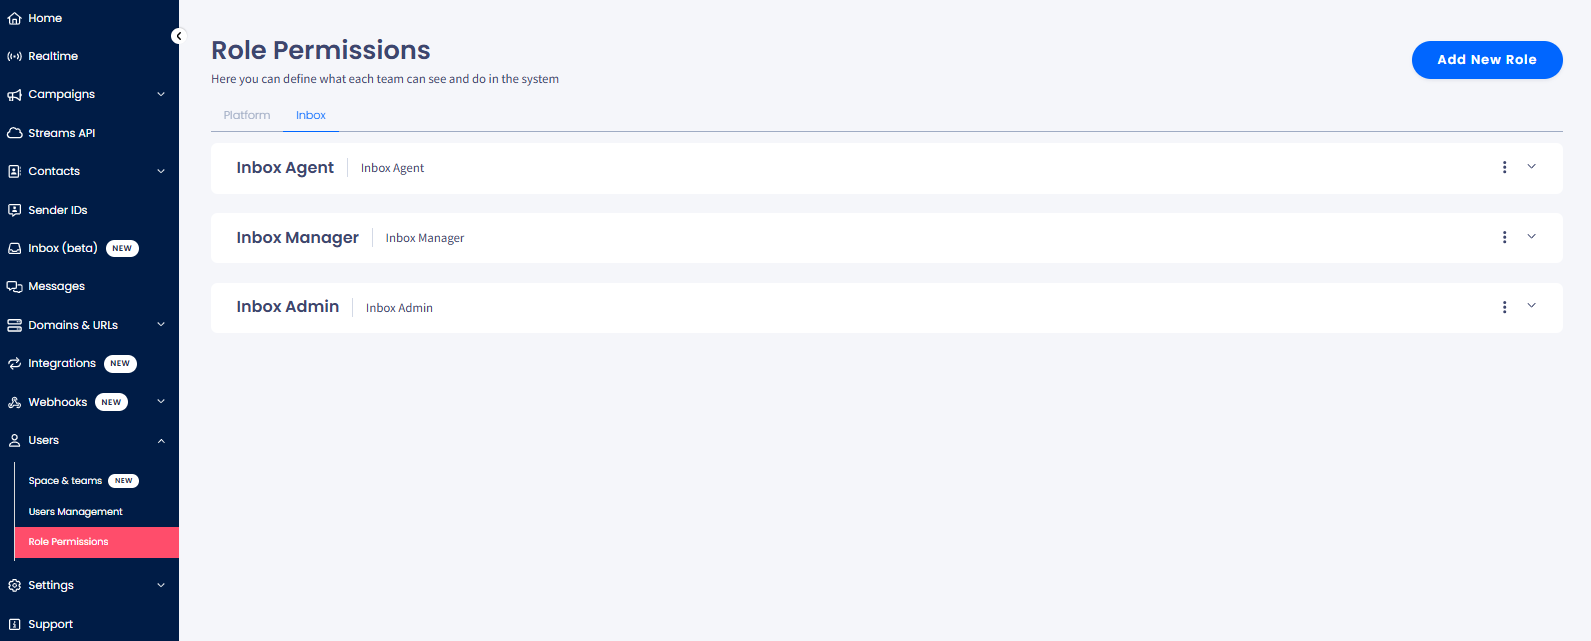
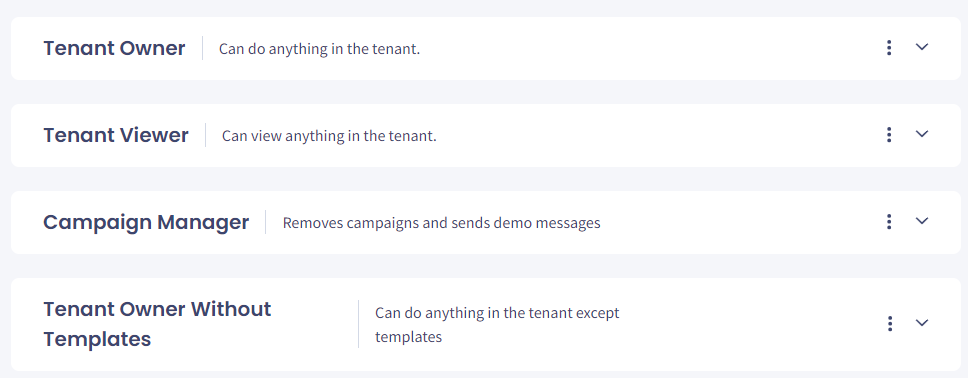
Role Permissions > Inbox tab
Adding New Roles
The following roles are created by default: Tenant Owner and Tenant Viewer as the built-in platform master roles, and Inbox Admin, Inbox Manager, and Inbox Agent to manage everything related to the inbox.
You can add other custom roles and define their permissions according to your needs.
To create a custom role:
Select the Role Permissions tab in the main menu's Users section.
Choose the type of role you want to add. To add a general platform role, remain on the Platform tab; switch to the Inbox tab to add an inbox-specific role.
Click Add New Role in the top right.
The Add New Role button on the Role Permissions page
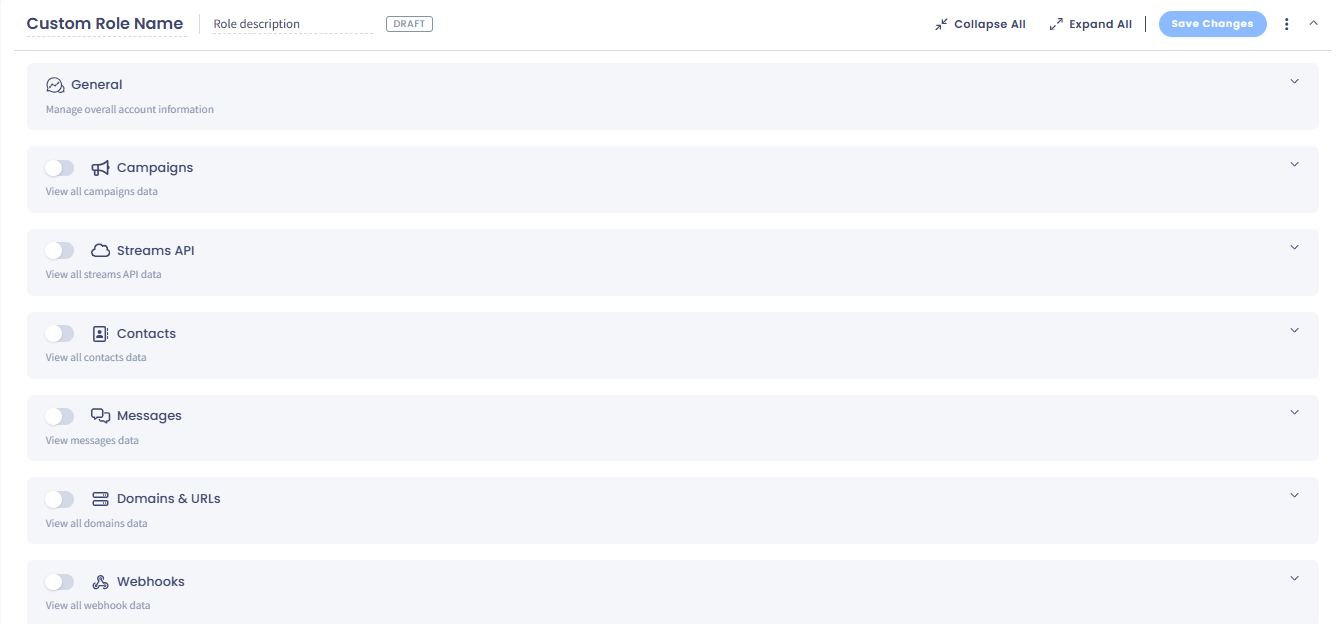
Enter a title in the Custom Role Name field. Then, enter a role description next to it.
Defining a custom role
Click Expand All to access categories with all available permissions. Alternatively, you can expand a specific category using the expand button on the right.
Expanding Campaign category
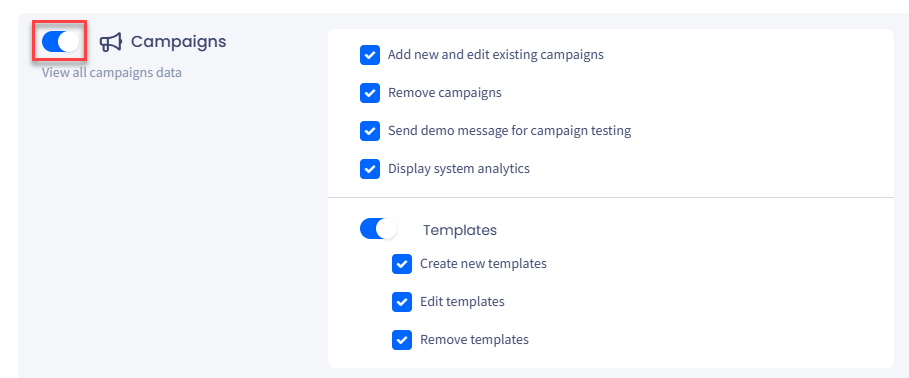
Enable one or more permission categories using the toggle buttons on the left.
The toggle button on the left
In the needed category, define permissions for your new role. You can unselect specific permissions as you wish.
Unselecting specific permissions
Click Save Changes.
Duplicating Existing Roles
You can duplicate any existing role as follows.
Click the three-dot menu icon and select Duplicate.
Duplicate option
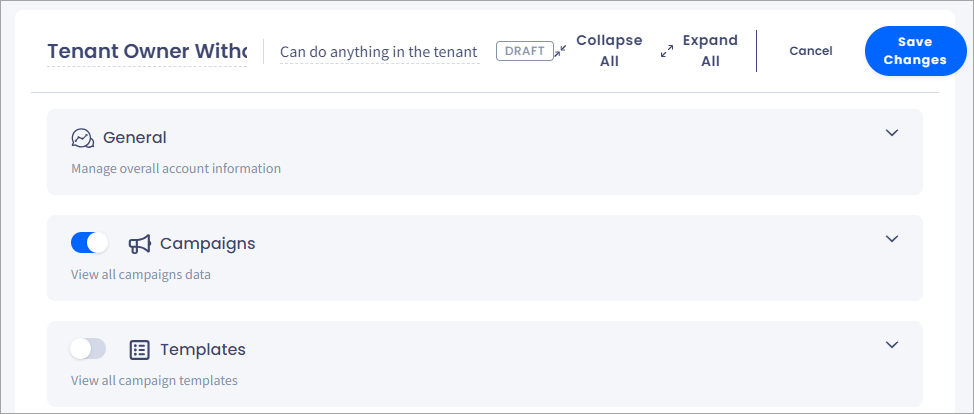
Modify the role title, description, and permissions as needed.
Form for modifying the existing role
Click Save Changes.
After you save your changes, the new custom role appears on the page.
A new custom role added
📘
NOTE
Even if you unselect all permissions, the new role will still have a viewing ability as stated below the category title.
All Campaigns permission disabled for the role
Allowing & Denying Permissions
You can also enable or disable permissions for all roles in bulk except for the two built-in master roles, Tenant Owner and Tenant Viewer.
Allowing All Permissions
Click the three dots and select Allow all.
Allow all option
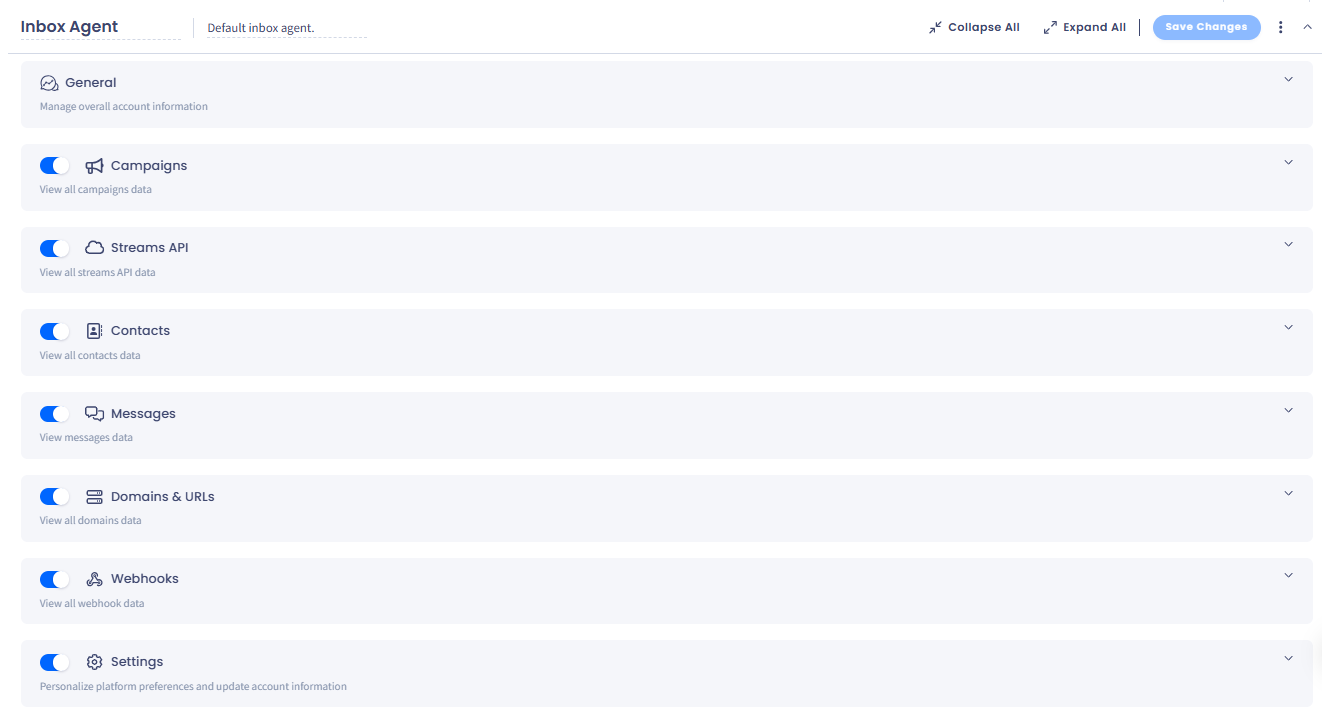
All permission categories and subcategories become enabled for the user role.
All permission categories and subcategories enabled for the Inbox Agent role
Denying All Permissions
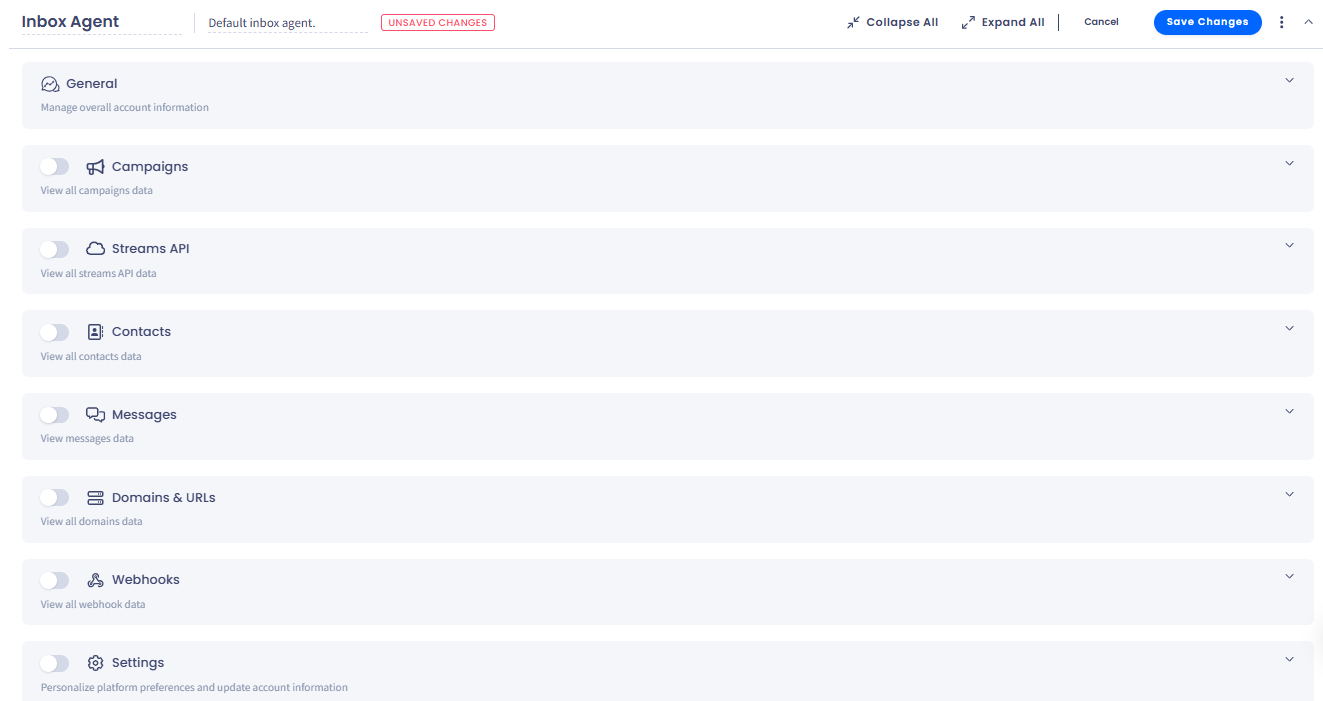
Click the three-dot menu icon and select Deny all. All permission categories and subcategories for the user role will be disabled.
All permission categories and subcategories disabled for the Inbox Agent role