Control which lead statuses agents can select on the Feedback page. Set call duration conditions to restrict when certain statuses become available.
In the Lead Status Workflow section, you can specify which lead statuses will be available to agents on the Feedback page during predictive dialing. Based on the previous lead status, agents will only be able to select the designated statuses in the Status drop-down list.
You can also set call duration conditions for specific statuses, limiting their availability based on the length of the call.
📘
NOTE
Both Row and Matrix views offer the same functionality, allowing flexible workflow customization.
To define the lead status workflow:
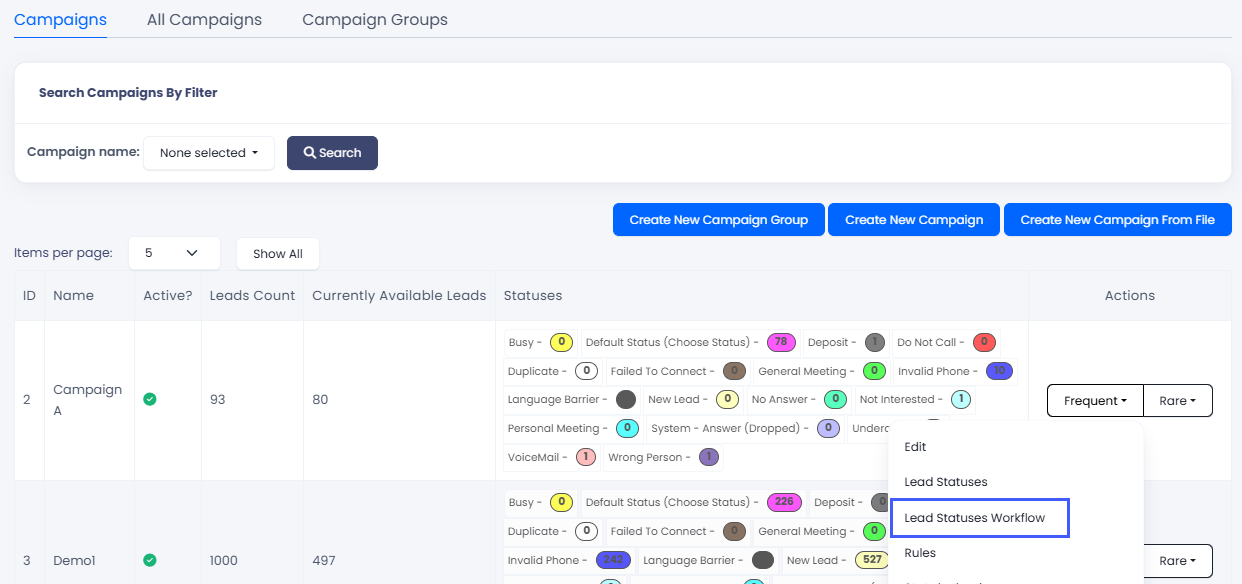
Go to Leads & Campaigns > Campaigns in the main menu.
Expand the group containing the desired campaign, or click Expand All to view all campaigns.
Locate the campaign, then in the Actions column, click Frequent.
Select Lead Statuses Workflow.
Lead Statuses Workflow option
You can switch between two tabs to configure the statuses workflow depending on your preferences. Both options serve the same purpose but offer different views for your convenience.
❗️Some statuses related to personal assignment may be missing on the Feedback page, even if they should be available according to the Lead Status Workflow. This happens when the agent has reached the maximum number of assigned leads and can't choose a status that would assign another lead to them.
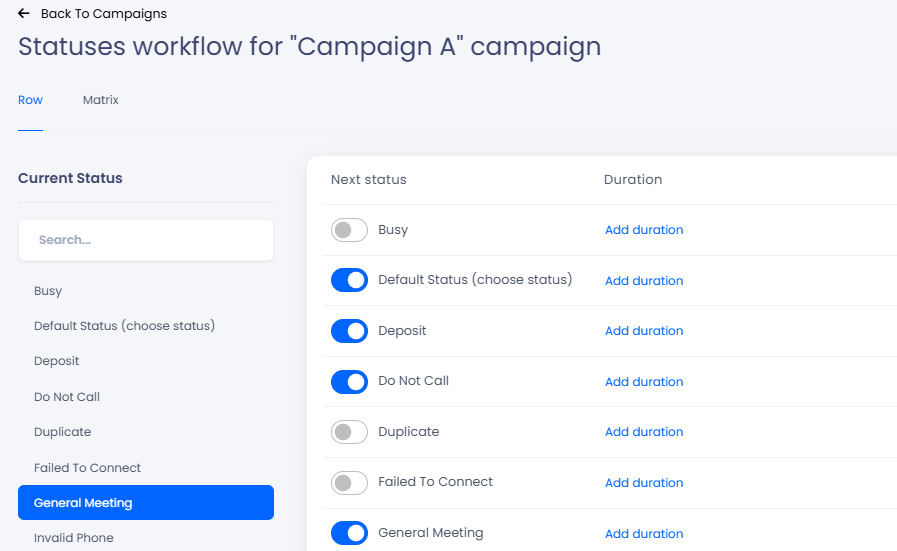
Configure Lead Statuses Using the Row View
This view is more compact and includes the Search option. However, defining statuses one by one may take more time.
Click the status on the left under Current Status or use the Search filter.
Defining statuses on the Row tab
Use the toggles to activate the statuses to be available after the current status.
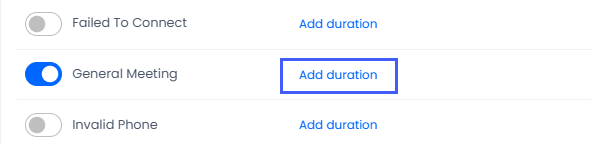
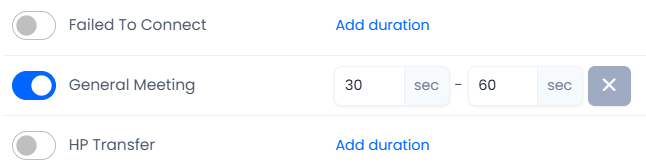
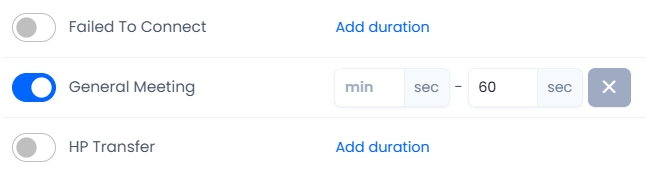
Click Add duration to set time conditions.
Add duration button
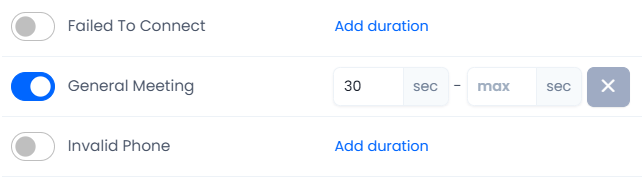
Enter the minimum and/or maximum call duration in seconds, after which the status can be applied. You can specify either the minimum, the maximum, or both options as follows:
the agent will be able to apply the General Meeting status if the call duration exceeds 30 seconds
Minimum duration
the agent will be able to apply the General Meeting status if the call duration is longer than 30 seconds but shorter than 60 seconds
Maximum duration
the agent will be able to apply the General Meeting status if the call duration is shorter than 60 seconds.
Minimum and maximum duration
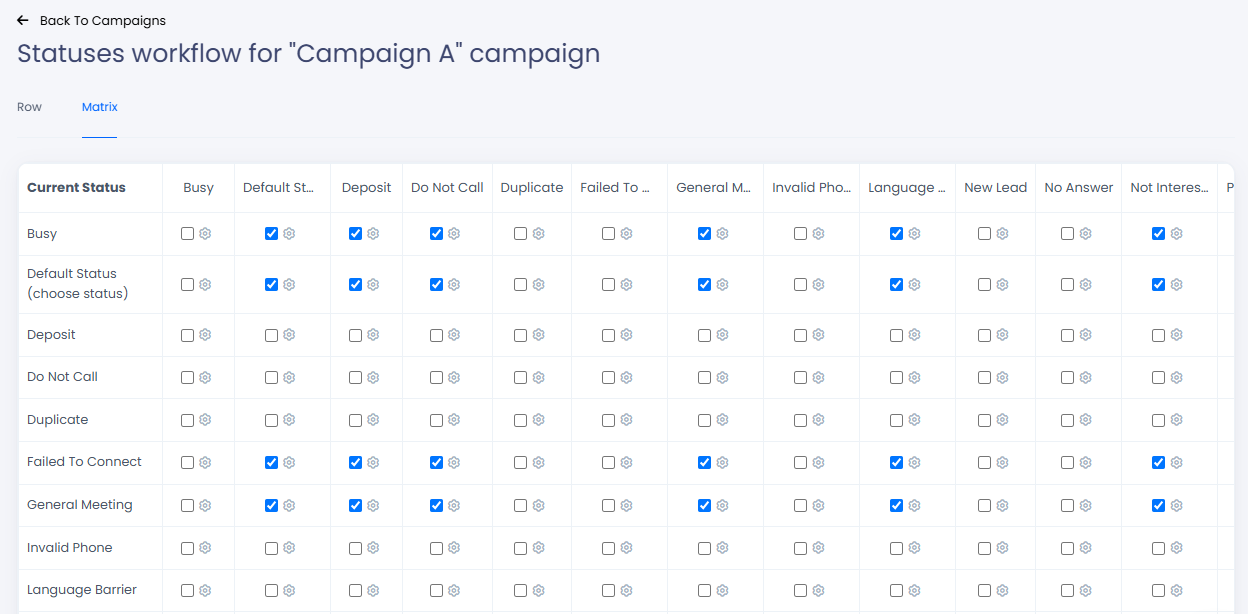
Configure Lead Statuses Using the Matrix View
This view is more complex to manage, especially when navigating large tables with multiple rows.
For each status on the left under Current Status, select the checkboxes on the right to activate statuses available after the call.
Defining statuses on the Matrix tab
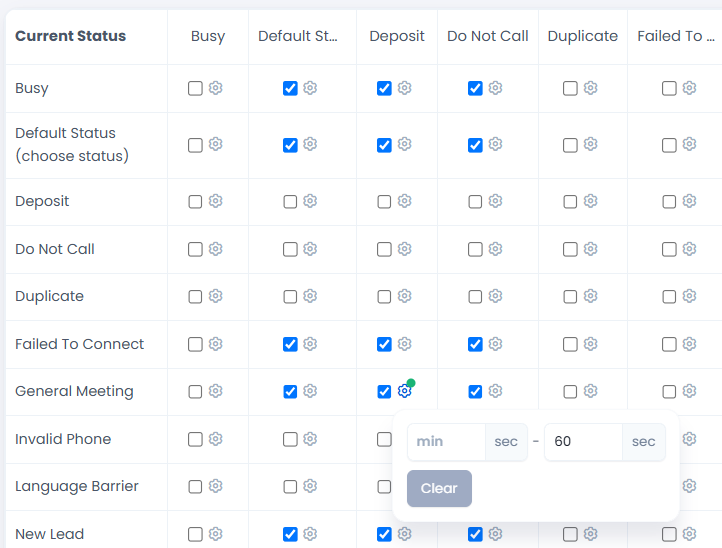
If you wish to set time conditions to a specific status on the left, click the setting icon next to the checkbox. Then, define the conditions similarly to the Row mode in the previous section.
Defining time conditions on the Matrix tab
Workflow Examples
Consider these specific cases of configuring the status workflow using either the Row or Matrix view.
Row
📍
Example
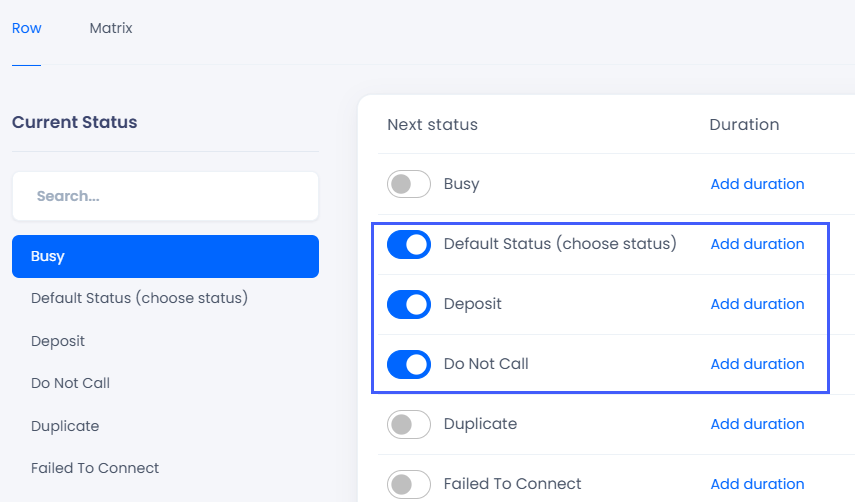
When an agent receives a lead with the status Busy, they can update it on the Feedback page by selecting one of the following statuses: Default, Deposit, or Do Not Call.
Example of lead statuses workflow on the Row tab
This means that the agent will not have the option to select the following statuses: Busy, Duplicate, or Failed to Connect on the Feedback page.
Matrix
📍
Example 1
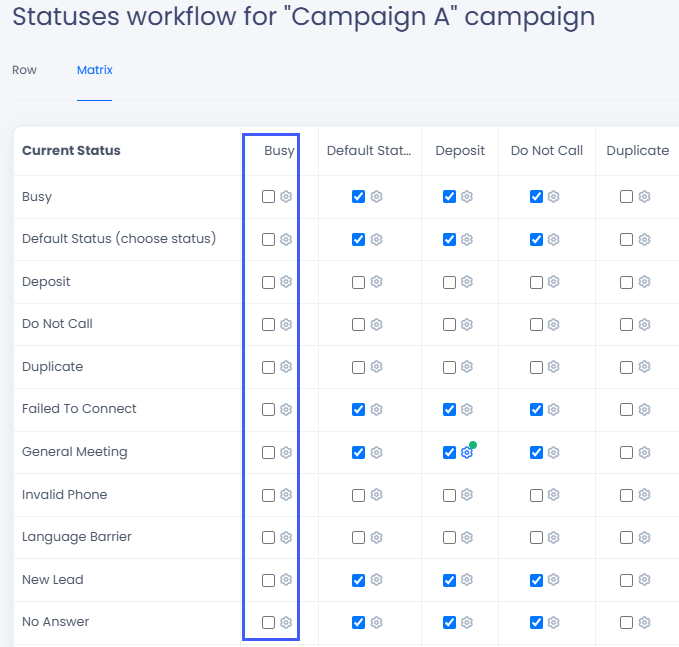
If the current status is New Lead in the workflow example, after completing a call with the lead agents can set the following statuses:
Busy
Do Not Call (DNC)
General Meeting
No Answer.
Example of lead statuses workflow on the Matrix tab
📍
Example 2
Busy status is unavailable for the agent.
Workflow with the Busy status unavailable
📍
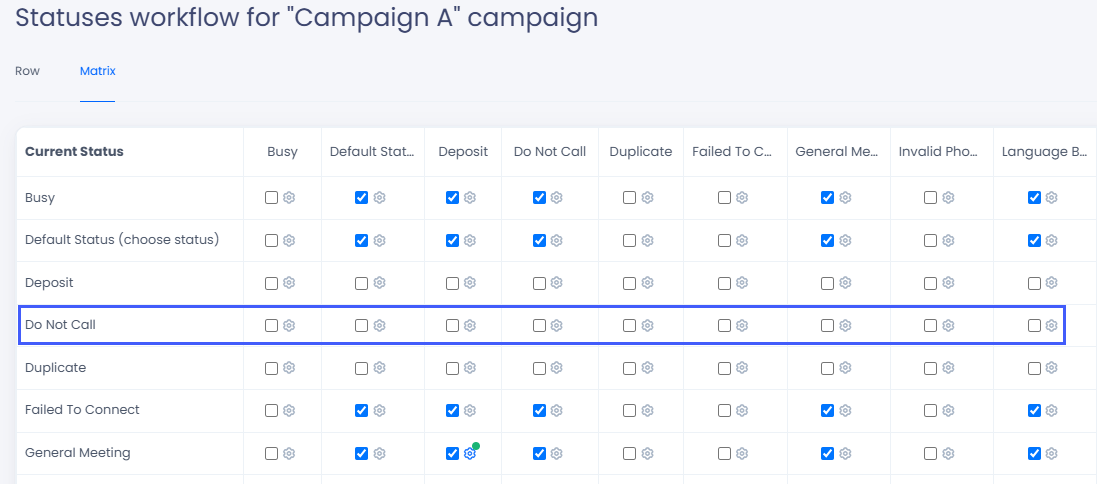
Example 3
After the Do Not Call status, the agent will not be able to select any other status. This is due to the rule that prevents the lead from being contacted again.
Workflow with Do Not Call as the current status
📍
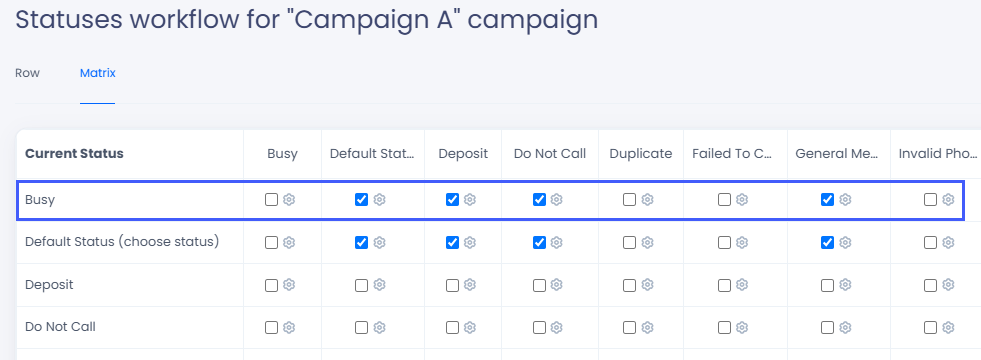
Example 4
The current status of the lead is Busy. Once the agent accesses the Feedback page, the available statuses will be Default, Deposit, Do Not Call, and General Meeting.