

EasyTech Click2Call
Step-by-step instructions for integrating your EasyTech CRM with CommPeak Click2Call, enabling seamless call functionality from within your CRM.
Here's a step-by-step guide to integrating your EasyTech CRM account with the CommPeak Dialer or Cloud PBX Click2Call integration.
This setup will allow you to initiate calls from CRM and post additional information about calls, as well as call recordings, and send them to EasyTech CRM.
NOTEContact CommPeak support or your Dialer manager if you wish to implement Click2Call with ecrypted numbers (decrypt
leg_bin Click2Call requests).
Click2Call Request Example
Example of a update request body from CommPeak to EasyTech
{"uuid":"1695242666.8051","disposition":"hangup","durationseconds":3,"agentid":"16475588537","timestamp":"2023-09-20 20:44:27","direction":"Outbound","public_recording":"https:\/\/example.td.commpeak.com\/recordings\/6dea7066cb8c2ced555a3b2f1da89673.mp3","caller":"123456789"}
Step 1: Add Click2Call integration
-
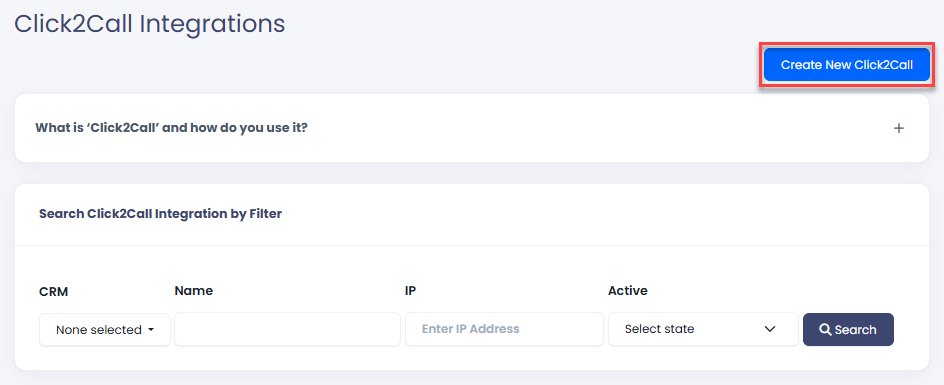
In your CommPeak Dialer or Cloud PBX, go to Settings > Click2Call Integrations and click Create New Click2Call.
-
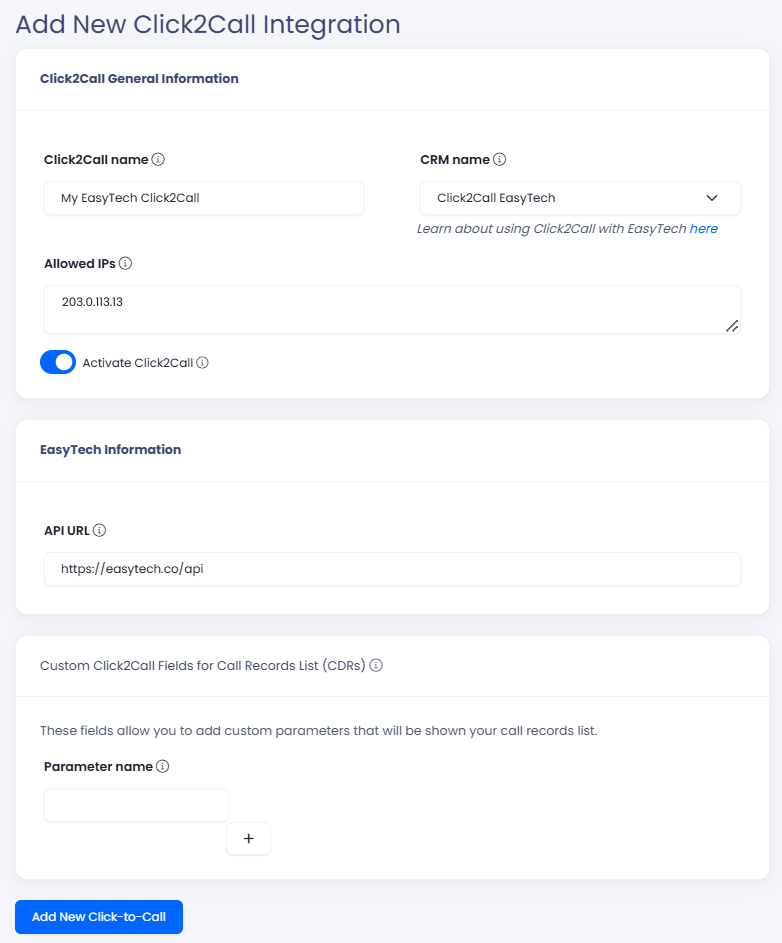
Enter data for your new integration:
-
Click2Call General Information:
- Click2Call name: specify the name of your integration to be able to find it in the list.
- CRM name: select Click2Call EasyTech.
- Allowed IPs: enter the IP addresses you want to authorize for Click2Call integration, separated by commas.
- Activate Click2Call: use the toggle to activate the integration or turn it off as needed.
-
EasyTech Information: enter the EasyTech API URL.
-
-
Click Add New Click-to-Call.
-
A new integration will be added to the Click2Call Integrations page. Webhook settings are configured automatically.
Hover over the Show Integration link. You will access your dedicated Click2Call event information, which should be set up in the CRM. It initiates your calls to the agent extension. Click the copy icon to copy the link.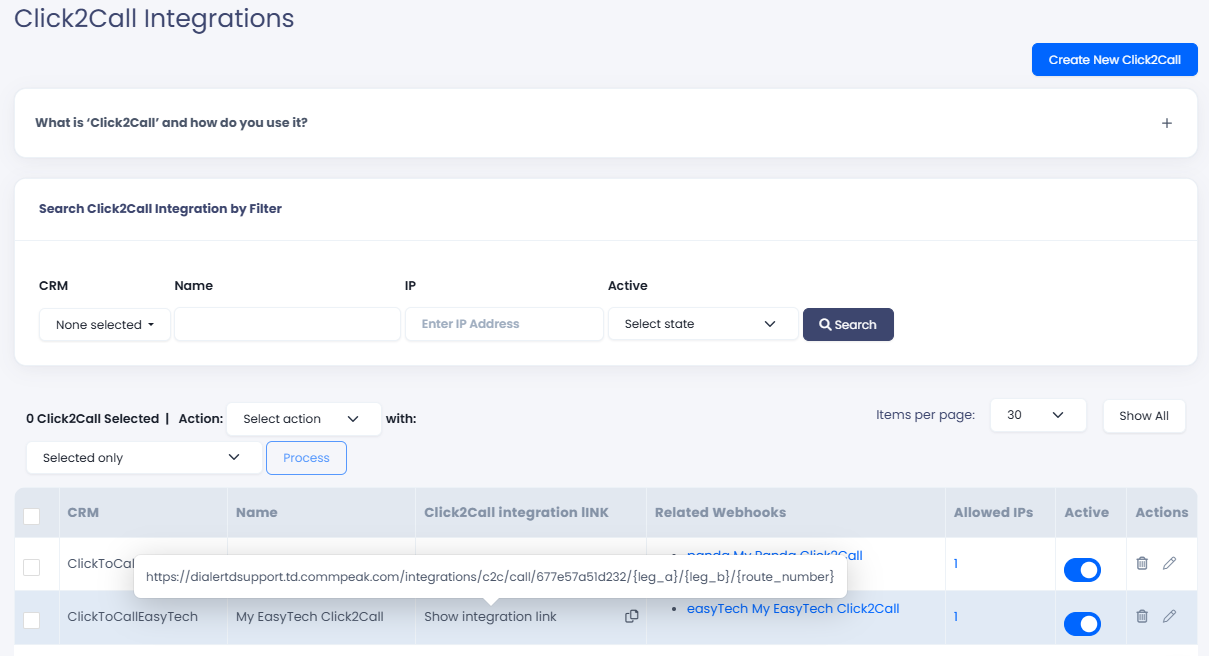
-
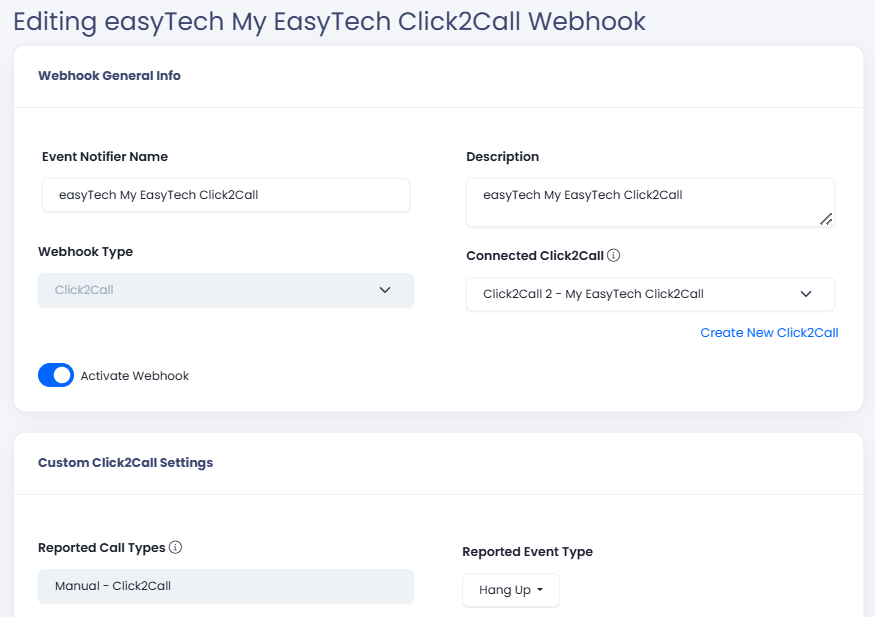
Click the link in the Related Webhooks column to view or edit webhook settings.
IMPORTANTEnsure that your IPs are included in the Public Recordings ACL to access call recordings via the CRM widget.
Step 2: Complete Click2Call setup (CRM side)
Map the CommPeak fields in the left column to the corresponding EasyTech fields in the right column:
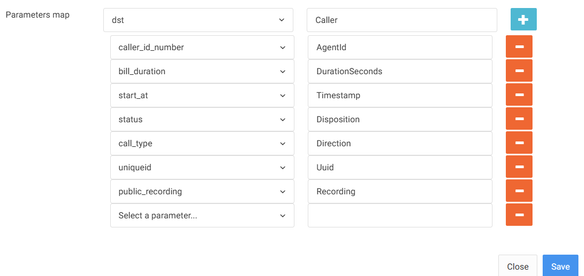
Mapping CommPeak and EasyTech fields
Step 3: Complete CDR field mapping
Map the CommPeak fields in the left column to the corresponding EasyTech fields in the right column:
- Id1 -> Click2callid
- Owner -> Server.
Updated 8 days ago