Making Calls
This article walks you through the steps required to start receiving lead calls in CommPeak Dialer Agent Workspace. It also introduces the agent workspace, including the options and actions available during an active call in the Predictive Mode.
If you're using the legacy Dialer Agent Interface, refer to the Predictive Dialing article.
Video Tutorial: Predictive Dialing
The workflow in the Predictive Mode consists of four main steps:
Getting Started
To start receiving calls:
-
On the home page, go to Workspace > Predictive Dialer. The page confirms that predictive mode is currently off.
-
Click the profile icon at the top-right corner and select Clock In.
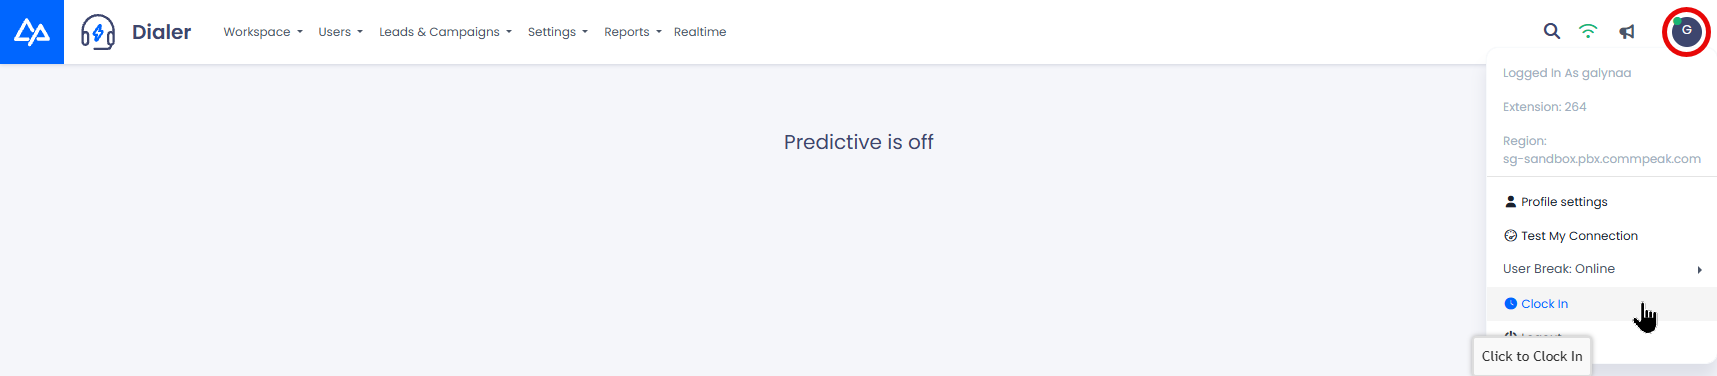
Selecting the Clock In option
-
Accept an incoming call to your softphone or IP phone from the system, and you will be connected to an automated call.
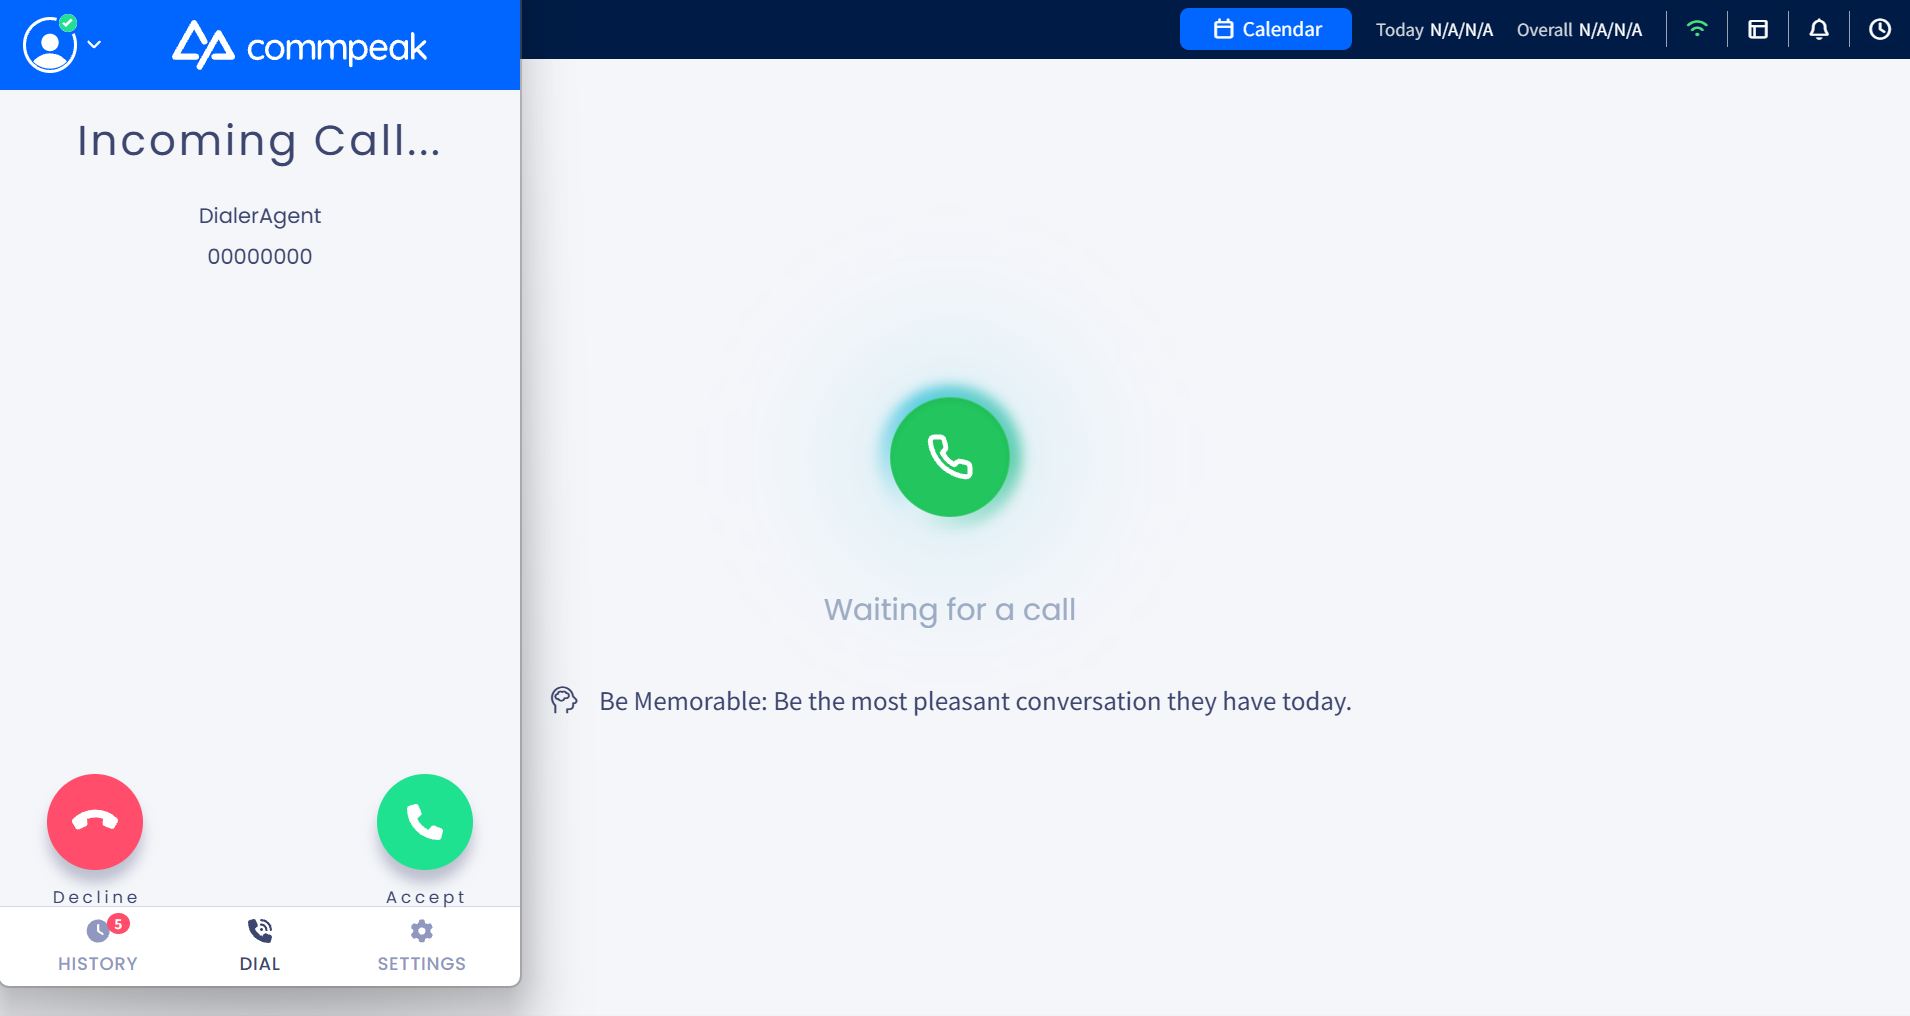
Incoming call in the built-in softphone
IMPORTANTTo continue receiving calls, you must stay connected to the call in your softphone or IP phone. You can minimize the softphone window as you have all needed controls in the call panel.
- When you accept a call in the Dialer, the system will try to connect you with a lead. Once the lead has answered, you will hear three short beeps.
- The Agent Workspace opens, giving you access to all available call controls and actions.
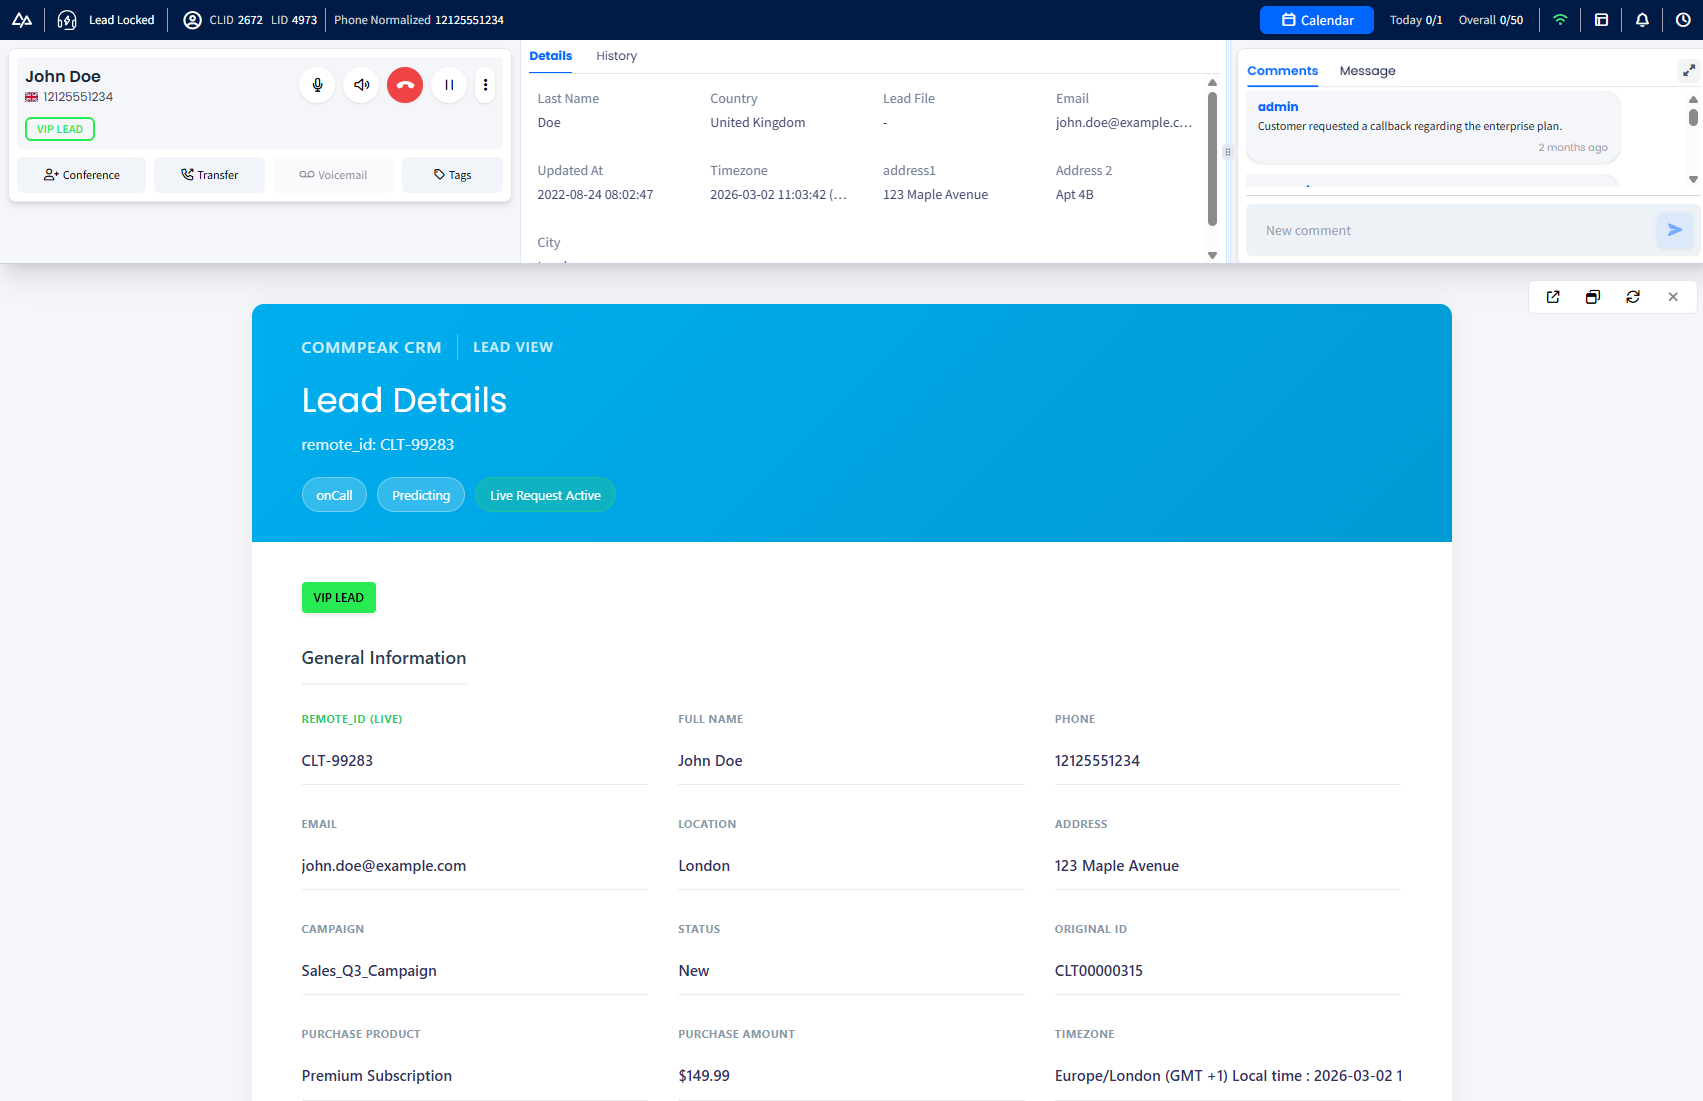
Agent Workspace
Agent Workspace
The new Agent Workspace is the central hub where agents manage their activities, both during active calls and when submitting feedback. It provides all the necessary tools and controls for handling calls, accessing lead information, tracking lead status, and making real-time updates.
At the top of the workspace, the header section displays key information about the agent and the lead, providing a quick overview.
Below the header, the workspace is organized into three horizontal sections:
- Call panel (left), where the active call is managed. You can put calls on hold or hang up, adjust audio settings, transfer or forward calls, and initiate conference calls.
- Lead details and History (middle) display lead information from the system, interaction history, and status changes. You can edit lead details, filter call history, search for specific data, and switch between detailed or summarized views.
- Comments (right) provide you with a space to view, add, and manage comments regarding the lead or call, ensuring proper follow-up. From here, you can switch to the Message tab and access messages sent within your Messaging Inbox.
The lower section displays lead information pulled from the integrated CRM, giving agents context such as contact details and past interactions.
Header
Below, we provide explanations of the header options and controls, from left to right.
The left section displays the agent’s current status, such as Idle, On Call, or In Feedback, along with the call duration in minutes.

Agent status and ongoing call duration
Next, you can see the lead identifiers: CLID is the campaign lead ID, and LID is the lead ID.

Lead identifiers
This section displays the following:
- The current status of the lead
- Their normalized (E .164-formatted) phone number
- Lead ID.

Lead status, phone, and ID
Next, you can do the following:
- Click the calendar icon to view the schedule of your personal meetings with the lead
- See the number of your meetings scheduled for today out of the total allowed per day
- View the total number of your personal meetings with leads compared to the maximum allowed.

Calendar button and meeting limits
In the area of the header on the right, you can:
-
Hover over the wifi sign to view the quality of your Internet connection
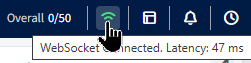
Connection quality indicator, notification icon, and clock icon
-
Choose the layout for your workspace
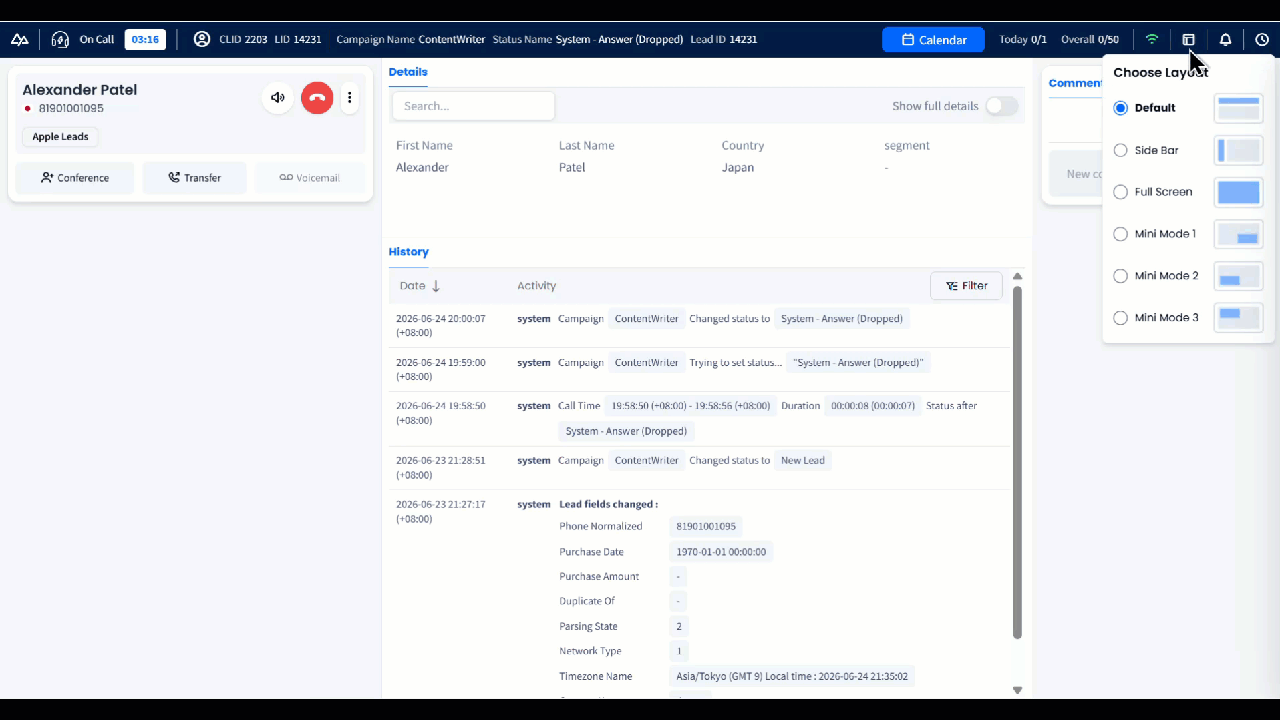
Customizing workspace layout
- Click the notification icon to access recent notifications
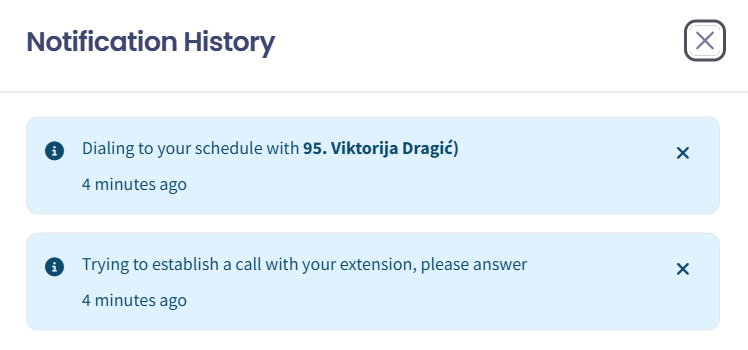
Popup with recent notifications
- Click the clock icon to clock out.

The clock icon
Call Panel
The left section of the Agent Workspace displays the active call with the lead.
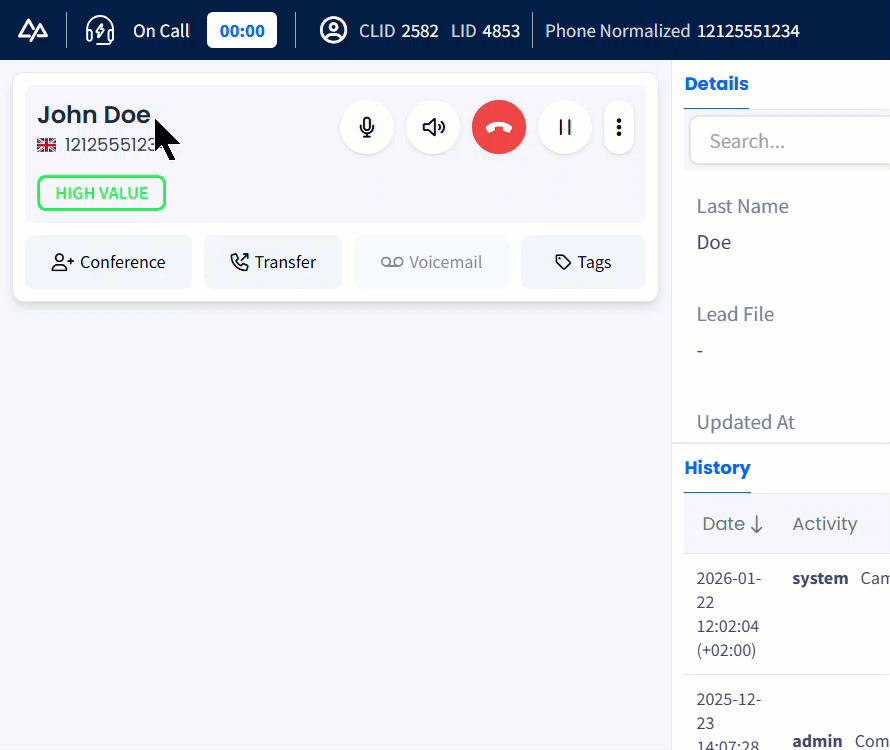
Call controls and options
From here, you can:
- View the lead’s name, country, and phone number
- View the lead's tag below the name
- Mute the call
- Adjust the input and output audio volume by clicking the volume icon on the right
- End the call using the red hang-up icon; if you occasionally hang up, you can redial in the feedback window
NOTE
The Hangup button becomes active after a certain time during the call. The exact time depends on your customization.
- Put the call on hold or return to it using the Hold/Unhold button
- Rate the call by selecting the three-dot menu
- Start a conference or 3-way call using the corresponding icon at the bottom
- Transfer the call to another agent
- If voicemail is detected at the connected phone number, click the Voicemail button to end the call and apply the voicemail status without opening the feedback page
NOTE
The Voicemail button becomes inactive after a certain time during the call. The exact time depends on your customization.
- If the hashtags were created for specific campaigns to conversation segments, applying this feature becomes available for the call. Check the Applying Hashtags in Agent Calls section to learn more.
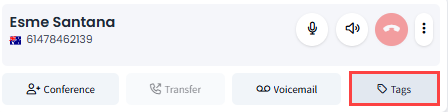
Tags button
Lead Details and History
During the call, the middle section of the Agent Workspace displays the lead's details and interaction history.
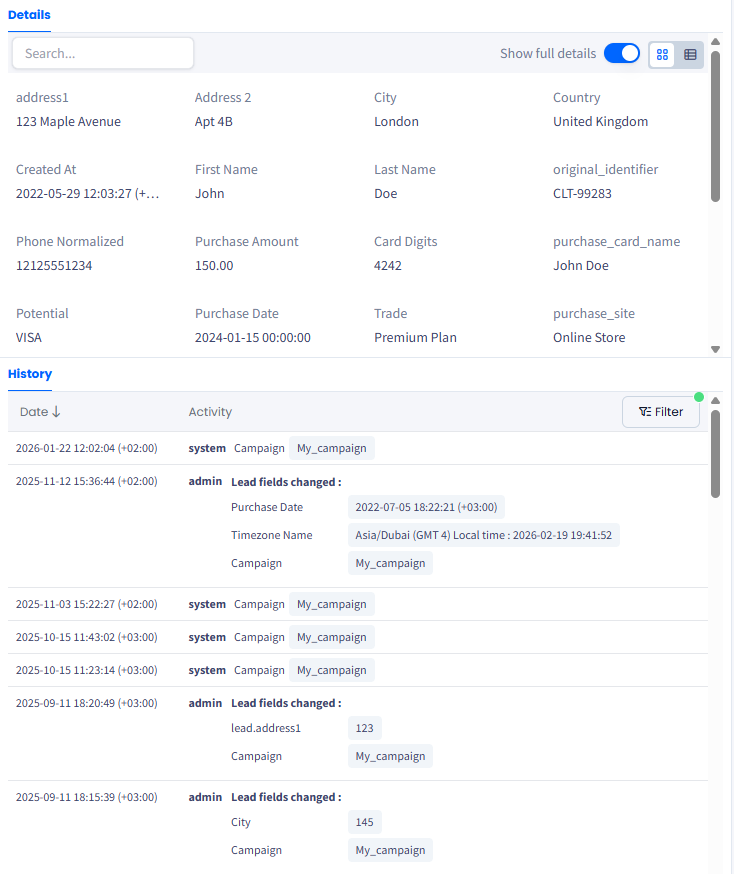
The Details and History sections
From here, you can:
- Resize the history panel to adjust your view or see more lead information
- Edit the lead’s details
- Switch to the full details view using the toggle in the top right corner; in full view, you can alternate between grid and table layouts
- Search for specific information within the lead’s details
- Filter the lead’s history by status changes, calls, or data updates.
NOTELearn more from the Lead Details article.
Agent Comments
The right section of the Agent Workspace during the call or while providing feedback displays internal comments and inbox messages.
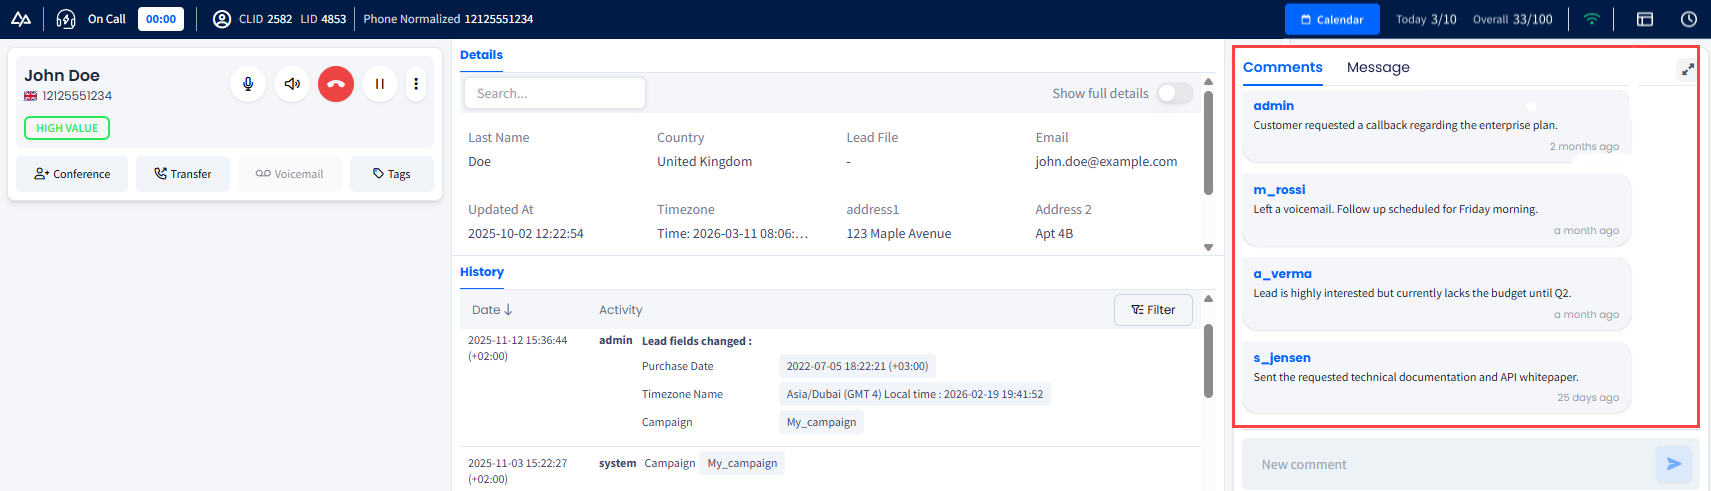
The Comments section
From here, you can:
- Expand the Comments sections
- View the comment history for the current lead
- Add a new internal (visible to your manager or other employees with permissions) comment
- Switch to the Message tab to see messages sent within your Dialer Messaging Inbox.
NOTELearn more from Leaving Comments article.
Working with the CRM
The extended information about the lead pulled from the CRM is located in the lower section of the Agent Workspace.
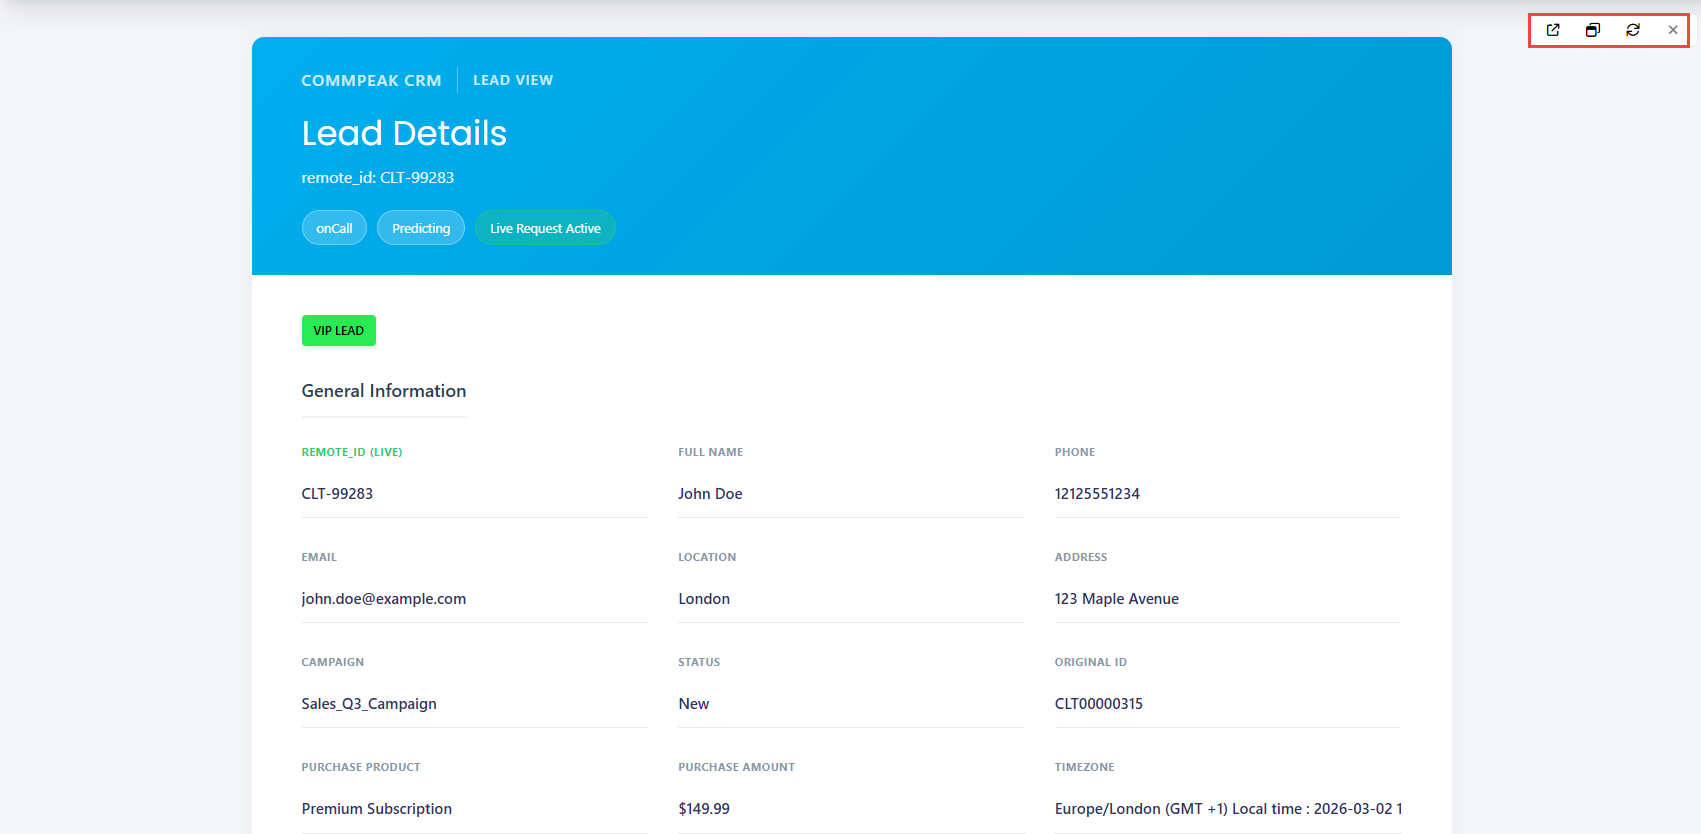
Available controls in the integrated CRM
During the call, you can:
- Scroll down to view additional lead details
- Open the CRM page with the lead’s information in a pop-up window (choosing from three available window sizes) or in a new browser tab
- Refresh the CRM view to load the most up-to-date information.
Breaks or End of Day
If you need to take a break or finish your shift, you must clock out of the system.
To clock out:
- Click the clock icon in the top-right corner and select a reason from the drop-down list.
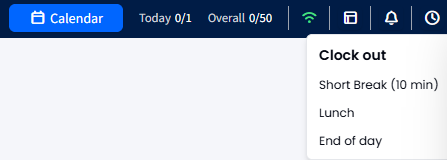
Selecting a clock-out reason
- A notification will appear in the Agent Workspace header confirming that predictive mode has been turned off.

The notification that the predictive mode was turned off
IMPORTANTIf you click Clock Out while you are in a call or providing feedback, you will be clocked out no sooner than you end the call and submit feedback.
It is not recommended to clock out when waiting for a new call, as you can accidentally drop a call that has just started.
Updated 29 days ago