Manual Dialing Routes
Learn how to manage manual dialing routes for PBX calls.
In your CommPeak Dialer or Cloud PBX routes, you can define how and for whom calls are made through PBX. This can be configured on the Settings > Outbound Configurations > Manual Dialing Routes page.
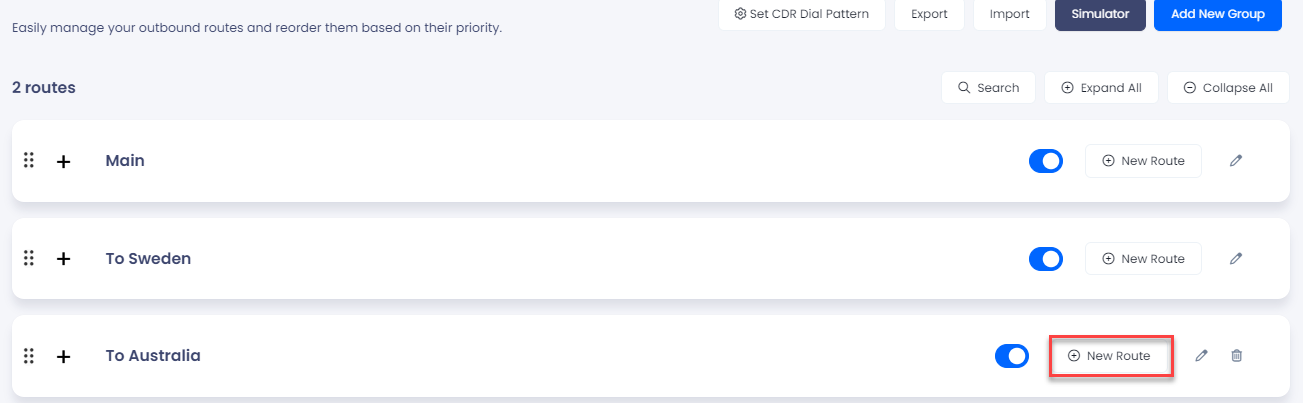
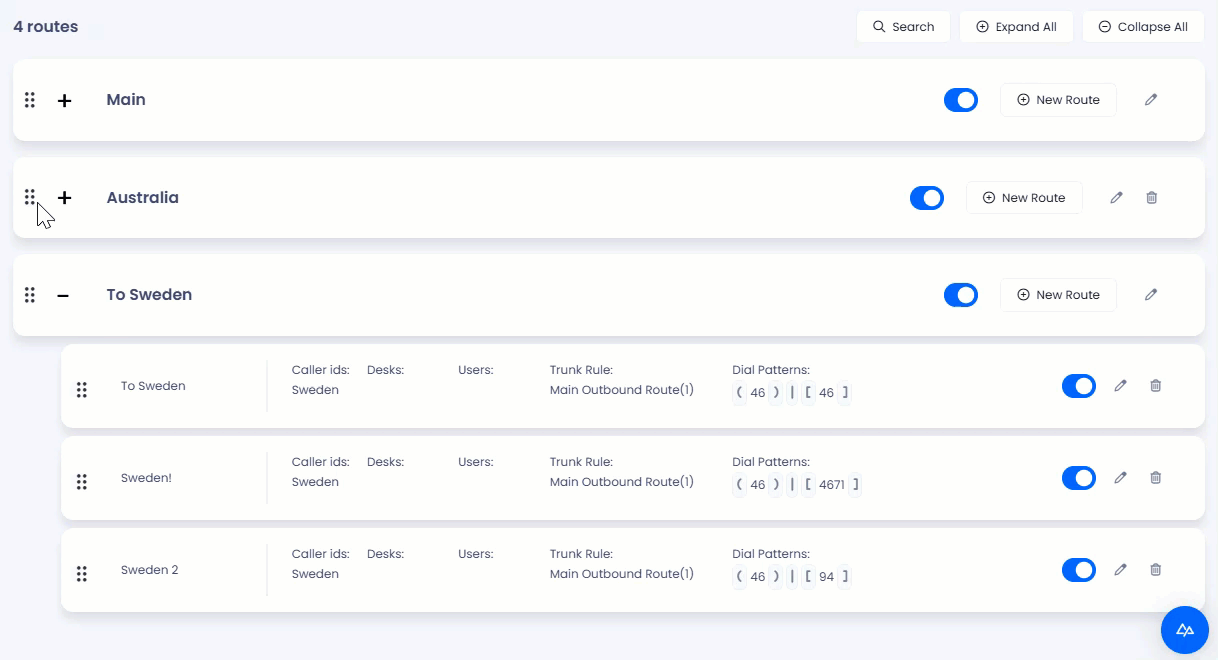
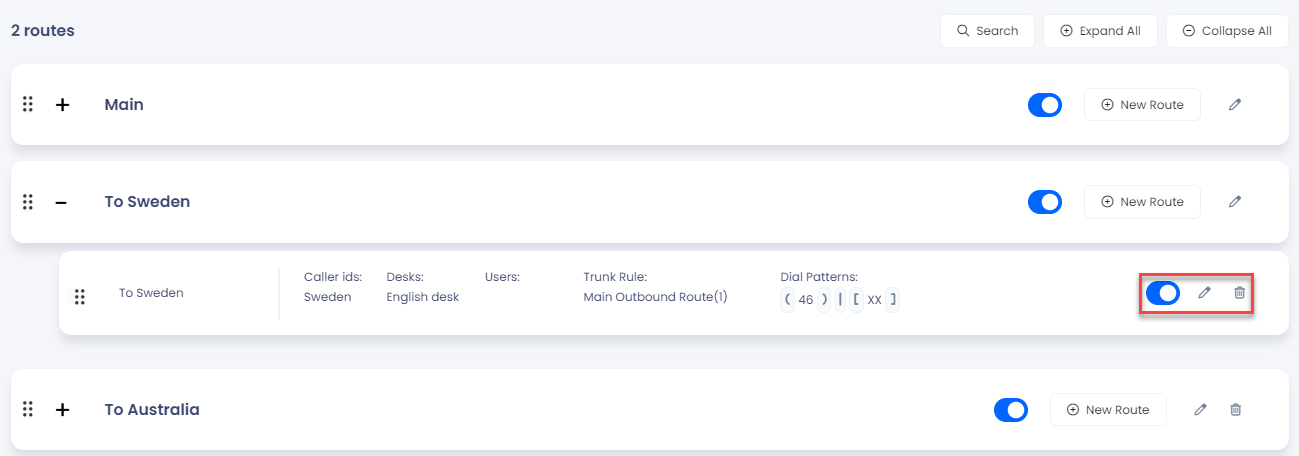
You can arrange similar routes into groups. For example, a group can include routes within a country. Create a group first and then add routes within that group.
Click Expand All to view all routes, or click + to expand a specific group.
Or use the Search field to quickly locate a specific route or group by name instead of expanding each group manually.

Adding Dialing Routes
Learn step-by-step how to add a new route to your system. First, you must add Caller IDs, then create a group, and finally add routes within that group.
Step 1: Add Manual Dialing Caller IDs
The Manual Dialing Caller IDs section allows you to add Caller IDs for calling via PBX.
- Navigate to Settings>Outbound Configurations in the main menu, then switch to the Manual Dialing Caller IDs tab.
- Click Create New Caller ID at the top right to add a new manual Caller ID.
IMPORTANT
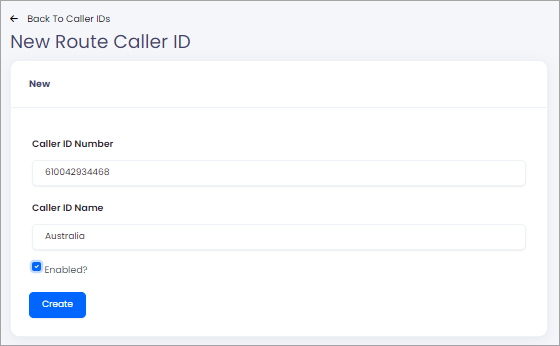
You must verify the phone number in your CommPeak Portal account before using it as a Caller ID.
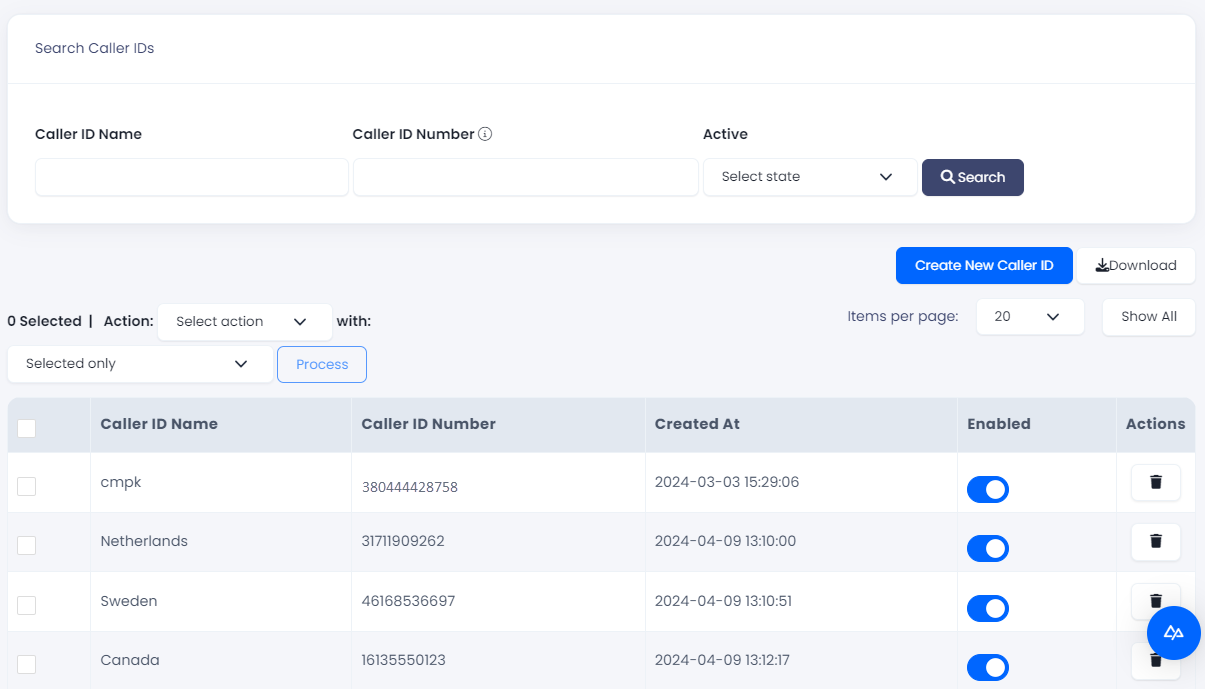
- Enter its number and name and click Create.
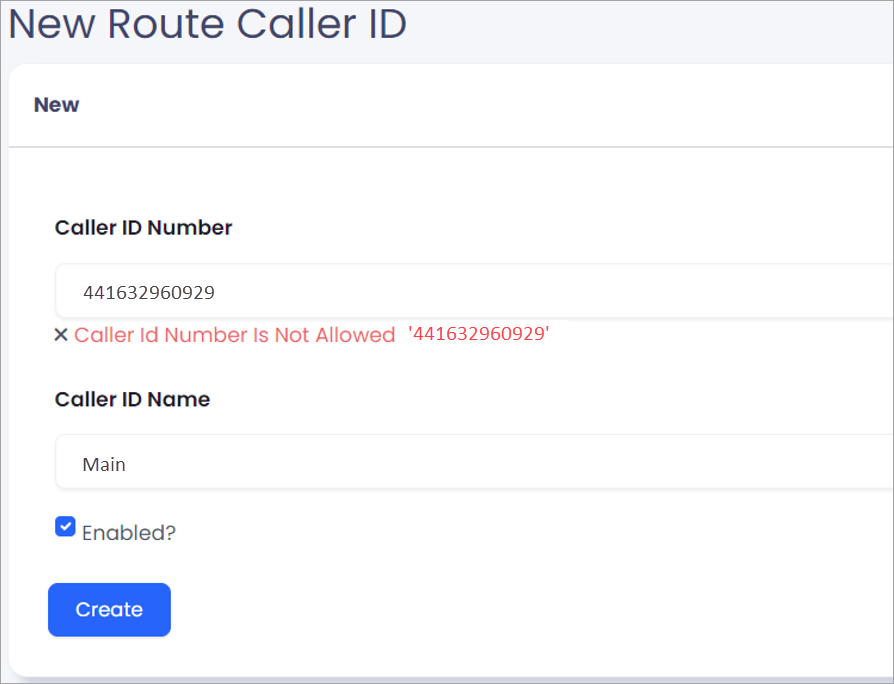
- If you attempt to enter an unverified number, the system will display an error similar to the following. Complete its verification and repeat your attempt.
- Enable the Caller ID and use it in the dialing routes.
- To temporarily deactivate the ID, move the toggle to the left in the Enabled column.
- To remove a Caller ID, use the Delete icon in the Actions column.
Step 2: Add Groups
NOTEYou must have at least one route group already set up to add a new route.
- In the main menu, select Settings > Outbound Configurations and then switch to the Manual Dialing Routes tab.
- Click Add New Group at the top right.
- Enter a route group name.
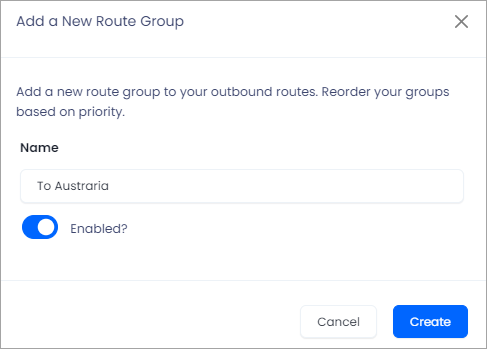
- Click Create.
- Add as many groups as you need, and then rearrange your groups according to priority.
Step 3: Add Manual Dialing Routes
- Click + New Route in the group where you want to add a route.
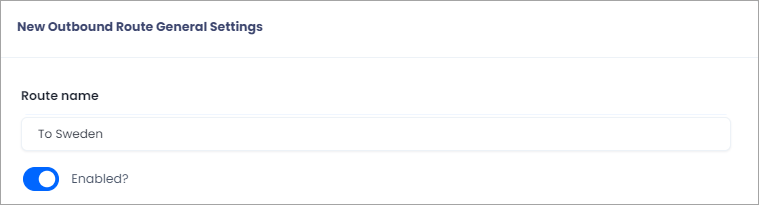
- Route name: Enter the route name. If you'd like to use it later, you can turn it off.
-
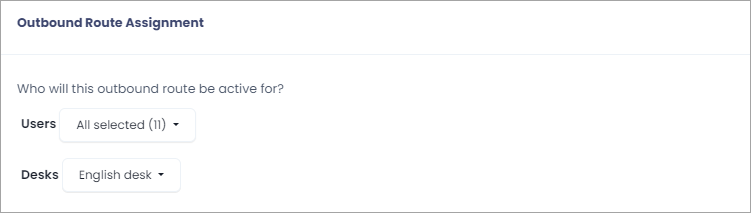
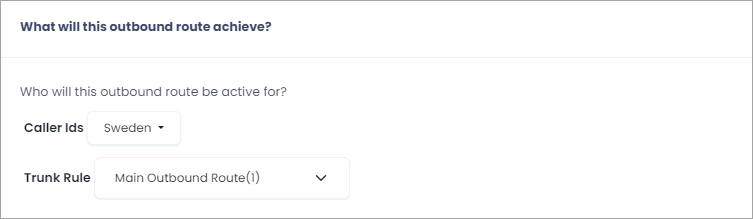
Outbound Route Caller ID and Trunk Rule: Select users and/or desks from drop-down lists to assign to the route. If no selection is made, the route will be active for all users and desks.
-
Outbound Route Caller ID and Trunk Rule: Select Caller IDs and trunk rules from the drop-down lists in your Dialer or Cloud PBX. By default, choose the main outbound route unless you have third-party trunks.
-
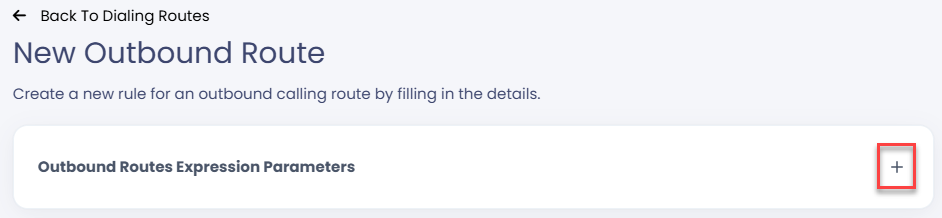
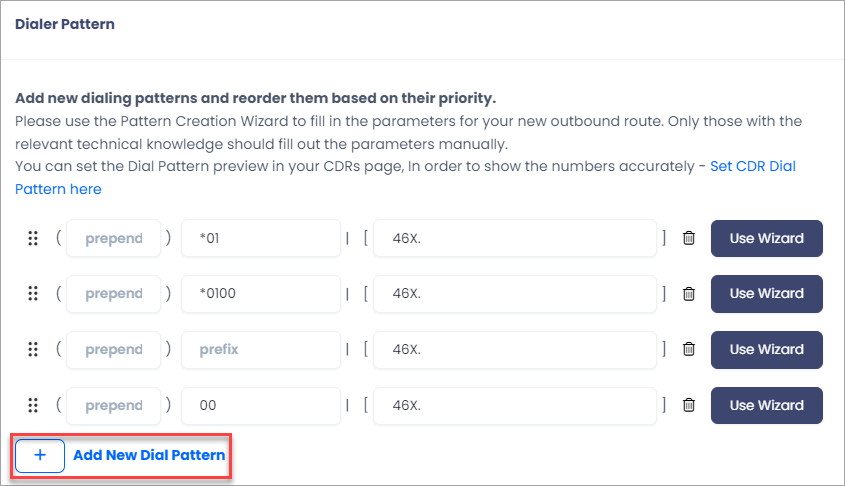
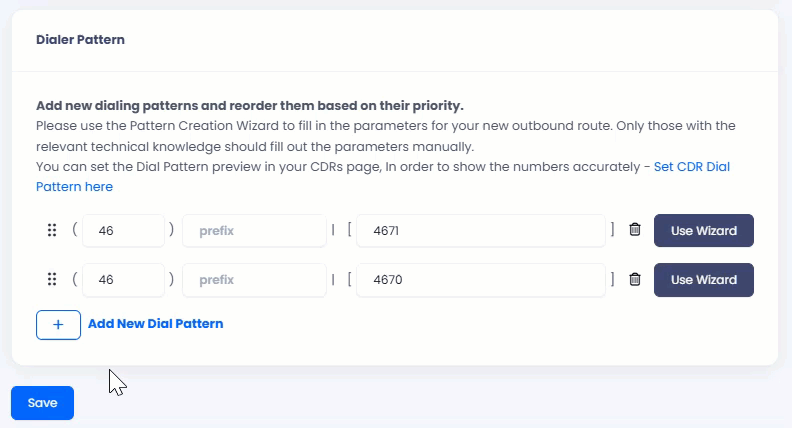
Dialer Pattern: Add new dialing patterns and rearrange them according to priority.
NOTEYou can click the plus icon at the top right of the page to expand an explanation about parameters in the outbound route expressions.
Click the Add New Dial Pattern button to add more patterns.
Add as many groups and routes as you wish, and then rearrange the groups and the routes inside them according to priority.
❗The order of pattern configuration is crucial, as the system evaluates the rules from top to bottom. If the system finds a match while reviewing the pattern rules, it will take action immediately, even if additional patterns on subsequent rows could also apply. You can modify it when editing a route.
-
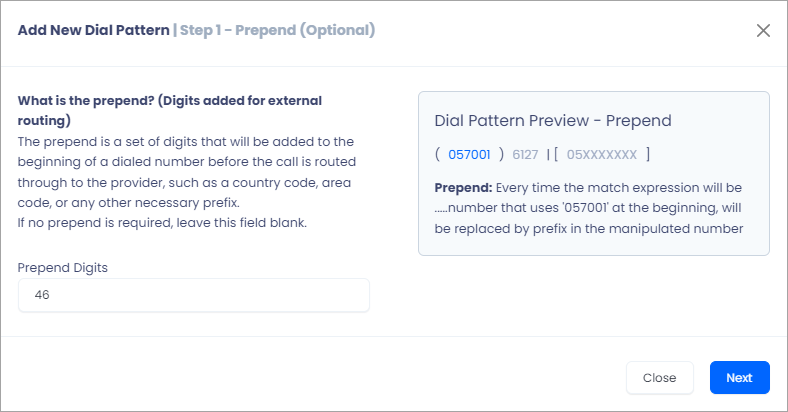
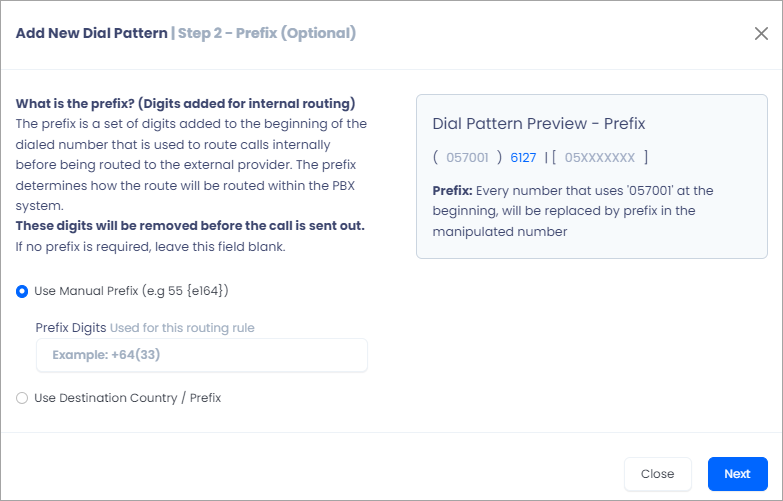
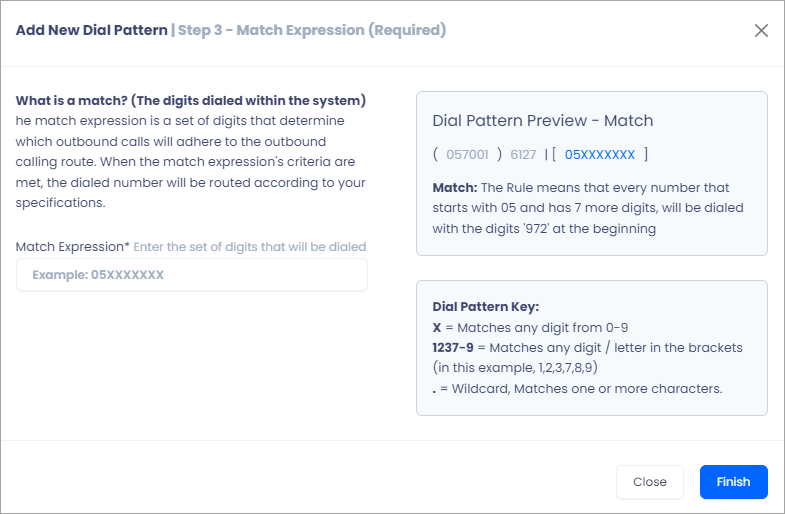
If you are unsure what information to enter in the prepend, prefix, and match pattern boxes, click Use Wizard to get a tip about the pattern parts:
-
Enter a prepend, then click Next.
-
Select a prefix option, then click Next.
-
Enter a match expression, then click Finish.
-
Click Add Route.
Managing Routes
After adding a new route, you can modify, disable, or remove it if necessary. To do so, navigate to the desired route and use the available controls.
Exporting and Importing Routes
You can back up your current outbound route configuration at any time by clicking Export in the upper section of the page, which downloads your groups and routes as a file. To restore a saved configuration or apply routes from another setup, click Import and select the file to upload.
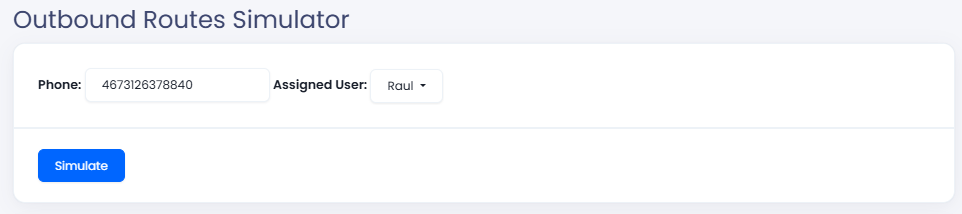
Using Route Simulator
You can run a simulation to determine which routes match a specific user. To perform the simulation:
-
Click the Simulator button in the upper section of the page.

-
Enter a phone number, and choose the assigned user.
-
The results will show which routes match the simulation data. Using the simulator allows you to verify your configuration and adjust the rule based on the results it provides.
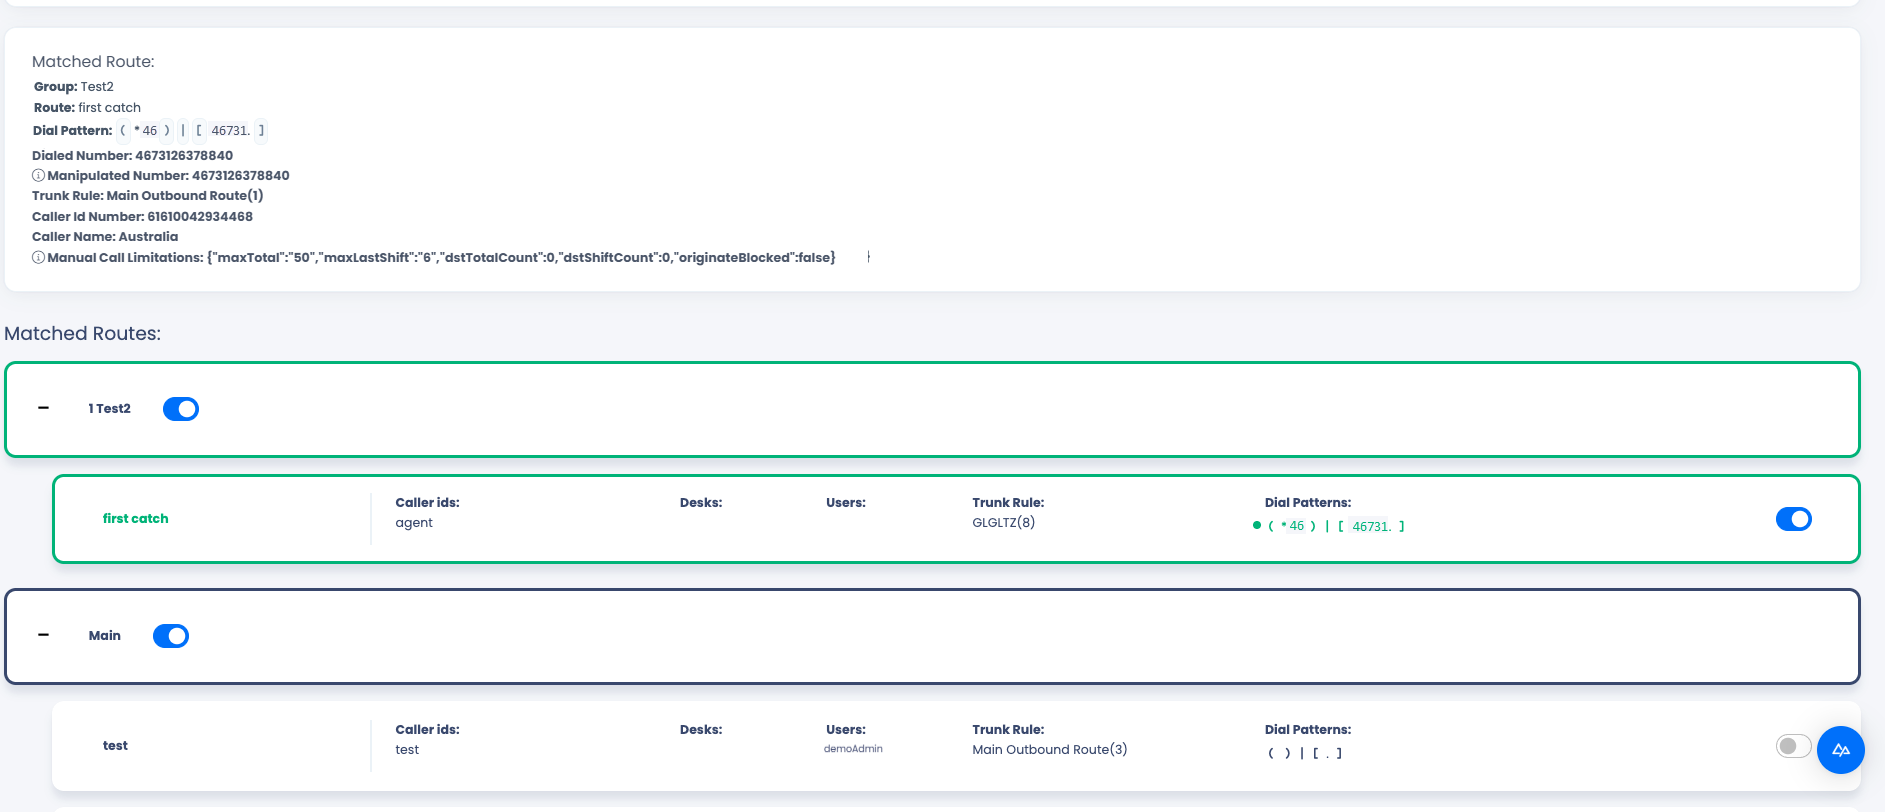
This example illustrates that the green route is selected because it is the first match. Other routes are also associated with the call route rule but are not selected due to priority settings.
Updated 6 months ago