Configuring Inbound Call Routes in PBX
Configure inbound call routes in CommPeak Classic PBX, including setting up routing rules, destinations, and call recordings.
Classic PBX provides various options for routing your incoming calls. This article shows steps to route the call to a user extension or any other destination you have set up in Cloud PBX .
Step 1: Access the Classic PBX Web Interface
-
First, perform login to CommPeak Portal at my.commpeak.com.
-
Then, open your PBX instance and click Login with CommPeak.
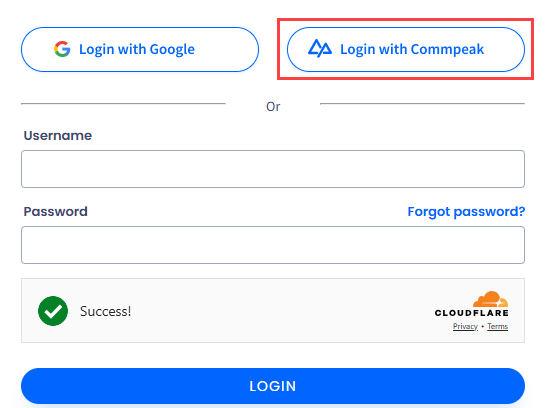
Accessing Classic PBX Web Interface
Step 2: Configure Inbound Call Routes
Obtain your Classic PBX server's domain and admin credentials from the CommPeak support team.
-
Open a web browser, navigate to the domain, and log in to the server.
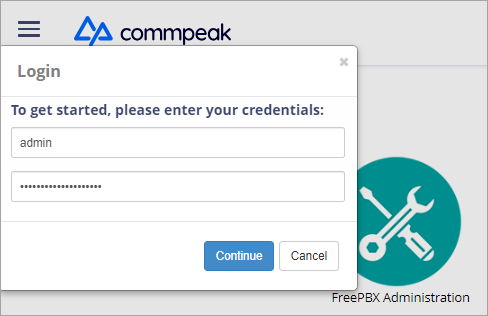
Accessing Classic PBX Web Interface
Step 2: Configure Inbound Call Routes
-
Go to CONNECTIVITY > Inbound Routes.
-
Click + Add Inbound Route.
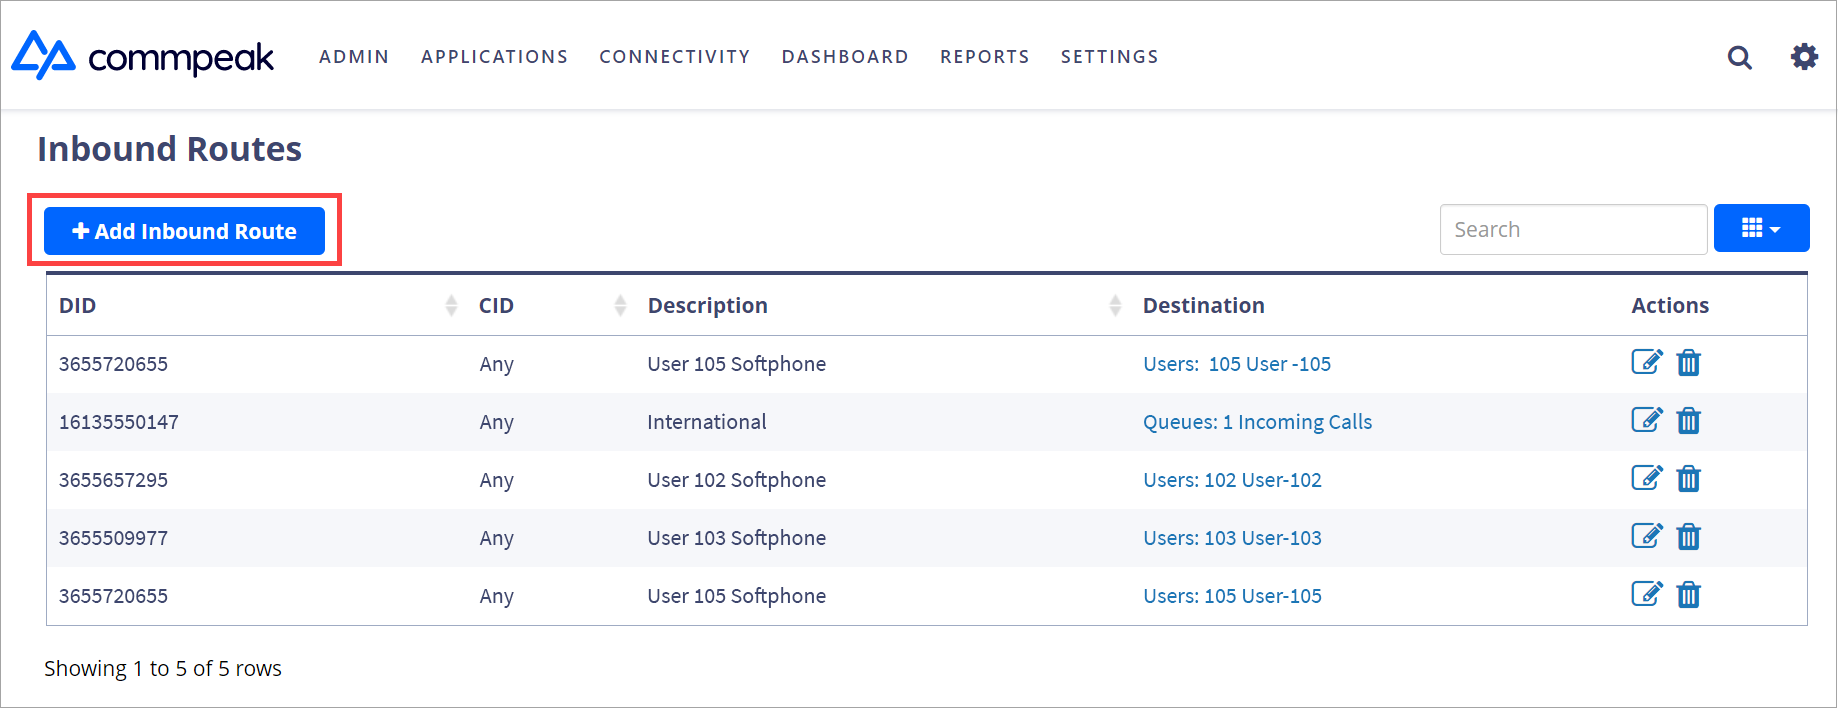
+ Add Inbound Route button
-
On the General tab, add a description and DID number.
NOTE- In the DID Number field, you can enter one number or use a pattern match (e.g., 2[345]X ) to match a range of numbers. You can set the pattern prefix when configuring Forward Voice URI for DID numbers.
- In the CID field, you can set the country code or number from which you want to receive incoming calls (e.g., +359X ).
-
Select Users in the Set Destination drop-down list and indicate the user who will receive the call.
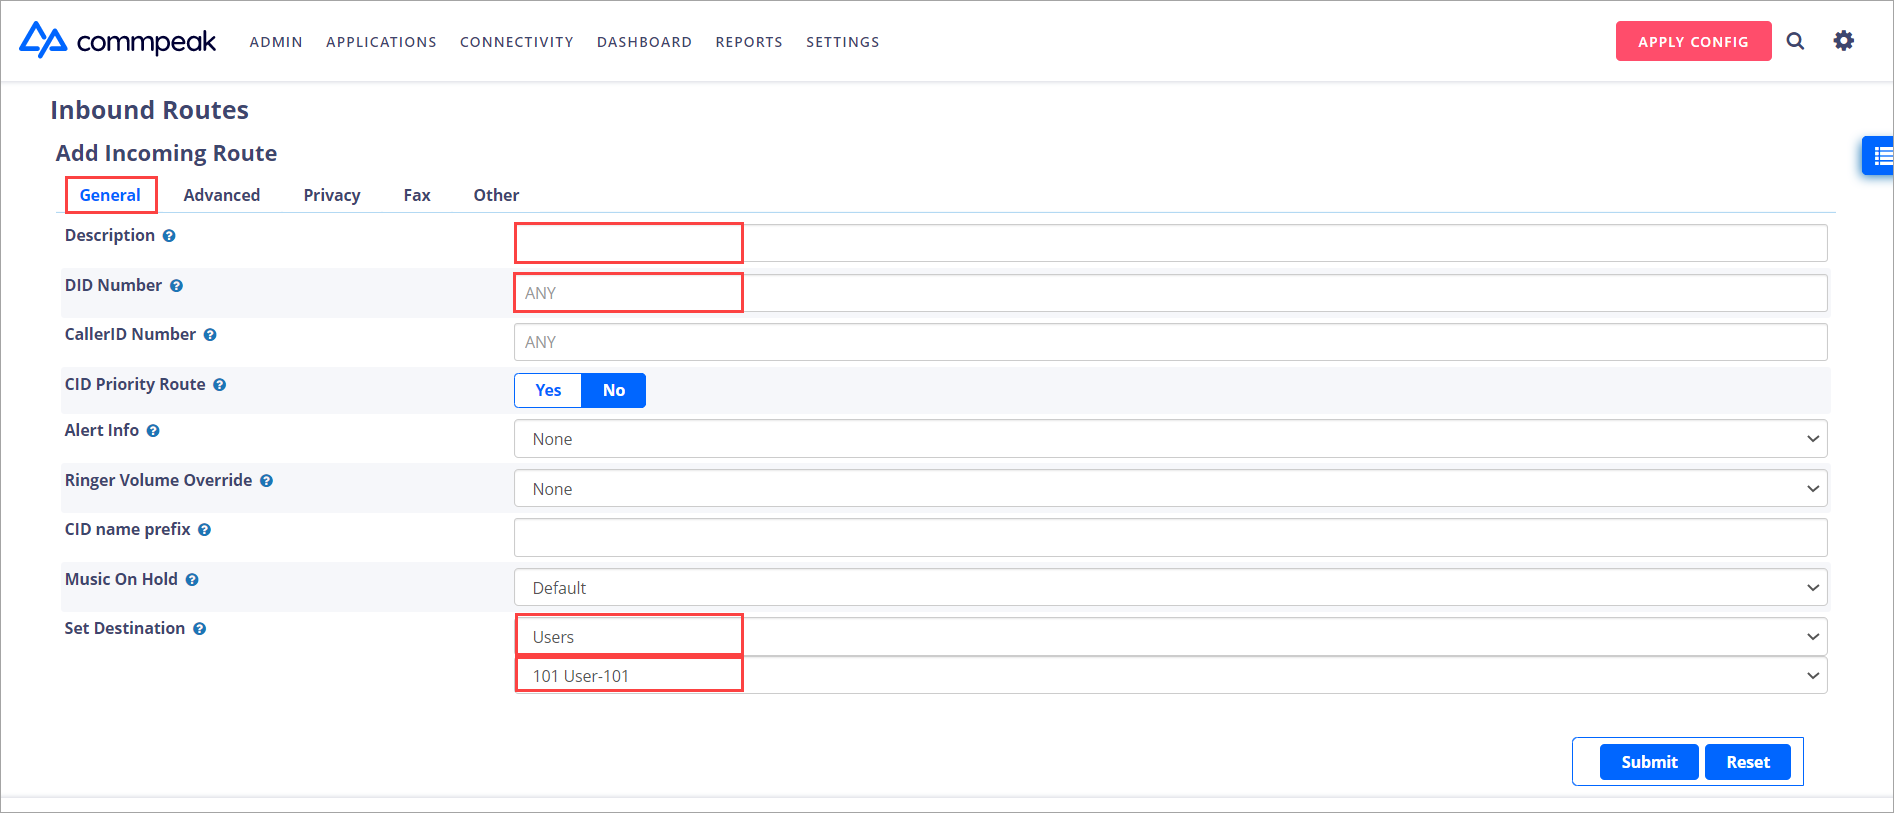
Inbound Routes > General tab
NOTEInstead of connecting the incoming call to an agent right away, in Set Destination, you can also enable a voice announcement, IVR, or Time Conditions.
-
On the Other tab, click Yes next to Call Recording, or else the call won’t be recorded.
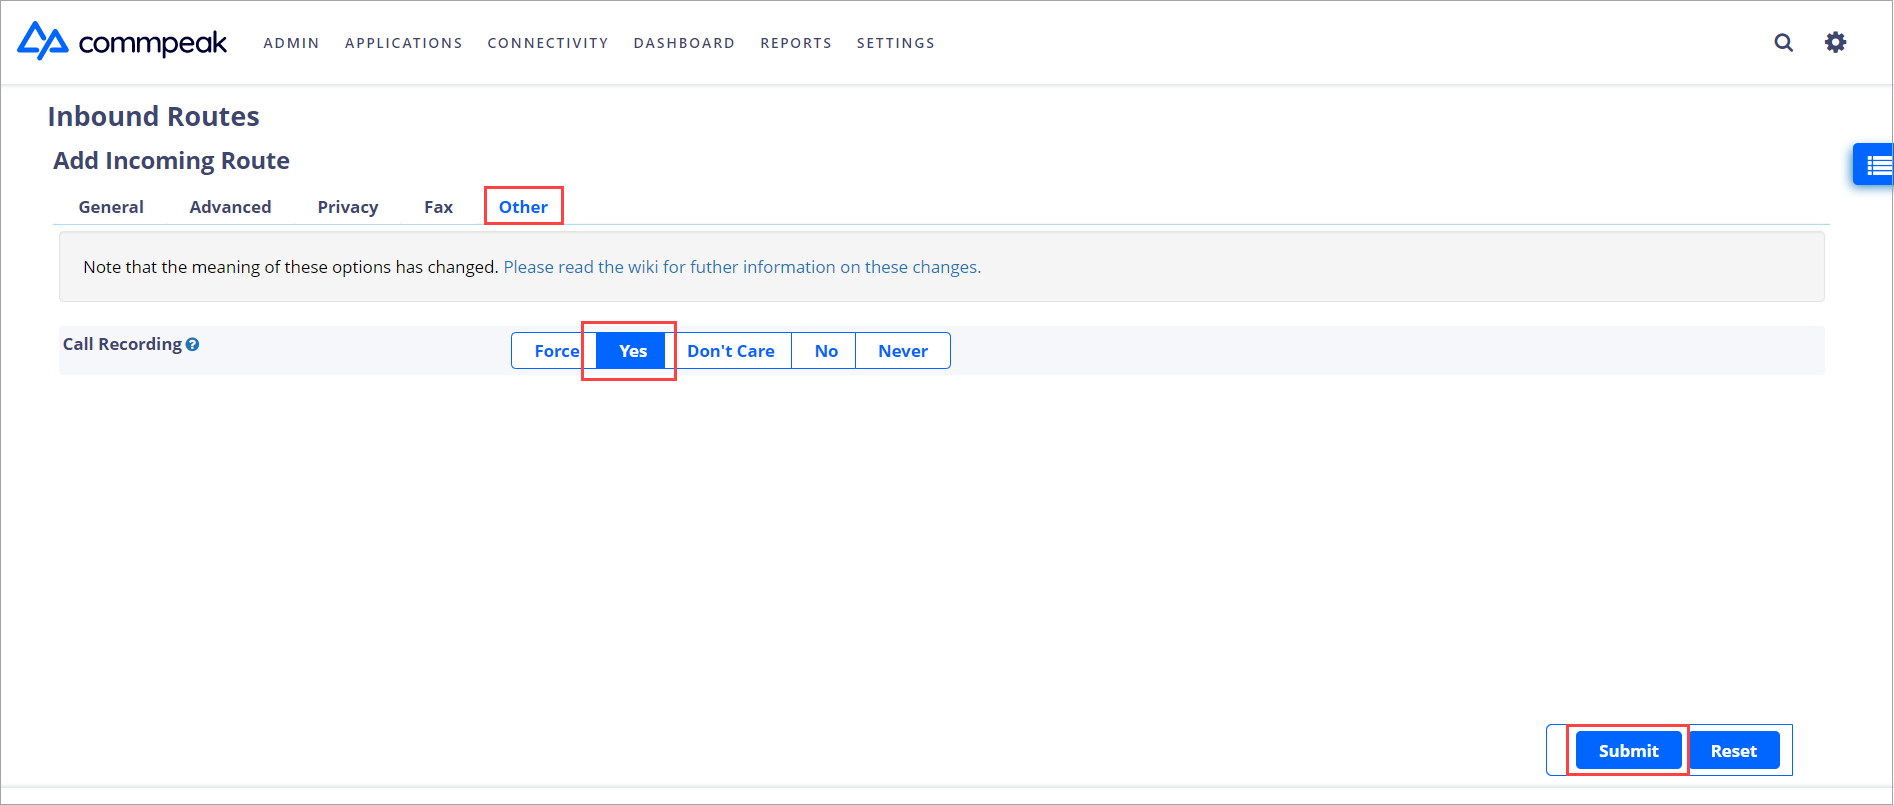
Inbound Routes > Other tab
-
Click Submit.
-
Click APPLY CONFIG in the top right corner.

APPLY CONFIG button
Step 3: Test the Inbound Call Route
- Place a test call to the designated phone number or DID that triggers the inbound call route.
- Verify the call is routed to the correct destination based on the configured routing conditions.
We recommend that you contact our support team with a request to configure inbound call routes and destinations for you, and we will be happy to do it.
Updated 6 months ago