Realtime Customization
Learn how to customize the Realtime page for monitoring your call center activities. Learn to apply and clear filters, define settings like layout, alerts, and agent states, and switch to TV mode for a full-screen view.
The Realtime Stats page provides flexible customization options for creating an online preview of your call center calls and activities according to your needs. You can find the following controls in the top right:

Customization options
- Applying filters
- Clearing filters
- Defining settings, including the Realtime page layout, alerts, and states
- Switching to TV Mode.
1. Applying filters
- Click the filters button.
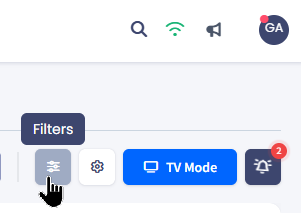
Filters button
- Select the needed desk(s) and agent state(s) to display the associated data on the Realtime Stats page.
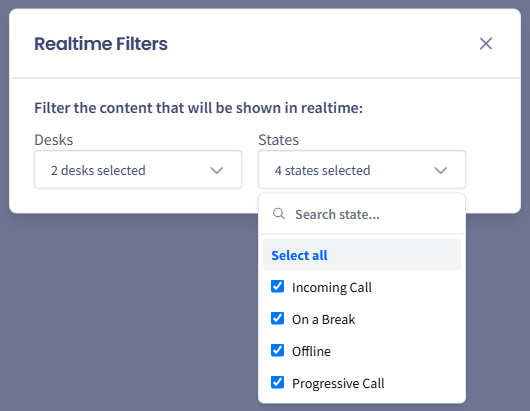
Realtime drop-down filters
2. Clearing filters
After you set the filters, panels with filter data appear on the left. You can hover over the panels for details.
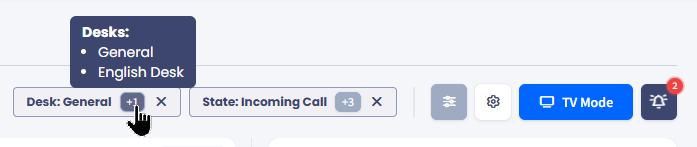
Filter details
Click the clear (x) buttons to reset filters.
3. Defining settings
Click the settings icon to customize the layout, set alerts, and select the states that will appear in the agents list.
Layout
To choose a layout for your Realtime desktop screen:
-
In the Realtime Layout Type drop-down list, select whether your agents are doing manual calls, predictive calls, or a mix of both.
-
Apply one of the suggested layouts, which is the most optimal for your needs.
Click Show Full Screen to view an enlarged version of the screen.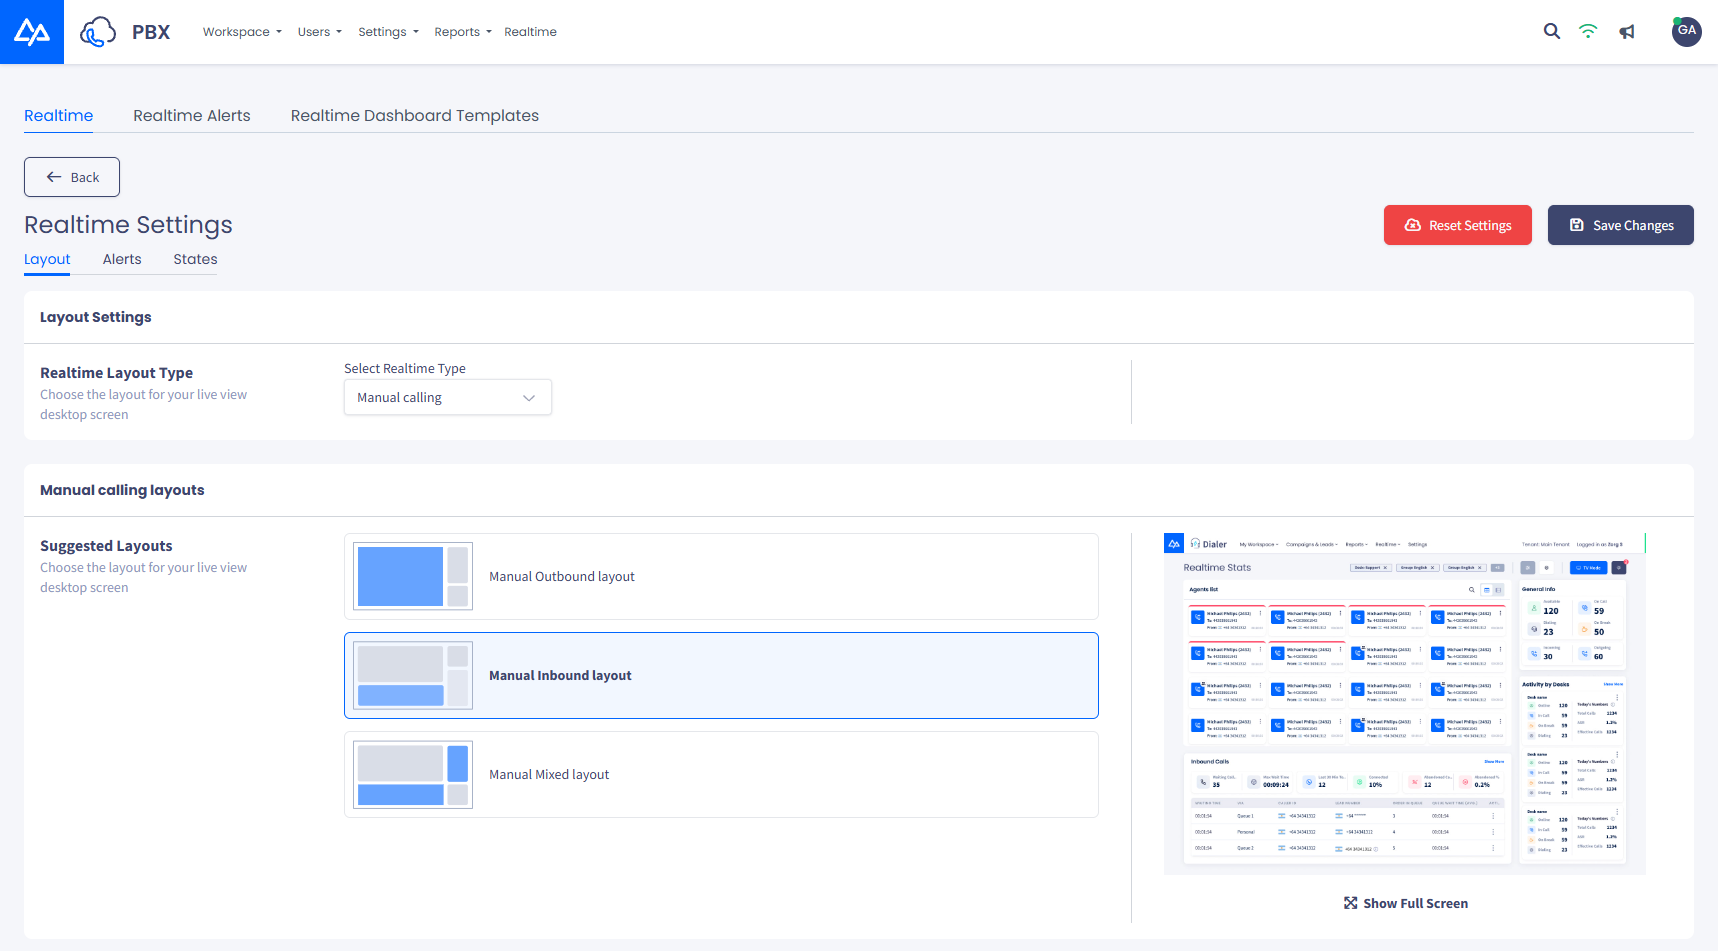
Layout tab
-
Click the Save Changes button in the top right.
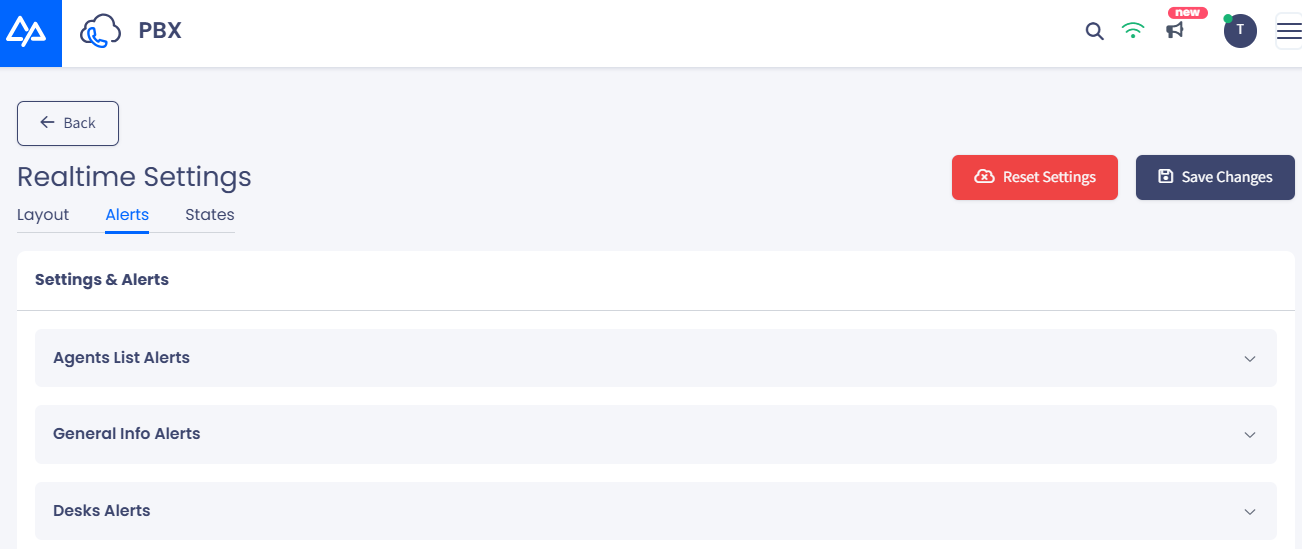
Alerts
Here, all users can set their alerts for the agent list, general info, groups, and incoming calls.
To set alerts:
-
Switch to the Alerts tab.
-
A page with several alert panels will open to configure settings for the relevant modules. Agent List Alerts will be expanded by default. You can collapse it and proceed to other panels as needed.
Alerts tab
-
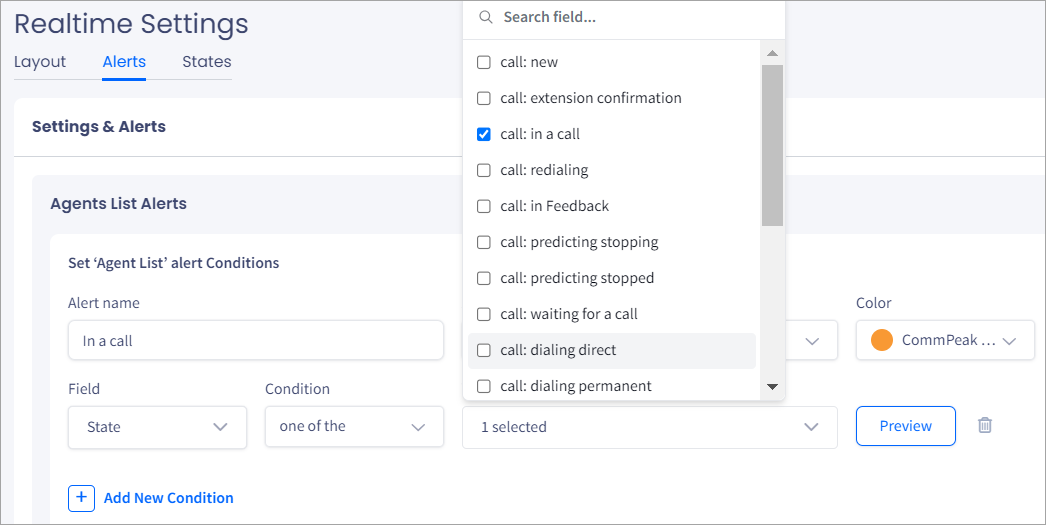
Enter an alert name.
-
Select priority:
- Sorted - enables setting priorities for showing some agents at the top of the list on the Realtime page
- Unsorted - the agents will appear at the bottom of the list
- Hidden - select it if you wish to exclude some agents from the page (for example, offline agents).
-
Select the sort level. The smaller the number, the higher the line will appear in the list.
-
Select color.
-
Select a field, condition, and value. For example, you can create an alert for agents in a call as follows:
Setting alerts for the agent list
-
Click Add New Condition to define another condition in the alert. You can, for example, set the state duration.
-
Click Preview to preview the alert on the right.
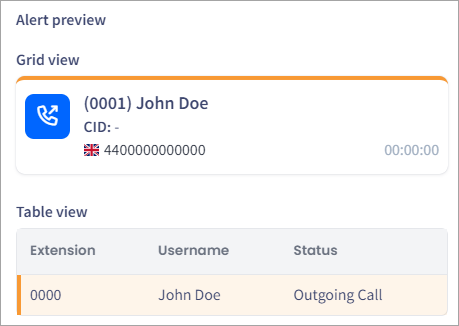
Alert preview
-
Click the Save Changes button in the top right.
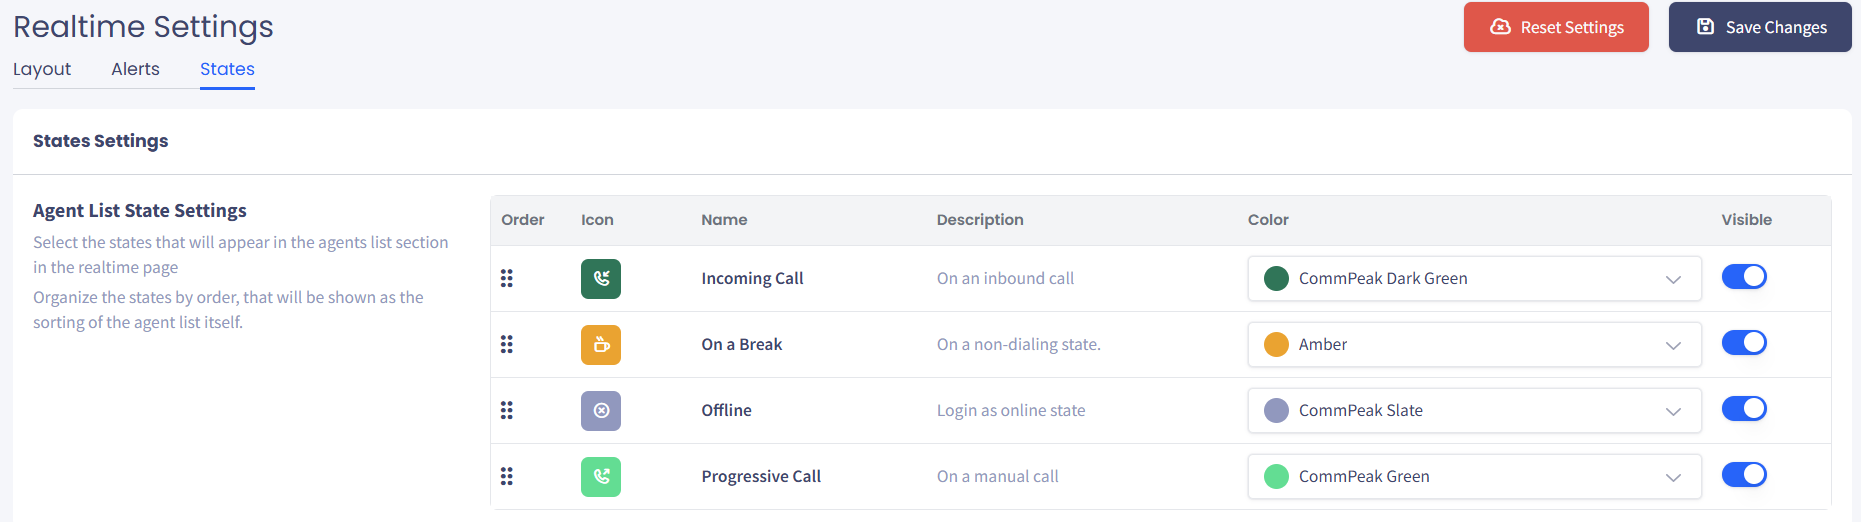
States
On the States tab, you can:
-
Turn on the agent states for the agents' module and apply the States filter
-
Choose colors for icon states to distinguish them in the Agents module
-
Drag and drop the lines to reorganize the states' order for the agents' list.
States tab
The following agent states will appear in the States tab and throughout the Realtime page:
| State | Description |
|---|---|
| Incoming Call | Agent is on an inbound call. |
| On a Break | Agent is in a custom non-dialing status (e.g. a break or lunch period configured by the tenant admin). The agent is logged in but will not receive calls until they return to an active state. |
| Offline | Agent is logged in to the system but is currently set to the default online/offline state. In PBX mode, this is the agent's base Available status before they begin taking calls. |
| Progressive Call | Agent is on a manual outbound call they placed themselves. |
4. Switching to TV mode
TV mode is a presentation/display mode designed for showing the Realtime Stats dashboard on a large screen like a wall-mounted monitor or TV in a call center. You activate it by clicking the blue TV Mode button in the top-right of the Realtime Stats page.
TV Mode button
After you click TV Mode, you enter the full-screen mode. In this view, you can select a different Agent grid size.
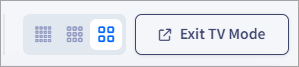
Exit TV Mode button
Click Exit TV Mode to return to the default view.
Updated 18 days ago