Tips for Managing User Groups
Apply these tips to effectively manage user groups and get the most of your Dialer.
CommPeak support team can assist you with configuring user groups, a crucial element of the CommPeak Dialer system.
This article presents several tips about basic parameters, filter configuration, and predictive settings on the editing user group page. It will help you better understand the filter groups and learn how to manage them effectively.
To open a user group for editing:
-
Go to Users on the main page, then select Groups Management.
-
Click Edit in the Actions column for the group you wish to modify.

Editing user groups
IMPORTANTPlease familiarize yourself with the tips below before modifying filter groups and creating new ones.
1. Create object lists and use them in filters
Object lists can include countries, lead statuses, or affiliates. You can learn how to create object lists in the Settings menu from this article.
Once you create a list, you can use it in lead filter settings under predefined object lists.
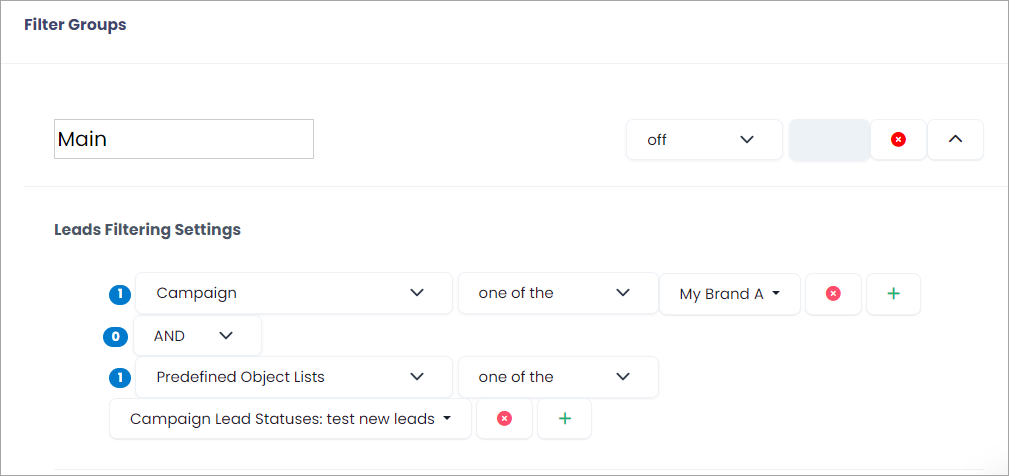
Using object lists in group filters
If the same items are used in several filters, you can modify the objects list to which these items belong instead of editing each filter group one by one.
2. Clearly state the purpose of the user group
When creating or editing a user group, enter clear information in the Name and Description fields at the top of the page. Learn how to edit a user group from this article.
Specifying user group name and description
This information will help you understand which leads this group will fetch.
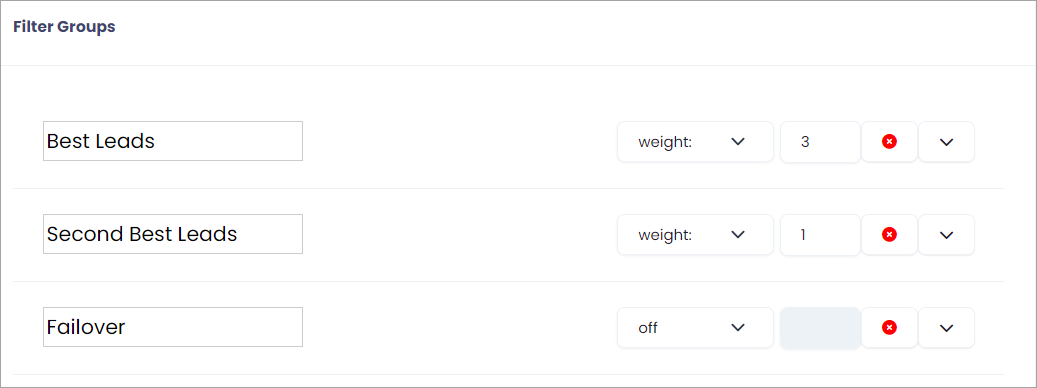
3. Set filter group weight to prioritize leads
The weight option that works like a ratio enables prioritizing the filters by setting the sequence for their processing. Learn how to set weight from this article.
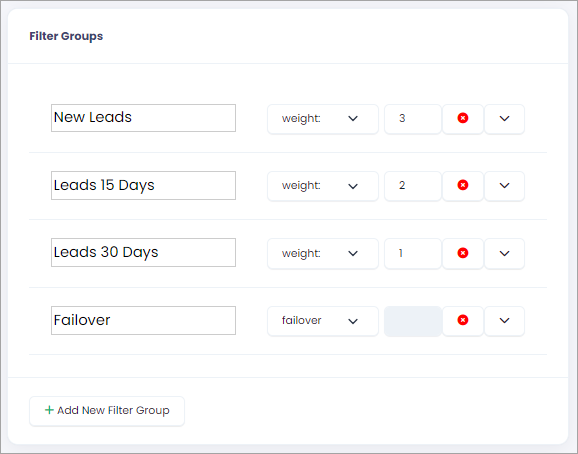
Setting filter group weight
In the above example, the Dialer will call every three leads from the first group, two leads from the second group, and one lead from the third group. When there are no leads in these filter groups with weight priority anymore, it will call leads that fit the conditions of the failover group.
4. Set the campaign filter in the first line of each group
The Dialer needs to know from which campaign to fetch the leads. You can learn how to work with campaigns from this article.
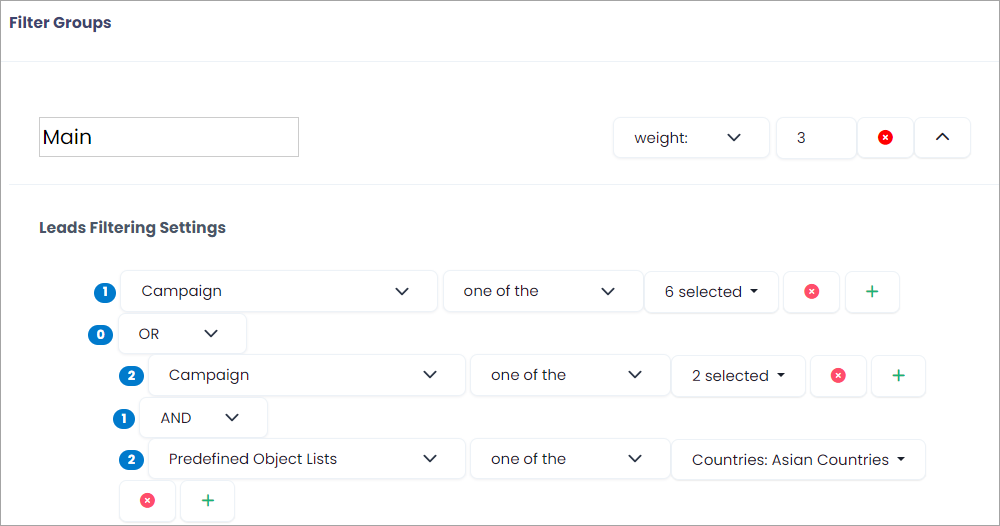
Setting campaign filters
You can set one or not one of the selected campaigns in the filter. If you use the OR operator, add the second line with campaigns.
5. Every group and every filter should fetch different leads
The Dialer will operate most effectively if each filter fetches completely different leads. The following examples show two different filters from the same group.
The first filter for a campaign takes leads from the Pacific region countries.
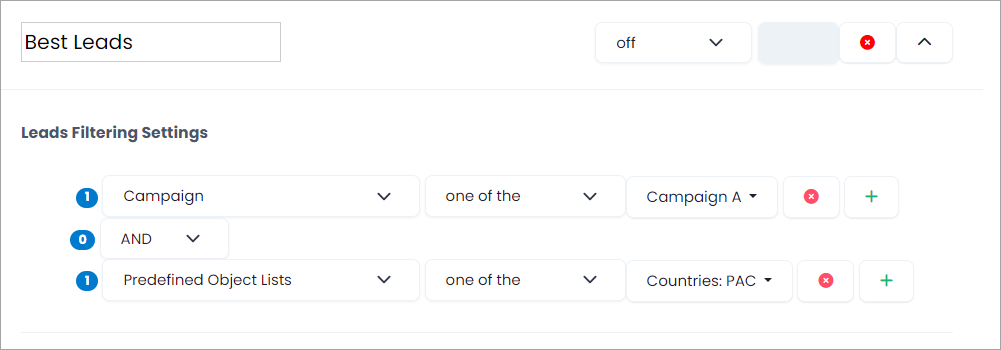
The first filter in a user group
The second filter for the same campaign is for the Middle East countries.
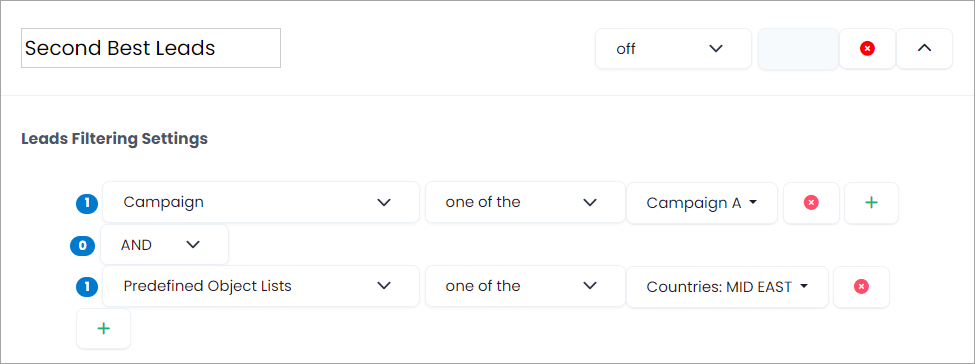
The second filter in a user group
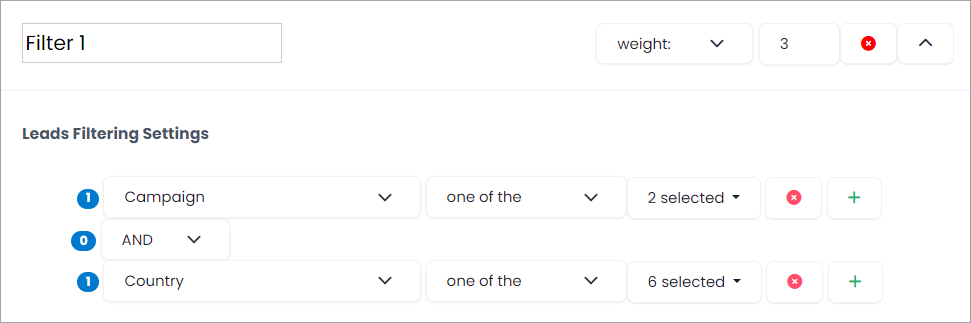
6. Create from one to four lines in each filter group
The filters should be simple enough not to overload the system.
Filter lines in a group
7. Connect filter lines by AND operator
We recommend that you avoid using OR. Create another filter line instead.
Using the AND operator
8. Create only one line with countries
The following campaign filter example is set for Arabic-speaking countries. It uses a predefined object list to which we've added all the countries from which we want the system to call leads.
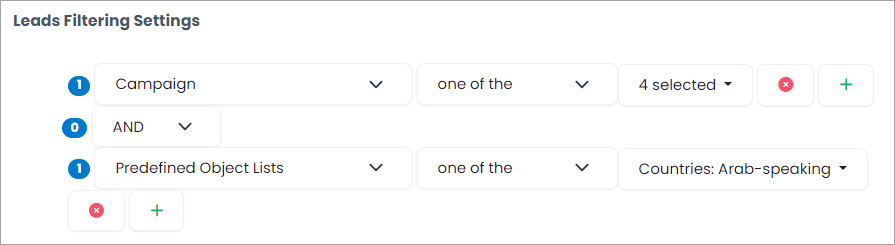
Filter line with countries
9. In your filters, use CRM fields synced with the Dialer
The following filter example contains the purchase date, which is mapped to the lead registration date in the CRM. The purchase site usually corresponds to the affiliate or campaign in the CRM.
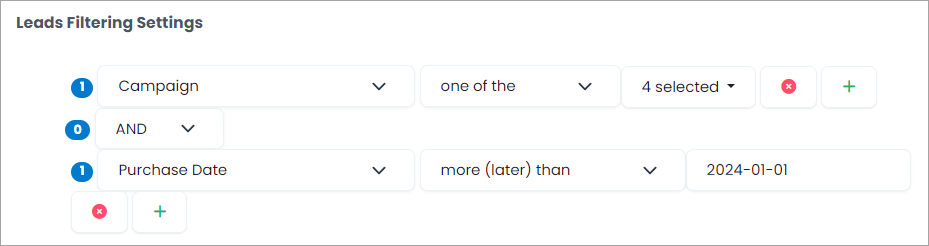
Screenshot of filter settings with the use of CRM data
10. Use either 'one of the' or 'not one of the' options
When using 'one of the', there is no need to add another line with 'not one of the' for the same field.
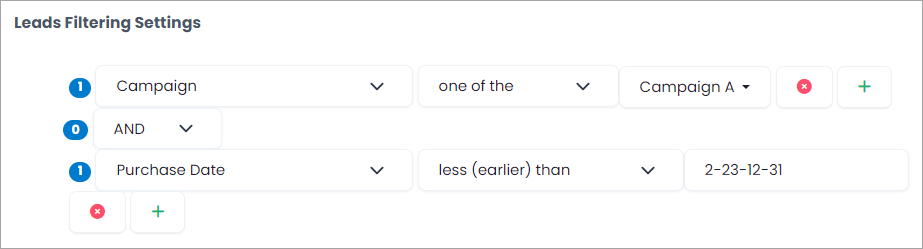
Screenshot of filter options
11. Use predictive settings to change the system behavior
You can select several options on the user group page below filter groups. You can learn more about predictive settings from this article.
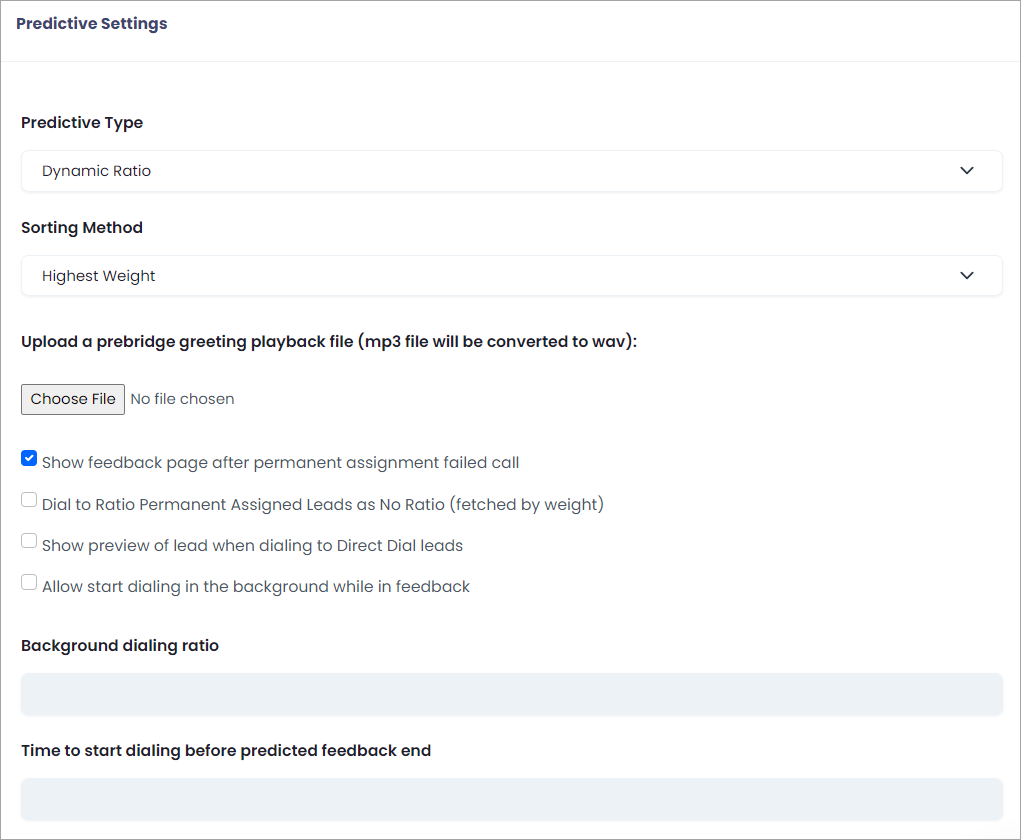
Screenshot of using predictive settings in filters
Updated 6 months ago