Configuring Outbound Caller IDs
Learn how to add, modify, and manage verified caller IDs for outbound calls, with tips on firewall settings and dial pattern configuration.
You can add a new Caller ID from verified DID numbers or modify existing ones. It is a number your called parties will see when they get outbound calls.
IMPORTANT
- To access your PBX web page, allowlist your public IP address in your CommPeak Portal account: Cloud PBX > PBX Instances > your PBX domain > Firewall Settings > Web ACL tab.
- Ensure you use verified Caller IDs in your outbound routes. Calls from unverified ones will be rejected.
To add a Caller ID:
-
In your PBX control panel, go to Connectivity and select Outbound Routes:

Connectivity > Outbound Routes tab
-
Click Add Outbound Route:
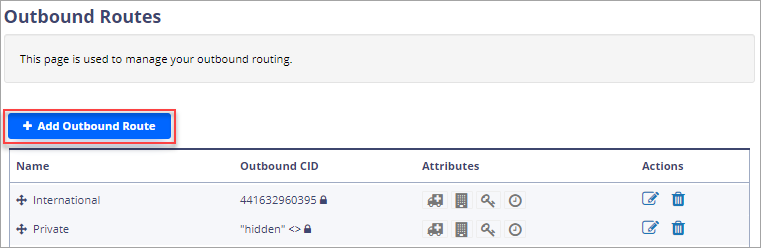
+ Add Outbound Route option
-
Fill in the route details:
-
enter a name to locate the route quickly in the list - this information is only visible to you in the PBX control panel
-
enter a number or several numbers in the E.164 format separated with a comma
-
set the Override Extension option to Yes to ignore extension Caller IDs and use this one.
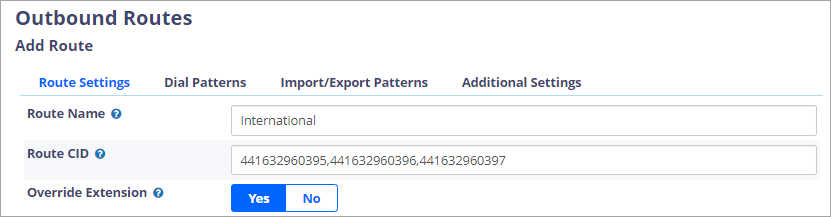
Filling in route details
-
-
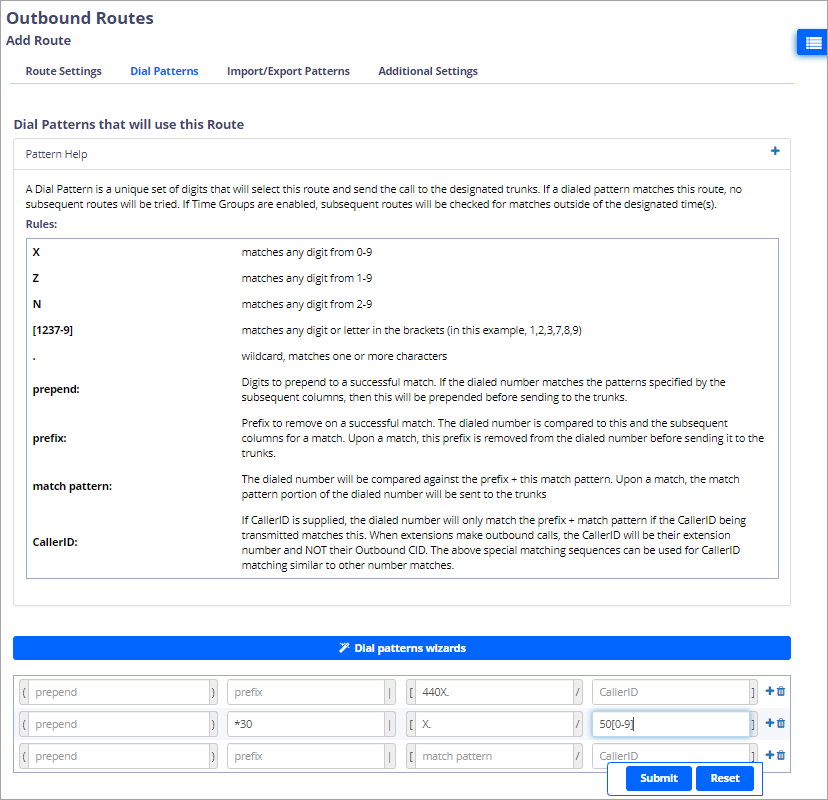
On the Dial Patterns tab, configure the patterns:
-
prefix: enter the prefix to be dialed before a phone number.
-
match pattern: international calling code. For example, for calls in all directions, enter X.
-
CallerID: enter an extension or a range of extensions permitted to make calls in a specific direction. If you want more information about dial patterns, you can look at Pattern Help. To open the Help, click the + in the top right.
Pattern Help option
In the preceding example, all extensions will call phone numbers starting with 440. The extensions from 500 to 509 will make calls internationally if they dial *30 before a phone number.
-
-
Click Submit.
-
Click APPLY CONFIG in the top right to apply the settings immediately:
APPLY CONFIG button
NOTEThe outgoing rules work with priorities; the highest rule is the first priority, and the lowest rule is the lowest priority.
-
To modify a Caller ID, click Edit in the Actions column, change the ID settings, and then click Submit. Click Apply Config to complete the modification.
Updated 6 months ago