PBX IP ACL Settings
Allow specific IP addresses to access your PBX system by setting whitelisted IP addresses in Web ACL, SIP ACL, or Click2Call ACL. You can also use Dynamic DNS (DDNS) for dynamic IP addresses and Geo ACL for country-based whitelisting.
Access settings will increase your network protection, minimize security risks, and prevent unauthorized access to your PBX.
Video Tutorial
To open the access settings for Cloud PBX :
-
Log in to the CommPeak Portal.
-
In the main menu on the left, expand Cloud PBX in the main menu on the left and then click PBX Instances.
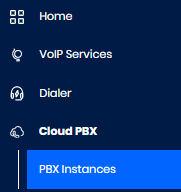
PBX Instances in the main menu
-
In the PBX Instances table, click the three-dot icon on the right of the needed PBX instance, and select the Firewall Settings option.

PBX Instances table
The Firewall Access Settings sidebar opens with several tabs: Web ACL, SIP ACL, Active blocks, and Click to call (if defined for this instance). Here, you can insert IP addresses to web, SIP, IP, and Click2Call access lists and see IP addresses that are blocked.
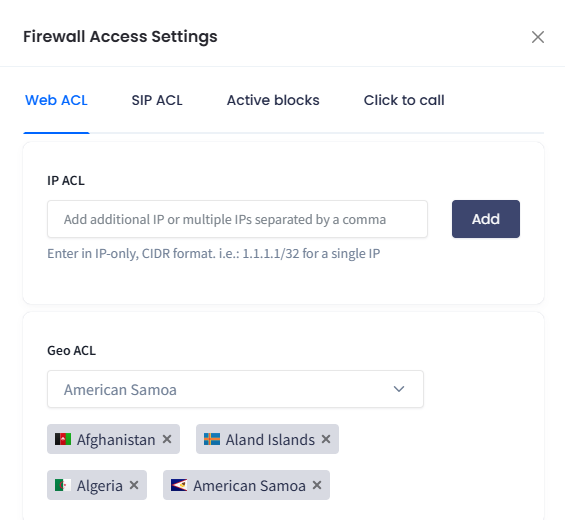
Firewall Access Settings sidebar
Web ACL
Web ACL restricts access to your PBX and PBX Stats web interfaces.
To set the web access list:
- Click the Web ACL tab in the Firewall Access Settings pane.
- In the field under IP ACL, enter an IP address or subnet in the CIDR format and click Add. You can also enter a domain. If you use Dynamic DNS, we will resolve it to IP periodically. For more information on DynDNS, refer to the section below about dynamic IP addresses.
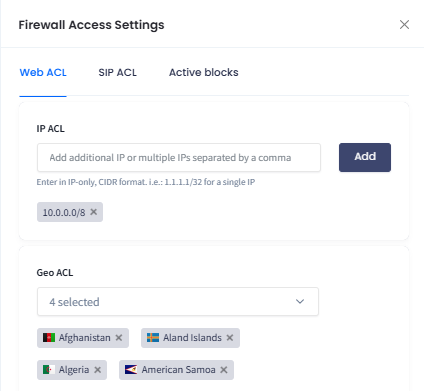
Web ACL tab
- Here, you can all the needed IPs one by one.
- To temporarily disable a specific IP, toggle the button next to the IP address. To delete an IP, click the delete icon.
- If you cannot whitelist all IP addresses, configure GEO ACL.
SIP ACL
SIP ACL whitelists specific IP addresses for SIP registration, calls, CommPeak Softphone, and PBX Stats Agent Interface.
To set the SIP access list:
- Click the SIP ACL tab in the Firewall Access Settings pane.
- In the field under IP ACL, enter an IP address or subnet in the CIDR format and click Add. You can also enter a domain. If you use Dynamic DNS, we will resolve it to IP periodically. For more information on DynDNS, refer to the section below about Dynamic IP Addresses.
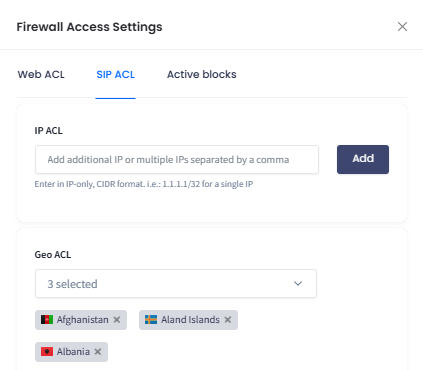
SIP ACL tab
- Here, you can add all the needed IPs one by one.
- To temporarily disable a specific IP, toggle the button next to the IP address. To delete an IP, click the delete icon.
- If you cannot whitelist all IP addresses, configure GEO ACL.
Click2Call ACL
On the Click to call tab, you set IP-based restrictions for Click2Call requests.
To set the Click2Call access list:
- Click the Click to call tab in the Firewall Access Settings pane.
- In the field under IP ACL, enter an IP address or subnet in the CIDR format and click Add. You can also enter a domain. If you use Dynamic DNS, we will resolve it to IP periodically. For more information on DynDNS, refer to the section below about Dynamic IP Addresses.
- Add all the needed IPs one by one.
- To delete an IP, click the delete icon.

Setting Click2Call ACL
Solution for Dynamic IP Addresses
You can effectively whitelist IP addresses for static IPs only. It is often a case that your Internet Service Provider (ISP) gives you a dynamic IP address. It keeps changing over and over again, so you can get rejected. The Dynamic Domain Name Service (DDNS) would be a solution for you in such a case.
You can register a hostname with one of the free DDNS providers (for example, no-ip). Once registered, you obtain a domain assigned to you.
You can set up ACL for your domain in the same way. Type the domain address (a fully qualified domain name) in the field under IP ACL and click to add it. When added, the address will appear on the access list.
NOTEAdding a domain address works for all the ACL options.
Geo ACL
Geo ACL allows any IP from countries that you can choose for both web and SIP access. Users will still need to provide their credentials when accessing your resources.
NOTEWe do not recommend country whitelisting. You can use this option if you cannot whitelist all IP addresses.
To whitelist IPs for countries:
- Go to the Web ACL or SIP ACL tab.
- Click in the field under Geo ACL to expand a list of countries.
- Start typing to search for a specific country, or scroll down to locate it.
- Select the checkbox next to the country name (or click to select all).
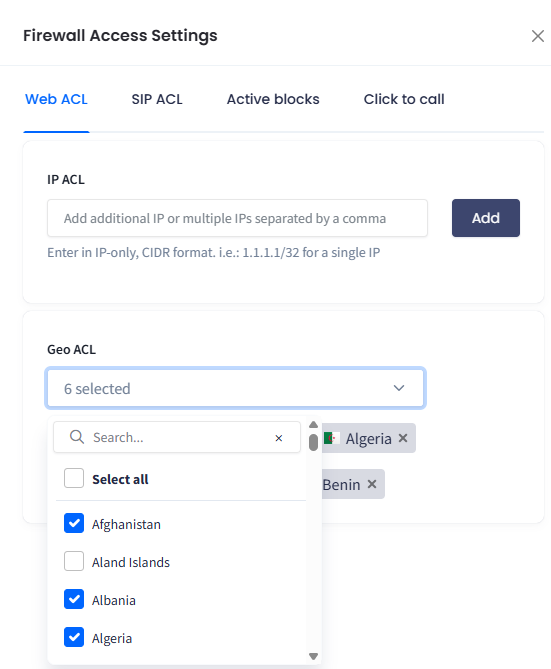
Setting geo ACL
- To disable a specific country, uncheck the checkbox next to the country name on the list or click the delete icon for the selected country.
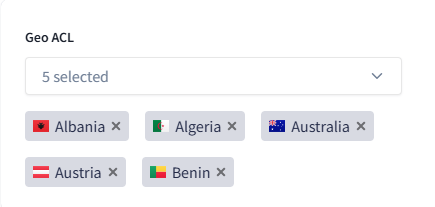
Geo ACL selected countries
Updated 6 months ago