

Realtime Customization
Customize the Realtime page for monitoring your call center activities. Learn to apply and clear filters, define settings like layout, alerts, and agent states, and switch to TV mode for a full-screen view.
Video tutorial
The Realtime Stats page provides flexible customization options for creating an online preview of your call center calls and activities according to your needs. You can find the following controls in the top right:

Customization controls
- Apply filters
- Clear filters
- Defining settings, including the Realtime page layout, alerts, states, and Extra Info customization
- Switch to TV Mode
1. Applying filters
Click the filter button and select the required desks, skill groups, and agent states to display the associated data on the Realtime Stats page.
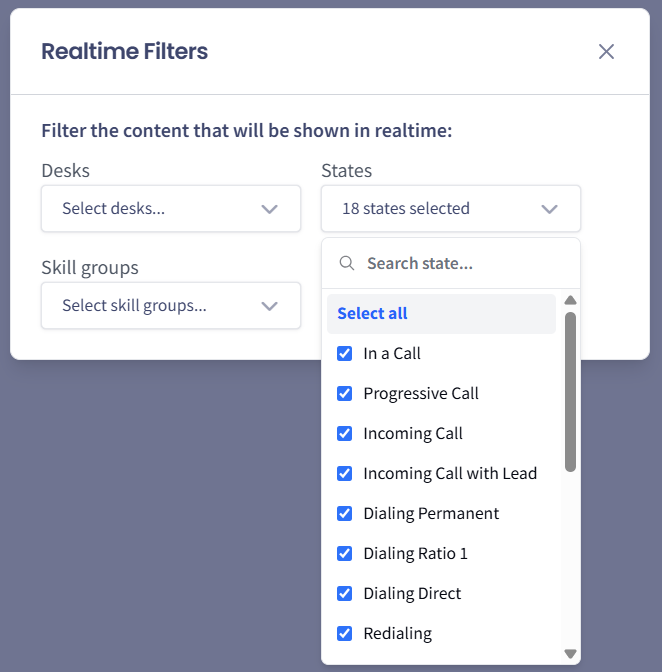
Realtime filters
2. Clearing filters
After you set the filters, panels with filter data appear on the left. You can hover over the panels for details.

Filter settings
Click the clear buttons to reset.
3. Defining settings
Click the settings icon to customize the layout, set alerts, and select the states that will appear in the agents list, and customize the Extra Info shown for each agent.
Layout
To choose a layout for your Realtime desktop screen:
-
In the Realtime Layout Type drop-down list, select whether your agents are doing manual calls, predictive calls, or a mix of both.
-
Apply one of the suggested layouts, which is the most optimal for your needs.
Click Show Full Screen to view an enlarged version of the screen.
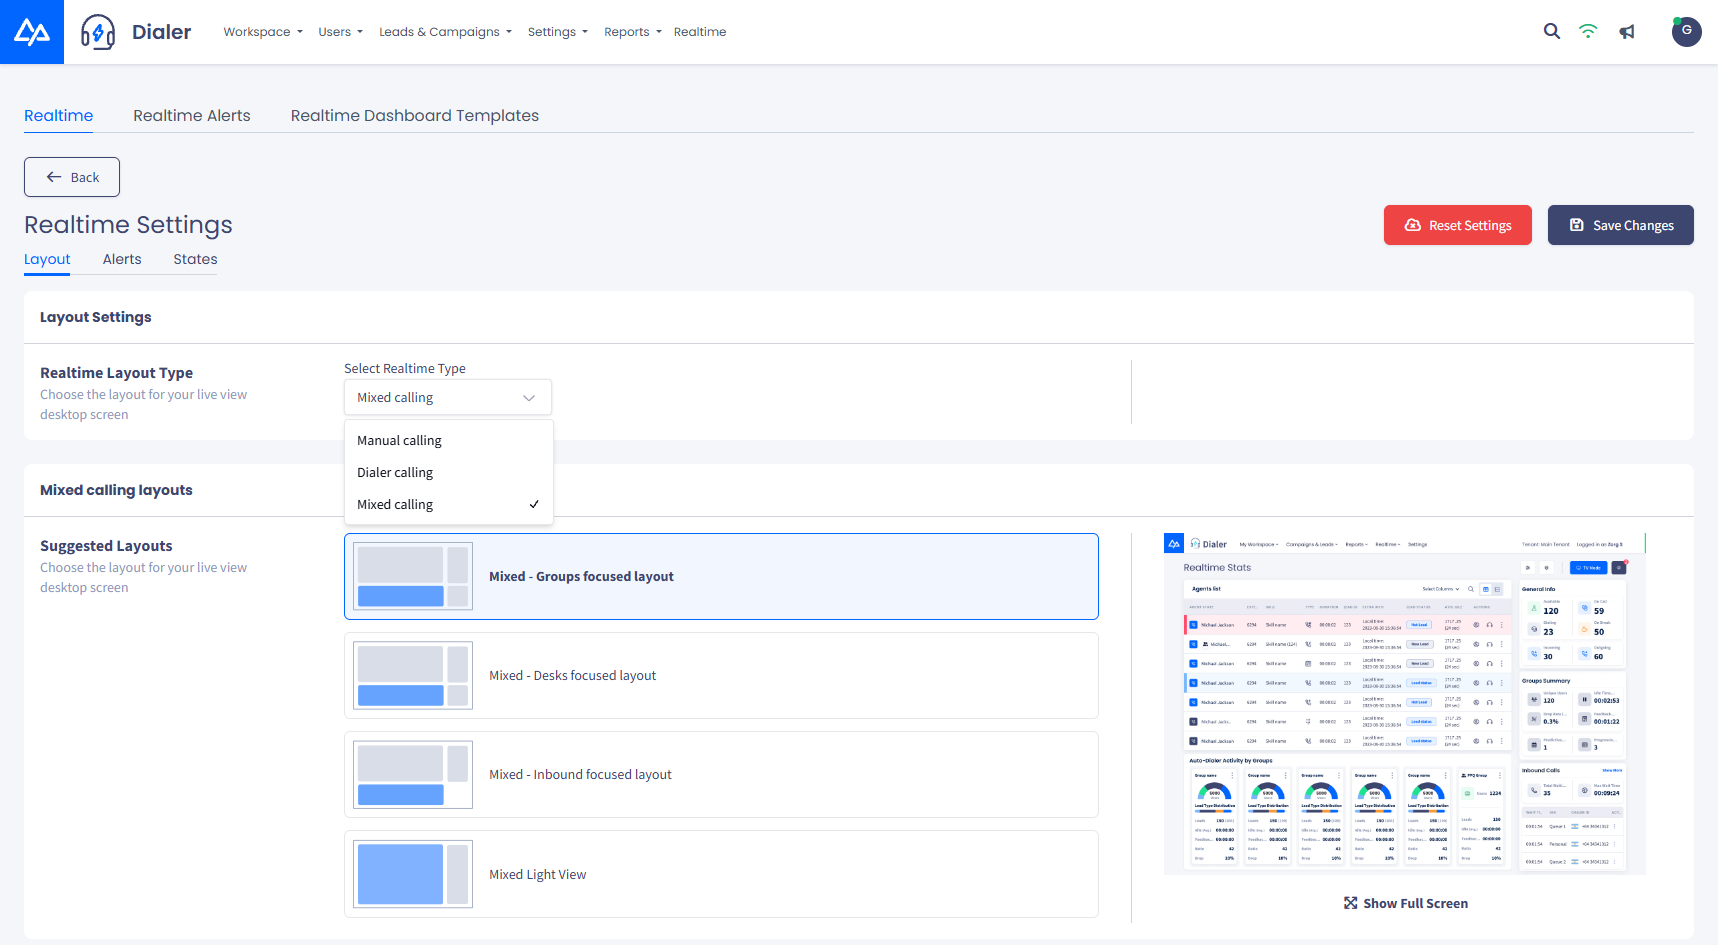
Layout tab
-
Click the Save Changes button in the top right.
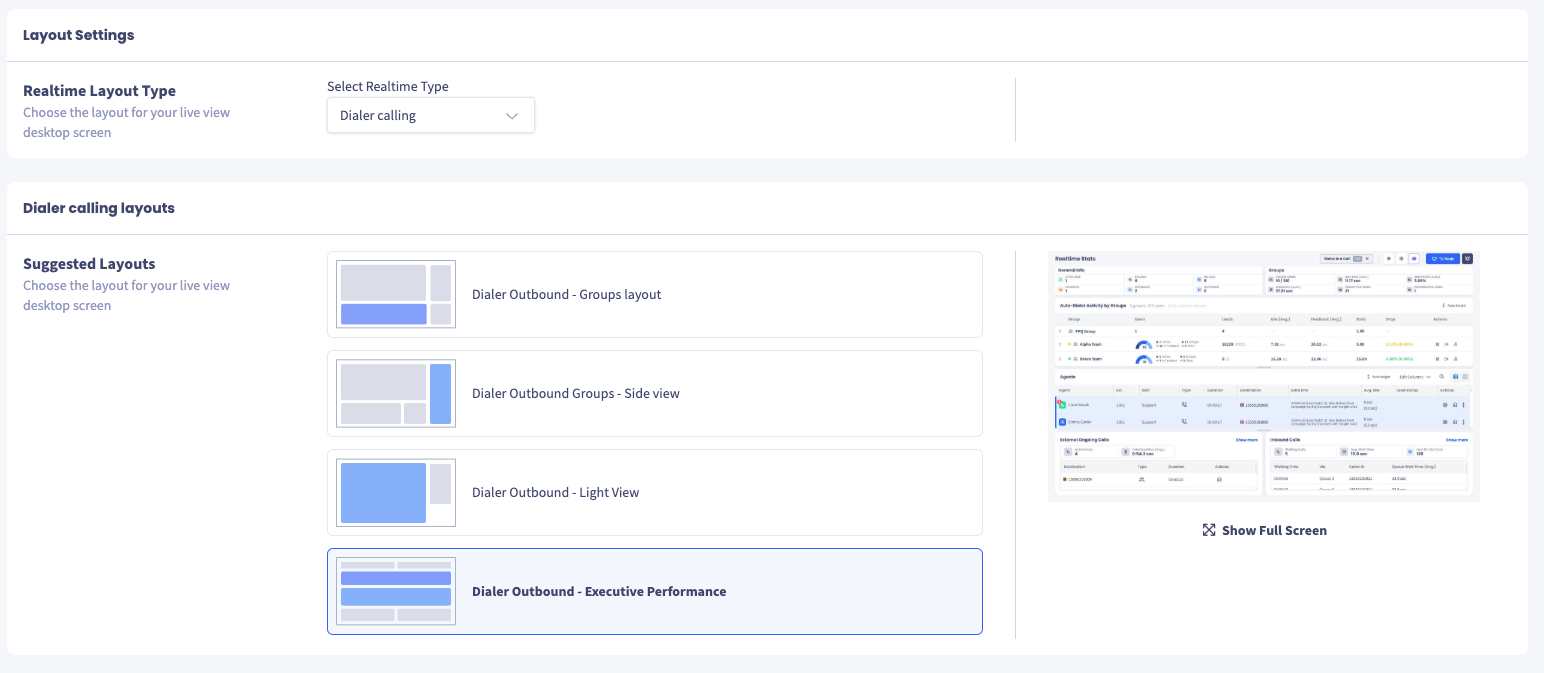
NOTEFor outbound/predictive teams, try the Dialer Outbound - Executive Performance layout under the Dialer Calling group. It fits the whole operation on one screen - summary strips, groups (as expandable rows), the agents roster, and live calls - and sizes itself to the browser window, down to a 7-inch tablet. Each panel has an Auto height switch (remembered per device), and you can drag the grips between panels to resize them (double-click a grip to reset).
Alerts
Here, all users can set their alerts for the agent list, general info, groups, and incoming calls.
NOTEClick Templates to apply a preset set of alerts as a starting point, then fine-tune them. Within a single alert you can combine multiple conditions with AND / OR logic, and any unsaved changes are kept if you leave the tab with the Back button and come back.
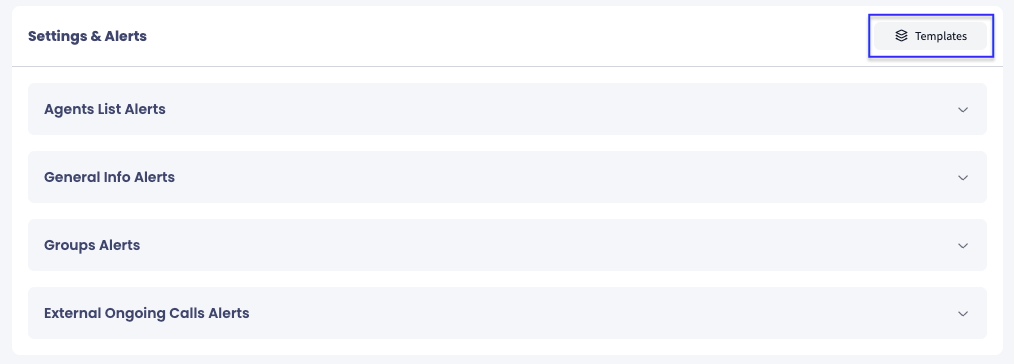
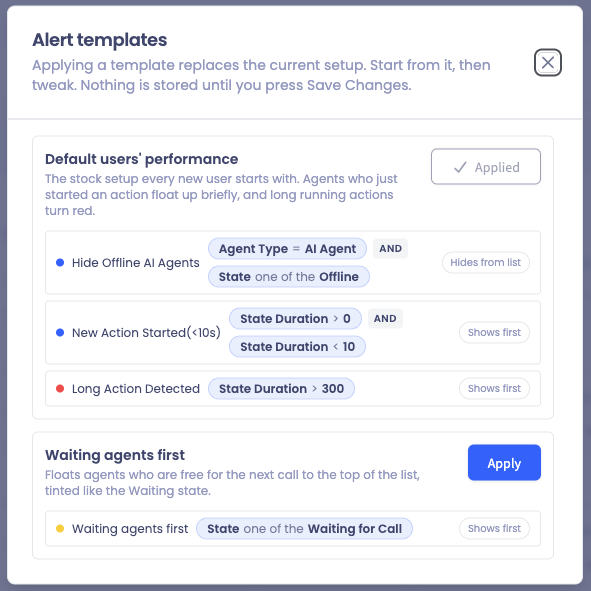
To set alerts:
-
Switch to the Alerts tab.
-
A page with several alert panels will open to configure settings for the relevant modules. Agent List Alerts will be expanded by default. You can collapse it and proceed to other panels as needed.
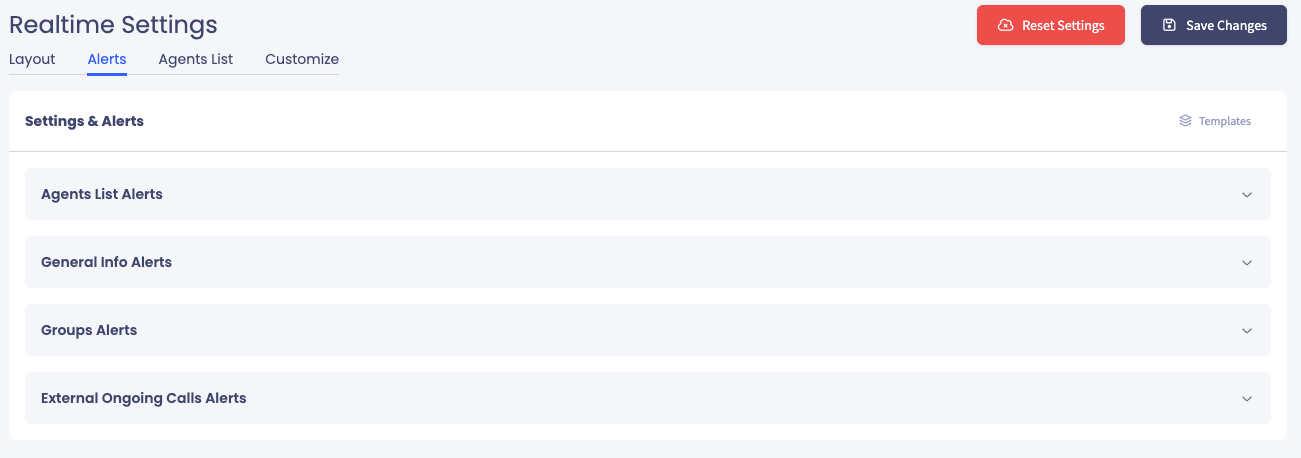
Alerts tab
-
Enter an alert name.
-
Select effect:
- Show first - enables setting priorities for showing some agents at the top of the list on the Realtime page by selecting Order at top 1st 2nd 3rd
- Highlight only - do not chnage any sorting, just make the alert color on the agent row.
- Hide from list - select it if you wish to exclude some agents from the page (for example, offline agents).
-
Select color.
-
Select a field, condition, and value. To combine several conditions in one alert, use the logic drop-down list at the top of the condition block:
- AND - the alert applies only when all conditions are true.
- OR - the alert applies when any one condition is true.
Click Condition to add another row.
AND example -
"I want to HIDE all the AI agents that are offline, how do I do it?"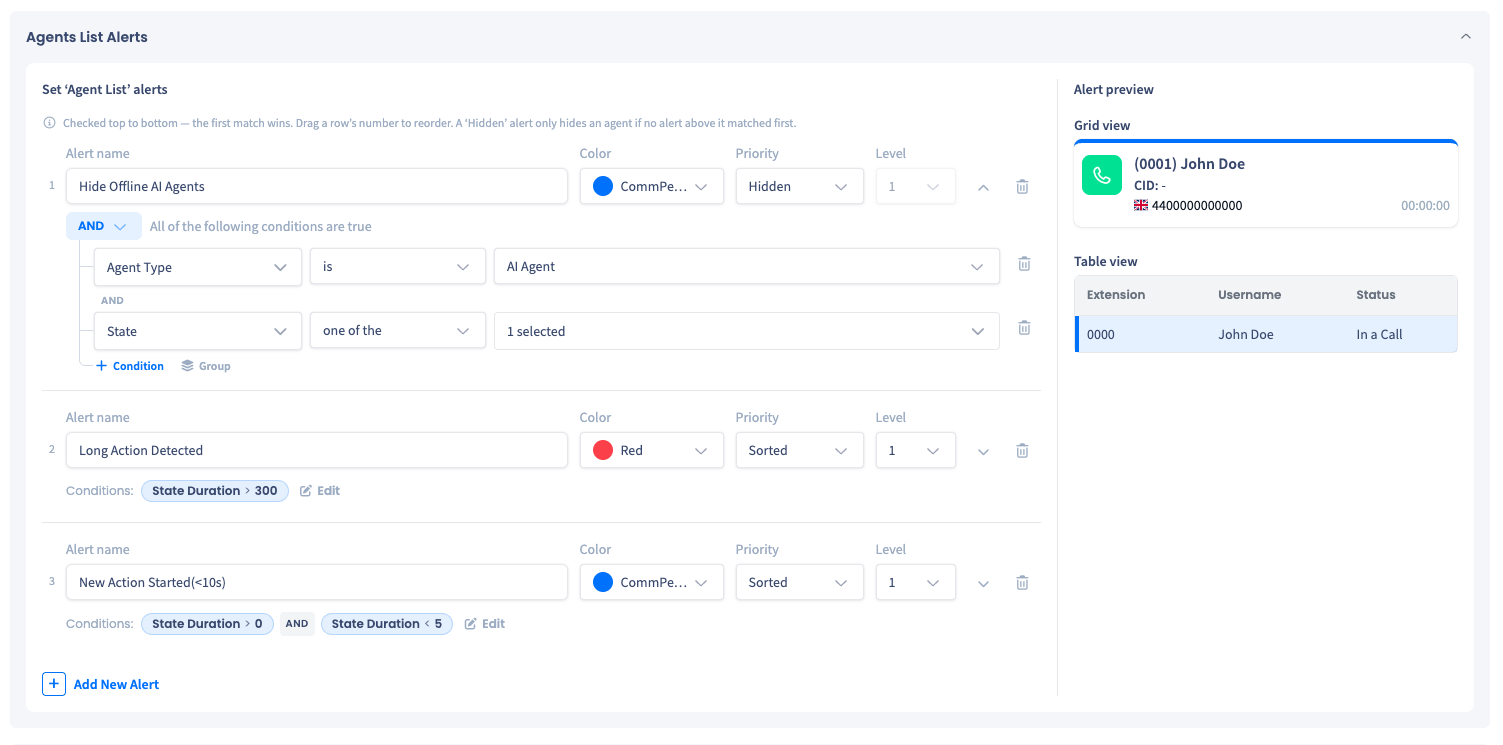
AND conditions in an Agents List alert
Hide Offline AI Agents: Agent Type is AI Agent AND State one of the Offline. An agent must match both, so only AI agents that are offline are hidden.
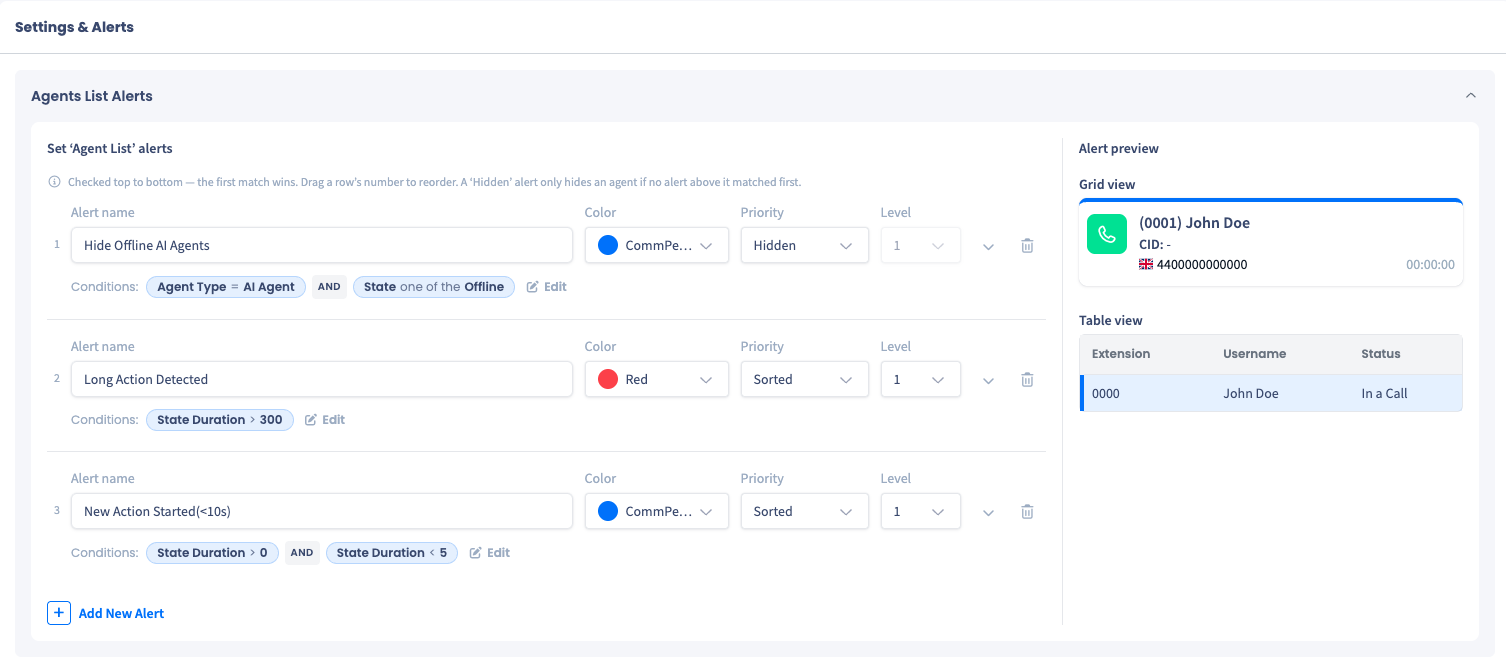
Agents List alerts saved
OR example -
"I want you to flag the call in RED when the Idle time is more than 5 seconds or the Drop Rate is more than 10 percentage, how do I do it?"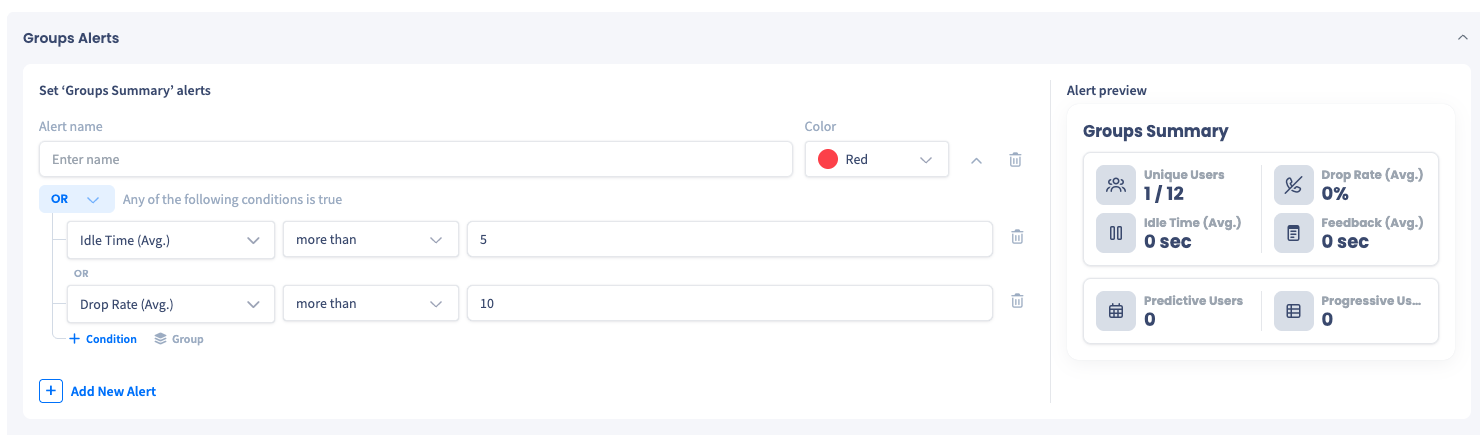
OR conditions in a Groups Summary alert
Groups Summary: Set the color to RED, then add Idle Time (Avg.) more than 5 OR Drop Rate (Avg.) more than 10. Only one has to be true, so the group is flagged as soon as either threshold is crossed.
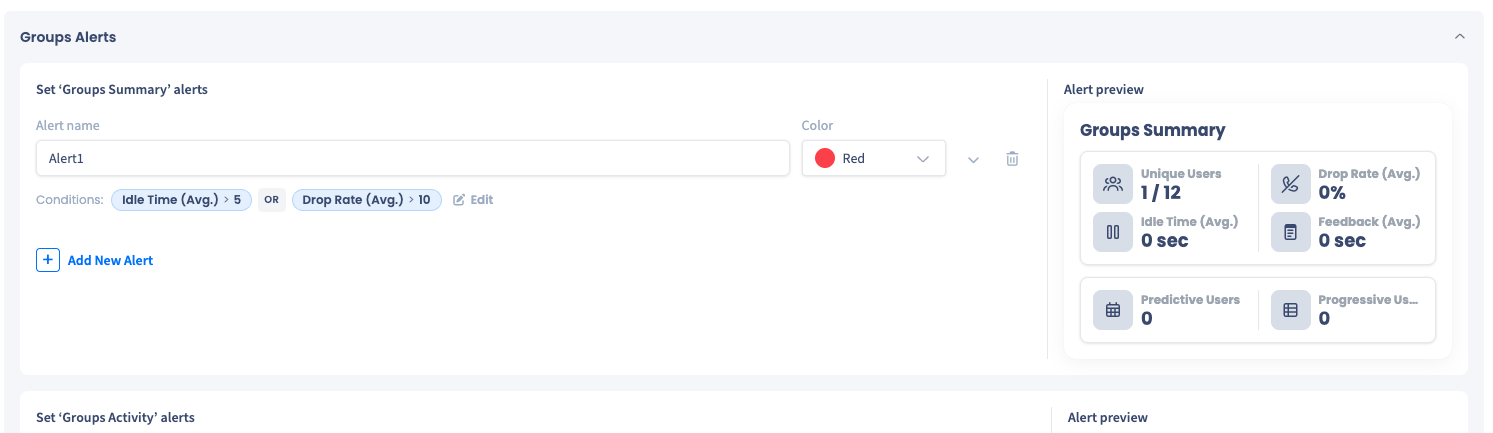
Saved Groups Summary alert
-
Click Add New Alert to define another condition in the alert. You can, for example, set the state duration.
-
Preview the alert on the right.
-
Click the Save Changes button in the top right.
Agent list
On the Agent List tab, you can:
- Modify the agent list sorting rules
-
Turn on the agent states for the agents' module and States filter
-
Choose colors for icon states to distinguish them in the Agents module
-
Drag and drop the lines to reorganize the states' order for the agents' list.

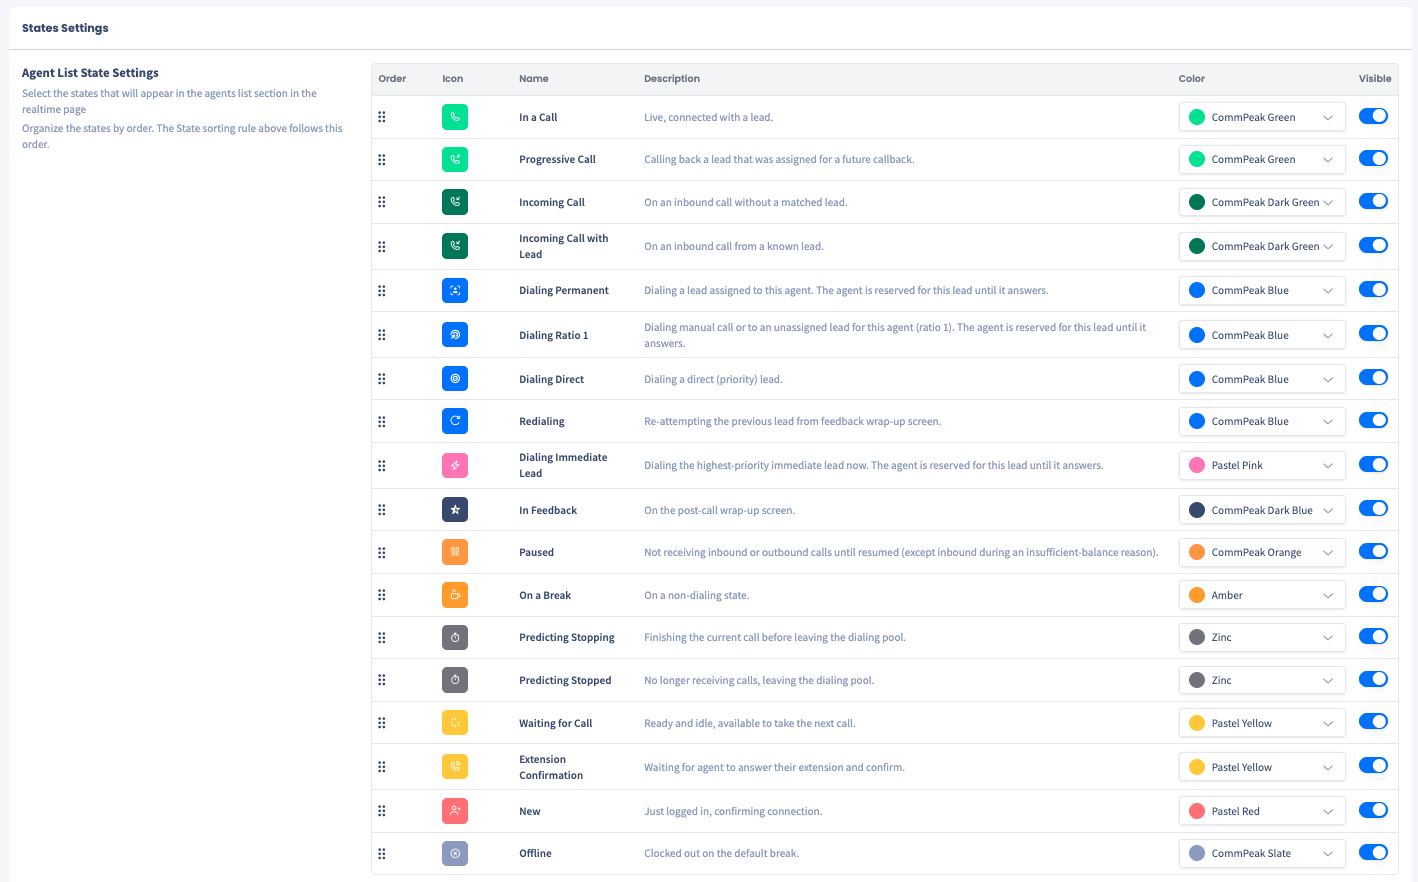
The following agent states may appear in the States tab and throughout the Realtime page:
| State | Description |
|---|---|
| In a Call | Live, connected with a lead. |
| Progressive Call | Calling back a lead that was assigned for a future callback. |
| Incoming Call | On an inbound call without a matched lead. |
| Incoming Call with Lead | On an inbound call from a known lead. |
| Dialing Permanent | Dialing a lead assigned to this agent. The agent is reserved for this lead until it answers. |
| Dialing Ratio 1 | Dialing manual call or to an unassigned lead for this agent (ratio 1). The agent is reserved for this lead until it answers. |
| Dialing Direct | Dialing a direct (priority) lead. |
| Redialing | Re-attempting the previous lead from feedback wrap-up screen. |
| Dialing Immediate Lead | Dialing the highest-priority immediate lead now. The agent is reserved for this lead until it answers. |
| In Feedback | On the post-call wrap-up screen. |
| Paused | Not receiving inbound or outbound calls until resumed (except inbound during an insufficient-balance reason). |
| On a Break | On a non-dialing state. |
| Predicting Stopping | Finishing the current call before leaving the dialing pool. |
| Predicting Stopped | No longer receiving calls, leaving the dialing pool. |
| Waiting for Call | Ready and idle, available to take the next call. |
| Extension Confirmation | Waiting for agent to answer their extension and confirm. |
| New | Just logged in, confirming connection. |
| Offline | Clocked out on the default break. |
Customize
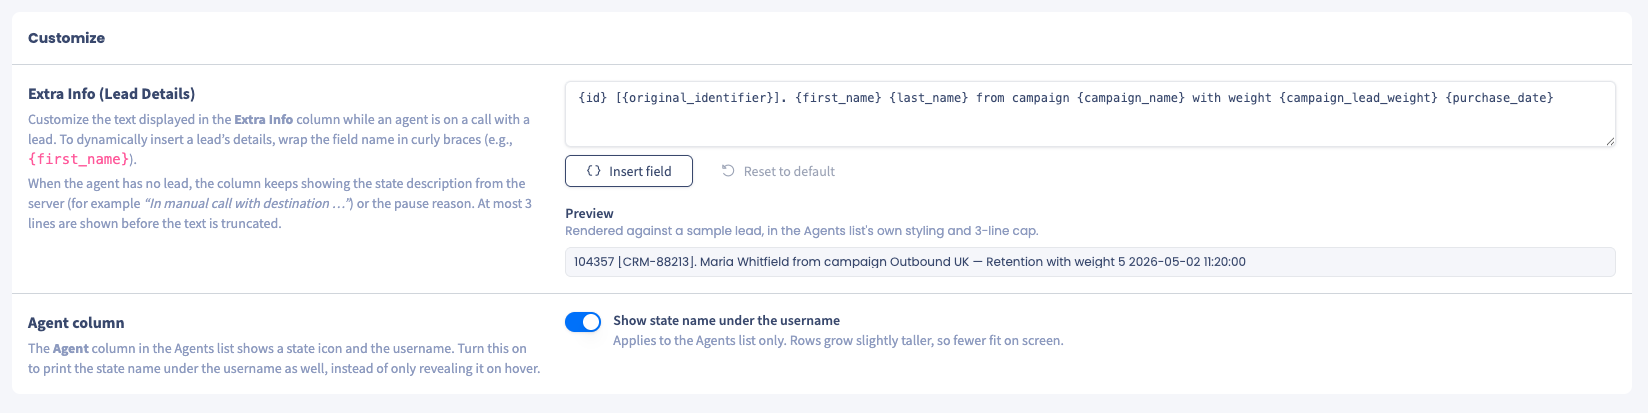
On the Customize tab, you define the Extra Info (lead details) shown under each agent in the Agents module.
When a lead is attached to the agent's current call, the Extra Info line shows that lead's data. When there's no lead, the system shows a fallback line instead (for example, In manual call with destination XXXXXXXX).
To customize the Extra Info:
- Switch to the Customize tab.
- Build the Extra Info line from the available placeholders — such as the lead's name, phone, and lead file. The placeholders are pulled from the system automatically. (Verify: exact placeholder names and syntax.)
- Optionally, show the agent's state name under the username in the agents list. (Verify: exact option label.)
- Click the Save Changes button in the top right.
4. Switching to TV mode
TV Mode is a presentation/display mode designed for showing the Realtime Stats dashboard on a large screen like a wall-mounted monitor or TV in a call center. You activate it by clicking the blue TV Mode button in the top-right of the Realtime Stats page.
TV Mode button
After you click it, you enter the full-screen mode. In this view, you can select a different Agent grid size.
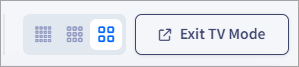
Exit TV Mode button
Click Exit TV Mode to return to the default view.
Updated 6 days ago