General Settings
Manage general settings, such as phone number masking, user session security, call page layout customization, and additional features like lead lookup and dropped call settings.
Users with relevant permissions can manage the settings of the tenant in which they operate: change the Phone Number Masking settings, enable and set up access control, modify the call page layout, or change the timezone of their Dialer platform.
To edit the general settings, click Settings > General Settings in the main menu.

Navigating to General Settings in the menu
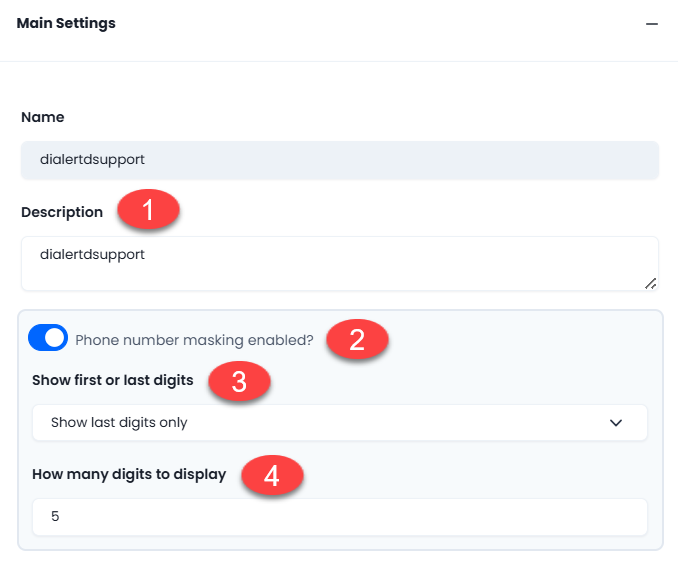
Main Settings
Here you can change the settings as follows:
- Update the system description
- Enable or disable the phone number masking
- Select if you want to show the first or last digits of the phone number
- Specify the number of digits to display. If you select 0, all the digits will be hidden.
Main settings
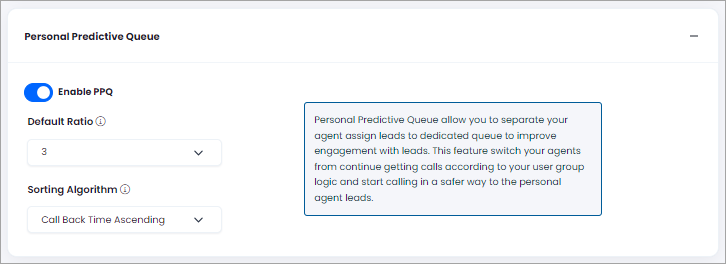
Personal Predictive Queue
You can enable the Personal Predictive Queue feature and set the following:
-
Default Ratio. Set the default call ratio for all agents. You can customize the ratio for specific agents in their user settings.
-
Sorting Algorithm. Choose the sorting method for calling PPQ leads by their call-back time or weight: Call Back Time Ascending or Weight Descending, Then Call Back Time Ascending.
-
Call Back Time Ascending or
-
Weight Descending, Then Call Back Time Ascending.
Personal Predictive Queue settings
-
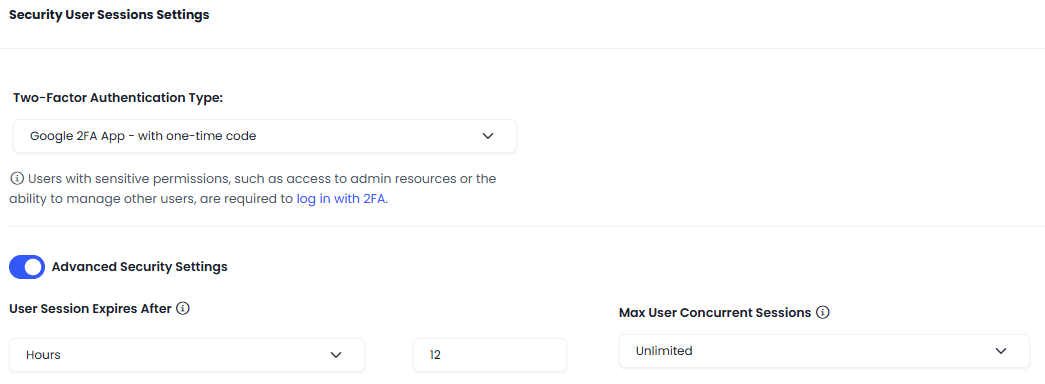
Security User Sessions' Settings
Here, you have the option to restrict the duration of the user's session and define the type of authentication.
-
Two-Factor Authentication Type. A security procedure where users offer two forms of authentication for system access. You have three choices: Disabled (no 2FA), Email authentication, or Google 2FA App.
-
Advanced Security Settings. You have the option to enable additional settings as follows:
- User session expires after. The user will be automatically logged out following the set duration.
- Max user concurrent sessions. A session is started for every browser on each individual device, enabling users to log in with multiple concurrent sessions. You have the option to restrict the number of sessions or allow an unlimited setting.
Security user session settings
Login Configuration
Configure the following login options for your users in the Dialer or Cloud PBX:
- Google OAuth
- Microsoft OAuth
- SAML

Login configuration settings
You can also choose to allow only SSO (OAuth or SAML) login:

Allow only SSO login option
When enabled, users will no longer be able to log in with a username and password. Authentication will only be allowed through an enabled login provider - Google OAuth, Microsoft OAuth, or SAML. Before enabling this setting, make sure at least one SSO method is properly configured to prevent accidental lockouts. To learn more, see the External Identity Providers Login Options page.
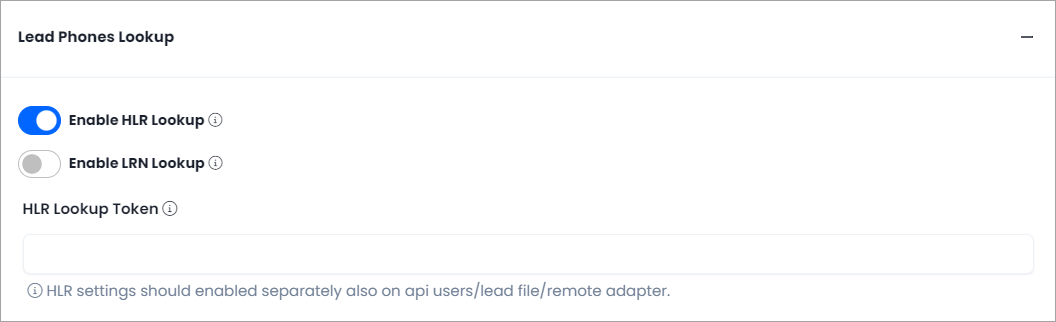
Lead Phones Lookup
You can enable the following options here:
-
EnableHLR LookUp. This feature will assist in identifying valid and active phone numbers, enhancing the likelihood of connecting with real customers.
-
Enable LRN Lookup: Enhance the detection of geographical locations and time zones for phone numbers in the USA and Canada.
-
HLR Lookup Token. To enable HLR lookup functionality, input the lookup token associated with your CommPeak account.
Lead phone lookup settings
NOTEHLR settings should be configured in API users, lead files and remote adapters. Please contact the support team for assistance.
Call Page Fields
In this section, you can modify the layout of the customer card displayed to the agent during the call.
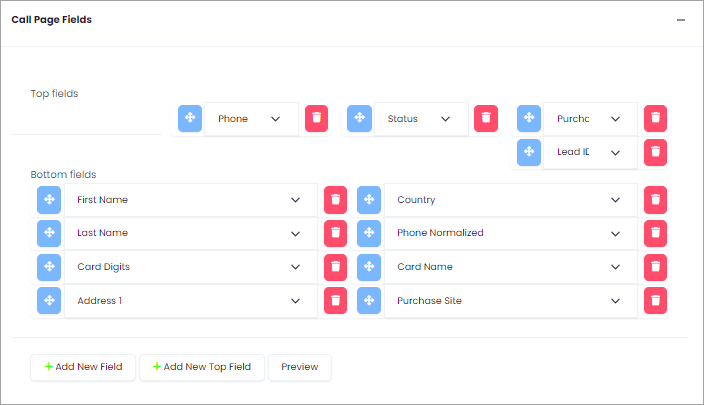
Call page fields' settings
You can perform the following actions:
- Add new fields. Click Add New Field, and for the new line that appears, select the required name from the drop-down list.
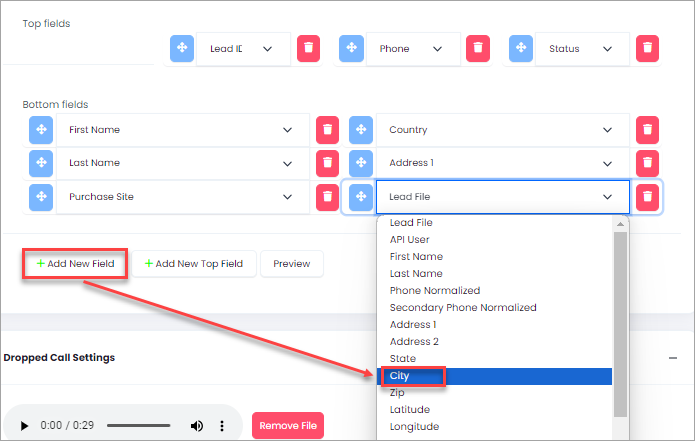
Adding new fields
In the same way, you can add top fields.
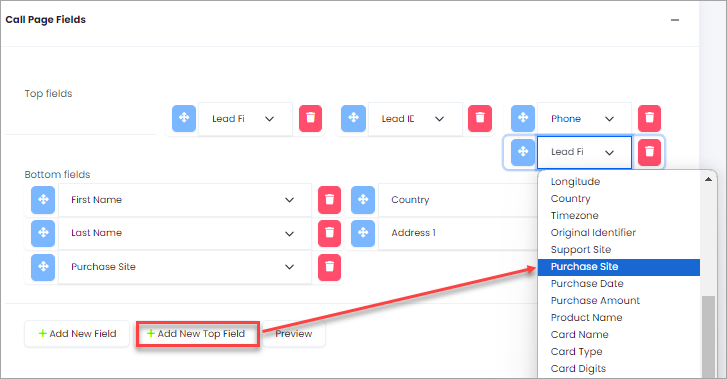
Adding top fields
-
Remove fields. Click the red button to remove the selected line.
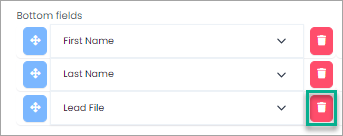
Removing fields
-
Change field order. Holding the mouse button down on the blue button, drag and drop the field to the place where you want it to appear on the call page.
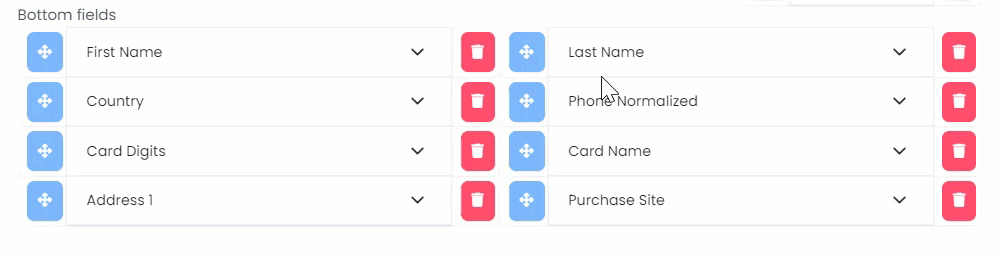
Changing field order
-
Preview the page. Click the Preview button and select the preview resolution.
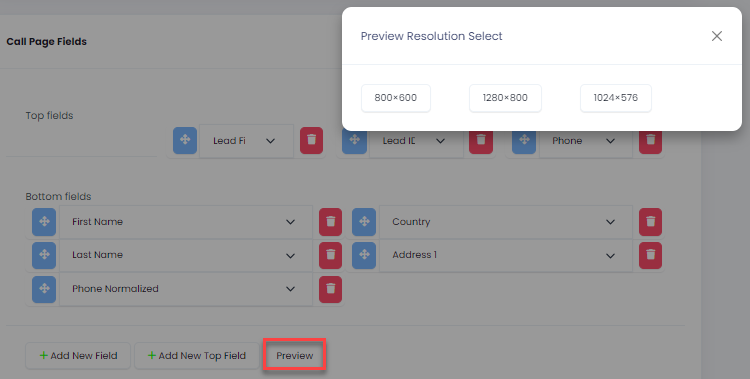
Previewing page
You will see the page layout preview.
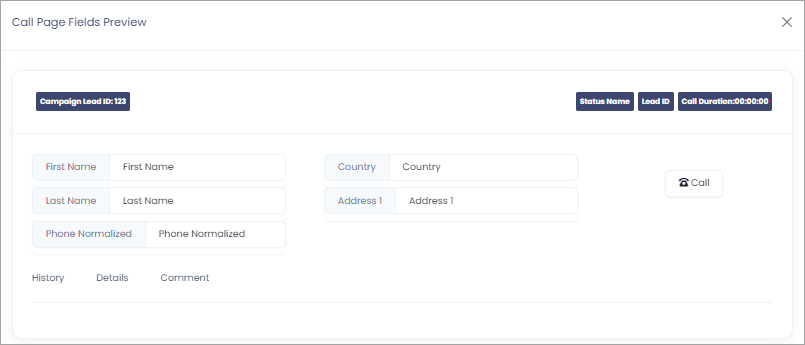
Preview of page layout
Dropped Call Settings
Here, you can define actions related to dropped calls.
Playback file while searching available agent You can upload a new audio file, generate one or choose from existing Dialer recordings to be played to the lead before an agent connects to the call.
NOTECheck the Recordings page to learn more about fast uploading or generation of voice recordings.
Timeout for searching for an available agent. Specify the duration (in seconds) for which the Dialer will search for an available agent before terminating the call.
Predictive Dropped Call Action. Select one of the following options:
- hangup call.
- play file (you must specify a file to play).
- forward call to SIP URI (you must specify the SIP URI).
- unselected (in this case, actions will be taken from group or campaign rules).
Also, set the number of seconds to wait till applying the default action.
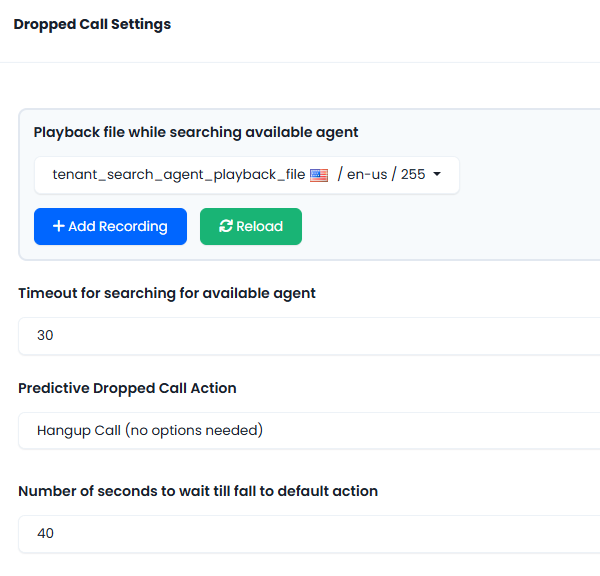
Dropped Call Settings
Extended Settings
In the Extended Settings section, you can:
- set the first day of the week (Sunday or Monday)
- change the timezone of your CommPeak Dialer platform
- enable additional filter options for the advanced lead search
- allow agents to rate calls.
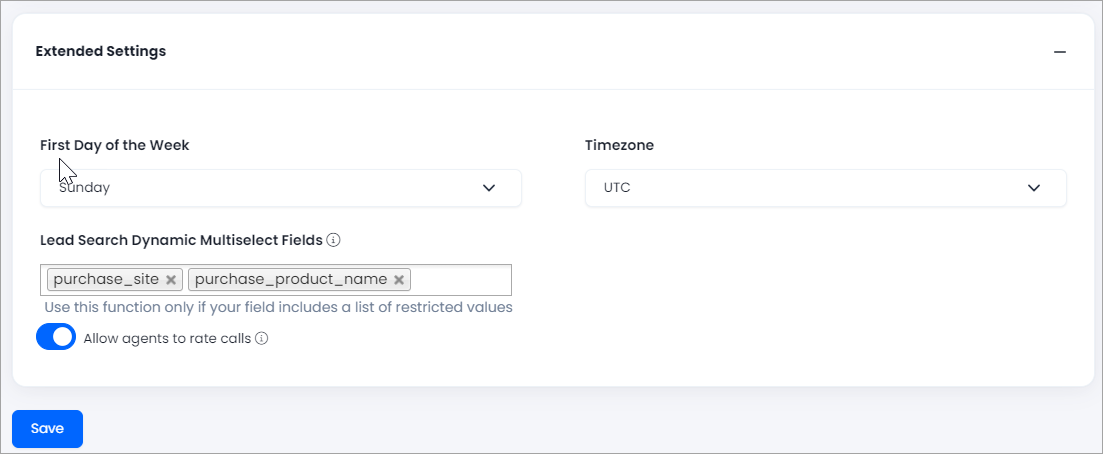
Extended settings
After making all the needed settings, click Save at the bottom of the page.