Zoho Integration
Learn how to integrate TextPeak Inbox with Zoho CRM: register your application with Zoho and complete the required steps in TextPeak.
This article describes how to integrate TextPeak Inbox with Zoho CRM.
Setting New Connection
To start adding Zoho Integration to TextPeak Inbox:
-
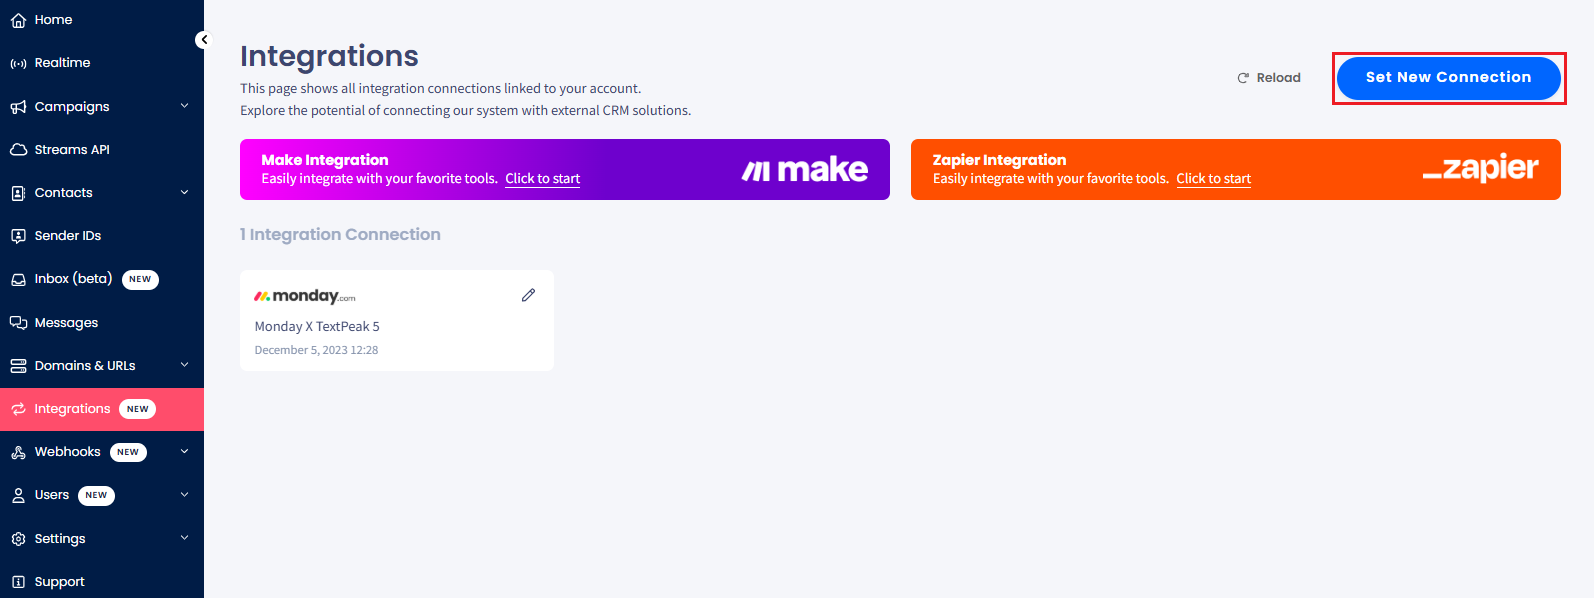
Click Integrations in the TextPeak main menu on the left.
-
Click Set New Connection in the top right of the Integrations page.
Set New Connection button
-
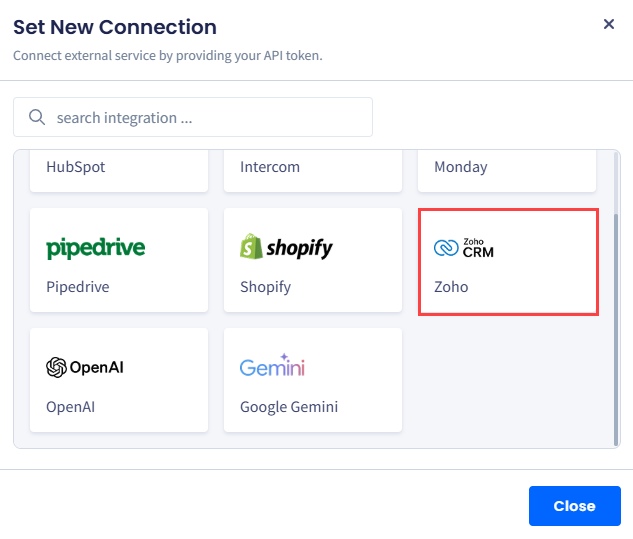
Select Zoho in the pop-up window.
Zoho selection
-
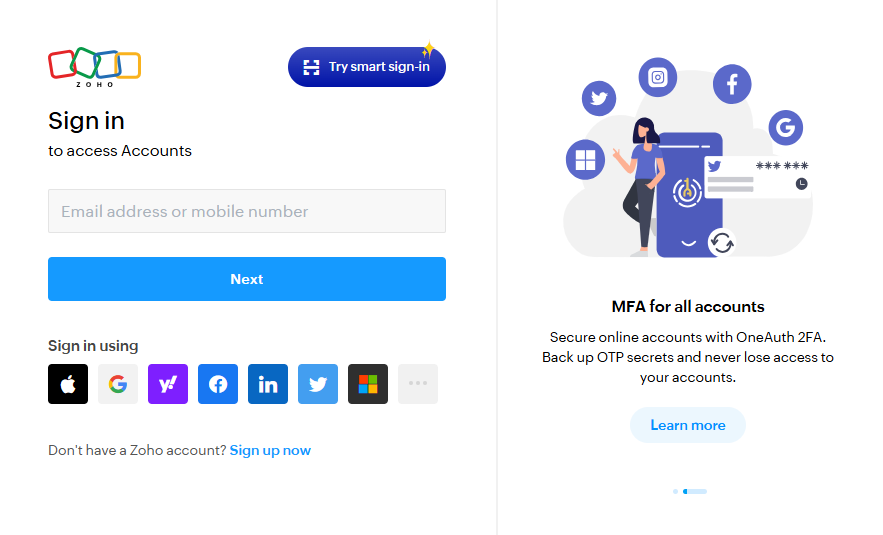
Enter your Zoho credentials to log in to your account.
Zoho Sign in window
TIPYou can also start by connecting your CRM with TextPeak via Zoho One-Click Integration.
- Choose a CRM production account to connect with TextPeak.
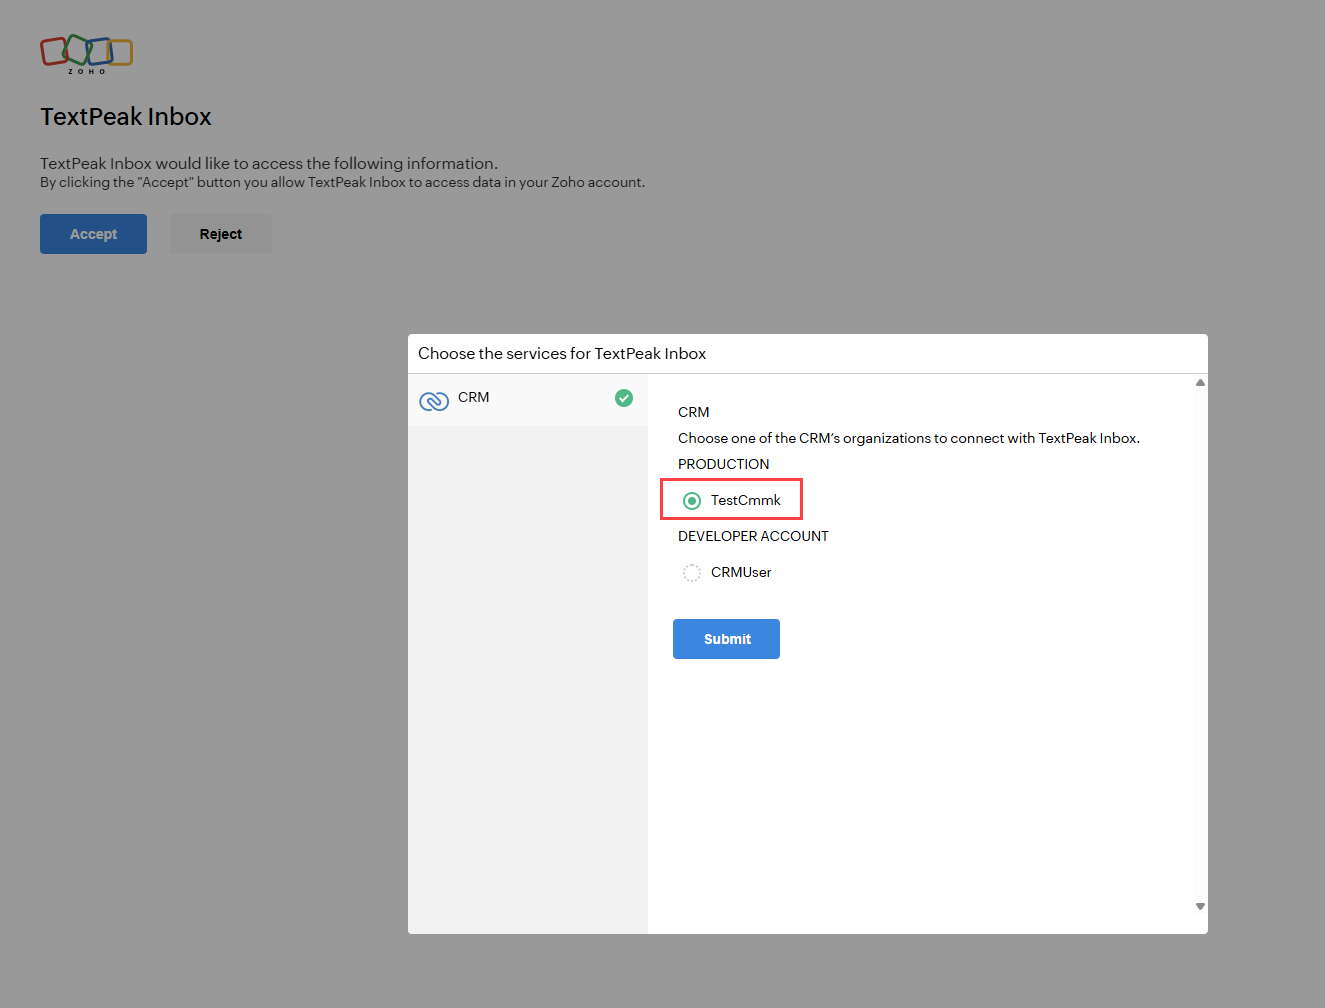
Choosing a CRM production account
- Provide permissions to TextPeak to access your data - click Accept.
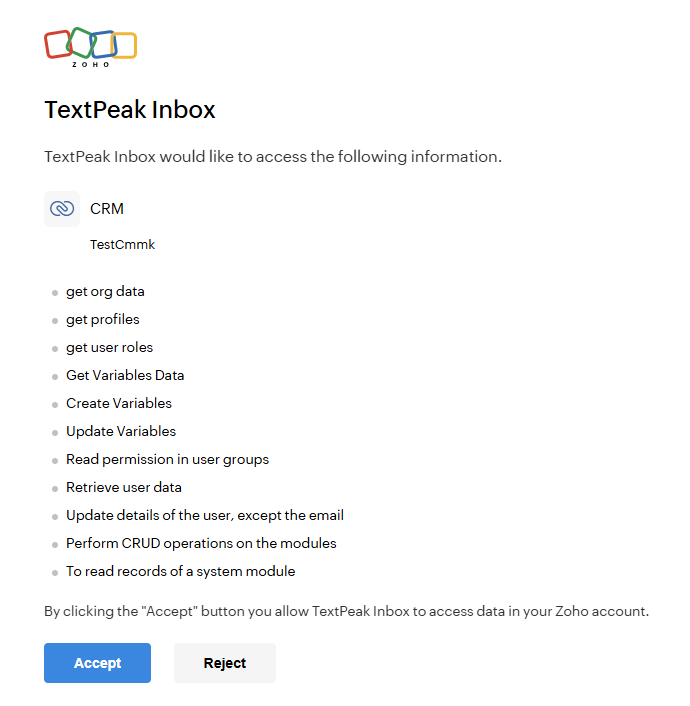
Granting access to TextPeak
- Click Login with CommPeak.
- For your TextPeak account, click Authorize.
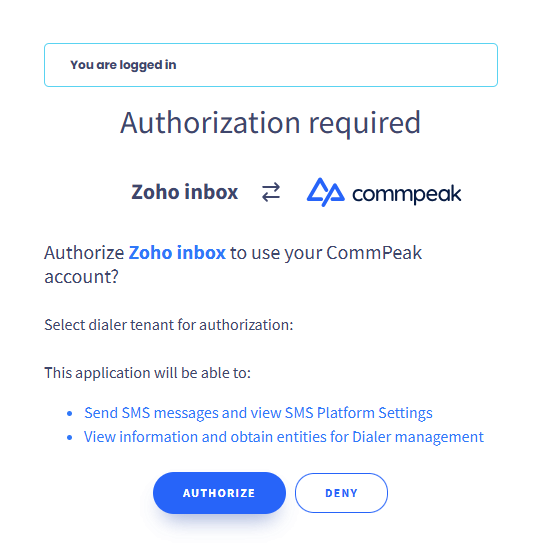
Authorizing Zoho
- To complete integration, select the users and/or teams you want to import from your Zoho CRM. There are three options to choose from:
- Importing only admins
- Importing all the users
- Importing users per profiles (teams).
- You can multiselect profiles for the last option, if needed.
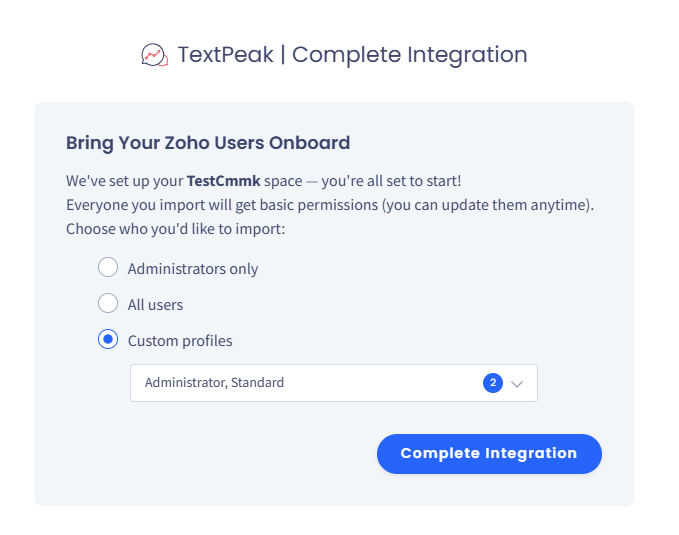
Importing custom profiles
- Click Complete Integration.
NOTENewly added agents within imported teams will be automatically registered when they access the inbox, while users removed from a team will lose access.
✔️ Congratulations! The integration is complete.
Customizing Zoho Settings
In this step, you must be automatically logged into your Zoho account.
To customize your Zoho setup:
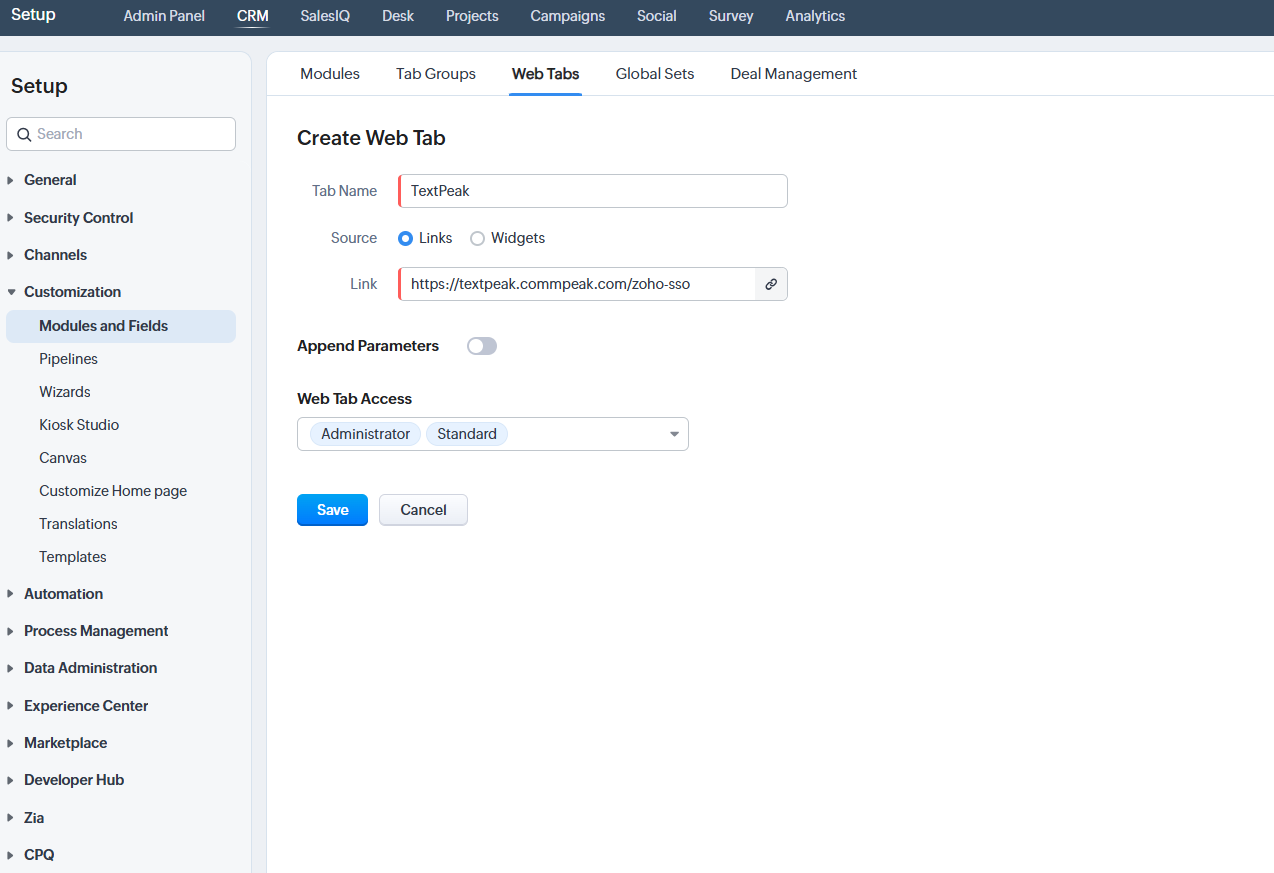
- Open settings and click to access Modules and Fields.
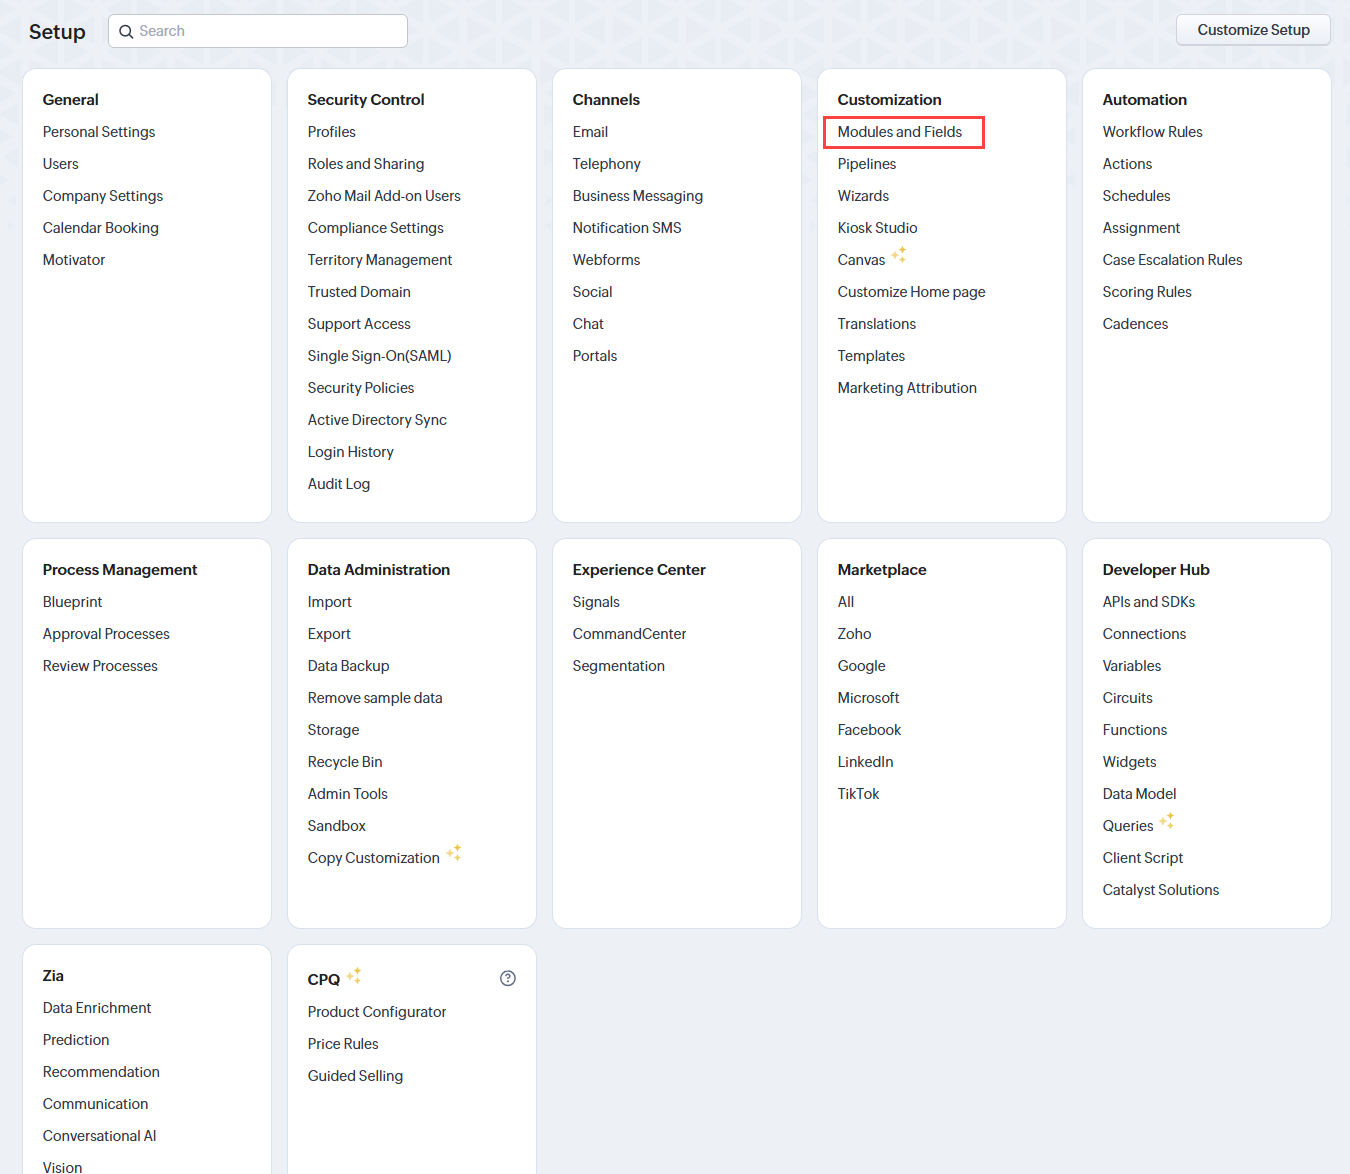
Zoho account settings
- In the Customization > Modules and Fields page, switch to Web Tabs, click to create a new web tab, and give it a name, for example, "TextPeak".
- For the source, select the Links option and insert the link that a TextPeak support agent will provide you with, for example, https://textpeak.commpeak.com/zoho-sso.
- Proceed with appending parameters and then click Save.
- When done, your TextPeak integration will become accessible from the Zoho main menu with a new option added (here, named TextPeak according to the name added to the Web Tab).
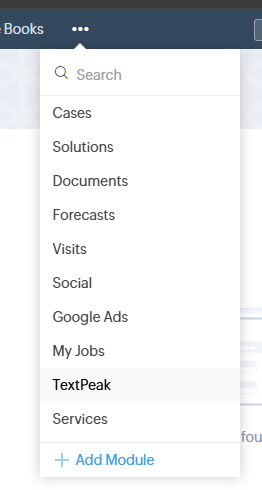
TextPeak menu option added
Agent Flow
- Select TextPeak on the list and click the button in the middle of the screen to confirm logging into your Inbox, integrated inside the Zoho CRM.

SSO with Zoho button
- Authenticate with Zoho.
- Choose the CRM to connect with TextPeak Inbox.
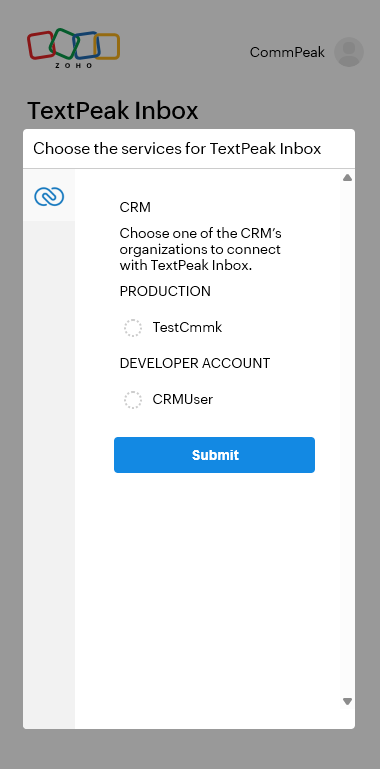
Selecting connected CRM
- Click Accept to approve the permissions.
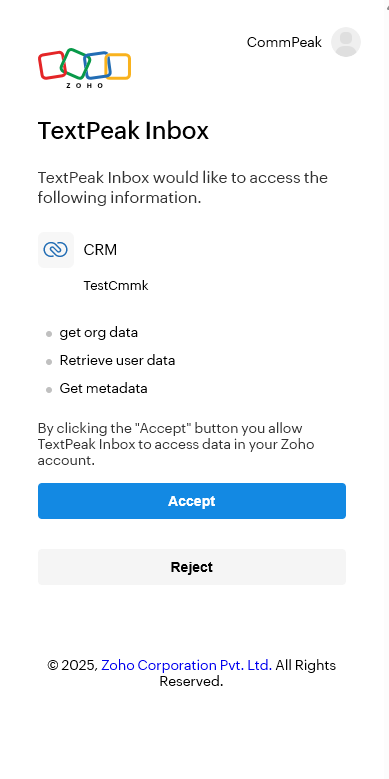
Approving access
- The TextPeak Inbox will be shown inside Zoho CRM ready to work with.
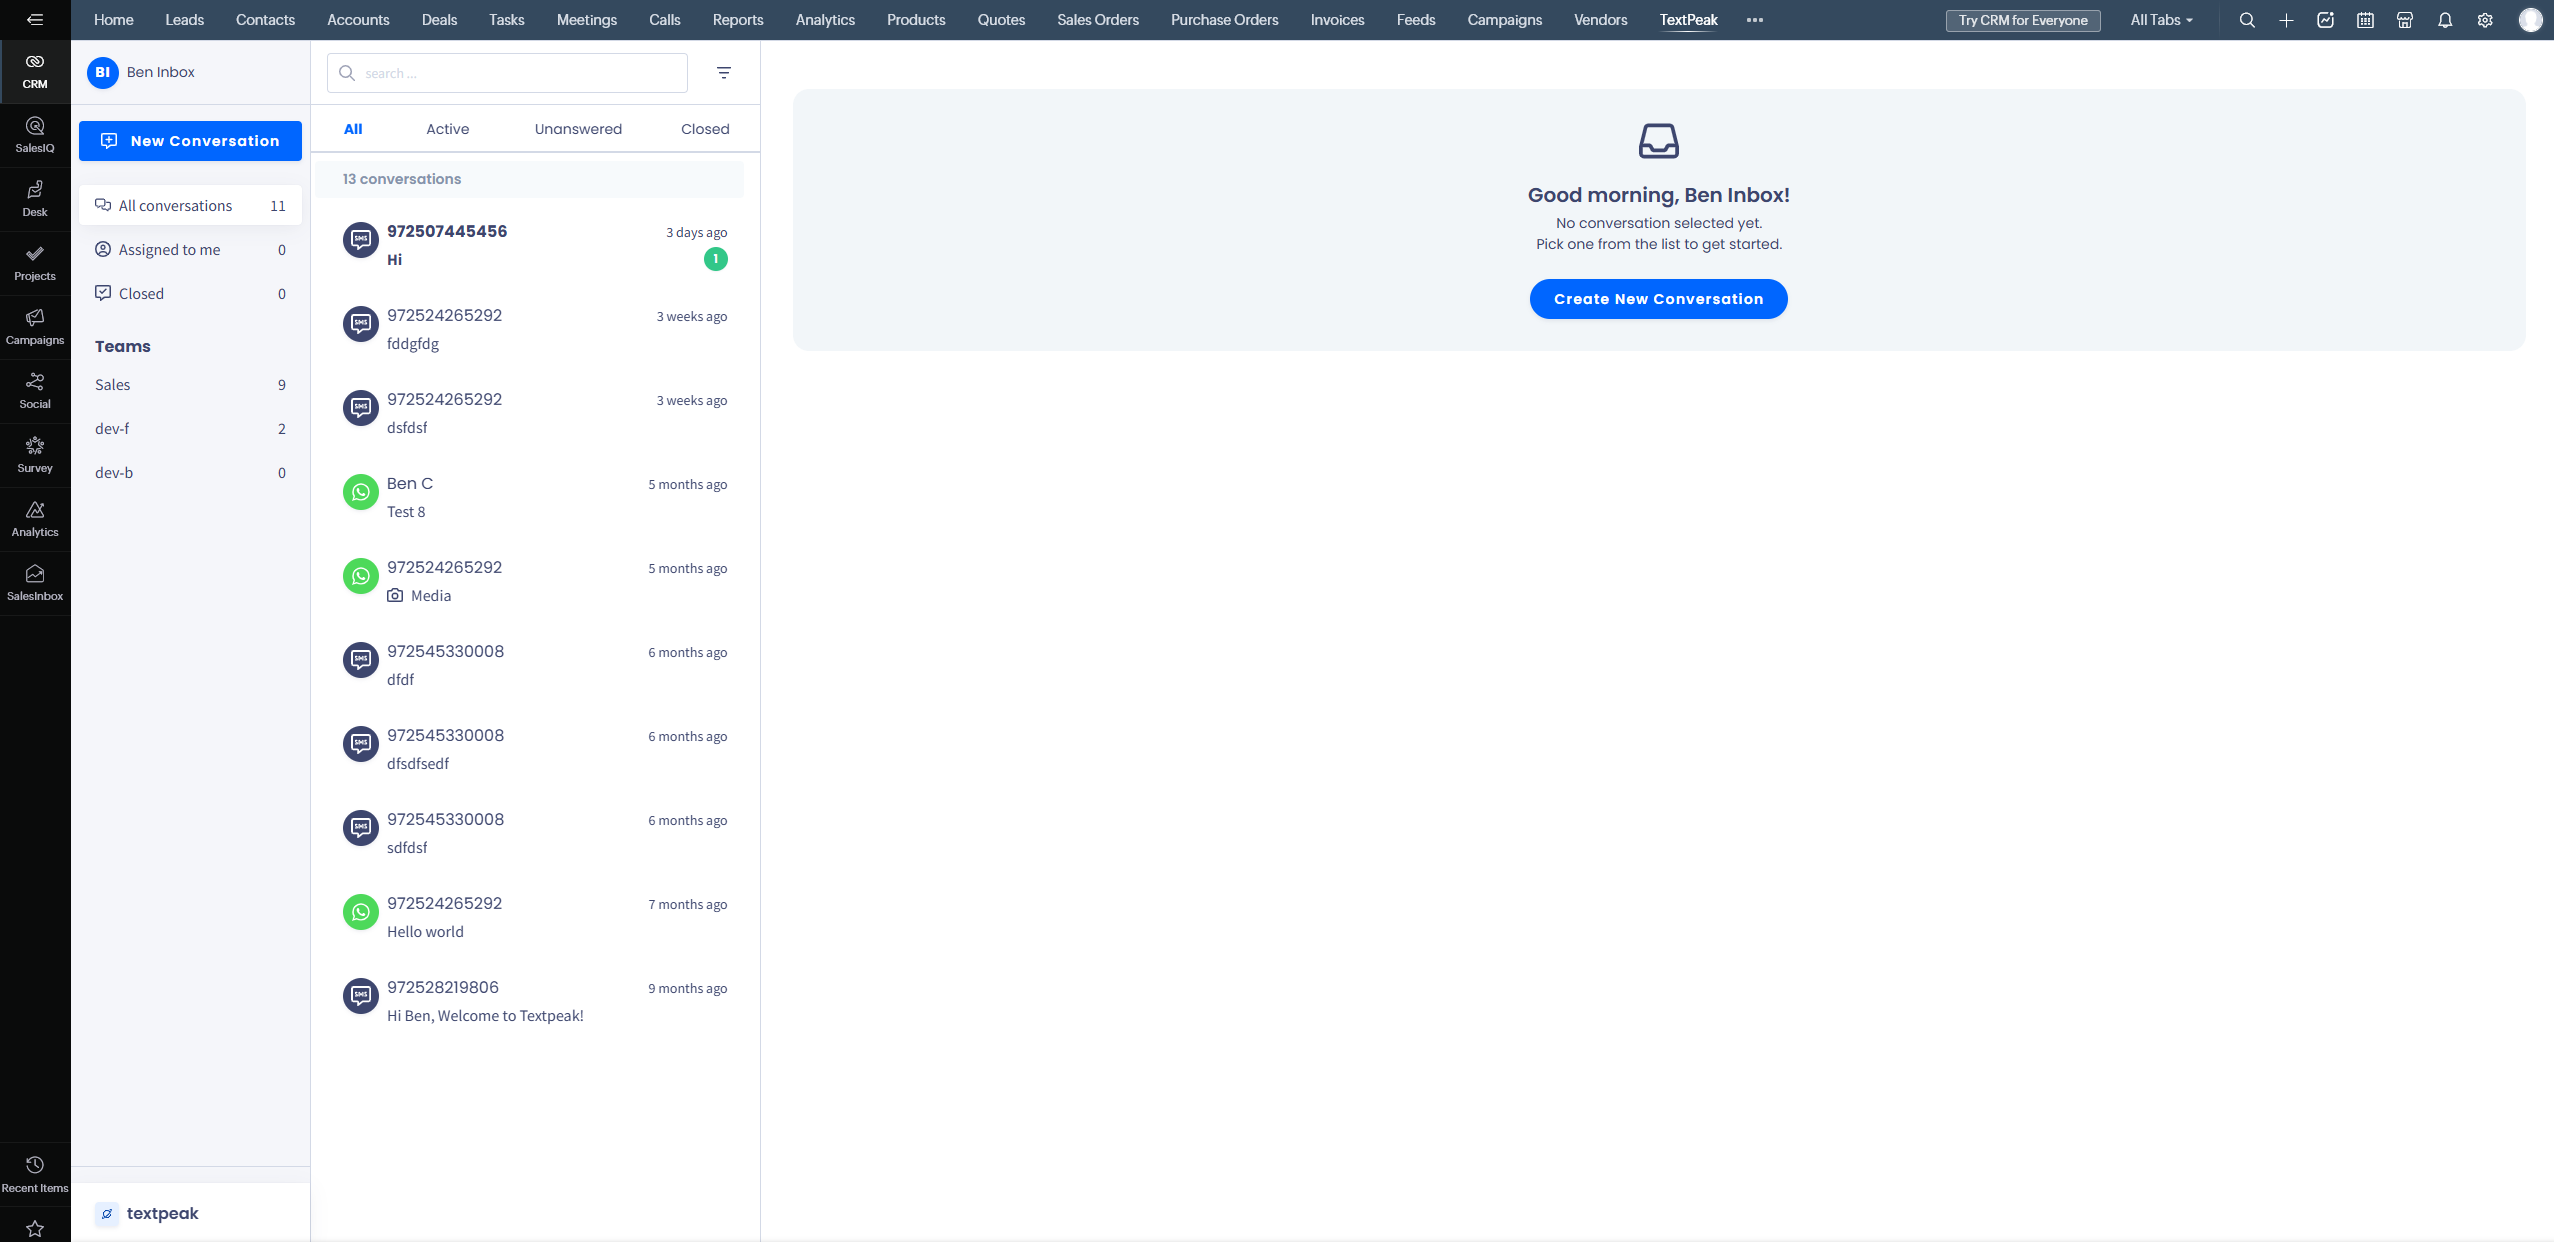
TextPeak Inbox inside Zoho CRM
NOTEYour session will remain active for at least 24 hours, so you won't need to authenticate again during this period.
Updated 6 months ago