Learn how to upload lead files in CommPeak Dialer, ensure file requirements are met, map columns correctly, and assign leads to campaigns.
In Leads & Campaigns > Lead Files, you can manage your lead files and upload new ones.
Managing lead files is one of the basic things you need to know when you start using CommPeak Dialer. Correct usage of lead files ensures a positive experience for you when working with Dialer.
Video tutorial
Uploading lead files
Before you start uploading your lead file, please check that it meets the following conditions:
There are no more than 50,000 leads in your file. Larger files might slow down Dialer's performance.
The size of the file is no more than 100 MB.
The format of your files is CSV.
All your files have the same lead structure.
The leads in the file are of proper quality. Low-quality leads can cause longer idle time for your agents and lower ASR.
To upload a lead file:
Open Upload
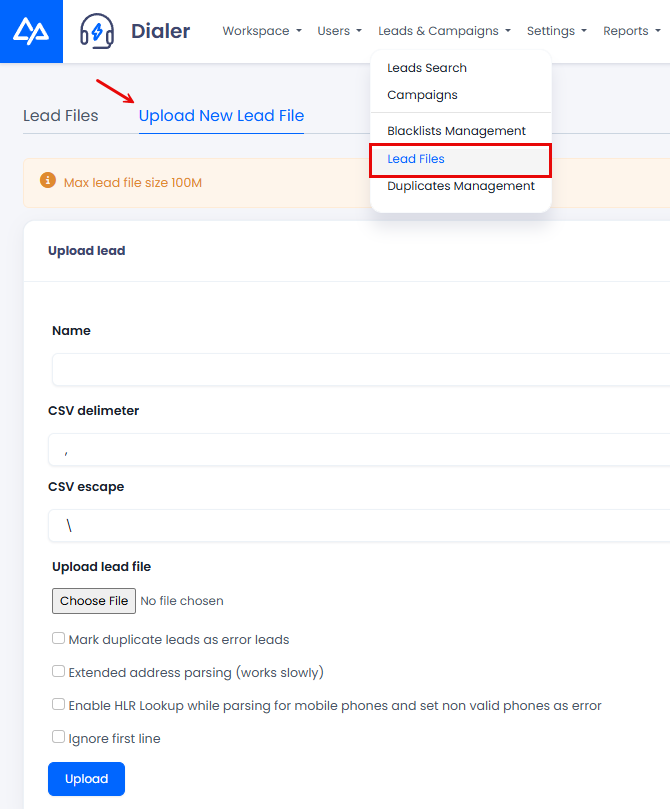
Go to Leads & Campaigns > Lead Files and then navigate to the Upload New Lead File tab.
Upload New Lead File tab
Fill in the fields
Fill in the fields as described below:
Name the file
Enter the file name.
Keep the CSV defaults
Leave the default values in the .csv delimiter and .csv escape fields.
Select the options
Select the checkboxes as necessary:
Mark duplicate leads as error leads - You will see an error message in the Lead State field if the lead's phone number is already available in the system. The lead will not be processed.
Message with an error and leads number
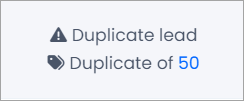
Otherwise, if the checkbox is blank, you will see an information message only.
Message with leads' number
Extended address parsing (works slowly) - Select it for the system to check the lead's phone number for correctness and use Google algorithms to fix it. However, the file will take longer to upload.
Ignore first line - Select the checkbox so that the header row of your lead file is skipped. Leave the check box cleared only if the uploaded file does not have the header row.
Enable HLR Lookup while parsing for mobile phones and set non-valid phones as error -Select to enable HLR lookup.
Choose the file
Click Choose File and select the file to upload.
Upload the file
Click Upload.
Map the columns
In the next window, map columns in your lead file with columns in Dialer by selecting a name for each column.
Mapping data columns
If you do not select any value, the column will be ignored.
Import the file
Click Import. Once you import the file, the Lead Files page is displayed, where you will see it in the list of other lead files.
Wait for parsing
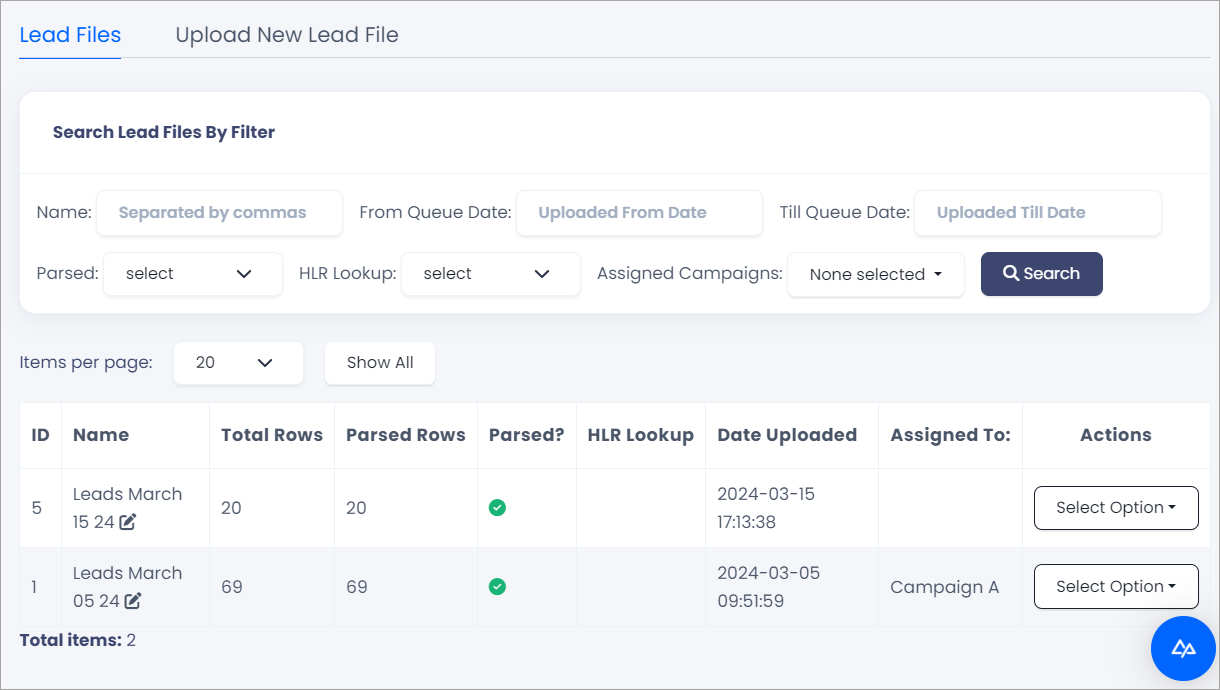
Wait until the file parsing completes (a green checkmark appears in the **Parsed?**column).
Assign the leads
Assign the leads to a campaign:
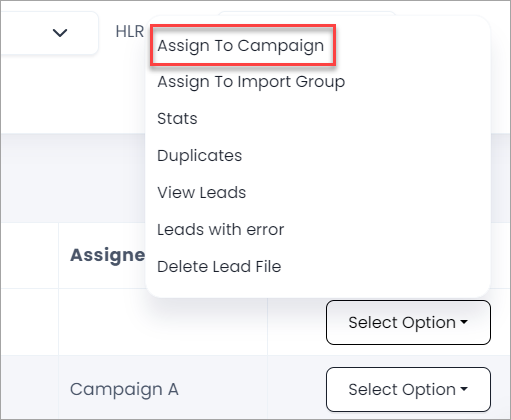
Click Select Option in the Actions column and choose Assign to Campaign.
Assign to Campaigns action
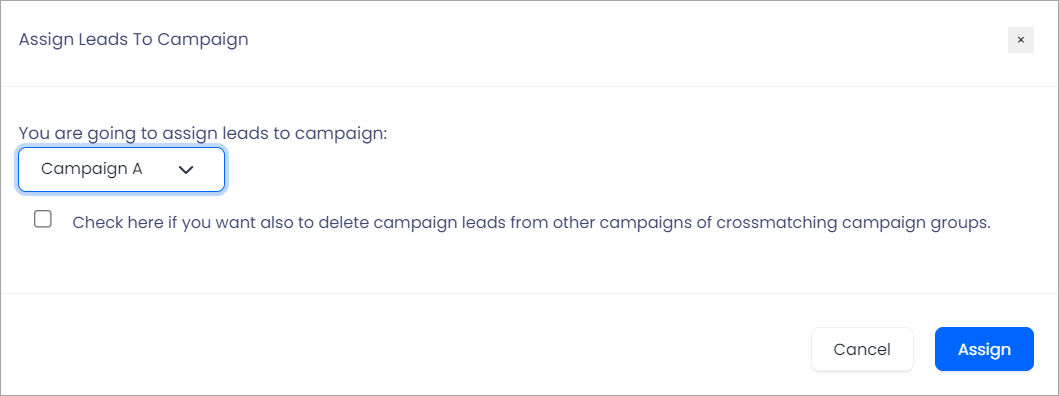
In the pop-up window, select the necessary campaign in the list.
If you want the uploaded leads to be assigned to this campaign only, in case they have already been included in other campaigns, you can just select the checkbox below.
The checkbox for deleting leads from other campaigns
Click Assign. As soon as you are done, the campaign name appears in the Assigned to: field.
The assigned campaign name
Now, the leads are uploaded and ready to be called.
Lead file details and statistics
After you have uploaded lead files, you can view statistics and detailed information about the leads.
To take a look at general statistics for your file, follow these steps:
Open Lead Files
In the main menu, click Leads & Campaigns > Lead Files.
The Lead Files tab
Select the action
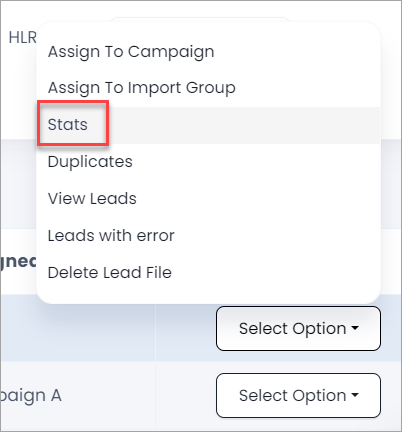
On the line with the needed lead file, in the Actions column, click Select Option > Stats.
The Stats option in actions
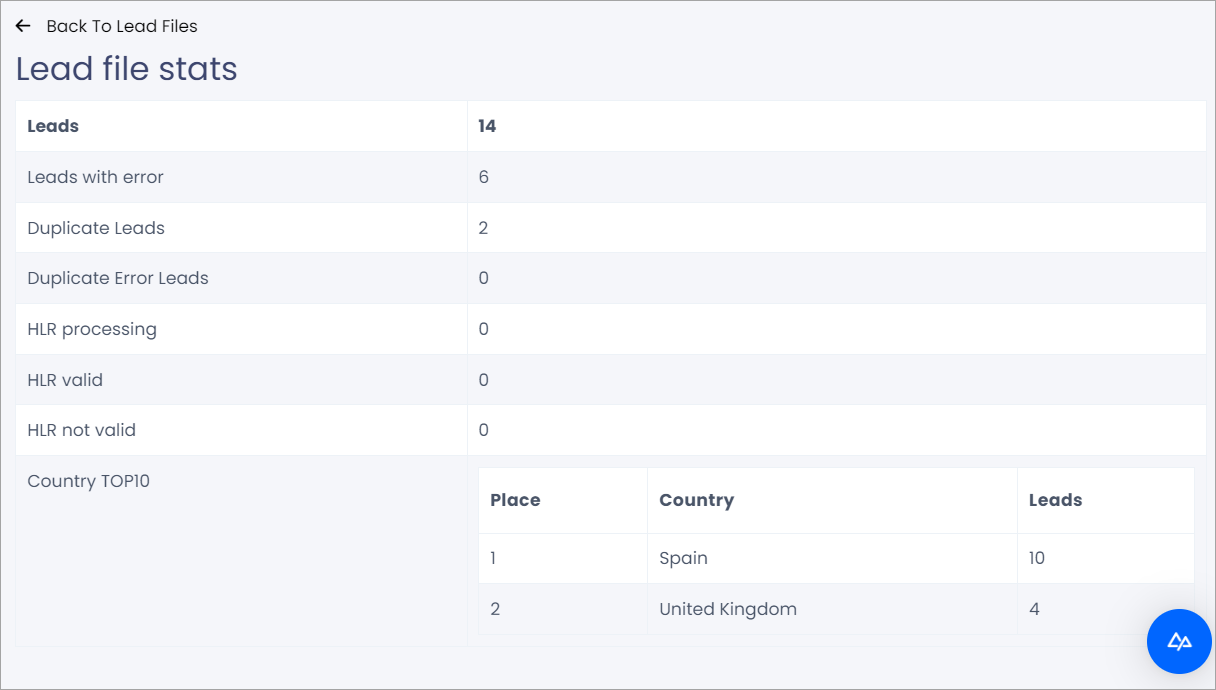
On the Lead File Stats page, you will see the total number of leads processed, the number of error leads, duplicates, duplicates with errors, and more. It also displays the top 10 countries by the number of leads in your file.
Statistics of the lead file
To get more details about your uploaded file, follow these steps:
Open Lead Files
In the main menu, click Leads & Campaigns > Lead Files.
View the leads
In the Actions column, click Select Option > View Leads. The Lead Search page will open, displaying all the leads uploaded in the file and search filters to find necessary leads quickly.
The Lead Search tab
👍
TIP
We recommend that you use this option to check your leads before you assign the lead file to a campaign. This way, you will make sure the leads have been uploaded successfully.
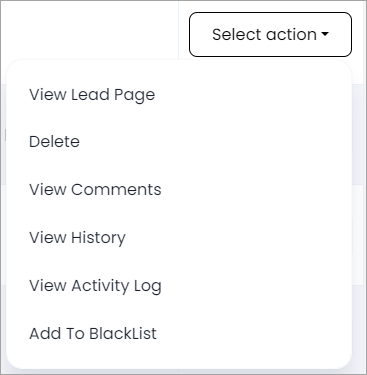
Click Select Action next to any lead to reach additional actions such as viewing the lead page, deleting the lead, adding it to a blacklist, and more.