Learn how to create, edit, and manage campaigns using WhatsApp Business streams.
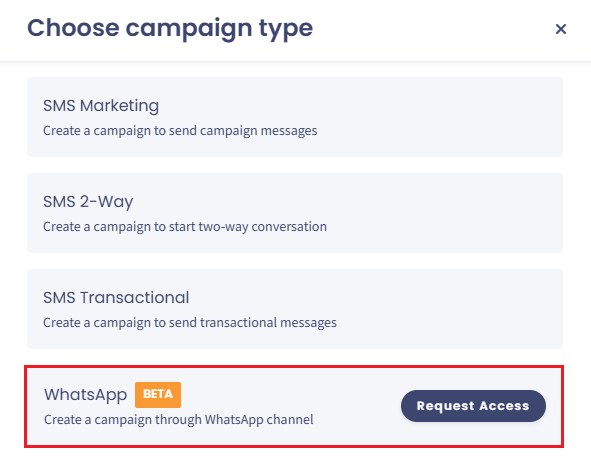
Creating WhatsApp campaigns is a Beta feature that is not available to all users by default. If you are interested in trying it, you first need to request access.
Requesting access to create WhatsApp campaigns
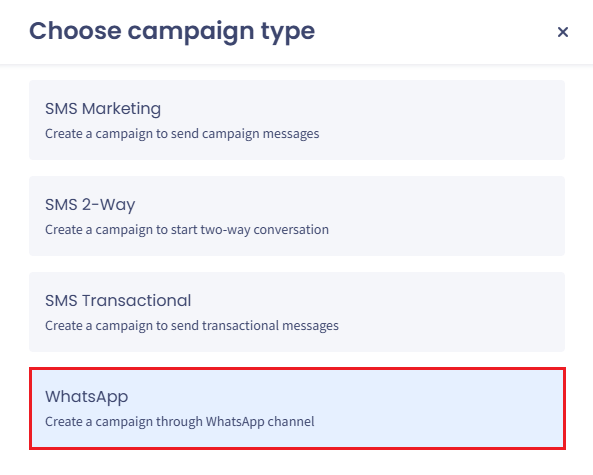
Once you are authorized to access the feature, you can start creating and managing your first WhatsApp campaign.
WhatsApp campaign creation option
❗️
IMPORTANT
Note that before you can try creating WhatsApp campaings, you will need to request WhatsApp Business Streams access and have at least on WhatsApp Business stream set for your account.
Alternatively, you can duplicate an existing WhatsApp campaign right from the Campaigns table. To duplicate it, navigate to Campaigns in the main menu, locate a campaign in the table, and click Duplicate from the three-dot menu on the right side of the row. This will create a draft clone of the selected campaign.
Duplicate menu option
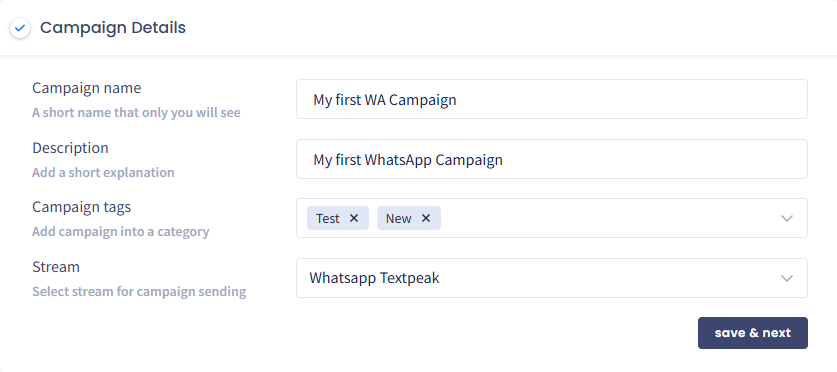
Campaign Details
The wizard starts by entering campaign details.
Campaign name - enter a meaningful name to locate the campaign quickly.
Description - provide more information that will be visible when you open the campaign.
Campaign tags - select the tags from the drop-down list to apply them to the SMS campaign immediately to categorize your campaigns and quickly find the ones you need (optional). To create a new tag, enter the new tag name in the field and click enter.
Stream - select the stream for campaign sending from the drop-down list of available WhatsApp streams and proceed to the next step.
📘
NOTE
Only the WhatsApp streams will be available for selection.
Campaign Details section
📘
NOTE
The campaign will be saved as a draft on each step and added to the campaign list with the Draft status. Then you can click Edit to return to the campaign and complete its creation.
After you click save & next, the step will be completed and the next tab will expand.
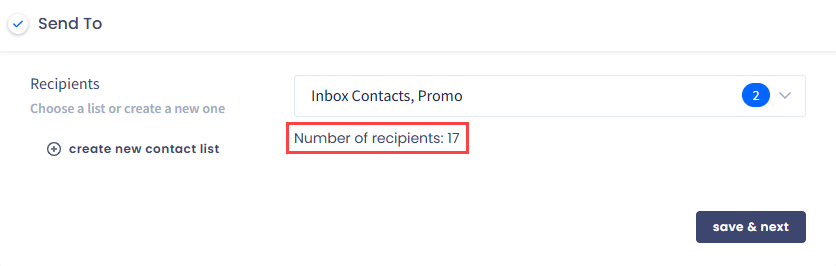
Send To
In this section, define SMS recipients. Choose one or several existing contact lists or segments from the drop-down list or create a new list or segment right away.
❗️
IMPORTANT
You can choose only WhatsApp senders that are related to the selectred stream and only one WhatsApp account.
The number of recipients equals the total number of contacts in selected lists or segments.
Send To section
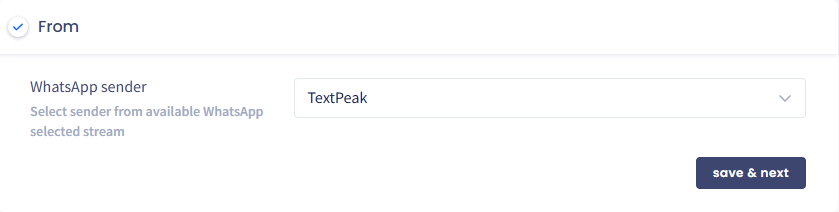
From
Here, select the WhatsApp sender from the available WhatsApp stream. If there are multiple senders, set a custom or equal sender ratio. By setting the distribution ratio, you can control how frequently each sender is used in your WhatsApp campaign.
From section
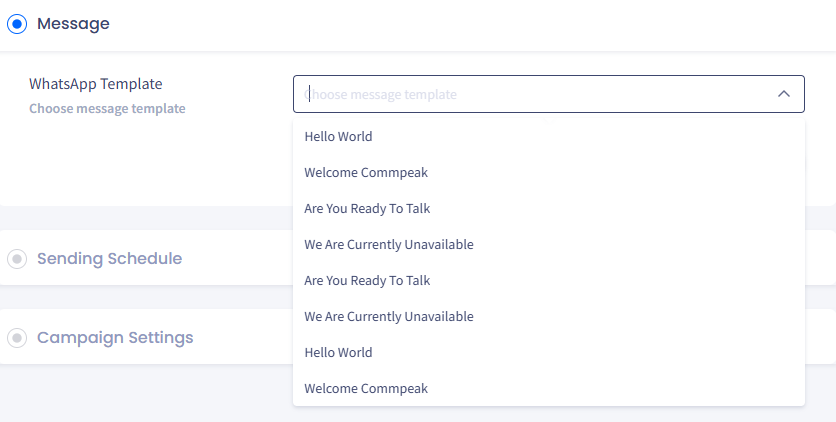
Message
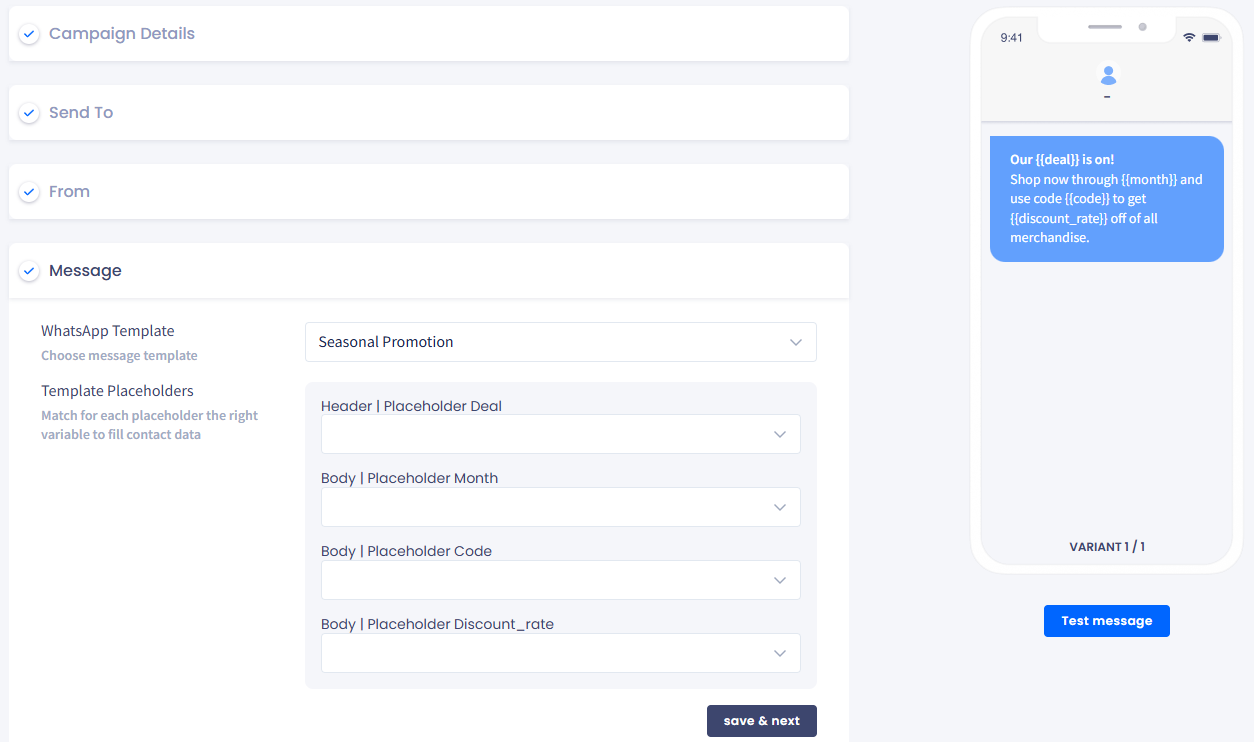
In the Message section, you will be asked to select a template to apply to the message you will be sending.
📘
NOTE
You can initiate a message only by using a template approved by WhatsApp Business or Facebook.
Message section: WhatsApp templates selection drop-down list
📘
NOTE
With TextPeak, you have an option to create new and manage your existing WhatsApp Business templates from the Streams API menu. Check the Managing WhatsApp Templates article to learn more.
For complex templates, you must modify the message body/placeholders: map the values to set, for example, the recipient's first and last names.
📘
NOTE
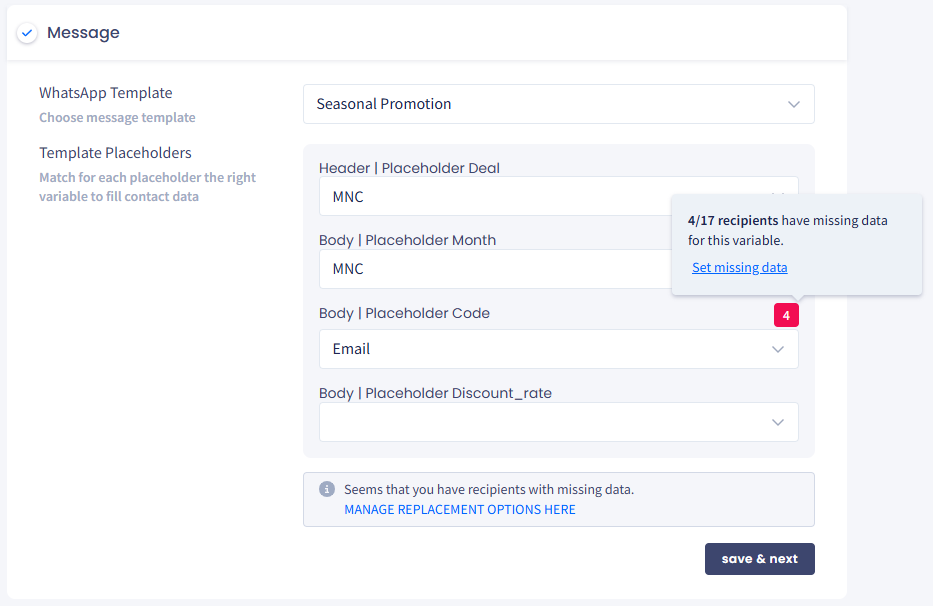
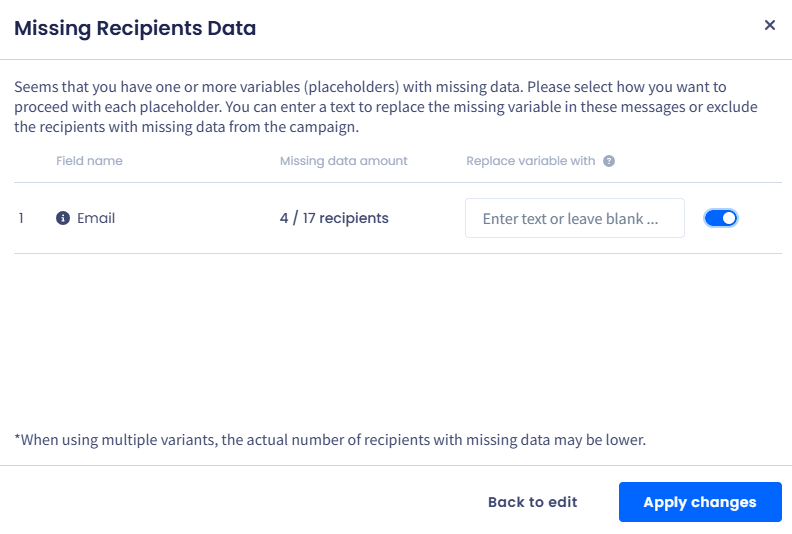
If you have added the recipients that miss the data required for the selected template, you will see the icon notifying of how many contacts are missing this part. In this case, you will be asked to manage the missing recipients data by clicking on the link to manage replacement options.
Icon with the number of recipients with missing data
To fix the recipients with missing data:
Hover over the number of recipients who have missing data and click MANAGE REPLACEMENT OPTION HERE.
A window pops up. You have two options to enter missing text or exclude recipients with the issue from the SMS campaign:
Enter the text to replace the variable
Toggle the switch to the left, and the recipients who have missing data will be excluded from the campaign.
Missing Recipients Data pop-up window
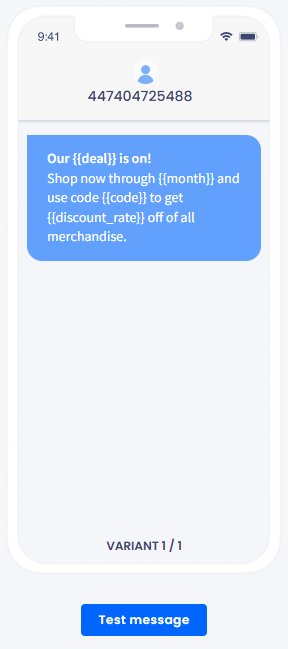
Preview
In this step, you can also preview how the message header and body (and, in some cases, the footer) will look like on a mobile phone.
Message preview
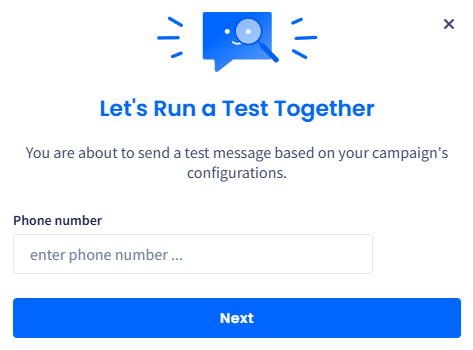
Testing Message Sending:
Click Test message.
Enter the recepient's phone number.
Test running confirmation pop-up
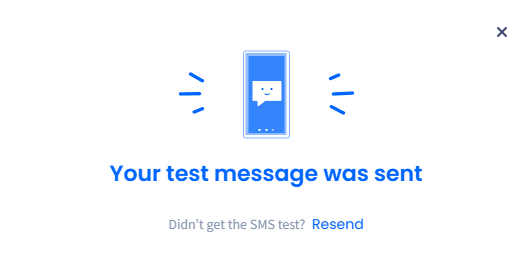
Then click Next and fill in the placeholder values in the window that pops up. Click Send Test.
Entering placeholder values
Wait for the confirmation that your message has been sent.
Your test message was sent confirmation
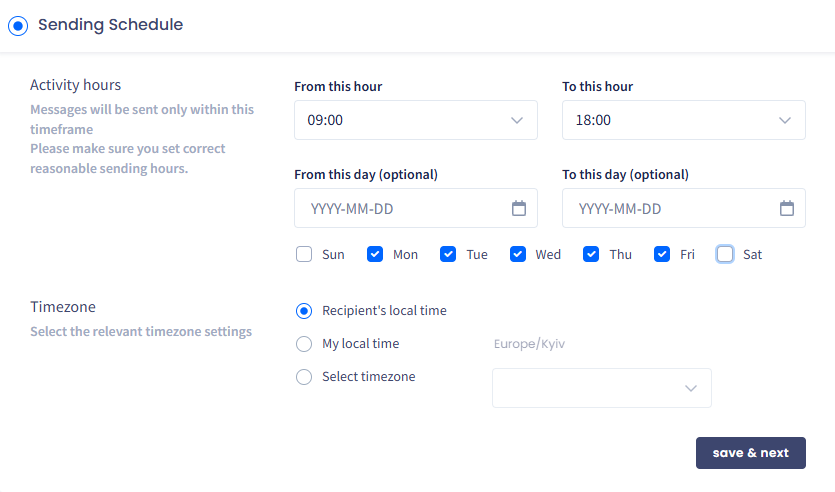
Sending Schedule
In the Sending Schedule section, you can set the time and date when your message will be sent.
Sending Schedule section
To set the campaign sending time:
Go to Activity hours and set the hours and days when the system will send messages. Optionally, you can choose the starting and ending dates of your campaign.
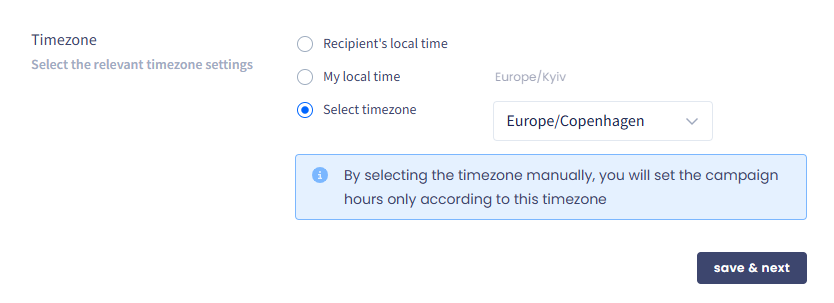
Configure the Timezone for the campaign from several available options:
Recipient's local time: the local timezone of each recipient, depending on their country (the system will determine it based on their phone number)
Select timezone: a specific timezone that you can select from the drop-down list.
Timezone section
📘
NOTE
We recommend using the recipient’s local time.
Some countries have regulations as to the allowed time for sending SMS messages.
If you set the sending time for your own time zone, a recipient in a different time zone can miss your message if the sending time doesn't fit into the allowed limits.
If some contacts won’t be able to receive your message, you will be notified about it later when you check the campaign details.
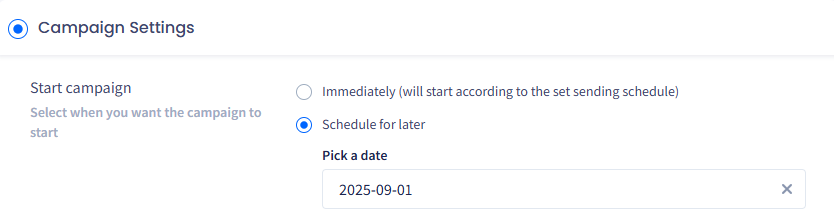
Campaign Settings
In the Campaign Settings section, you can define the following settings for your campaign:
Choose if you want to start the campaign immediately or pick a date in the future.
Start Campaign section
Select the checkbox next to Pause campaign if you wish to pause your campaign once or each time after a certain number of messages has been sent. This allows you to review your campaign's performance and make adjustments to improve its results while the campaign is running.
Pause Campaign section
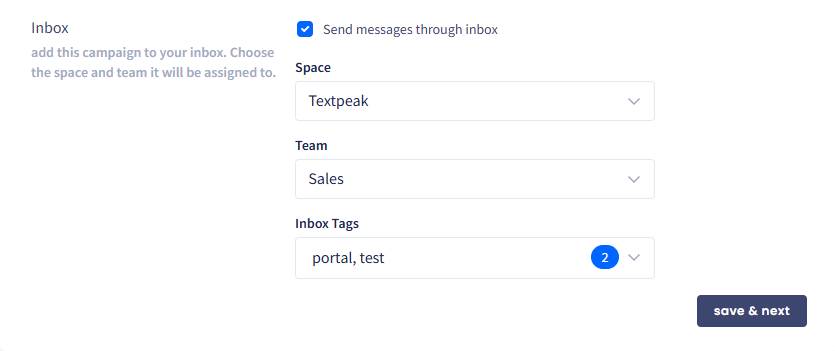
Also, you can arrange for all campaign messages to automatically become available inside your inbox. To do it, enable the Send messages through inbox checkbox and assign it to a space and team. You can also add tags.
Inbox section
Click save & next.
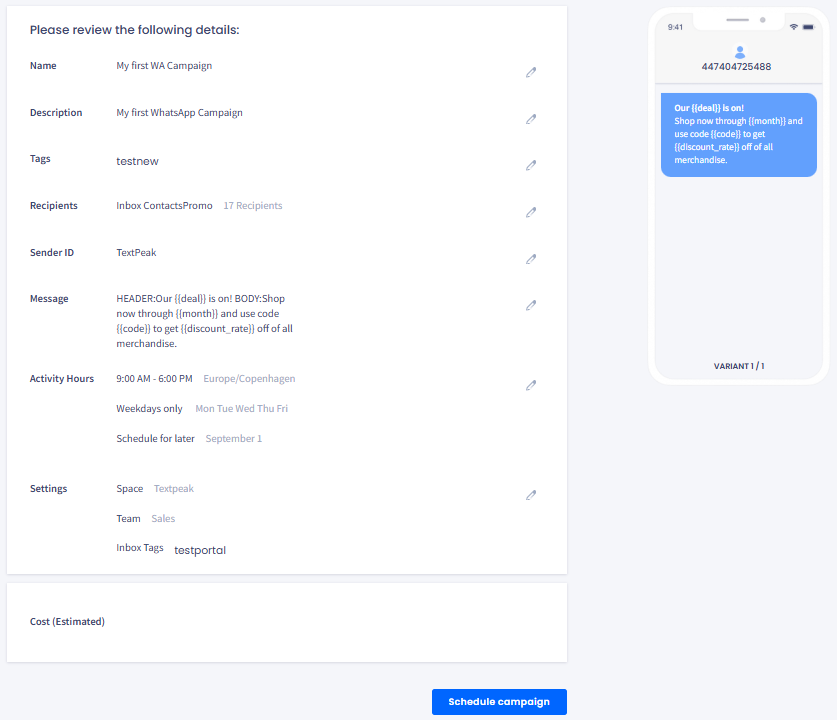
Reviewing Your Campaign
After you have saved all the steps, you will be asked to review your campaign details:
Click the edit icon to make changes in any tab you need.
At the bottom of the page, you can find the estimated price of your future SMS campaign.
When you finish reviewing the campaign, click Start campaign (or Schedule campaign if you selected to schedule message sending for a later date).
Here, you can also preview how the message header and body will look like on a mobile phone on the right.
Reviewing campaign details
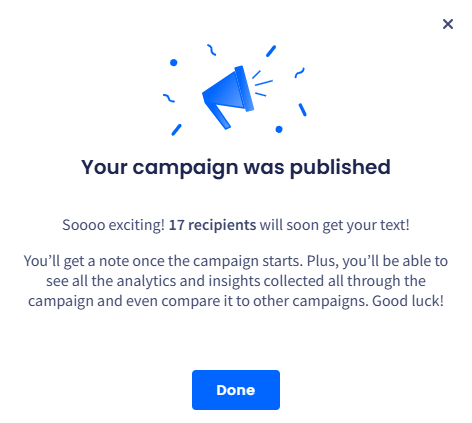
Click Done in the window that pops up.
Confirmation of the campaign publishing pop-up window
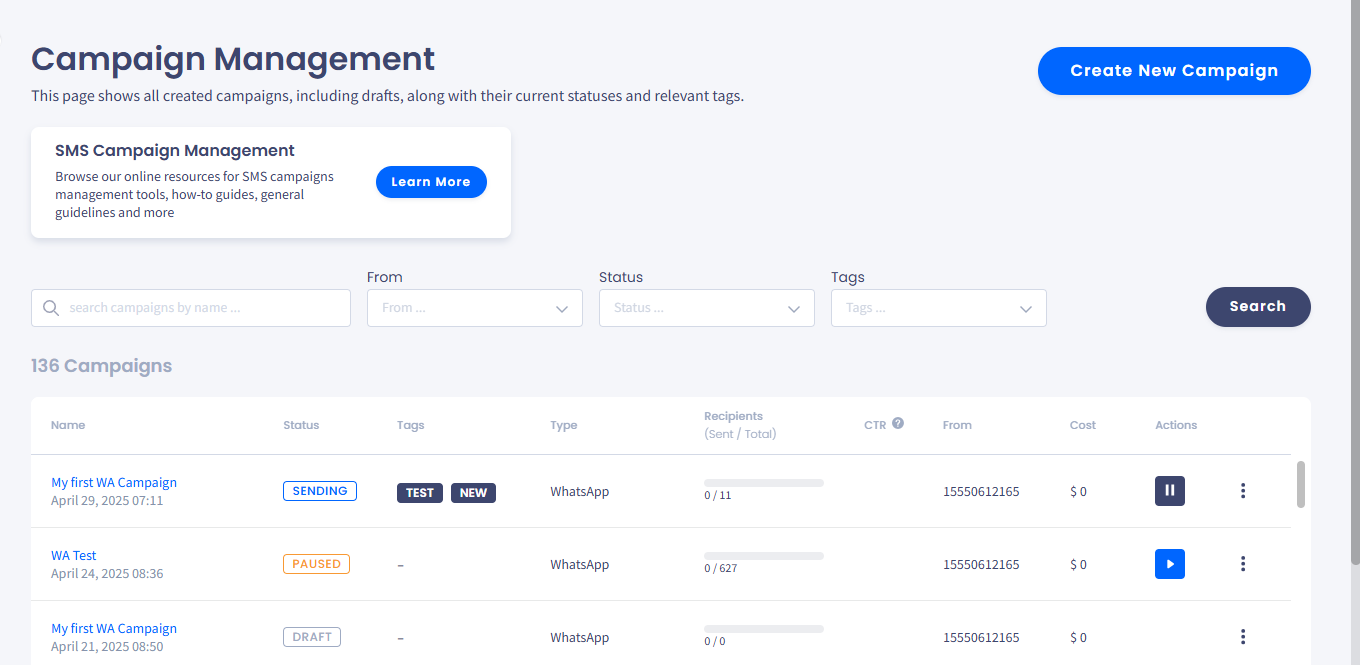
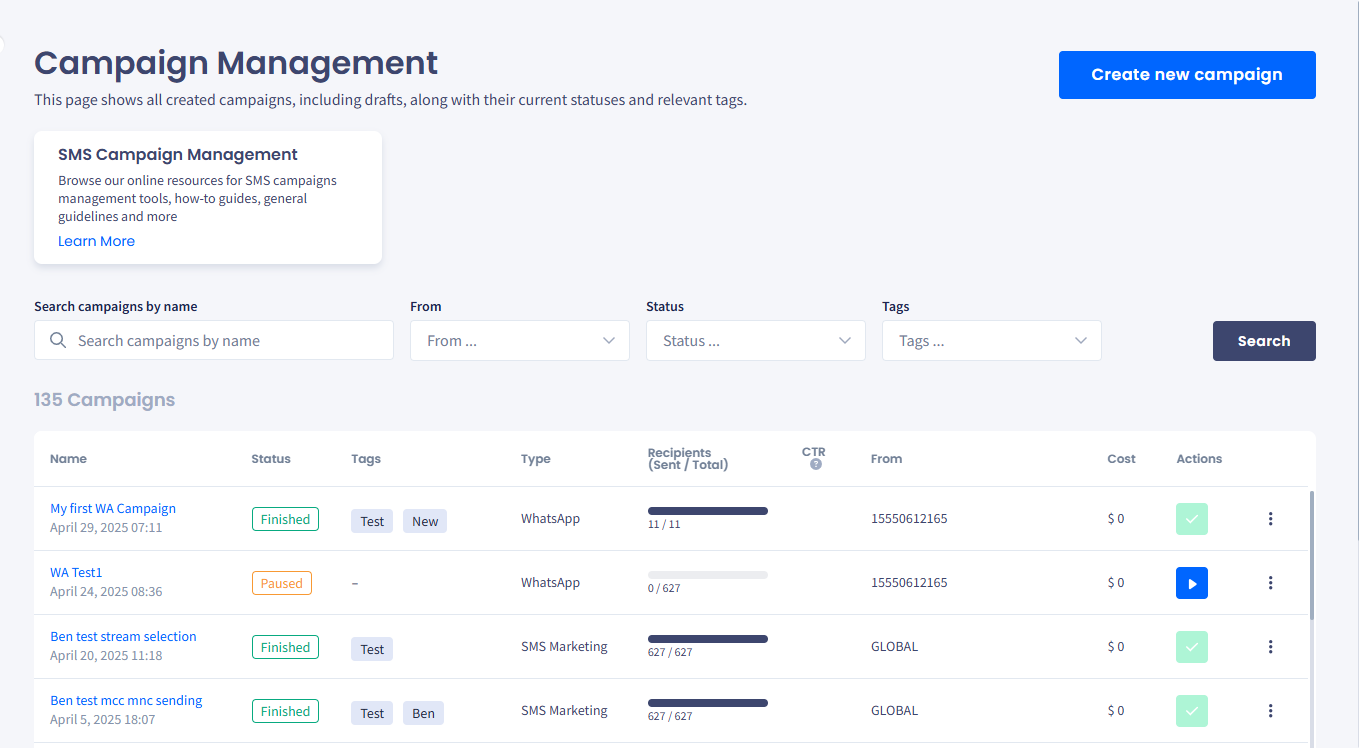
The new campaign will appear at the top of the Campaigns table with the corresponding status: Sending or Scheduled. Alternatively, you can pause the campaign sending by clicking the corresponding Actions button.
New WhatsApp campaign added to Campaigns table: Sending status
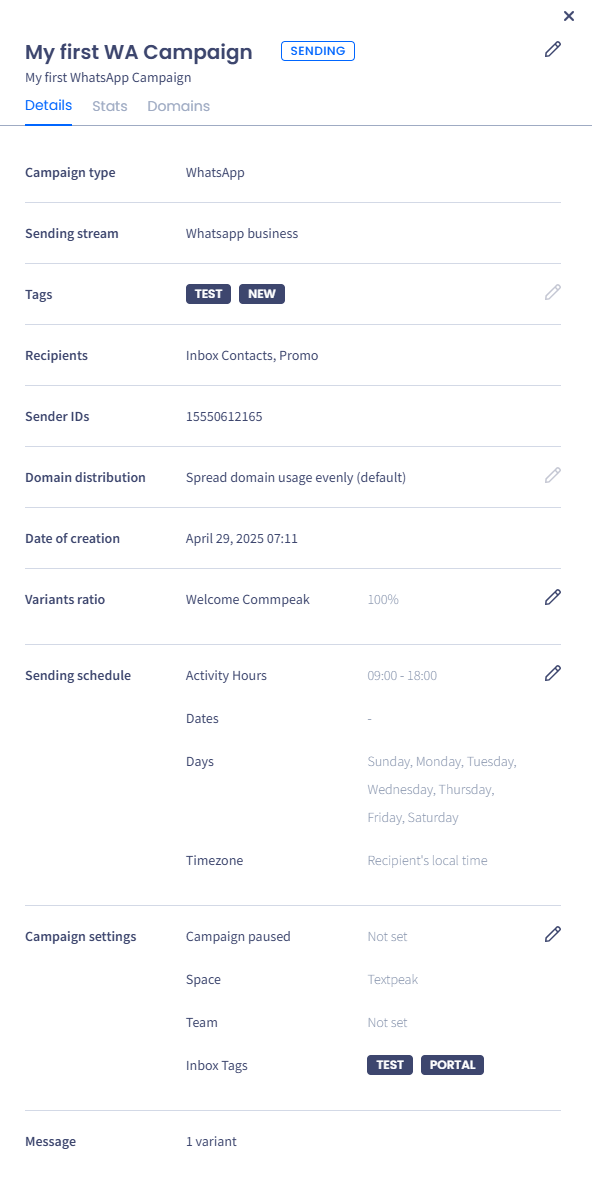
Click it to open the sidebar to view your campaign details, statistics, and domains.
Campaign sidebar data
The campaign status changes to Finished when sending messages has been completed successfully.
New WhatsApp campaign added to Campaigns table: Finished status