Salesforce Click2Call
Instructions for integrating your Salesforce CRM with CommPeak Click2Call, enabling seamless call functionality from within your CRM.
Here's a step-by-step guide to integrating your Salesforce CRM account with the CommPeak Dialer or Cloud PBX Click2Call. This setup will allow you to call your leads directly from Salesforce using your softphone client or IP phone.
IMPORTANTThe Click2Call integration is exclusively available for Salesforce Enterprise Edition.
Step 1: Add Remote Site Settings (Salesforce Side)
-
In your Salesforce account, click Setup.

Setup button
-
Navigate to Security > Remote Site Settings in your left-side menu.
-
Create a new remote site:
- Click New Remote Site.
- Enter a name: Dialer_C2C_URL.
- Enter a remote site URL: https://
{your_account_name}.td.commpeak.com - Click Save.
This will enable Salesforce CRM to trigger remote requests to any Click2Call adapter on your CommPeak Dialer or Cloud PBX domain.
Step 2: Create a Connected App to Allow Webhook for Dialer / PBX (Salesforce Side)
-
In your Salesforce account, click Setup.
-
Navigate to Apps > App Manager in the left-side menu.
-
Click New Connected App in the top-right.
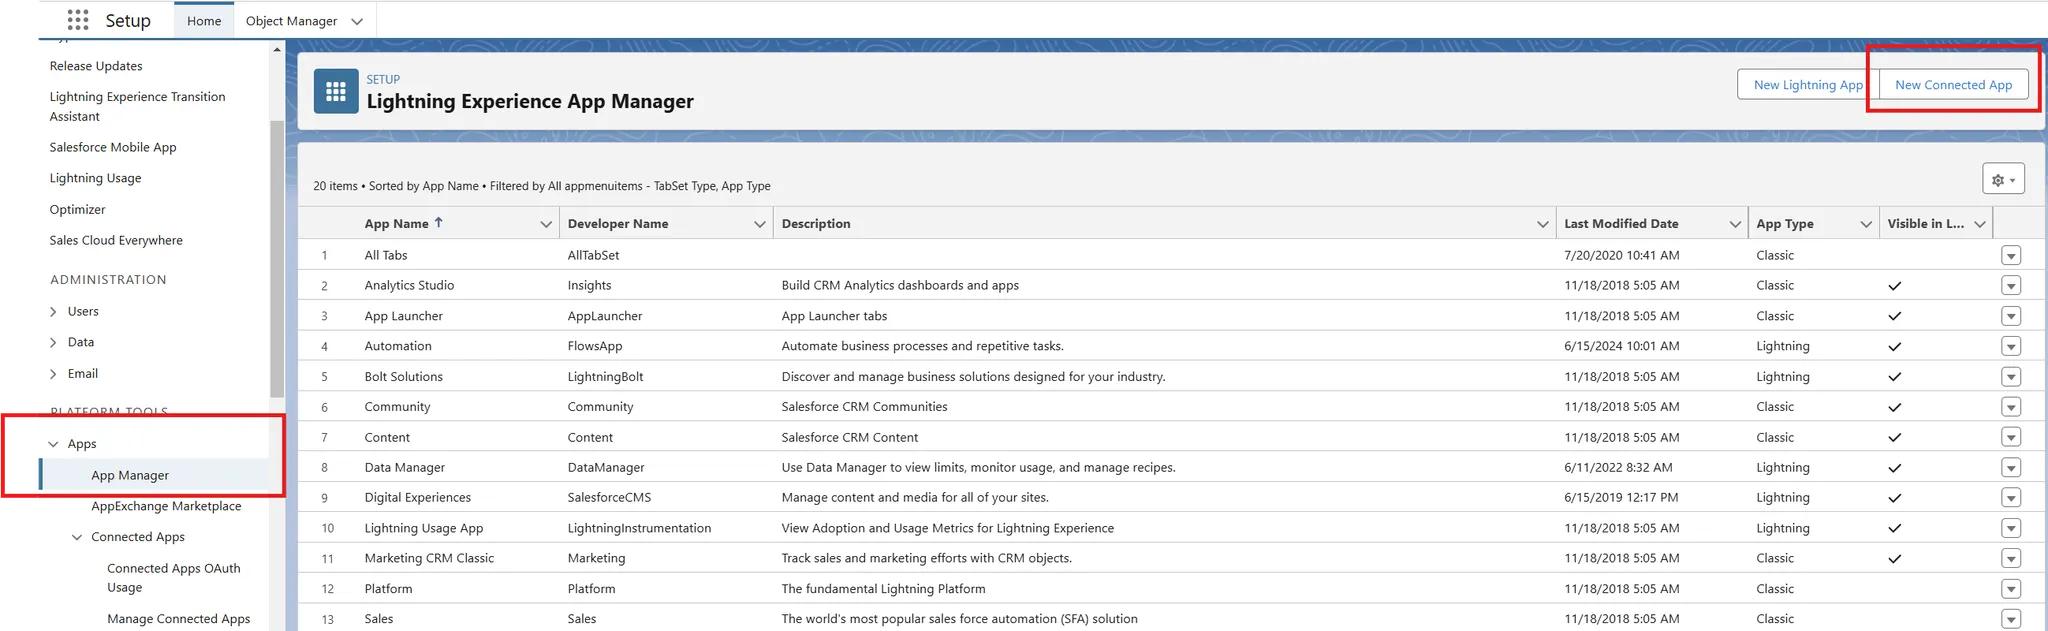
on the left-hand button in Setup
-
Choose Create a Connected App and then click Continue.
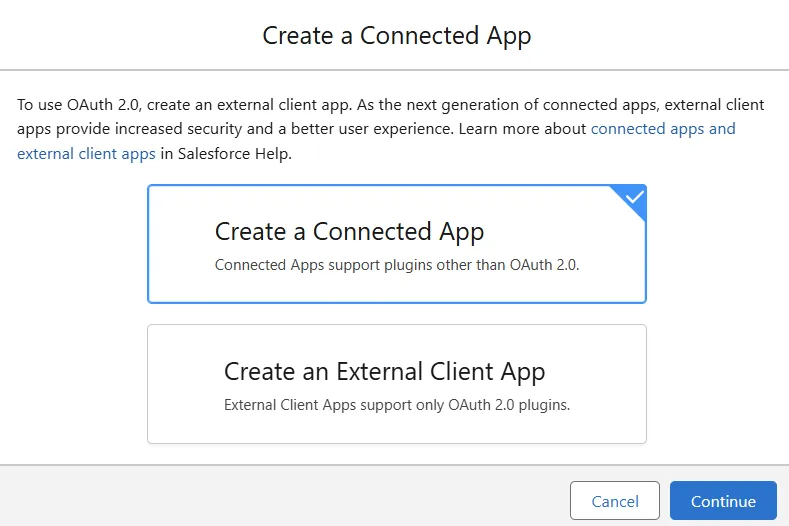
Creating a connected app
-
Enter the following information:
- Connected App Name: CommPeak
- Contact Email: [email protected].
- Enable OAth settings under API and select the following settings on the Manage Connected Apps page:
-
Select the EnableOAuth settings checkbox.
-
Select the Enable forDevice Flow checkbox.
-
Enter Callback URL: https://
{your_account_name}.td.commpeak.com/integrations/c2c/login-sales-force -
Selected OAuth Scopes:
- Manage user data via APIs (api)
- Perform requests at any time (refresh token, offline access).
-
Select the Secret for Web Server Flow checkbox.
-
Select the Secret for Web Server Flow checkbox.
-
Unselect Require proof key for code exchange.
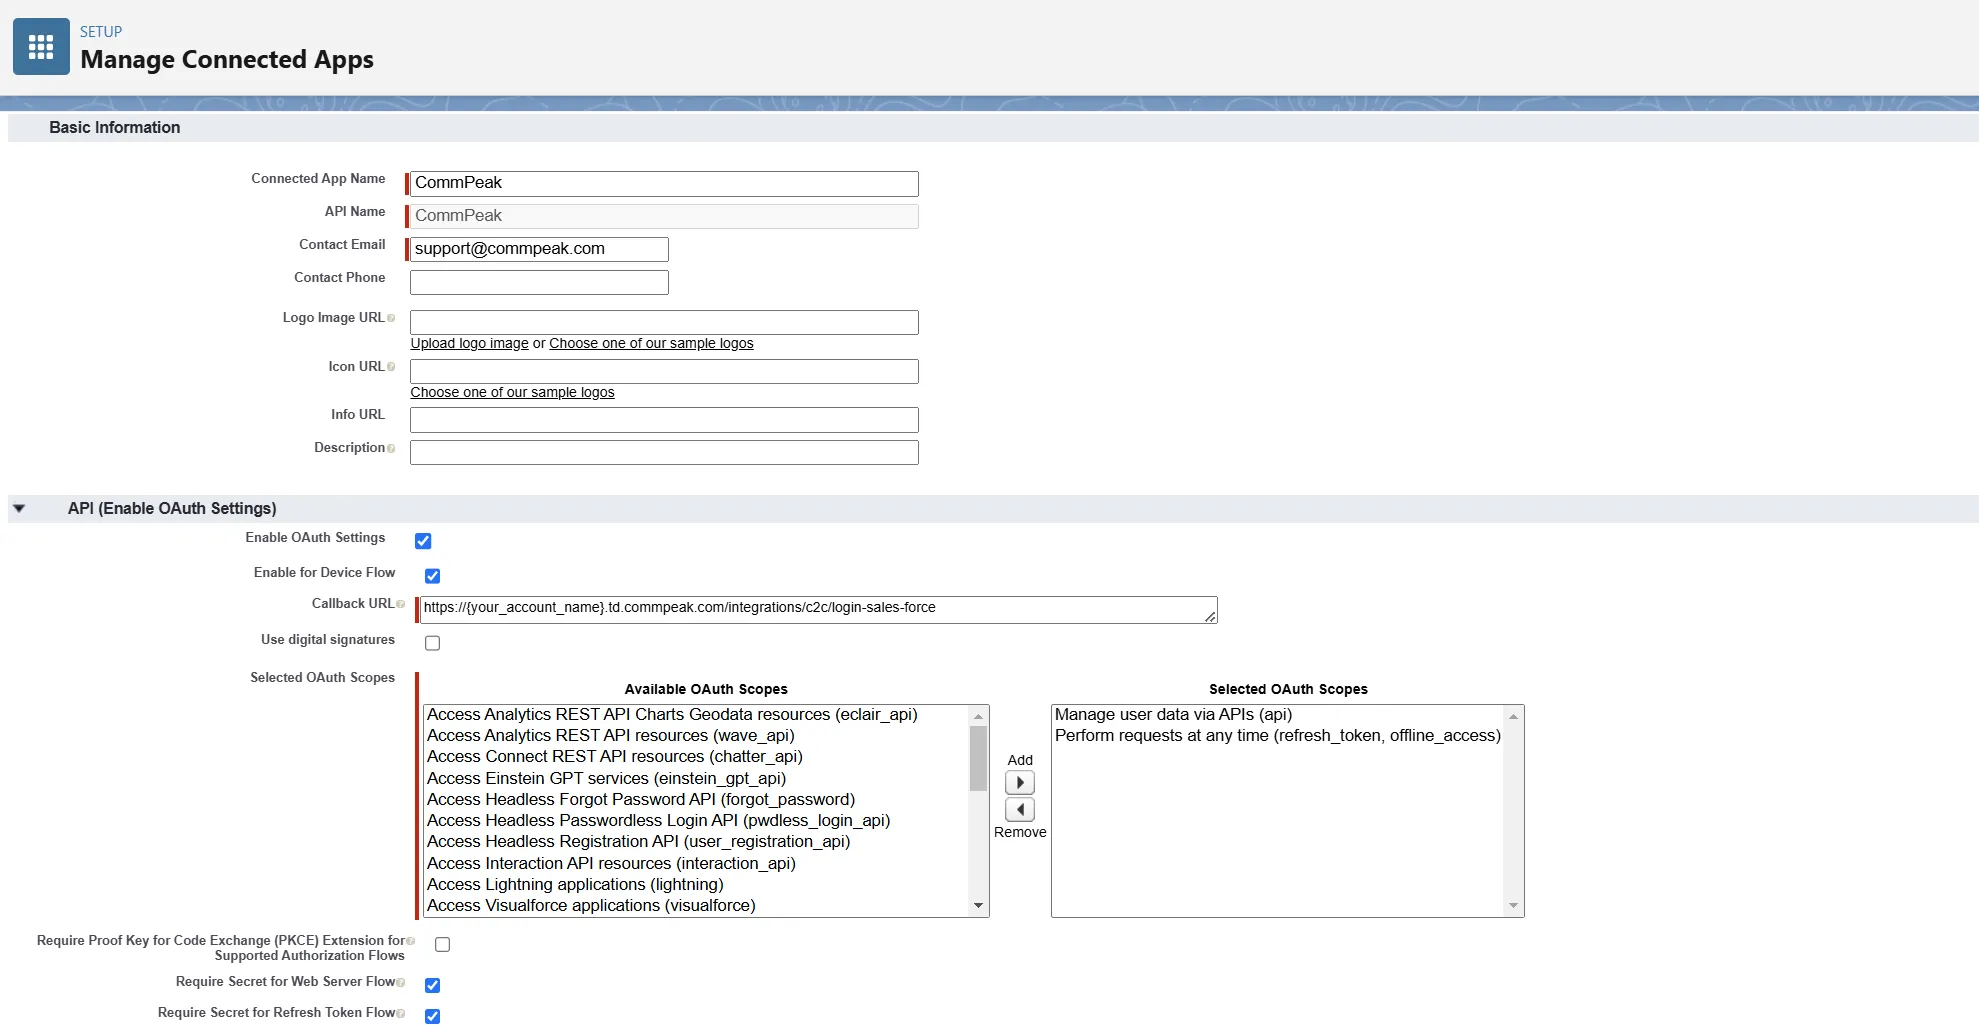
Connected app settings
Manage Consumer Details button
-
Click Save.
-
On the next page, click Continue.
-
Verify your Identity.
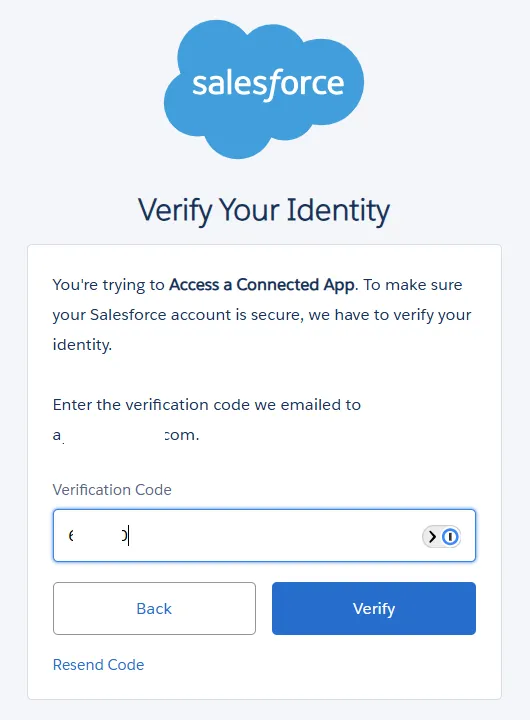
Identity verification
-
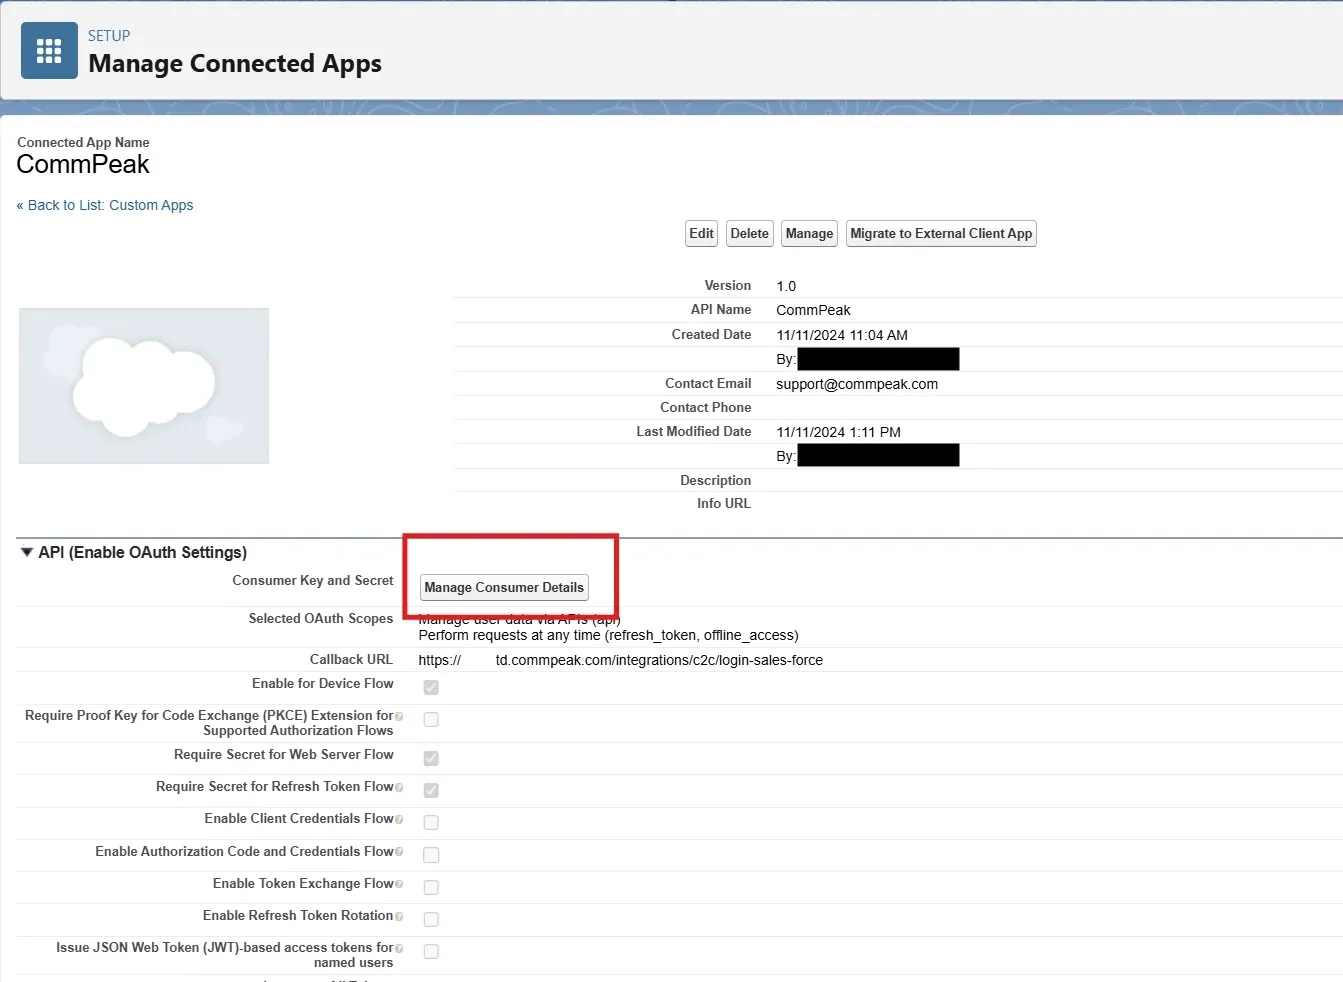
Copy Consumer Key and Consumer Secret. To find them in Salesforce, go to Setup > App Manager. Then expand CommPeak > View > Manage Consumer Details.
Those are the client id and secret to be used in the Dialer or Cloud PBX Click2Call setup.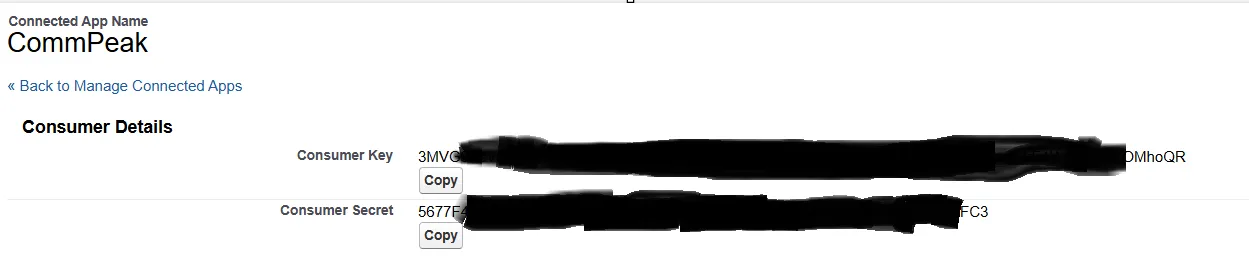
Providing consumer key and secret
Step 3: Add Click2Call Integration (CommPeak Dialer/Cloud PBX Side)
-
In your CommPeak Dialer or Cloud PBX, go to Settings > Click2Call Integrations and click Create New Click2Call.
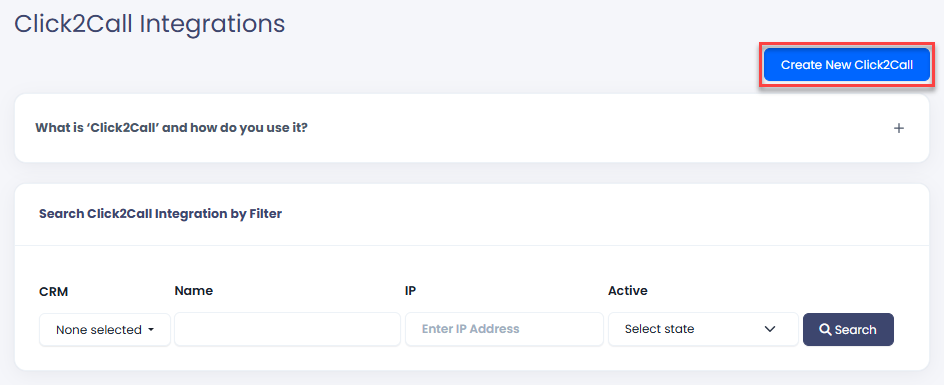
Create New Click2Call button
-
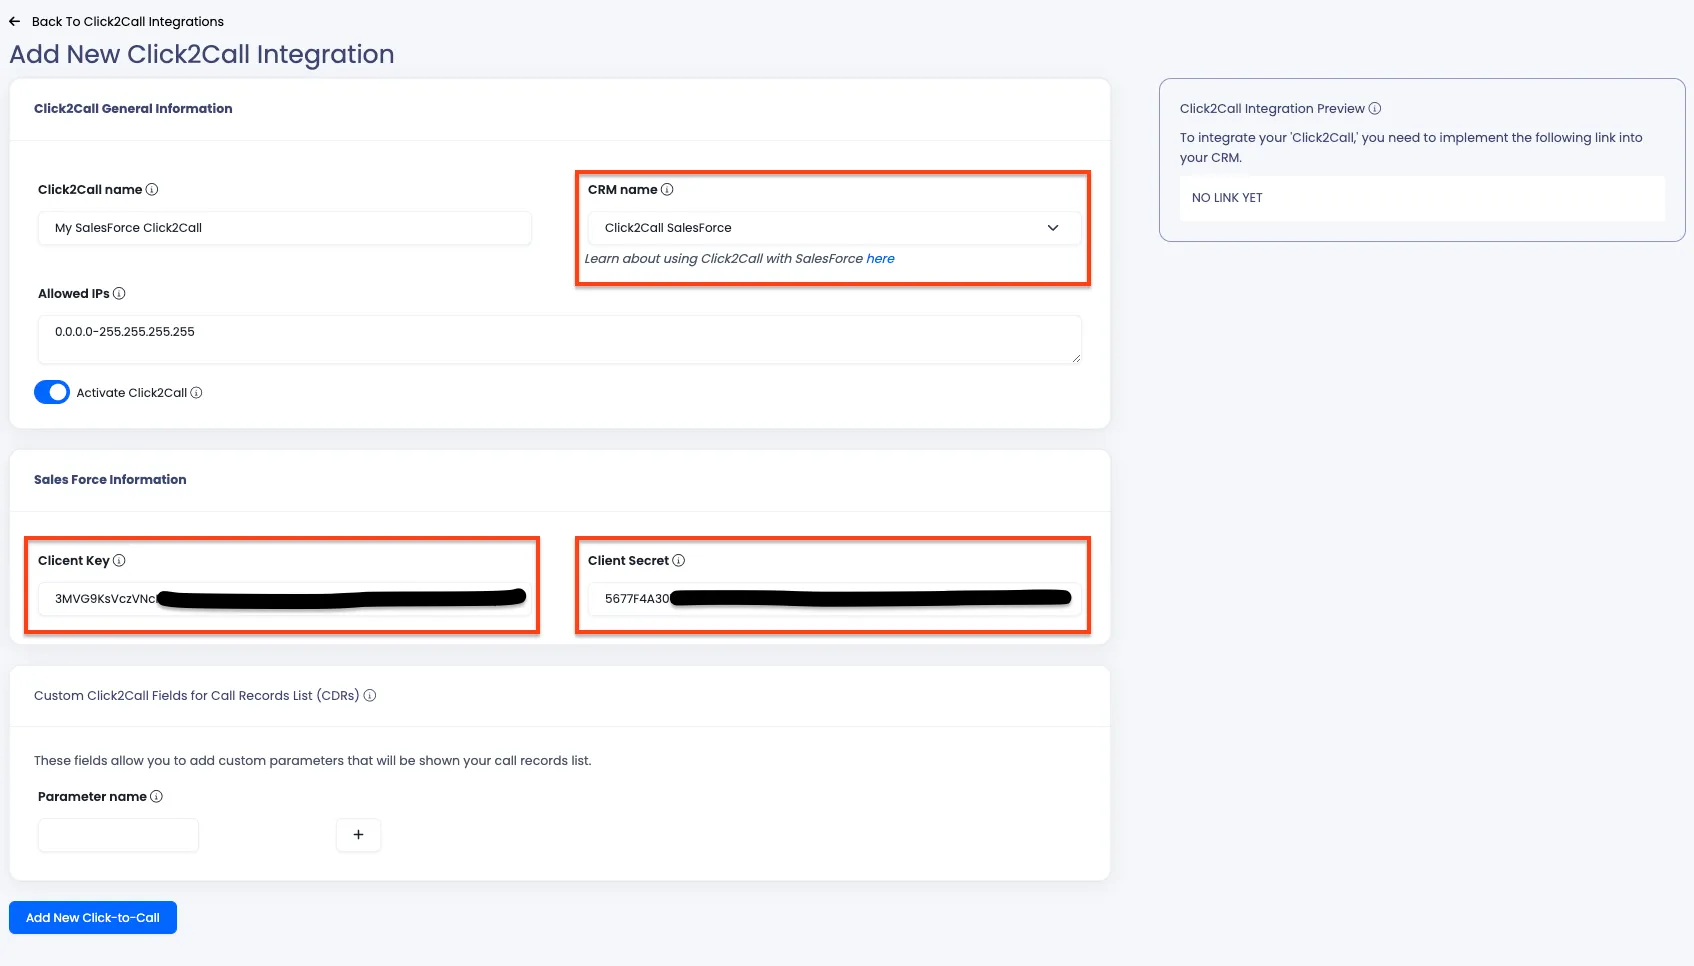
Enter data for your new integration:
-
Click2Call General Information:
- Click2Call name: specify the name of your integration to be able to find it in the list.
- CRM name: select Click2Call SalesForce.
- AllowedIPs: enter the IP addresses you want to authorize for Click2Call integration, separated by commas.
- Activate Click2Call: use the toggle to activate the integration or turn it off as needed.
-
Sales Force Information: enter the Client Key and Secret from Step 1.
Click2Call integration settings
-
-
Click Add New Click-to-Call.
-
The system will redirect you to the dedicated Webhook setup. All your Salesforce settings are configured automatically. You just need to click Login.

Webhook settings
-
The Salesforce authorization wizard will start. Click Allow.
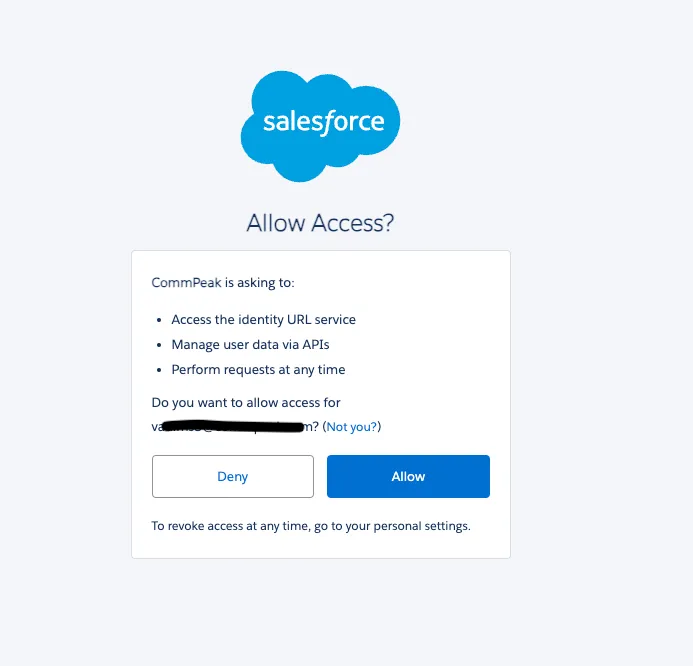
Salesforce authorization
After successful authorization, you will be redirected to the Dialer or Cloud PBX again with the message Webhook activated successfully. Now, you can add your custom fields to the webhook mapping.
Step 4: Install the Click2Call App (Salesforce Side)
- Start by clicking the app installation link.
- After the installation, click Create a remote site (named mdapi) on the new page.
- See if there are no errors with the new remote site.
If the page is not displayed, go to Setup > Custom Code > Visualforce Pages > PostInstall Configuration > Preview to open the page.
-
Click App Launcher (9 dots on the upper left side) and then search for Click2Call.
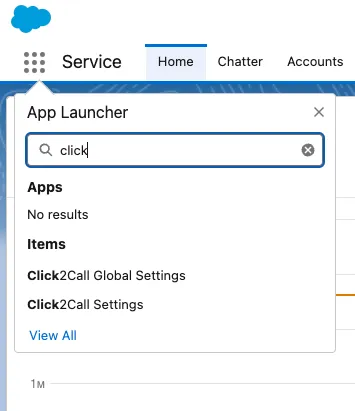
Searching for Click2Call in the App Launcher
-
Configure Click2Call Global Settings:
- PBX Name: set dialer / cloud pbx subdomain
- prefix: set 00
- UID: set your click2call UUID from Step 3.
- accounts:
type=account&ID={!Id}&name={!Name} - leads:
type=lead&ID={!Id} - contacts:
type=contact&ID={!Id} - predefined prefix:
00-International
01 - Check Space
*9911 - Check Long
no sign-
Check Allow Restricted Fields
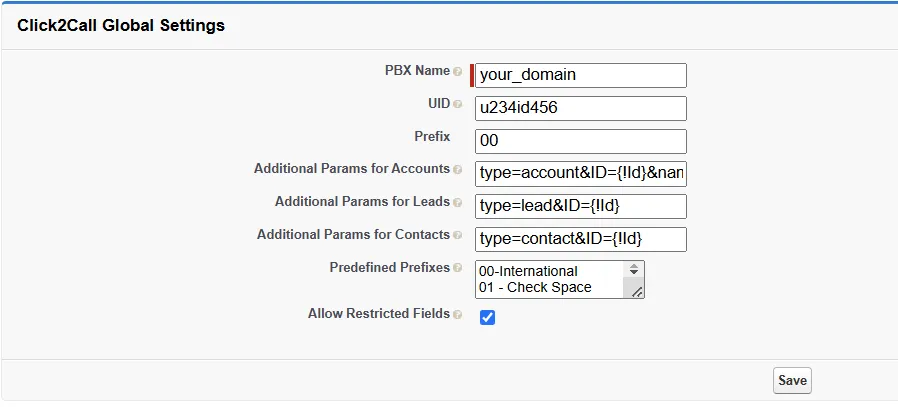
Click2Call Global Settings
- Configure Click2Call Settings for each Salesforce agent user. Here, we connect the Salesforce user to the Dialer / Cloud PBX extension.
- Pbx Name: set Dialer / Cloud PBX subdomain (it will be auto-filled from global settings)
- Extension: set the agent Dialer / Cloud PBX extension that will be ringing while the agent makes a call.
- Prefix: set 00
- UID: set your Click2Call UUID from Step 2. It will be auto-filled from the global settings.
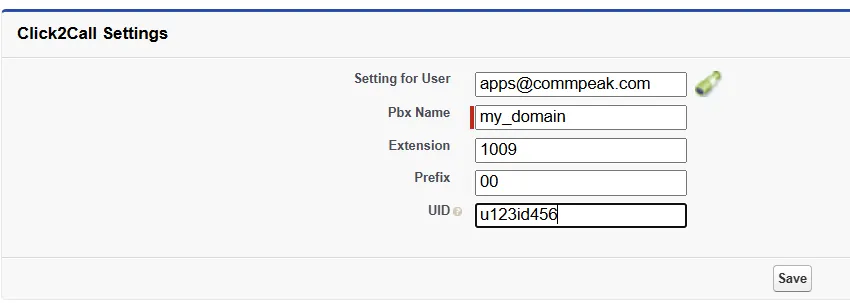
Click2Call Settings
- Click Save.
Step 5: Add the Click2Call URLs to the View (Salesforce Side)
-
In Setup, go to Object Manager > Account / Contact or leads.
-
Go to Page Layouts.
-
Click on the used layout. Then, from Custom Links, drag and drop all the phone fields that should use Click2Call.
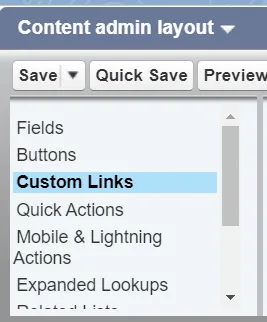
Custom Links menu
-
Save the layout.
Example of Click2Call in Salesforce CRM Lead Page
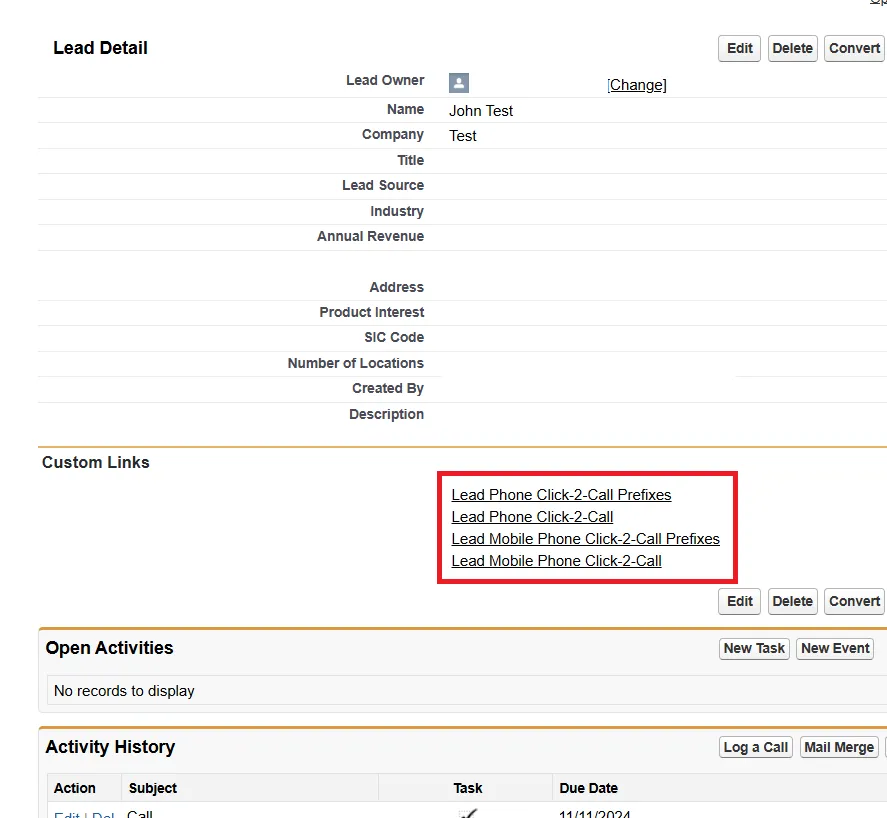
Click2Call controls in Salesforce lead details
IMPORTANTEnsure that your IPs are included in the Public Recordings ACL to access call recordings via the CRM widget.
Updated 6 months ago