

IP-Based Access Control
Learn how to protect your PBX Stats account by whitelisting authorized IP addresses, setting up web access control lists (ACL) in the CommPeak Portal.
To be able to use PBX Stats, you need to whitelist all the IP addresses allowed to access your PBX Stats account.
You can set the required web ACL (access control list) in your account at CommPeak Portal.
To set the web access control list:
Log in to the CommPeak Portal
Log in to the CommPeak Portal.
Open PBX & Dialer Instances
In the main menu on the left, click Cloud PBX & Dialer and select the Classic PBX Instances tab.
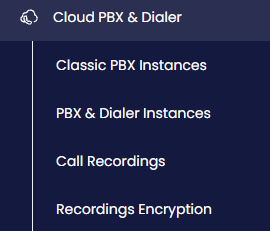
Cloud PBX > PBX Instances tab
Find PBX Instances
Scroll down to the PBX Instances section.
Open the firewall settings
Locate the needed PBX instance, click the corresponding three-dot icon on the right of this instance, and select the Firewall Settings option.
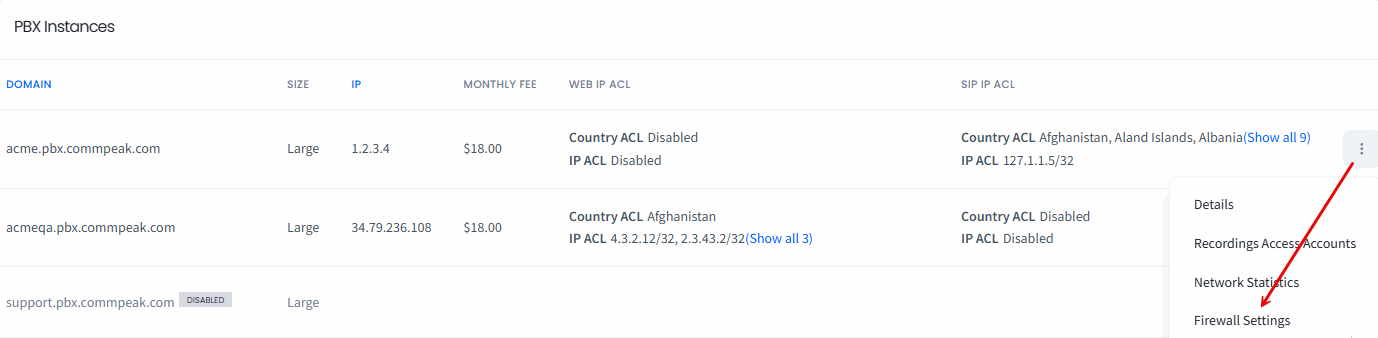
Firewall Settings icon
Review the firewall pane
The Firewall Access Settings pane with several tabs will open on the right. Here, you can insert IP addresses to web and SIP access lists.
Open the Web ACL tab
Click the Web ACL tab.
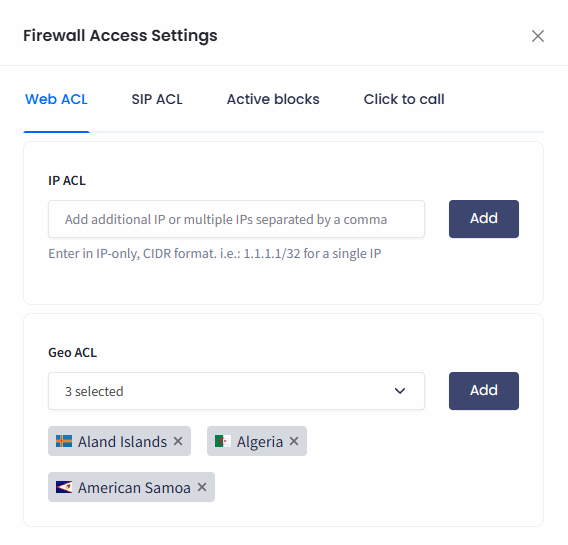
Firewall Access Settings page with Web ACL tab
Updated 4 days ago