Creating Tags and Assigning Them to DID Numbers
Create DID tags and assign them to your DID numbers in the CommPeak Portal.
You can create tags for the DID numbers in your CommPeak Account and assign them as needed.
Creating DID Number Tags
To create a tag:
- Log in to the CommPeak Portal.
- On the main menu on the left, navigate to DIDs and select Management.
- Select the Tags tab.
- The page opens with the table listing all tags added to your CommPeak Account.
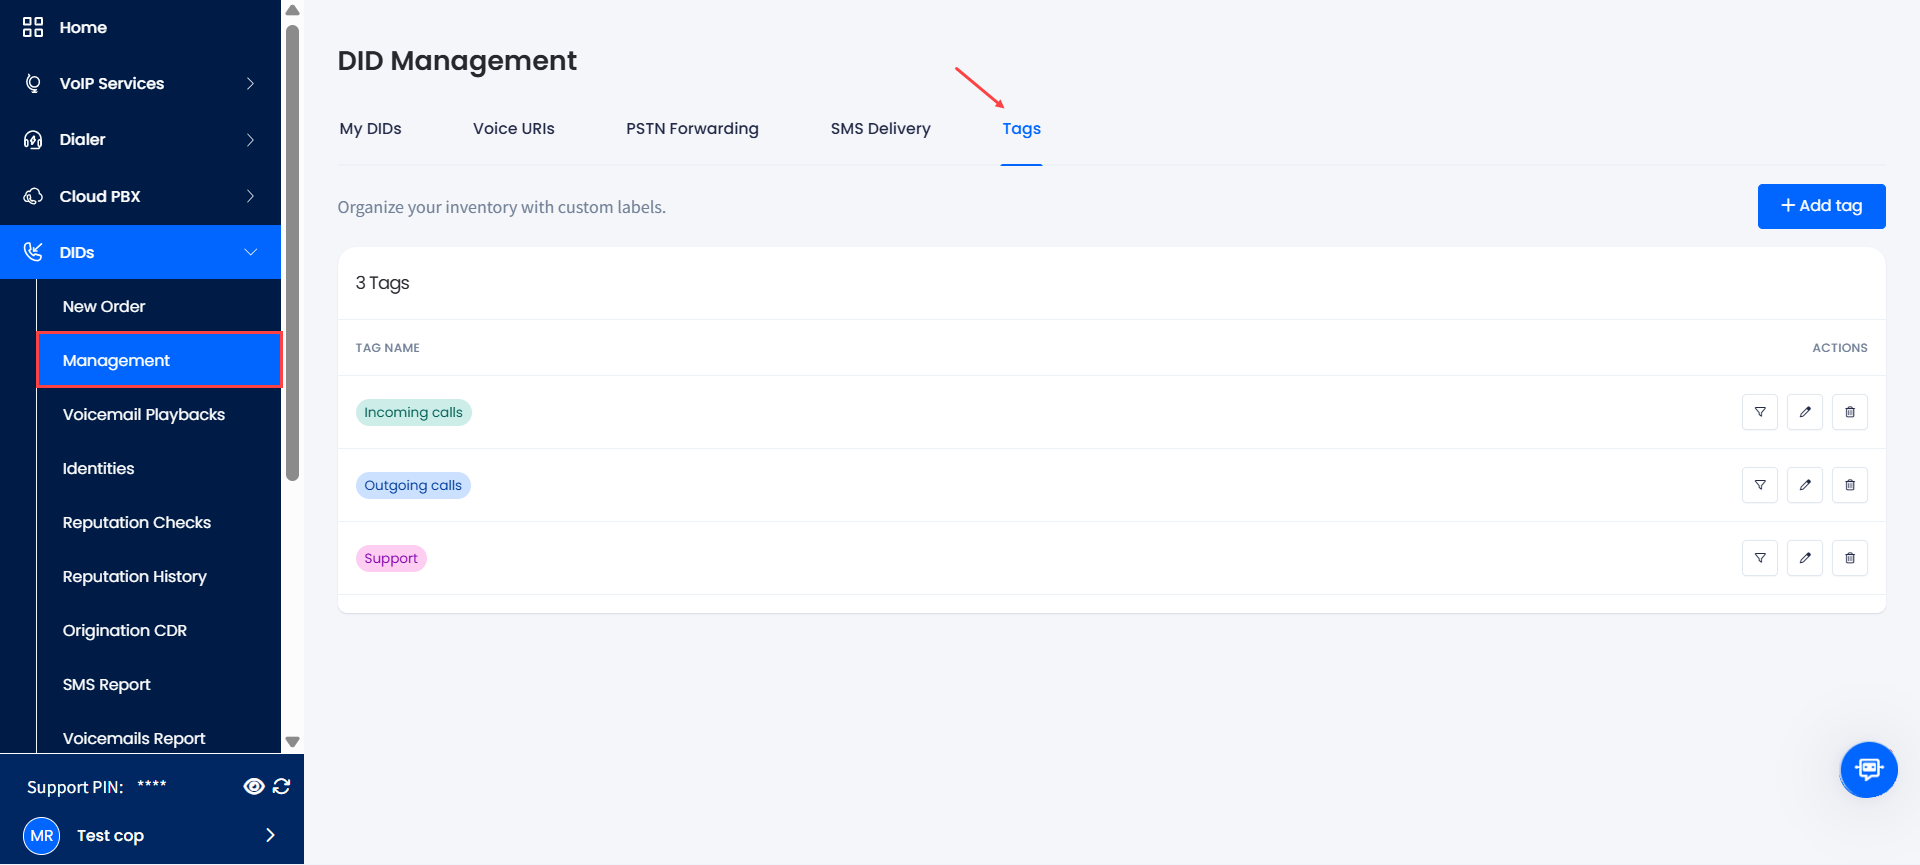
DIDs > Tags tab
- Click the + Add tag button.

Tags tab
- In the Add new tag side panel, enter a name, select the label color, and click Create tag.
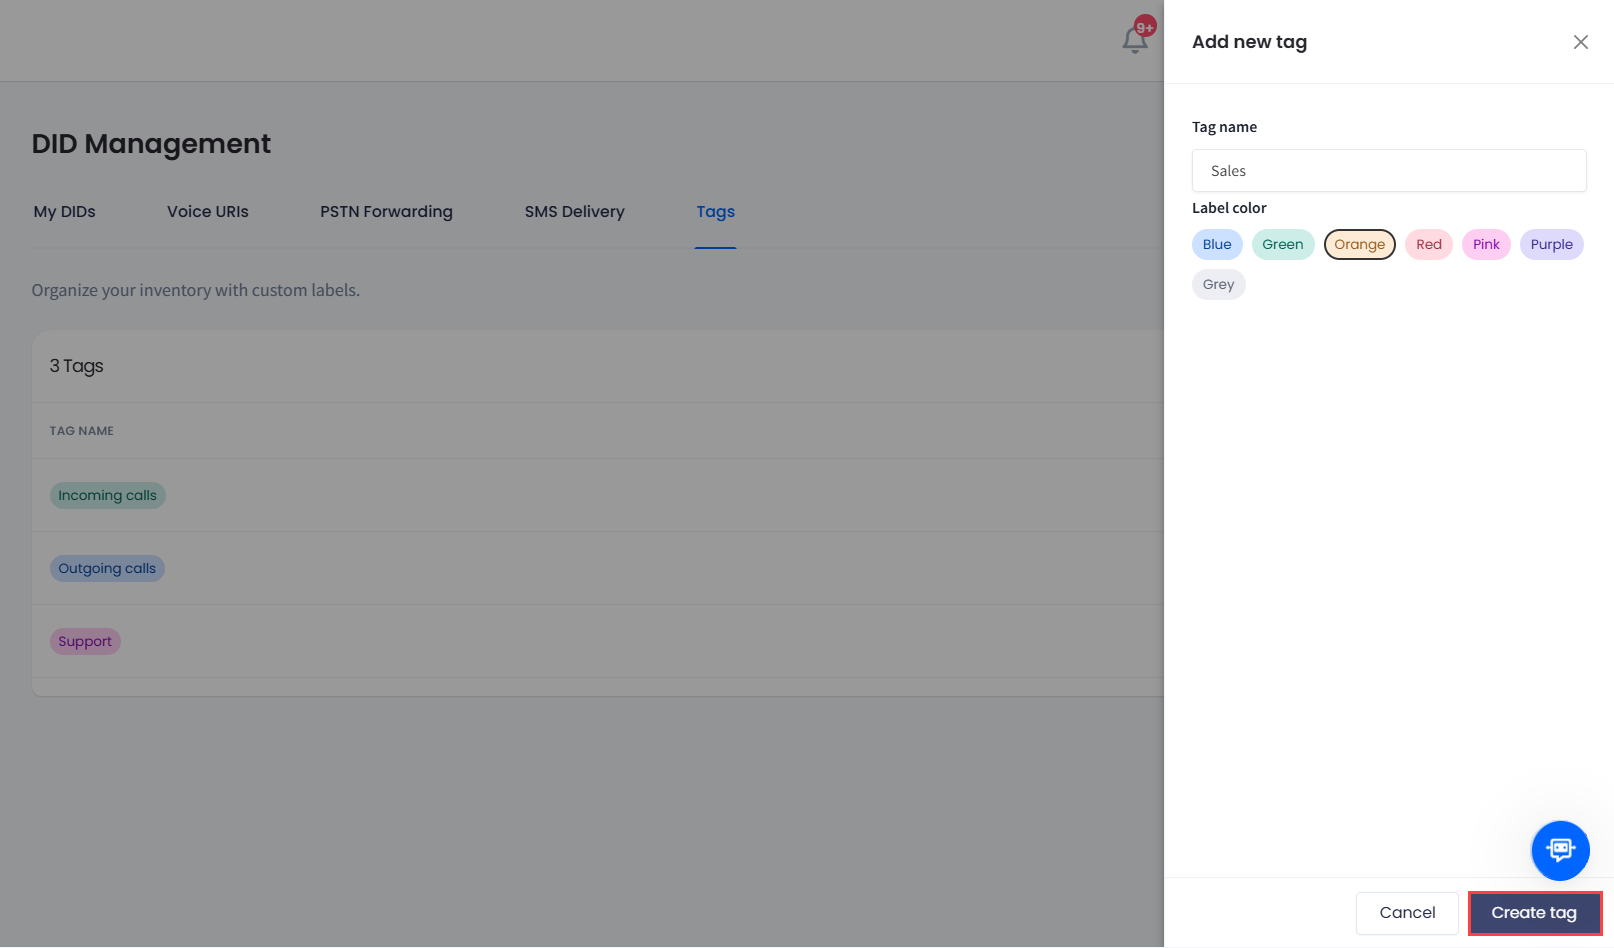
Creating DID tag
- The tag is created and is added to the list. You can now assign it to the DID numbers under your account.
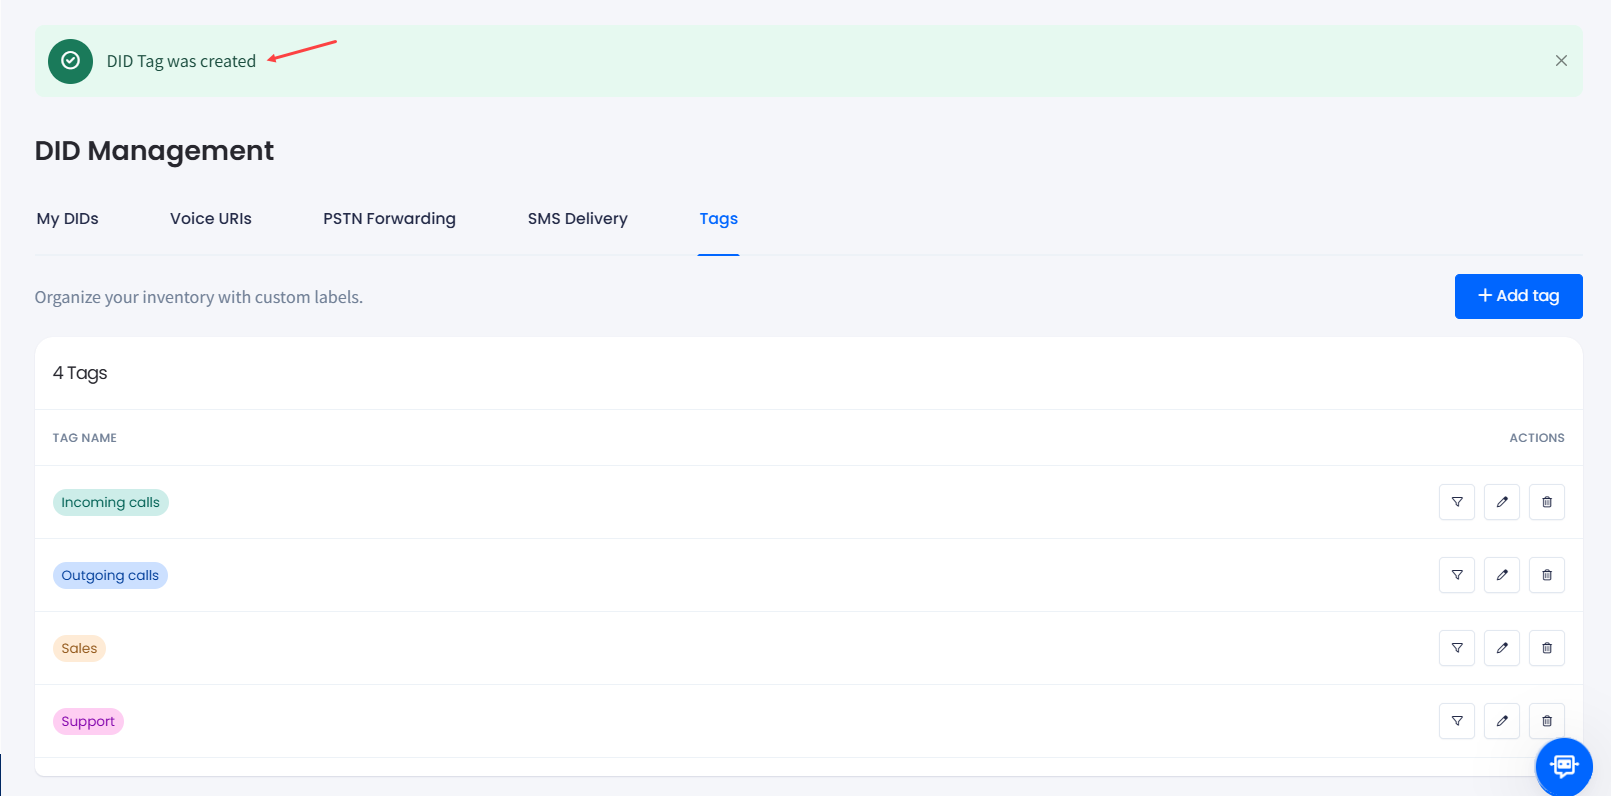
DID number tag created
Adding Tags to DID Numbers
To assign a tag to a DID number:
-
Open the My DIDs tab.
-
In the My DIDs table, use the checkbox on the left or select the needed number by applying search filters at the top right of the DID Management page.
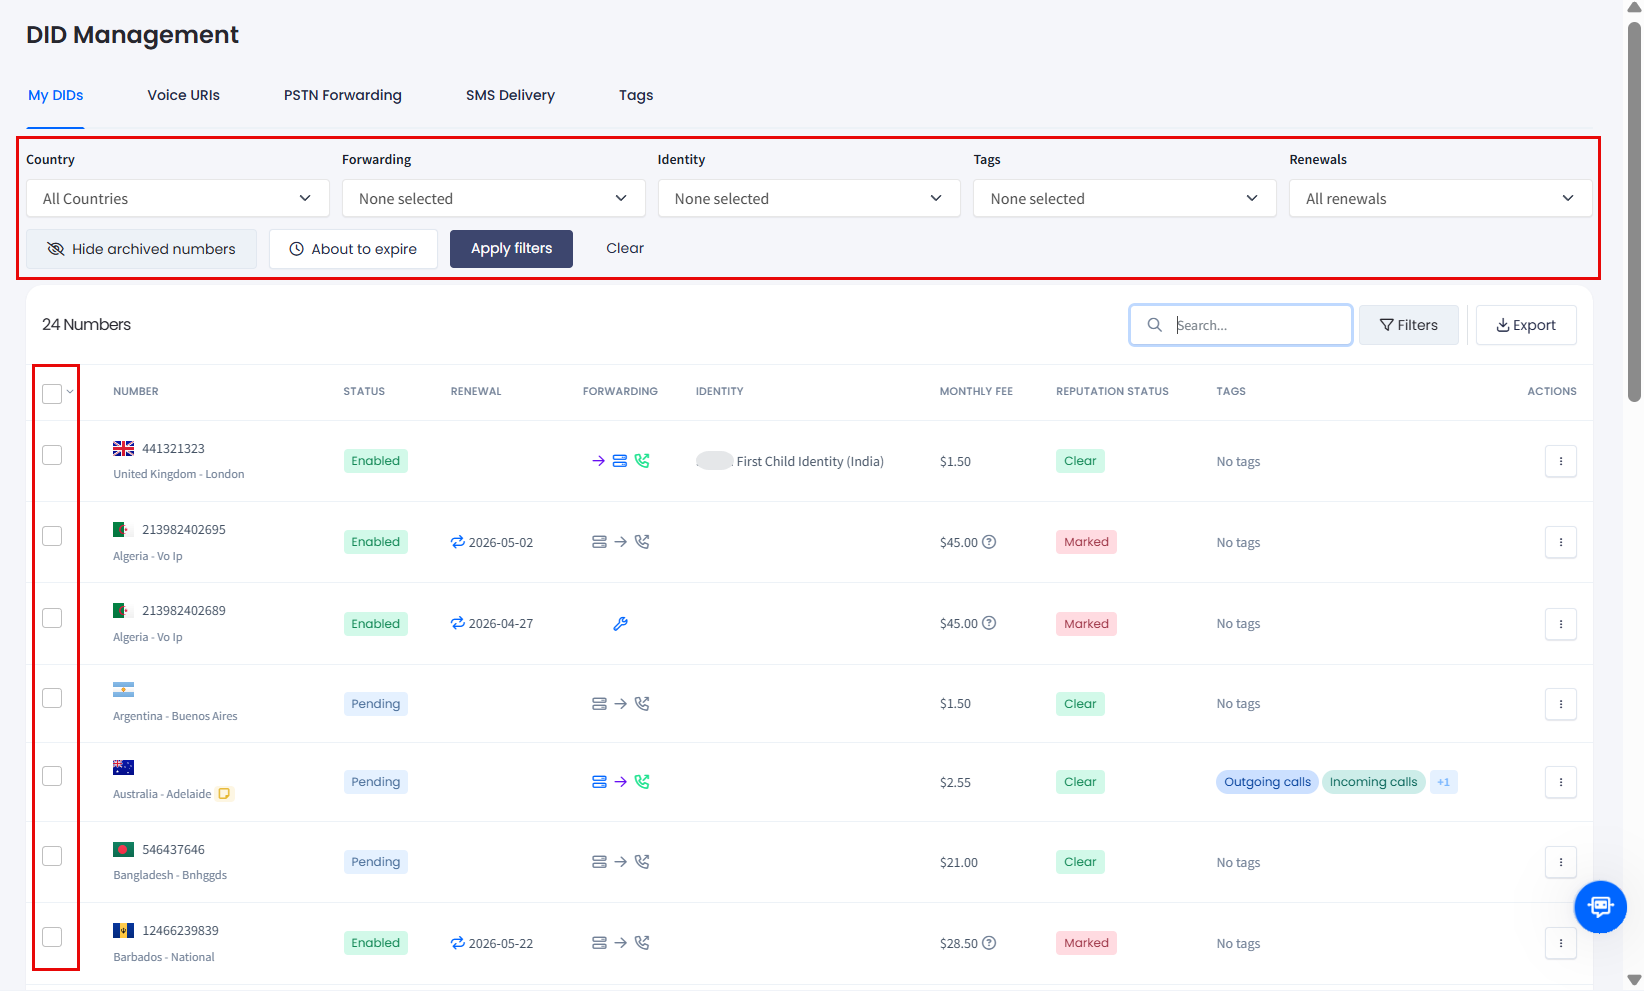
Filtering or selecting DID numbers
-
Click the three-dot action icon for the needed number and select the Manage tags action.
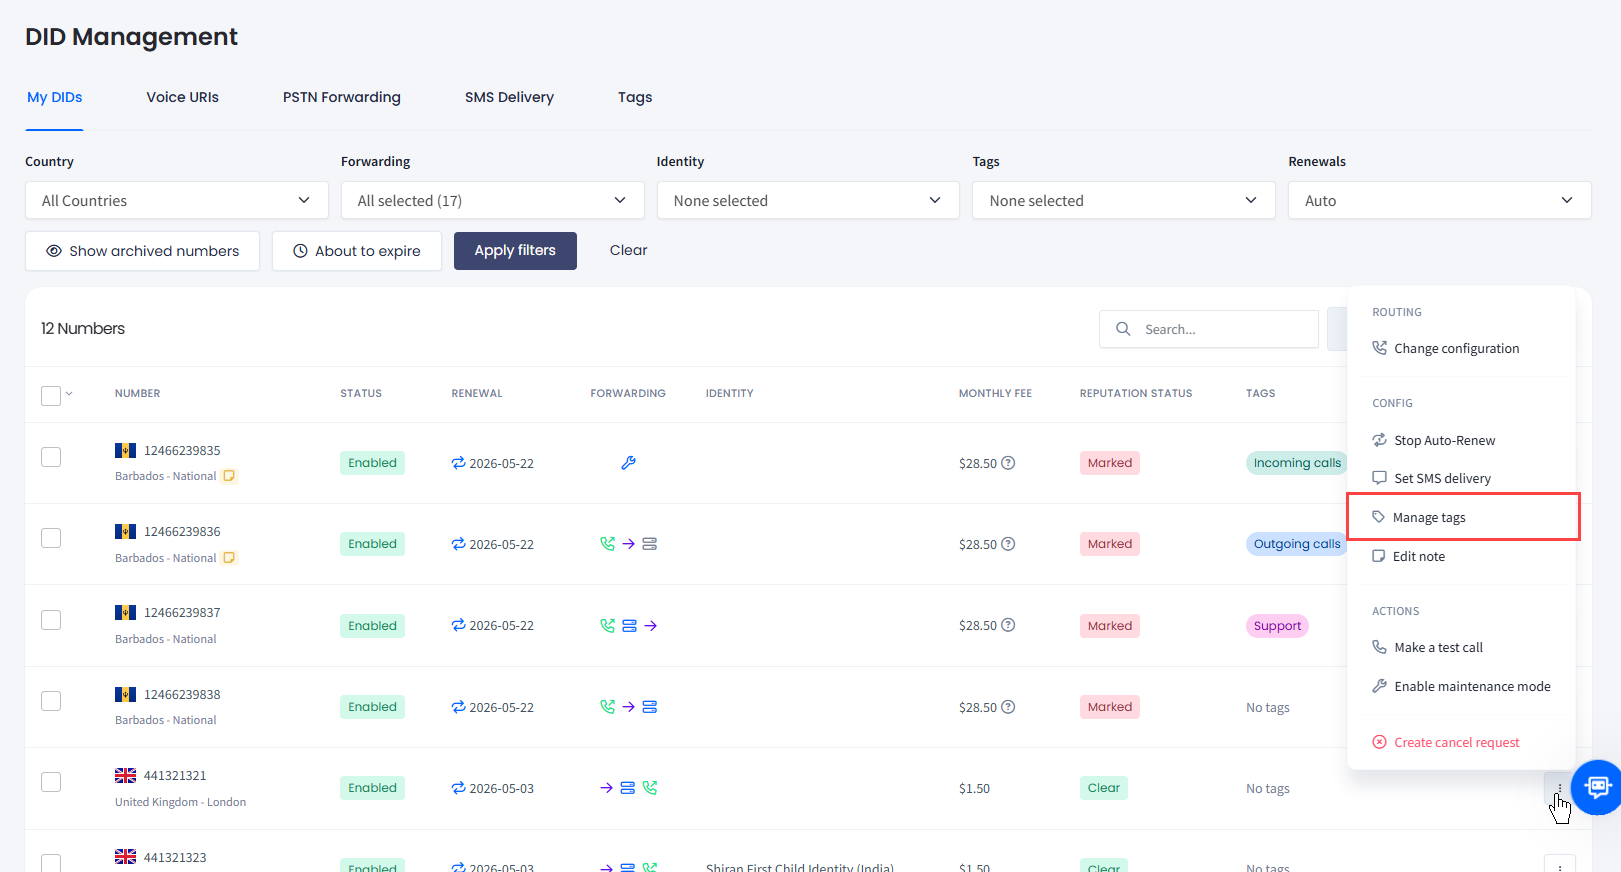
Selecting Manage tags action
NOTEYou can also apply this action across multiple DIDs. For more details, check the Managing Multiple DIDs article.
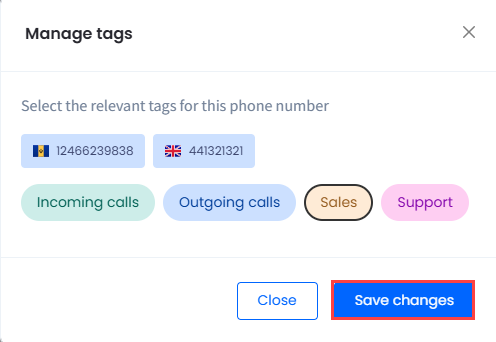
- In the Manage tags window, select the tag (or tags) you want to apply and click Save Changes.
Applying changes to the selected DID numbers
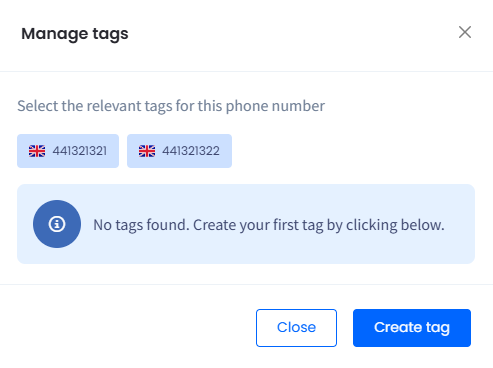
NOTEIf no tags are created under your account, you will get the following message:
No tags found message
- In a moment, you can see the updated tags list applied to the DID numbers.

Tag added to the DID numbers
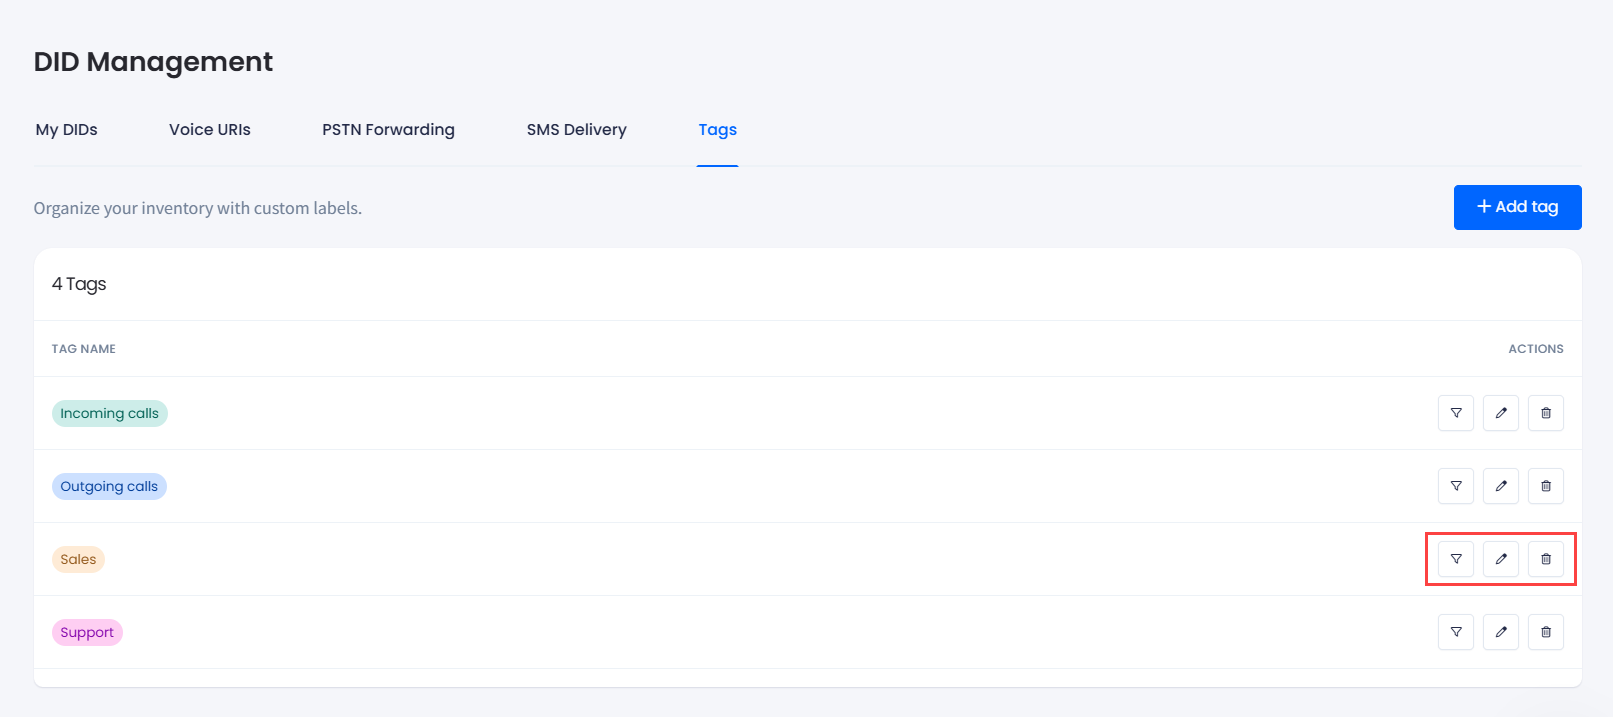
Managing Tags
You can apply the following actions to manage your DID number tags:
Tags actions
- Filter DIDs: click to open the DID Management tab with the DID records filtered by this tag.

DID records filtered by this tag
- Edit: click to open the Edit tag side menu.
- Delete: click to delete the tag record.