External DID Numbers
Connect virtual numbers from other providers to your CommPeak account and manage them from one inventory.
Use the External DID Numbers page to connect Direct Inward Dialing (DID) numbers you own through other providers, forward their calls to CommPeak's SIP servers, and manage them alongside your CommPeak inventory.
CommPeak DIDs vs External DIDs: What's the same and what's differentManaging external DID numbers works much like managing your CommPeak DIDs. You can apply many of the same actions - forwarding incoming calls to your DIDs, adding tags, enable/disable maintenance mode, and test calls - from a familiar interface. The range is narrower, though: CommPeak account-managed features such as Auto-renewal, Identities, Monthly fee tracking, SMS delivery, and Reputation checks apply only to CommPeak-issued DIDs and aren't available for external numbers.
External DID numbers are virtual numbers you purchased outside CommPeak. Once you forward their calls to CommPeak's SIP servers and verify them in My CommPeak, you can use the following CommPeak features and manage them next to your CommPeak DIDs:
- configuring Voice URI routing
- setting Up PSTN
- setting up inbound calls on SIP account
- creating and managing tags
- making test calls
- enabling/disabling maintenance mode.
To open the External DID Numbers page:
- Expand DIDs in the menu on the left.
- Click External Numbers.
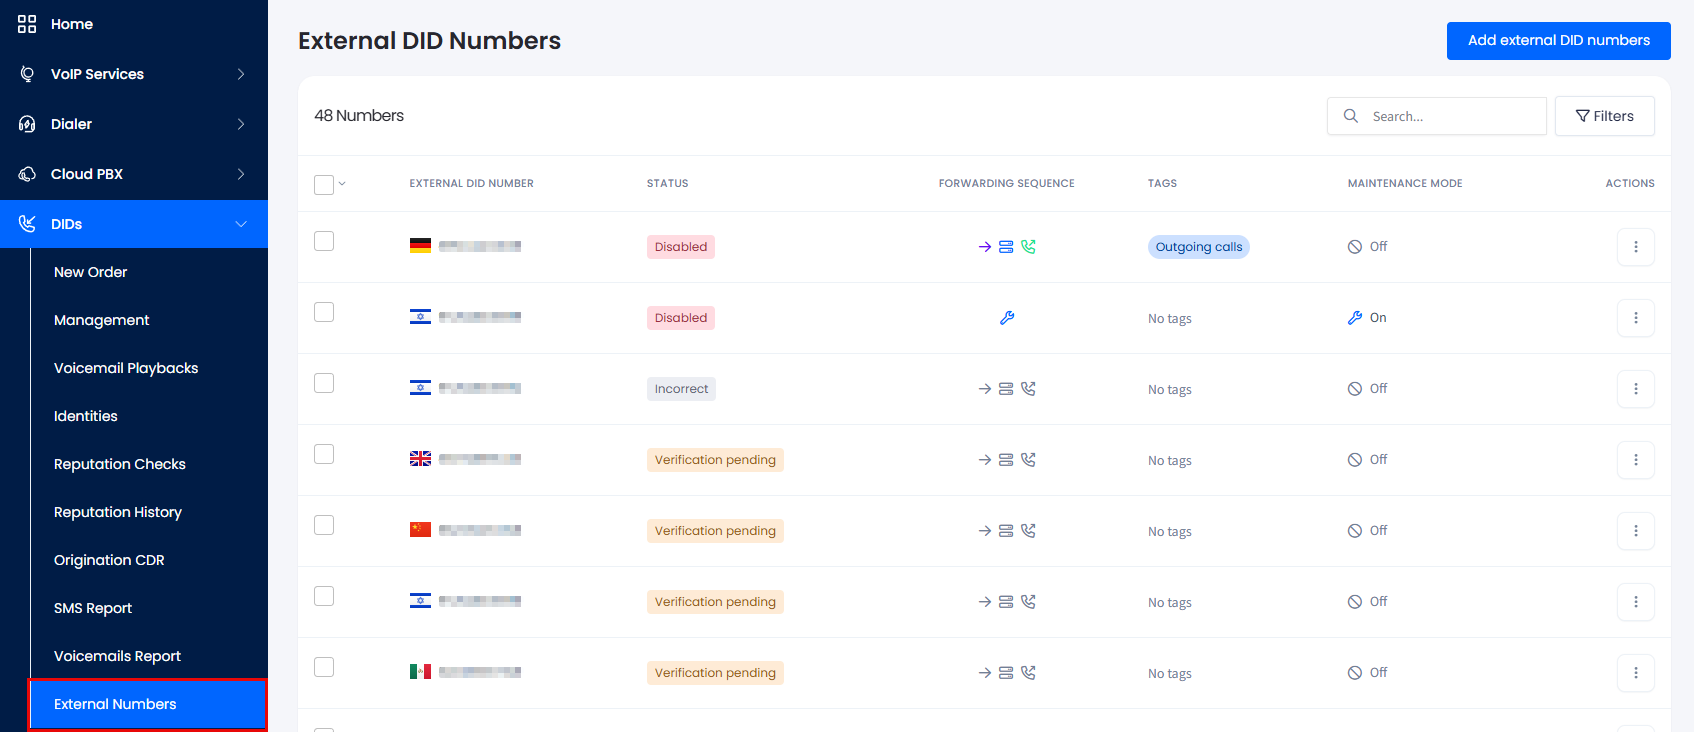
External Numbers in the DIDs menu
IMPORTANTBefore you add and manage external DIDs in My CommPeak, set up call forwarding on your provider's side and verify the numbers with CommPeak. For the full setup workflow, see the DID Verification: How to Verify Your External Caller IDs article.
External DID Numbers table
The External DID Numbers table lists every third-party DID you've added to your CommPeak Account, with the number of entries shown above the table.
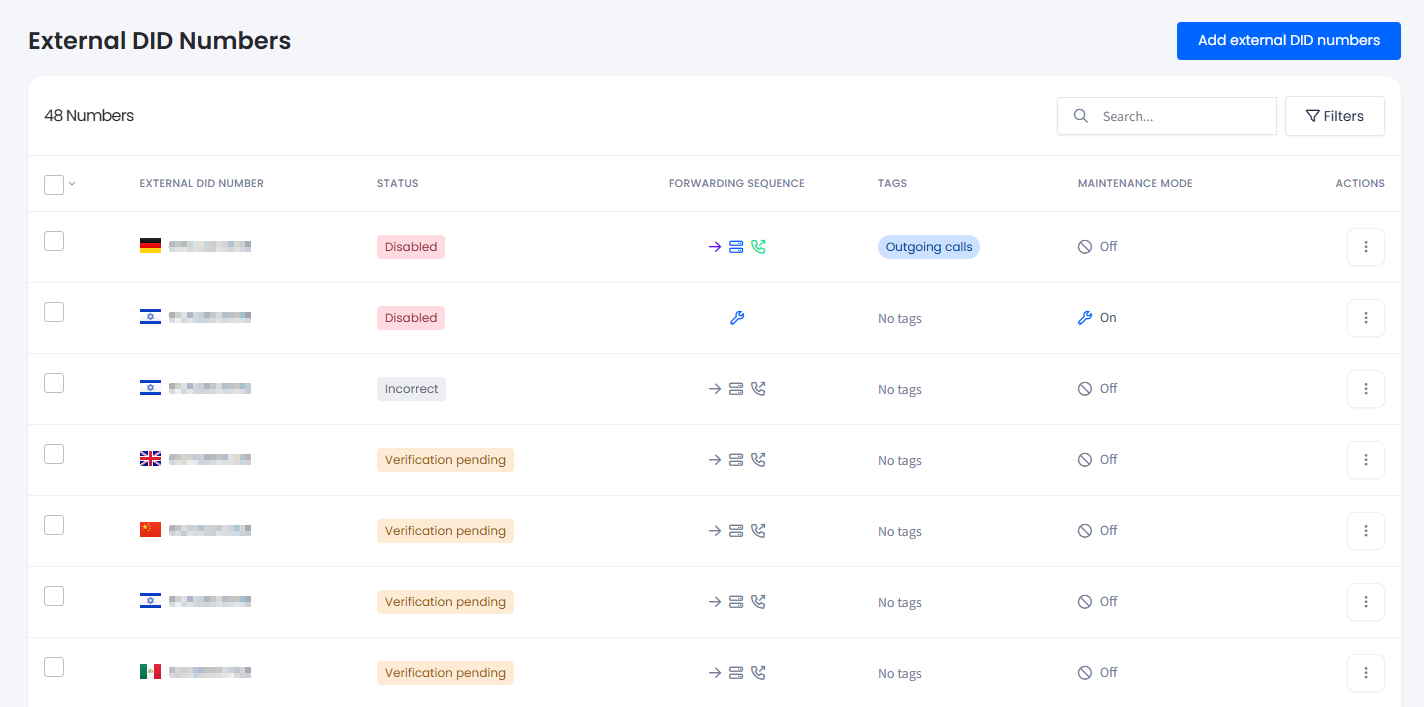
External DID Numbers page
Refer to the following table for column descriptions:
| Column | Description |
|---|---|
| External DID Number | The phone number in international E .164 format, including its country flag. |
| Status | The current state of the external DID in your inventory. External numbers can have one of these statuses: New, Incorrect, Verification pending, Verification failed, Verified, or Disabled. See the Status values section below for what each status means and when it appears. |
| Forwarding Sequence | The forwarding destinations that route incoming calls on your external DID(s), arranged in the specified order. Colored icons indicate whether the number routes via URI, SIP, or PSTN. If the forwarding icon is grey, this specific option is disabled. |
| Tags | Tags created for the external numbers in your CommPeak Account. Learn more in the Creating Tags and Assigning Them to DID Numbers article. |
| Maintenance Mode | Indicates whether Maintenance mode is On or Off for the number. |
| Actions | Click the three-dot icon to select an action from the list and perform further steps. |
Status Values
An external DID number progresses through the following statuses:
| Status | Description |
|---|---|
| New | You added the number to your inventory, but verification hasn't started yet. |
| Incorrect | The number didn't pass initial validation - for example, it's not in E.164 format or it's routed to a destination restricted for your account. |
| Verification pending | CommPeak is waiting to confirm forwarding through a test call. |
| Verification failed | The verification test call didn't reach CommPeak's SIP servers. Check provider-side forwarding to |
| Verified | The number is fully verified and active. You can apply routing, tags, maintenance mode, and test calls. |
| Disabled | The number no longer routes incoming calls through CommPeak. Disabling deactivates it in your CommPeak inventory. |
Searching and Filtering
Use the Search field at the top right of the table to find a specific number, or click Filters to narrow the list.
To filter the list:
- Click Filters at the top right of the table.
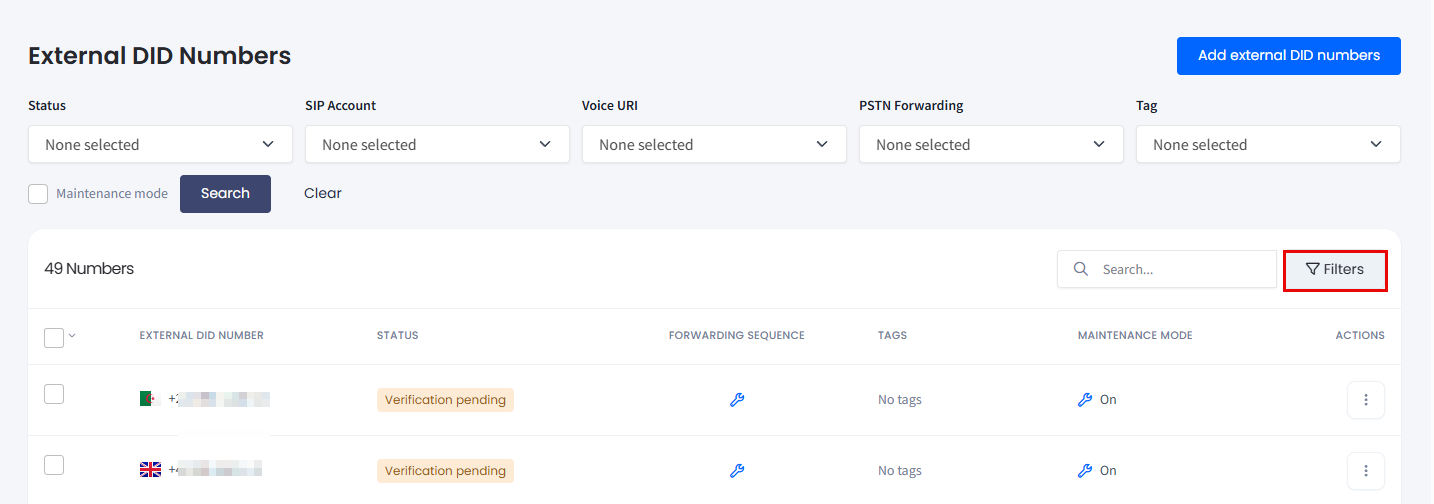
Filters panel
- Use the drop-down lists to filter by one or more of the following:
| Filter | Description |
|---|---|
| Status | Show numbers in one or more statuses (New, Incorrect, Verification pending, Verification failed, Verified, Disabled). Use the search field inside the drop-down to find a specific value, or Select all. |
| SIP Account | Show numbers routed to a specific SIP account. |
| Voice URI | Show numbers routed to a specific voice URI destination. |
| PSTN Forwarding | Show numbers forwarded to a specific landline or mobile number. |
| Tag | Show numbers carrying a specific tag. |
- To additionally sort by numbers with the maintenance mode enabled, check the corresponding checkbox.
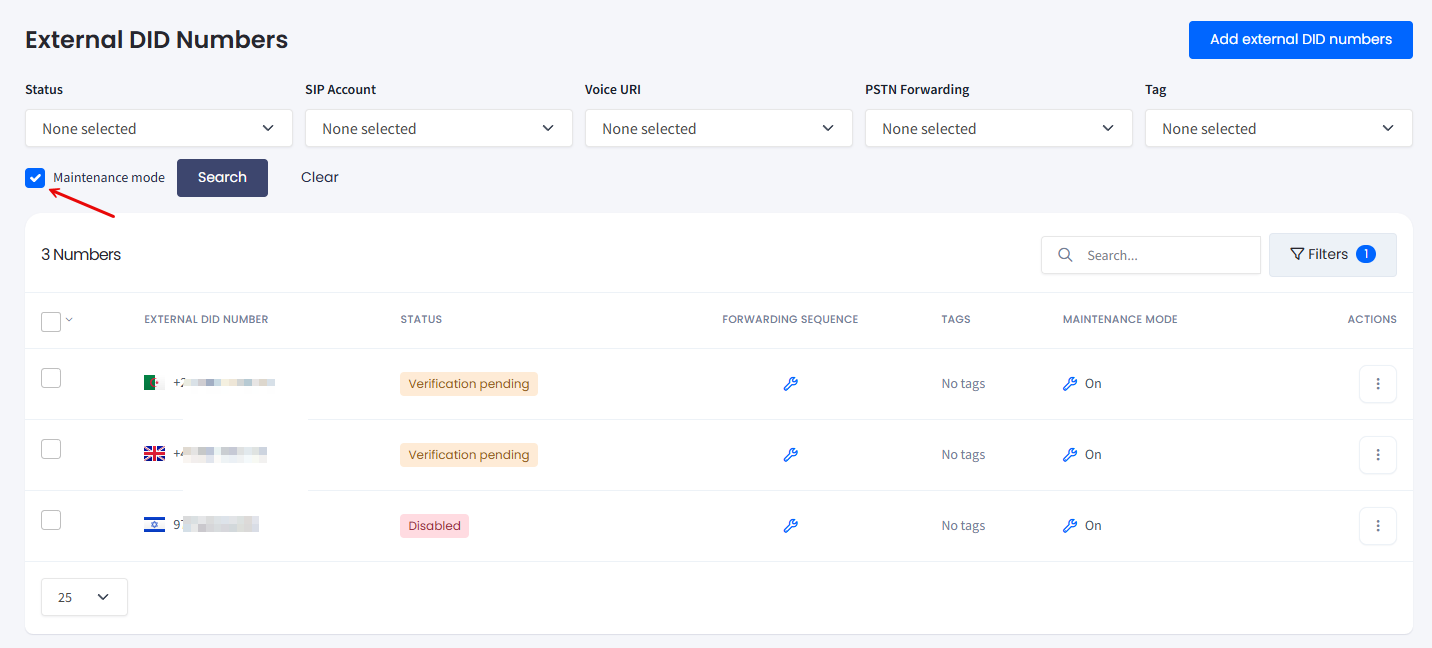
External numbers with the maintenance mode enabled
- The Filters button shows a counter with the number of active filters.
- To start filtering, click Search.
- To remove all filters, click Clear.
Adding External DID Numbers
Adding an external number is a three-step process: confirm SIP forwarding is in place, upload or enter the numbers, and verify them through a test call.
BEFORE YOU STARTConfigure call forwarding for every external DID on your provider's side before adding it in My CommPeak. Forward each call to
sip:{e164}@out.commpeak.com, replacing{e164}with the full number in E.164 format (for example,sip:[email protected]). Without this, verification will fail.
To add external DID numbers:
- Open the External Numbers page.
- Click Add external DID numbers at the top right.
- Review the SIP forwarding requirements. When call forwarding is in place on your provider's side, select I configured DIDs according to requirements and click Proceed to verification.
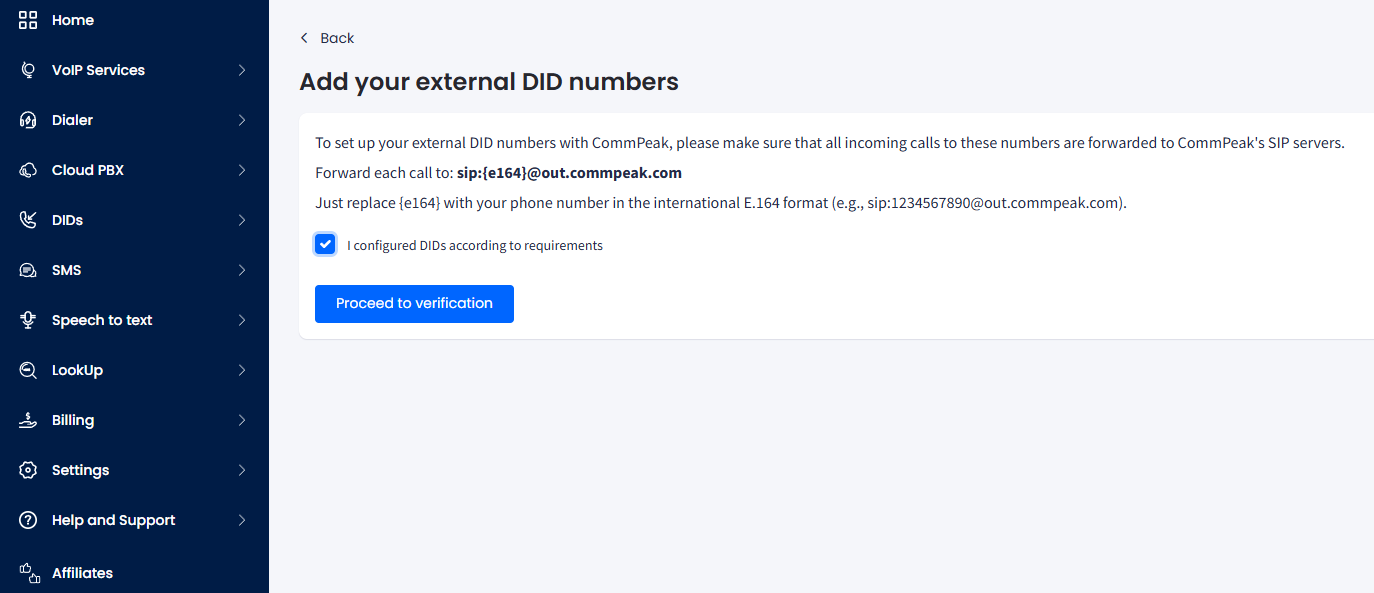
SIP forwarding requirements
-
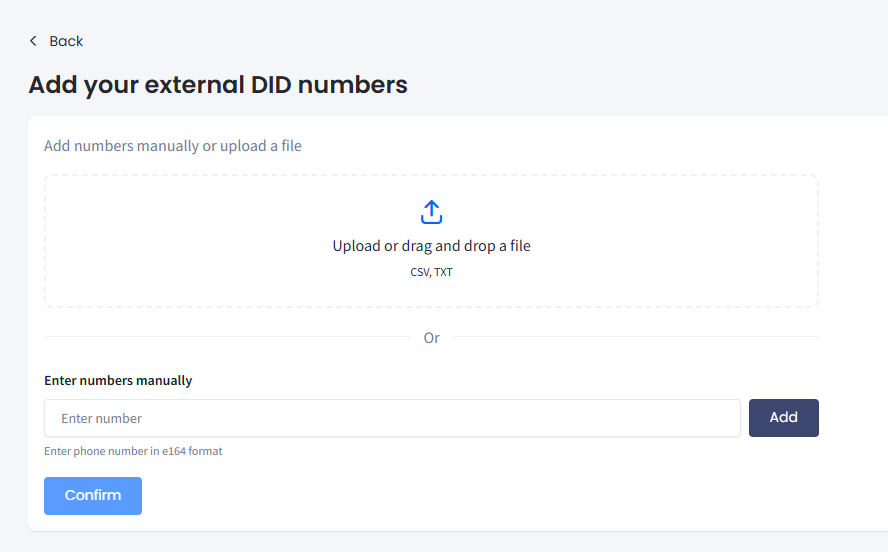
Add the numbers either by uploading a file or by entering them manually:
- Upload a file: drag and drop a
.csvor.txtfile into the upload area, or click the area to browse. - Enter numbers manually: type a number in E .164 format in the Enter number field and click Add. Repeat for each number you want to register.
- Upload a file: drag and drop a
Adding numbers manually or via file upload
NOTEFor .txt or .csv uploads, the system requires a one number per line format.
- Click Confirm.
- Review the validation results. CommPeak sorts your entries into Valid number and Invalid number lists.

Validation results
NOTEIf your list includes numbers flagged as invalid or routed to a destination that's restricted for your account, contact CommPeak support to continue the verification process for those numbers.
- Select I have configured DIDs properly, let's proceed to verification (real call will be performed) and click Proceed to verification.
IMPORTANTWhen you proceed, CommPeak places a real call to each valid number to verify the forwarding setup. Make sure your provider-side forwarding is live before you confirm.
- A success message confirms that CommPeak has accepted your numbers for creation.

External DID Numbers accepted for creation message
- The new entries appear in the External DID Numbers table with the status Verification pending until the test call completes.
Managing External DID Numbers
External DIDs: Actions
After a number is verified, use the three-dot Actions icon at the right of its row to update routing, configuration, or status. The menu is grouped into three sections: Routing, Config, and Actions.
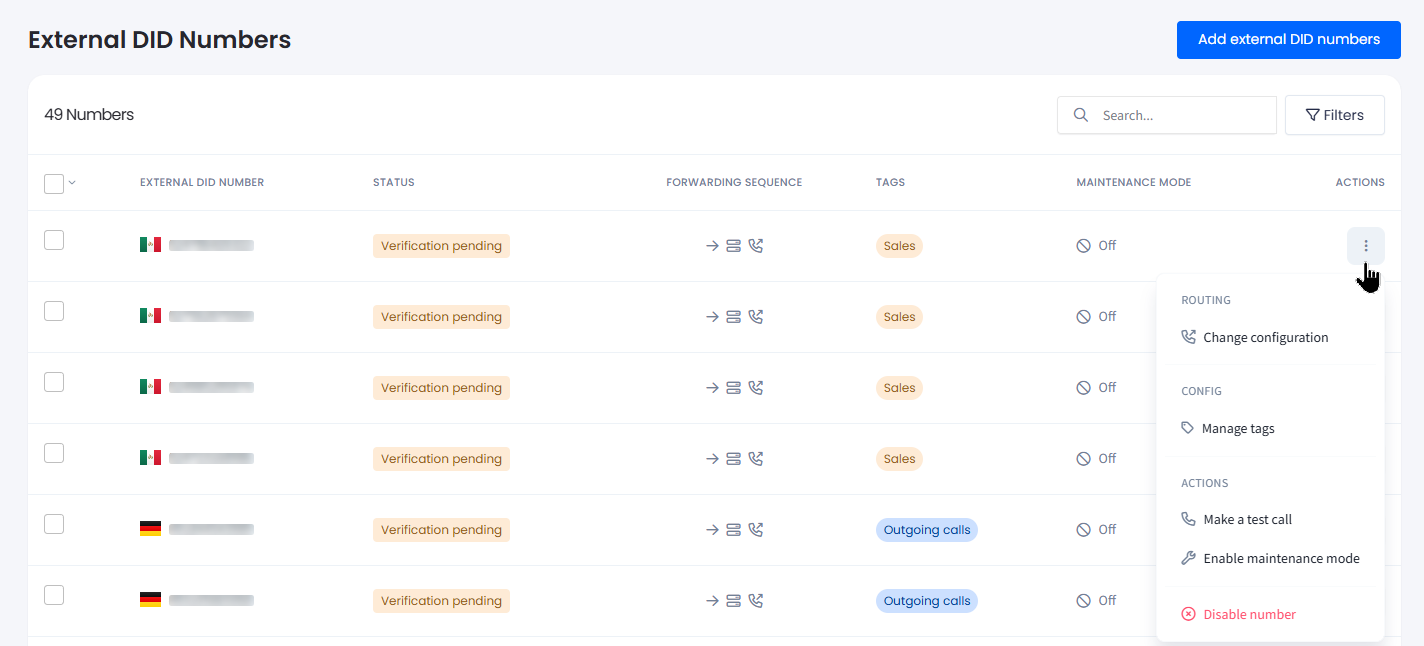
Actions menu grouped by Routing, Config, and Actions
Refer to the following table for action descriptions:
| Action | Description |
|---|---|
| Change configuration | Modify forwarding destinations and their priority. Set call forwarding to your SIP account, voice URI, or a landline or mobile number. |
| Manage tags | Create and manage tags assigned to the external DID number. |
| Make a test call | Simulate an incoming call within CommPeak cloud infrastructure to verify connectivity with no external phone required. |
| Enable maintenance mode | Switch the number into maintenance mode to run test calls without changing its permanent settings. When enabled, the Maintenance Mode column shows On. |
| Disable number | Deactivate the number in your CommPeak inventory. The number's status changes to Disabled and incoming calls are no longer routed through CommPeak. |
IMPORTANTDisable number is destructive: it stops CommPeak from routing incoming calls on the number.
Confirm whether re-enabling requires running the verification flow again before disabling in production.
Managing Multiple External DIDs
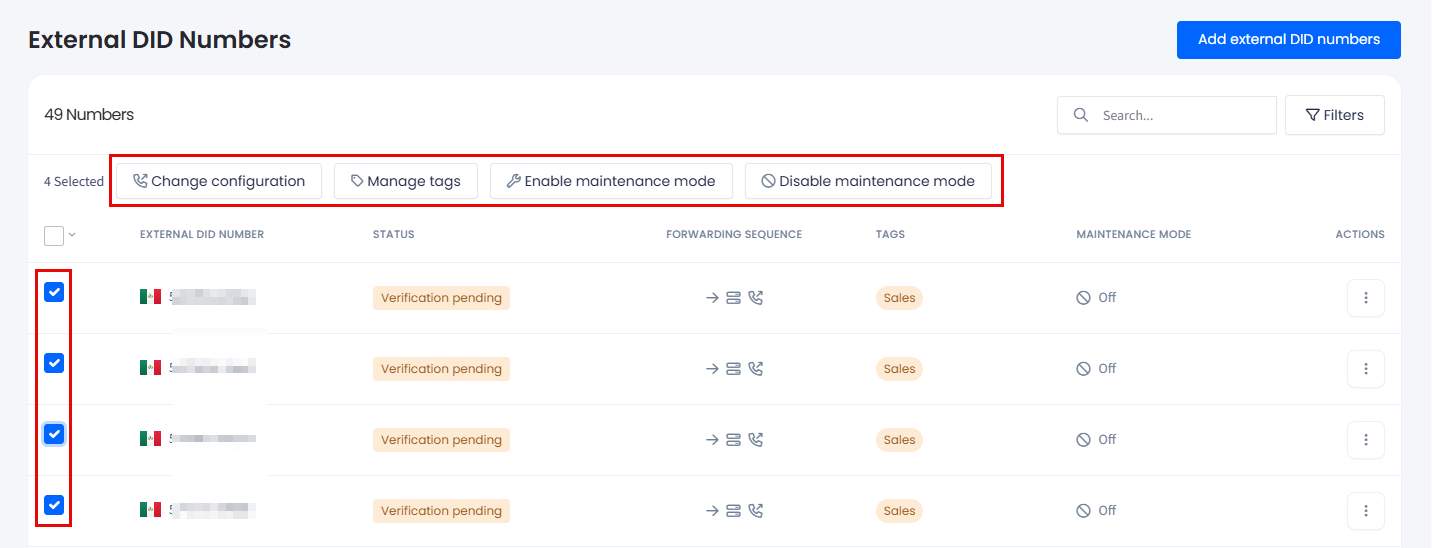
You can apply the following actions to multiple external DID numbers at once:
- Change configuration
- Manage tags
- Enable maintenance mode or Disable maintenance mode
To apply the needed action, select the checkboxes on the left of each row, then use the bulk action controls above the table.
Bulk action controls
NOTEFor more details, see the Managing Multiple DIDs article.
Note that bulk actions for external DID numbers differ from those of CommPeak DIDs' described.
Updated 27 days ago