Creating OTP Streams
This article will walk you through creating an OTP SMS stream step by step.
Video Tutorial
The Streams API in the CommPeak multi-channel messaging platform provides OTP routes that deliver one-time passwords to users.
To start creating an OTP SMS stream:
- Log in to TextPeak in your browser.
- Click Streams API in the main menu on the left.
- On the page that opens, click Create Stream API.

Create Stream API button
- Then, expand SMS and choose SMS OTP in the pop-up window.

Stream type options: SMS OTP
The Create New Stream wizard will load. Fill in the necessary information to complete each step.
Step 1: Stream API Details
Start with entering stream details:
- Stream API name - enter a meaningful name to locate the stream quickly.
- Stream API description - provide more information that will be visible when you open the stream.
- Enable IPACL - optionally, select the checkbox to limit access to the stream. Then, in the Add IP field, add one or more IP addresses from which you will make API calls. To add an IP, enter it and click Add.
- Tags - create tags and apply them immediately to categorize your streams and quickly find the ones you need (optional). To add a tag, enter it in the field and then select from the drop-down list.
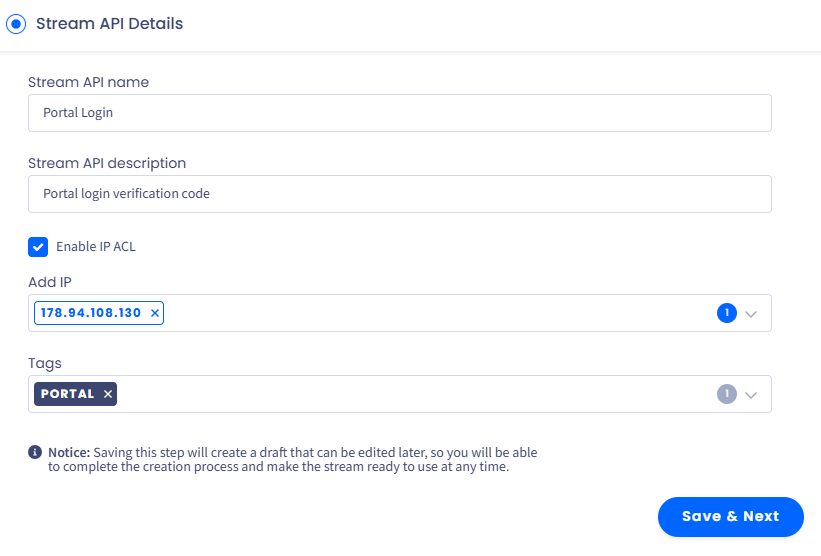
Stream API Details section
Click Save & Next to proceed to the next step.
NOTEYou can save the stream as a draft on each step and then complete the rest at any time later.
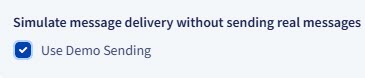
You can also enable the Demo Sending option to create a demo channel that simulates messaging flows without sending real messages. This option is available for any stream type and can be useful for testing and development use cases.
Enabling the Demo Sending option
NOTECheck the Creating Demo Channels section to learn more.
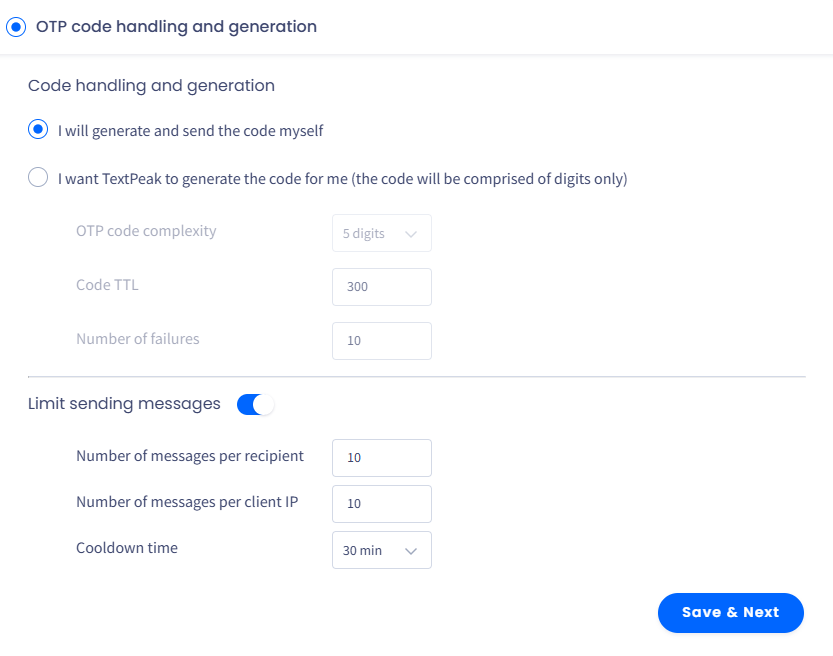
Step 2: OTP Code Handling and Generation
Select how you want to proceed with the OTP code generation.
OTP code handling and generation section
- Choose what you want to do about code generation:
- Under Code handling and generation select I will generate and send the code myself if you generate it yourself.
- If you want CommPeak to do it for you, select the other option and define the following:
- OTP code complexity - number of digits in the code
- Code TTL - code time-to-live
- Number of failures - the number of mistakes you allow the customer to make before disabling the code
- Enable the limit for sending messages using the toggle switch and set the following:
- Number of messages per recipient and Number of messages per client IP - limit for sending messages that will prevent the customer from spamming
- Cooldown time - if the sending limit is reached, the customer will need to wait this number of minutes before receiving a new message with a code
- Click Save & Next to proceed to the next step.
Step 3: Message Content
Create message content for this stream by adding one or more templates dedicated to certain events. Click the plus icon to expand the event creation section.
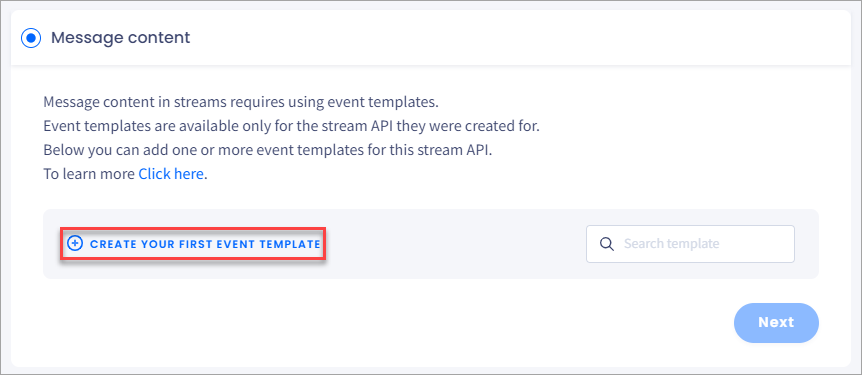
Message content section
-
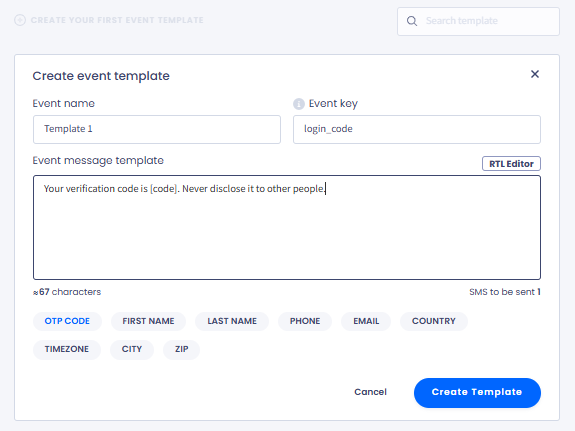
Enter event data:
- Event name - create a meaningful name to locate the event quickly.
- Event key is the key you will use on the request with this specific event template, so the values should be unique on the same stream. Click the information icon for reference on allowed characters.
- Event message template - enter text that will be sent to subscribers.
The UTF8 indicator will alert you if you use non-Unicode characters. The single SMS limit will decrease to 70 characters.
Below the message box, you can see tags. They are pulled from contact fields and used as variables to enable sending personalized messages. For example, you can add name tags, which will include the contact's first or last name in your message. You can also use the RTL Editor option to write messages in one of the RTL (Right to Left) languages, like Arabic or Hebrew.
IMPORTANTThe OTP CODE tag is required in event message templates.
-
To add a tag, place the cursor where your message is needed and click on the tag.
Create event template section
- Click Create Template.
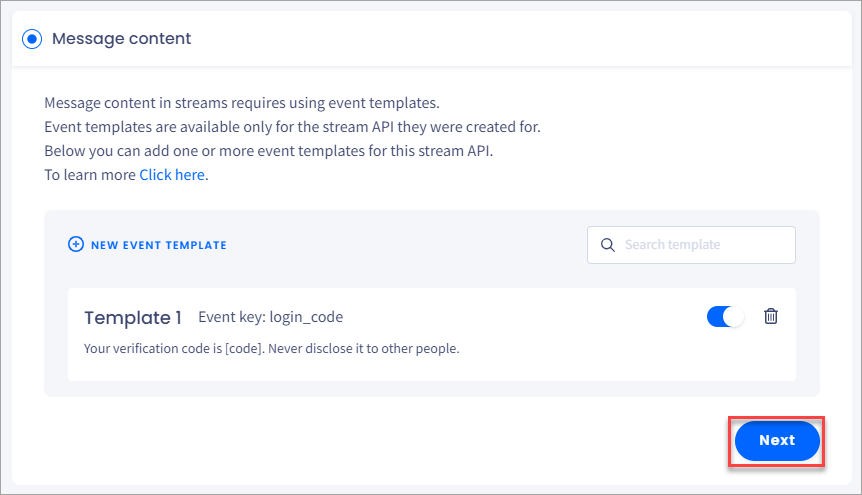
Message content section with template created
- Click Next to proceed to the next step.
NOTEYou can add as many event templates as you need to create a different text for each customer. Move the slider to enable or disable a template.
Step 4: Stream Summary
You can review stream details here.
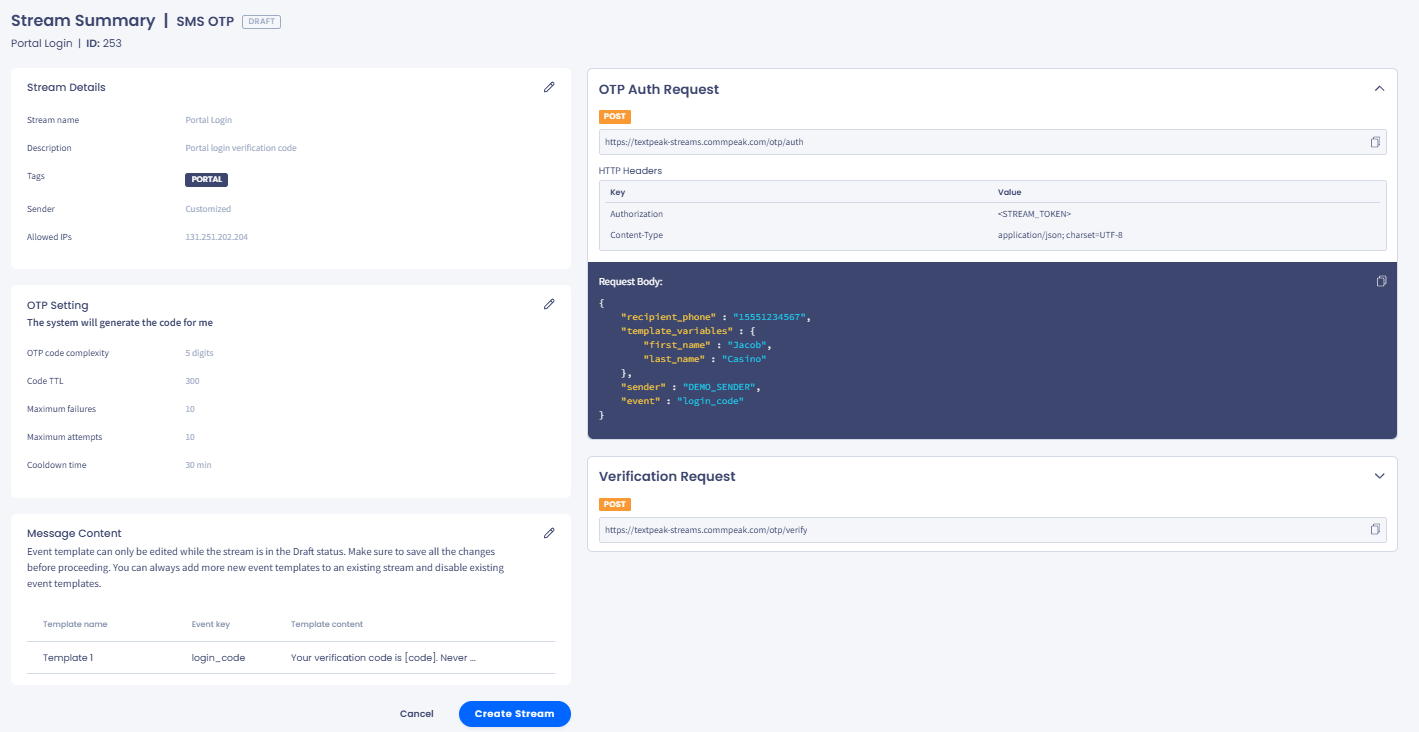
Stream Summary section
On the right, the API requests' preview is available. You can copy the endpoint or request body right away.
-
OTP Auth Request:
-
code is generated by CommPeak
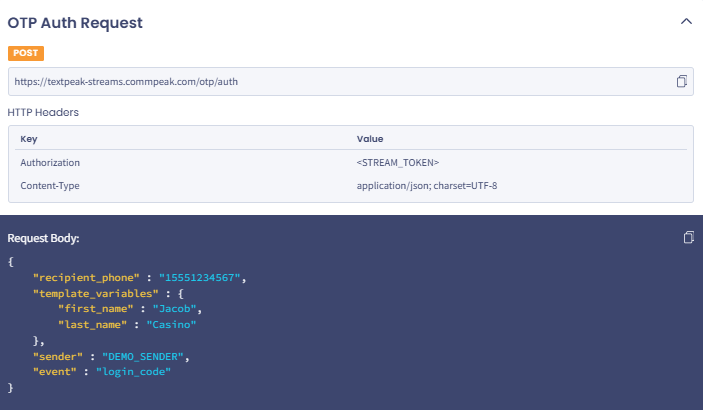
OTP Auth Request section with the Code Copy option
-
code is generated by you

OTP Auth Request section with code generated
-
-
Verification Request
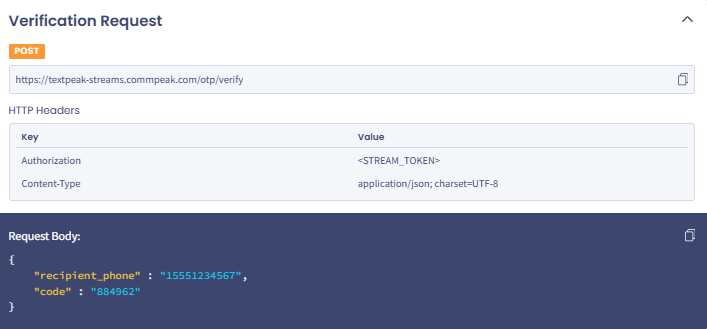
Verification Request section
After you click Create Stream, a pop-up appears. You can copy your authorization token here.

Stream IP was created successfully window
Finally, click Done. The new stream will appear at the top of your Streams API table.
Updated about 2 months ago