Zoho Click2Call
Instructions for integrating your Zoho CRM with CommPeak Click2Call, enabling seamless call functionality from within your CRM..
Here's a step-by-step guide to integrating your Zoho account with the CommPeak Dialer or Cloud PBX Click2Call using the CommPeak app. This setup will allow you to call your leads directly from Zoho CRM using your Softphone client or IP Phone.
Step 1: Install the Integration App
-
Start by connecting your CRM with CommPeak via Zoho One-Click Integration.
-
Enter your Zoho credentials to log in to your CRM account.
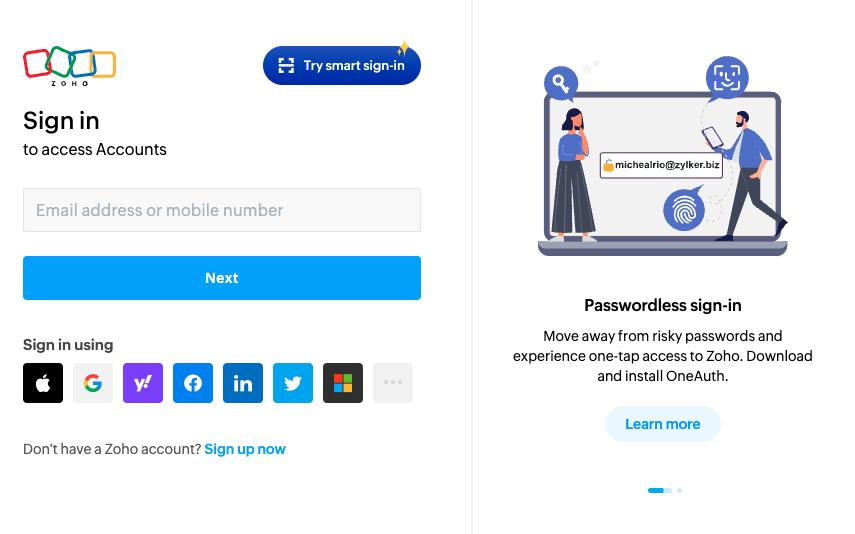
Zoho sign-in window
-
Choose a CRM production account to connect with CommPeak.
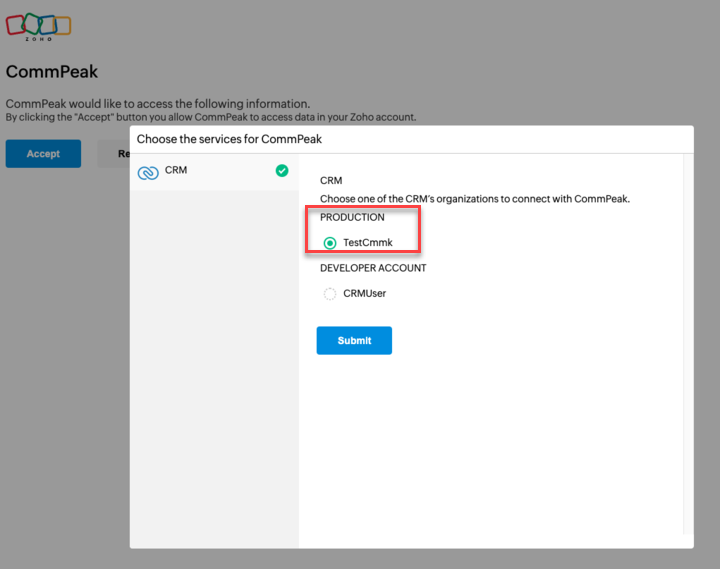
Choosing a CRM production account
-
Provide permissions to CommPeak to access your data - click Accept.
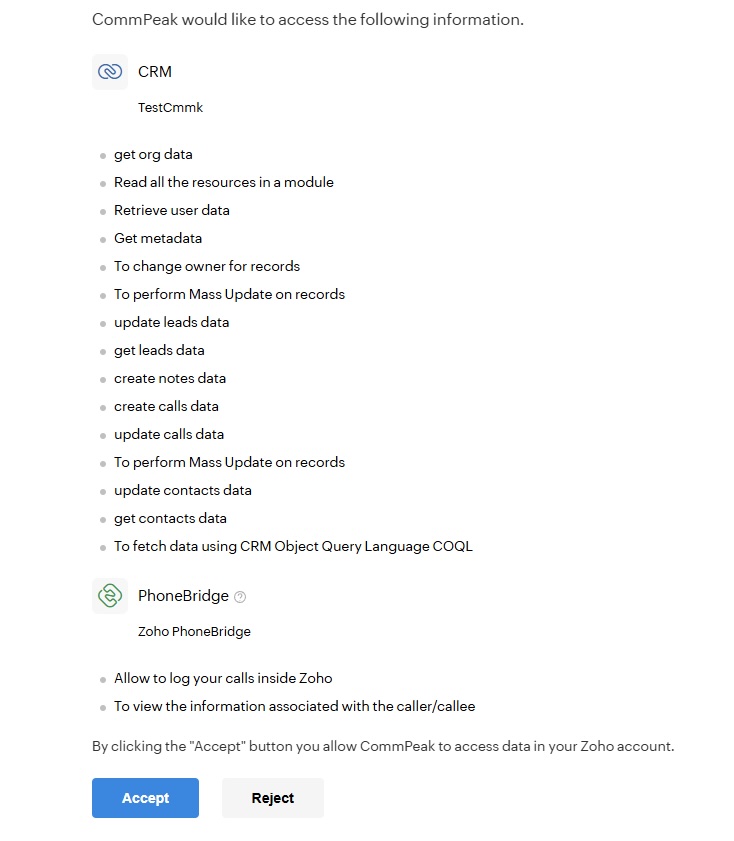
Granting access to CommPeak
Understanding Zoho permission requirementsThis scopes set allows CommPeak to:
✔️ Read and update leads and contacts.
✔️ Assign leads and contacts to specific users.
✔️ Create and update call and note records.
✔️ Execute complex queries using COQL.
✔️ Integrate with Zoho PhoneBridge for realtime call logging and searching (C2C)- org.READ: Grants permission to read organization-level information. Identifies the customer’s unique ID within Zoho CRM. Allow CommPeak to identify customer Unique ID in our system.
- modules.READ: Grants read access to all module data in Zoho CRM. Allows reading records from all standard and custom modules (e.g., Leads, Contacts, Deals). Needed to sync data or display it within CommPeak.
- users.READ: Grants permission to list all users in the Zoho CRM account. Needed to sync Zoho CRM users with CommPeak.
- settings.READ: Grants permission to read CRM settings and metadata. Allows fetching metadata such as field definitions, picklists, and custom settings. Needed to sync leads / contacts special fields metadata.
- change_owner.CREATE: Grants permission to change the owner of a record (e.g., lead). Needed to assign leads or contacts to a specific user within Zoho CRM.
- mass_update.Leads.UPDATE: Grants permission to update multiple lead records simultaneously. Enables batch updates for lead status and phone numbers.
- modules.Leads.UPDATE: Grants permission to update individual lead records. Allows updating fields like lead status, phone number, and other lead data. Needed to sync real-time changes from your product to Zoho CRM.
- modules.Leads.READ: Grants permission to read all lead records. Enables fetching the list of leads and their data. Needed for displaying lead information.
- modules.Notes.CREATE: Grants permission to create notes on records. Allows adding comments or notes to leads. Helps maintain a history of interactions with leads.
- modules.Calls.CREATE: Grants permission to create call records. Allows logging call records (CDR) after a call with a lead. Helps maintain a history of interactions with leads.
- modules.Calls.UPDATE: Grants permission to update call records. Allows updating call status or details after a call with a lead. Helps in adding follow-ups or tagging calls with outcomes.
- coql.READ: Grants permission to fetch data using the CRM Object Query Language (COQL). Needed for complex or custom queries to fetch specific records or metrics. Useful for generating reports or analyzing data.
- mass_update.Contacts.UPDATE: Grants permission to update multiple contact records simultaneously. Enables bulk updates of contact status and phone numbers. Useful for data migration or regular updates.
- modules.Contacts.UPDATE: Grants permission to update individual contact records. Allows updating contact details like phone numbers. Ensures real-time synchronization of contact data.
- modules.Contacts.READ: Grants permission to read all contact records. Enables fetching a list of contacts and their data. Needed for displaying contact information within CommPeak.
- PhoneBridge.call.log: Grants permission to log call activity through the PhoneBridge API. Allows logging click-to-call (Click2Call) activity. Used for tracking call history and linking it to CRM records.
- PhoneBridge.zohoone.search: Grants permission to search data within Zoho CRM using the PhoneBridge API. Needed for searching records (e.g., leads, contacts) during a call. Allows displaying customer information in real-time during calls.
-
Enter your CommPeak Portal account credentials, verify that you are human, and click Login.
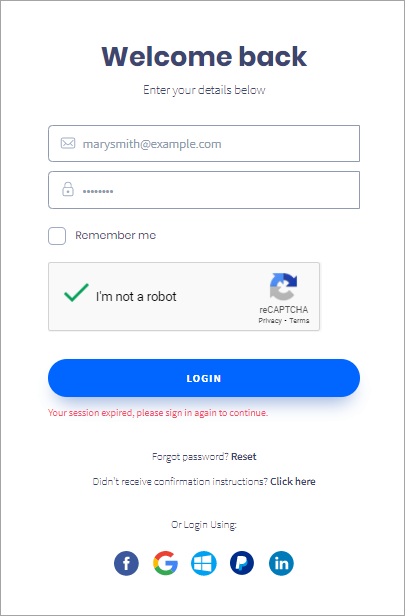
Entering CommPeak credentials
- Select your CommPeak account and then click Authorize.
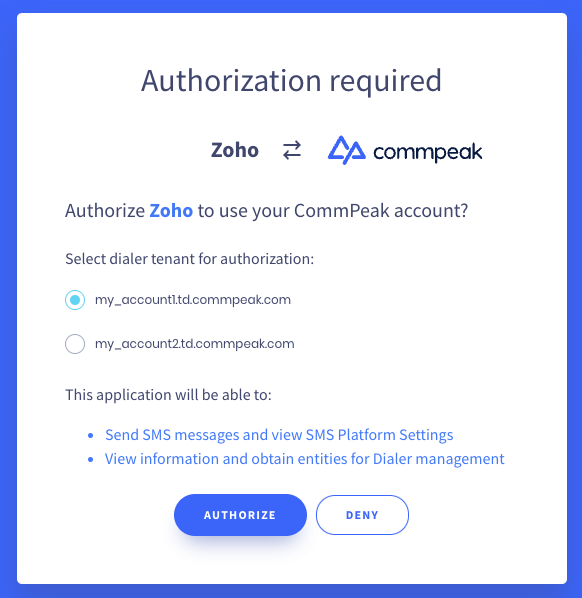
Authorizing Zoho
- The system will redirect you to the CommPeak Portal home page.
✔️ Congratulations! The installation is complete.
Step 2: Add Click2Call Integration
-
In your CommPeak Dialer or Cloud PBX, go to Settings > Click2Call Integrations and click Create New Click2Call.
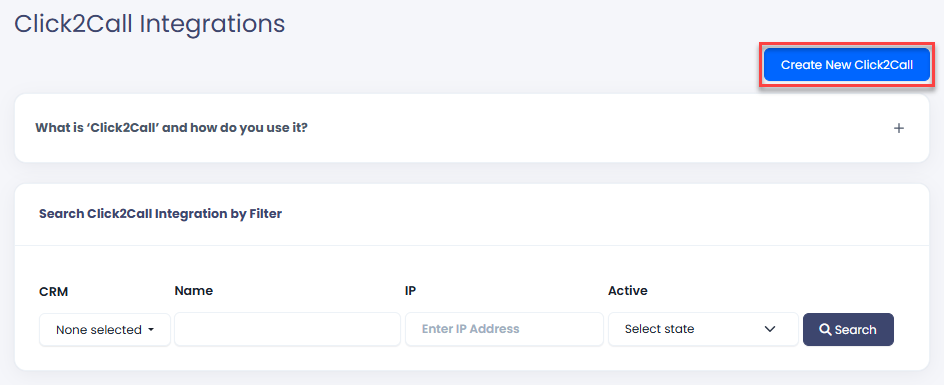
Create New Click2Call button
-
Enter data for your new integration:
-
Click2Call General Information:
-
Click2Call name: specify the name of your integration to be able to find it in the list.
-
CRM name: select Click2Call Zoho.
-
Allowed IPs: enter the IP addresses you want to authorize for Click2Call integration, separated by commas.
-
Activate Click2Call: use the toggle to activate the integration or turn it off as needed.
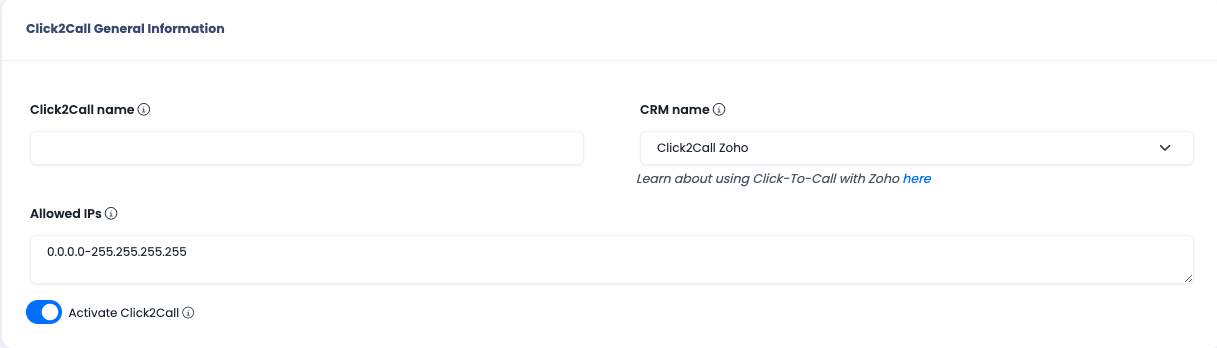
General information about Click2Call
-
-
Zoho Information:
-
Zoho Companies: select the option available after the installation in Step 1.
-
Zoho mapping agents: connect your remote Zoho agents to CommPeak Dialer or Cloud PBX agents. Here, you can set which user extension rings when your agent initiates a Click2Call in Zoho CRM.
-
Custom Click2Call Fields for Call Records List (CDRs): these are parameters available for updates on the Zoho side. Contact the support team or your account manager if you want to add any parameters here.
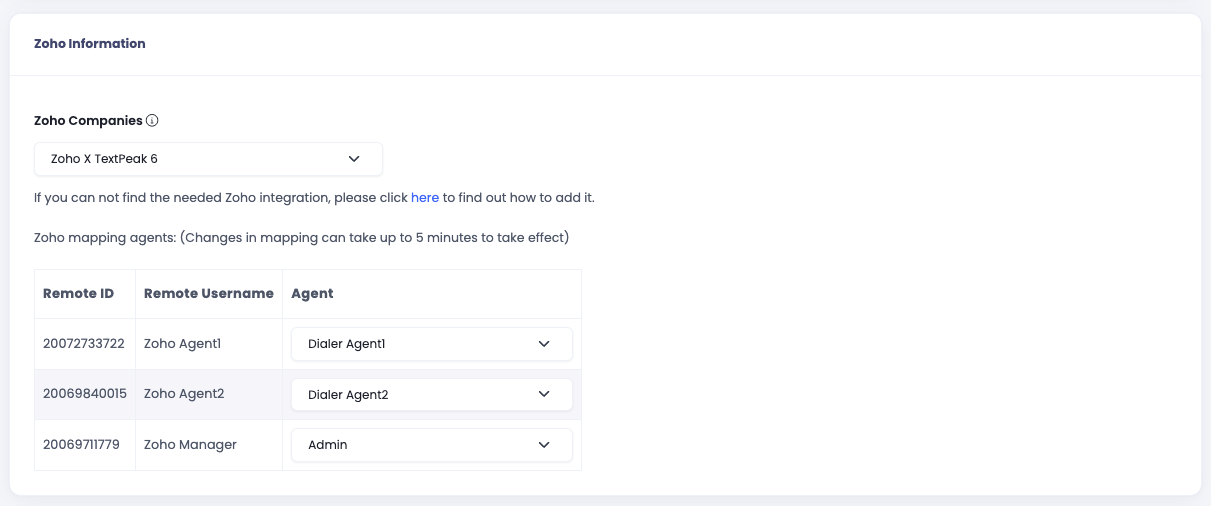
Zoho information
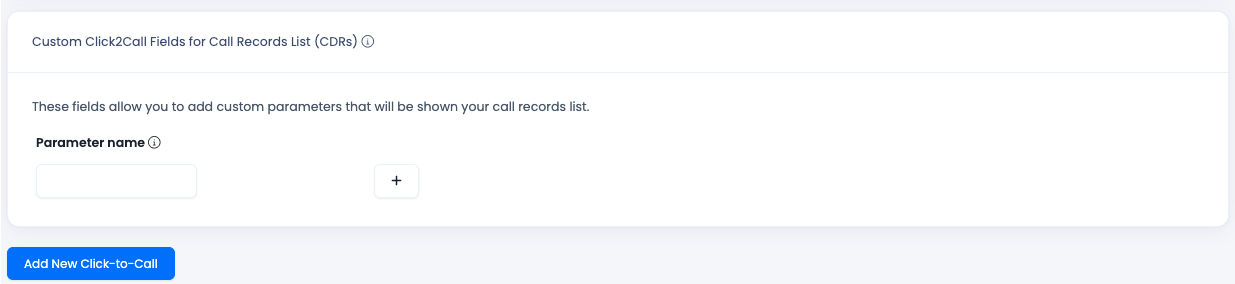
Fields for adding custom parameters
-
-
-
Click Add New Click-to-Call.
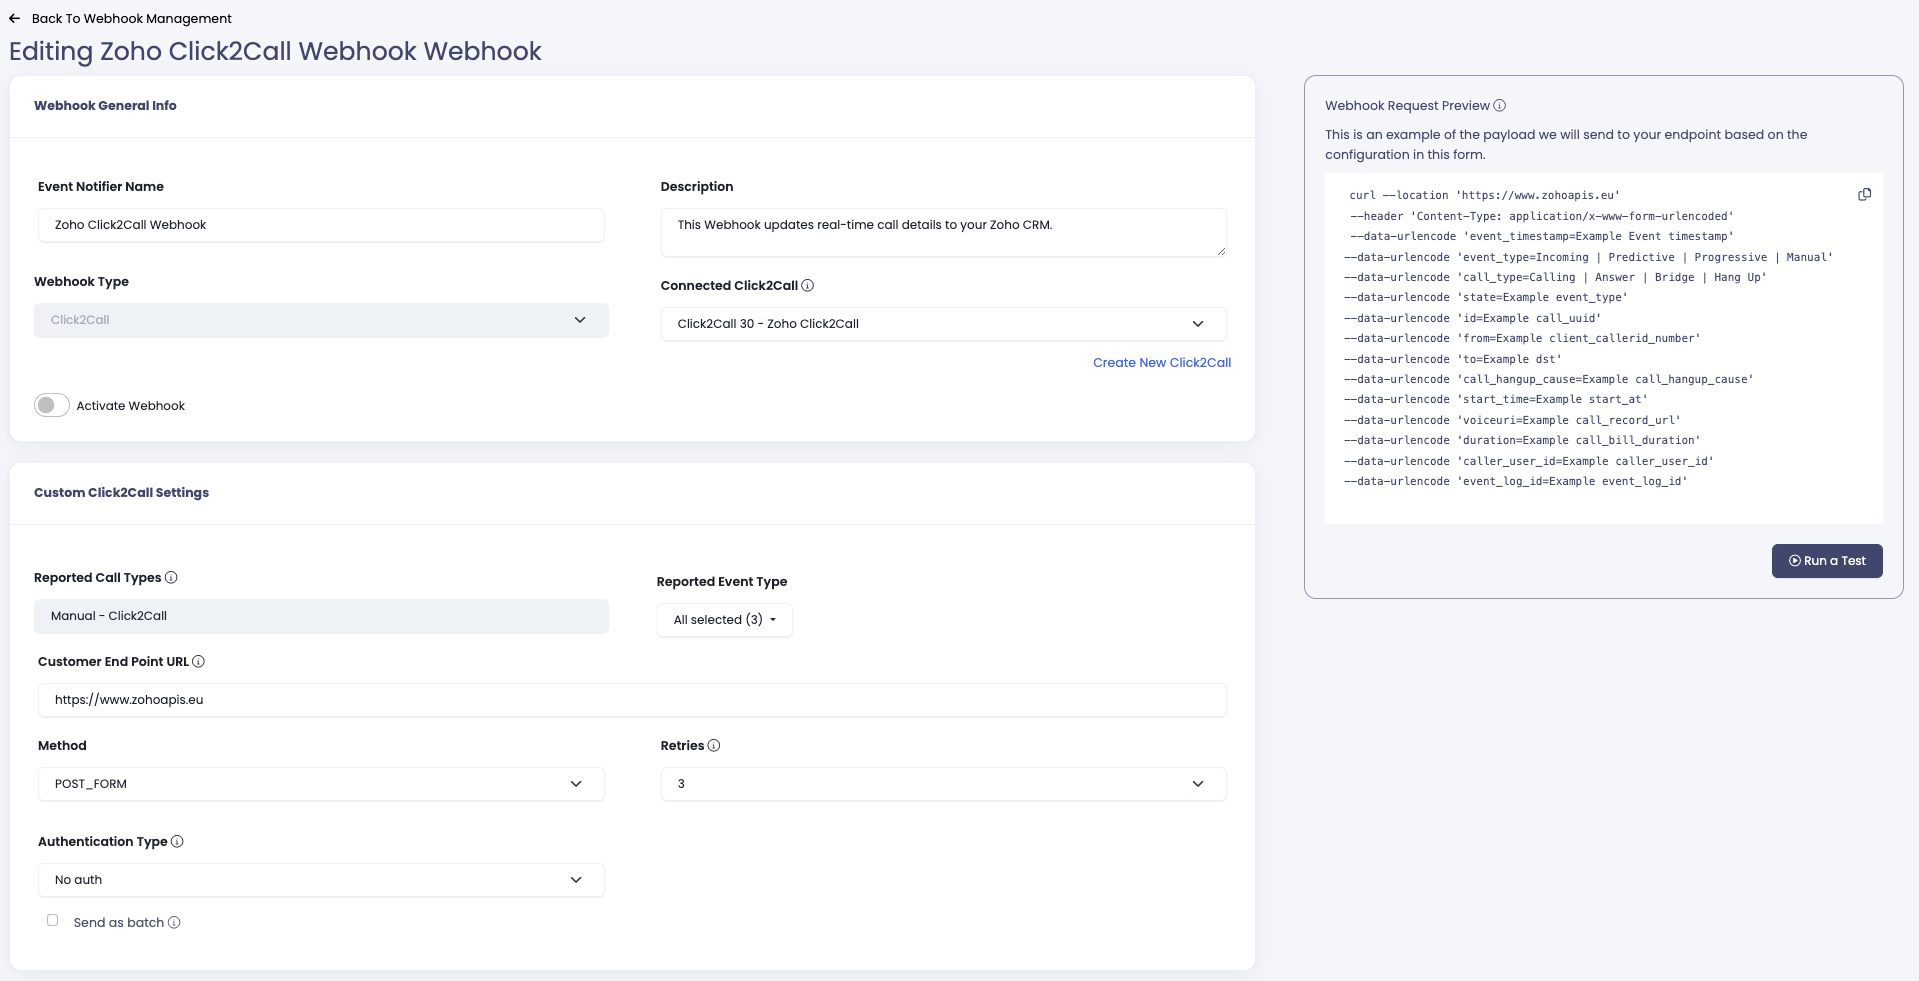
Step 3: Review Webhook Adapter Settings
Dialer or Cloud PBX will automatically create a webhook adapter that updates real-time call details in your Zoho CRM. If you want to review or change the update requests, act as follows:
- Go to Settings > Webhooks Management.
- Find your new Zoho C2C webhook and click the edit icon.
Webhook General Info and Custom Click2Call Settings are set automatically, there is no need to make any changes.
Webhook adapter settings
Field Mapping allows you to add more call details to the ones sent to your Zoho CRM. The system automatically populates the most commonly needed details for your CRM.
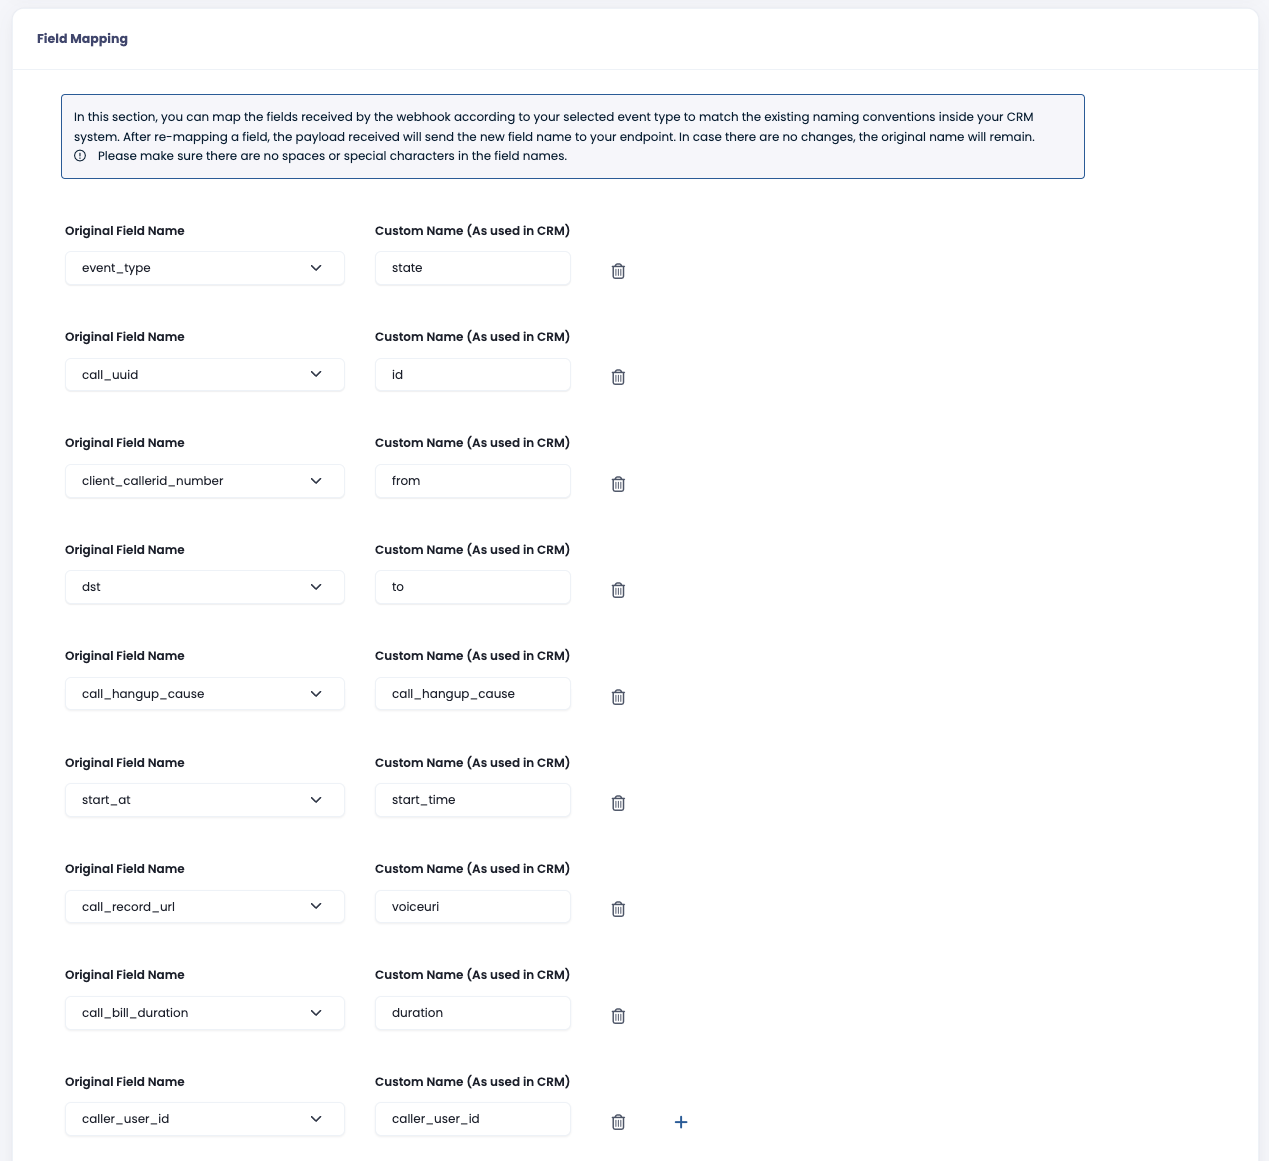
Webhook field mapping
Hangup Cause Mapping allows you to manage the name of the call hangup event. The system automatically populates your CRM with the most commonly needed details.
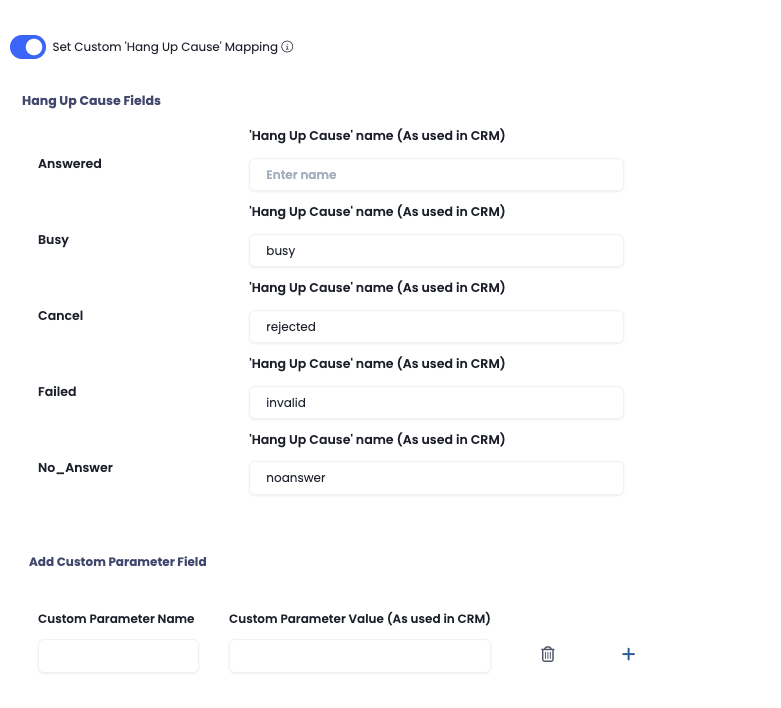
Custom hangup call mapping
Step 4: Make a Test Call
Once the installation is complete, follow the steps below to call your leads.
-
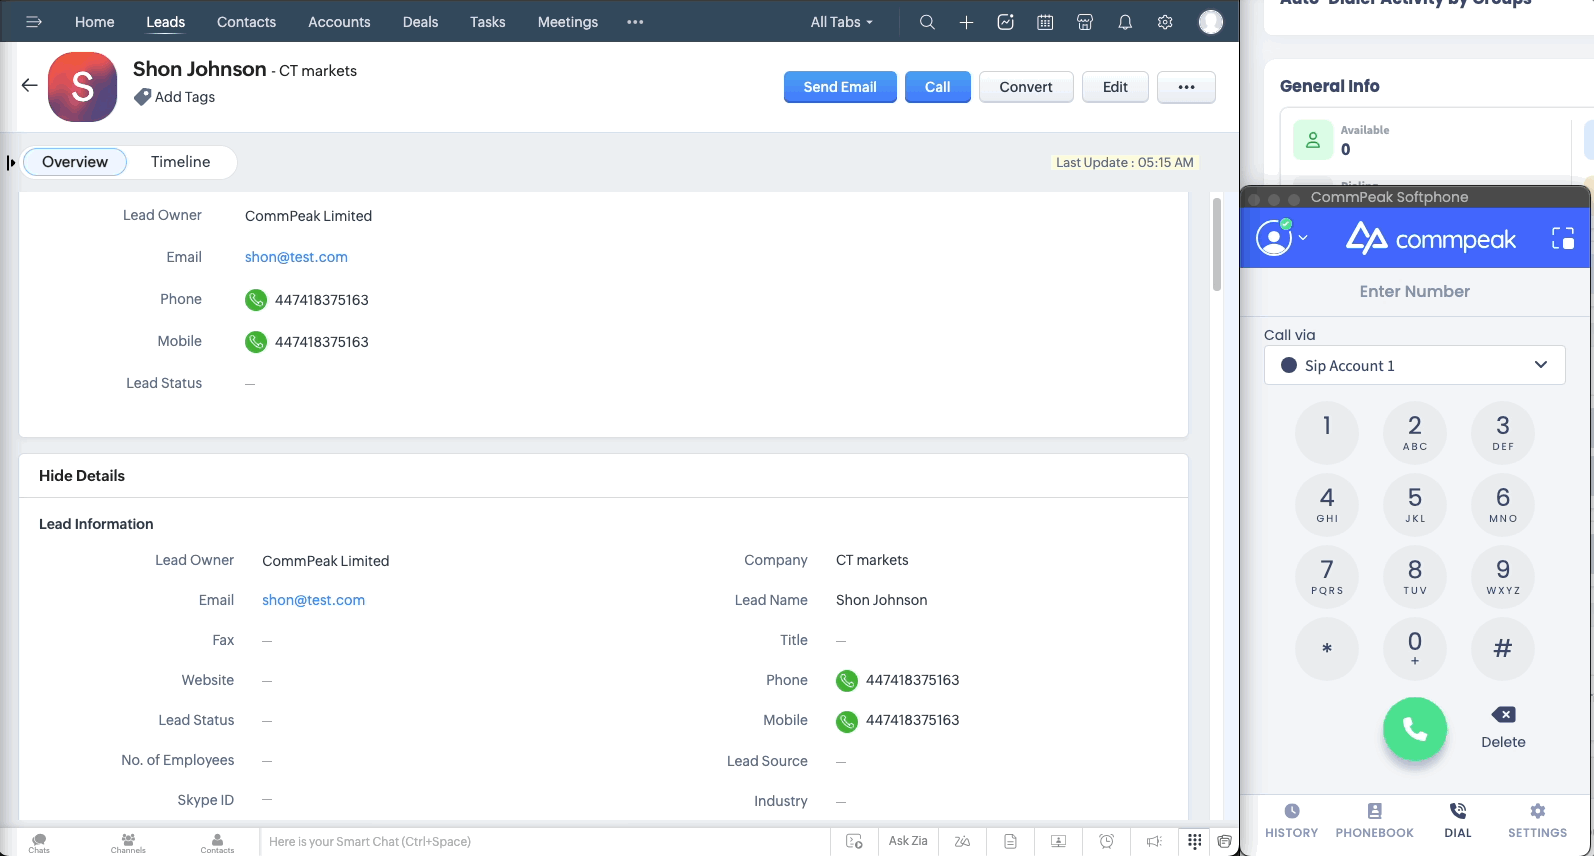
Go to your Zoho CRM account and select Leads in the main menu.
-
Find the contact you wish to call and then click the dial button next to its phone number.

The dial button in contact details
NOTEAlternatively, open the contact card and then click the green dial button.
- The system will trigger a call to your softphone client. In our example, we are using the built-in softphone. Click accept to answer the call.

Incoming call to your softphone account
- Once you answer, the system will call your lead. After the lead answers, a call will be established.
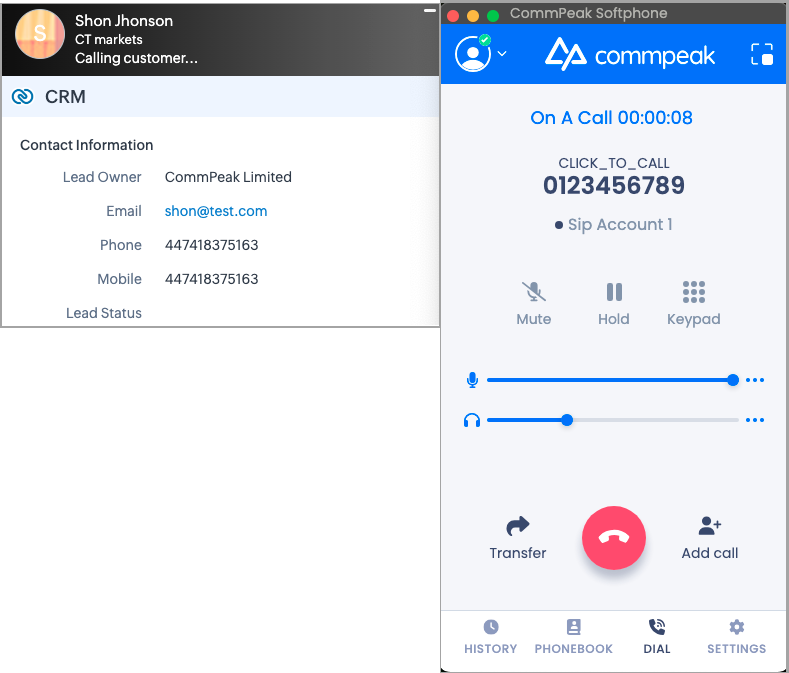
Call with a lead
You can view the whole Click2Call process in the following video:
Click2Call process
IMPORTANTUpon completing a CommPeak Click2Call in Zoho, no additional actions are required from your side. Preset CDR list will be automatically pushed to your Zoho CRM account.
This data transfer follows the field mapping defined in the webhook adapter settings, as outlined in Step 3.
Updated 9 days ago